

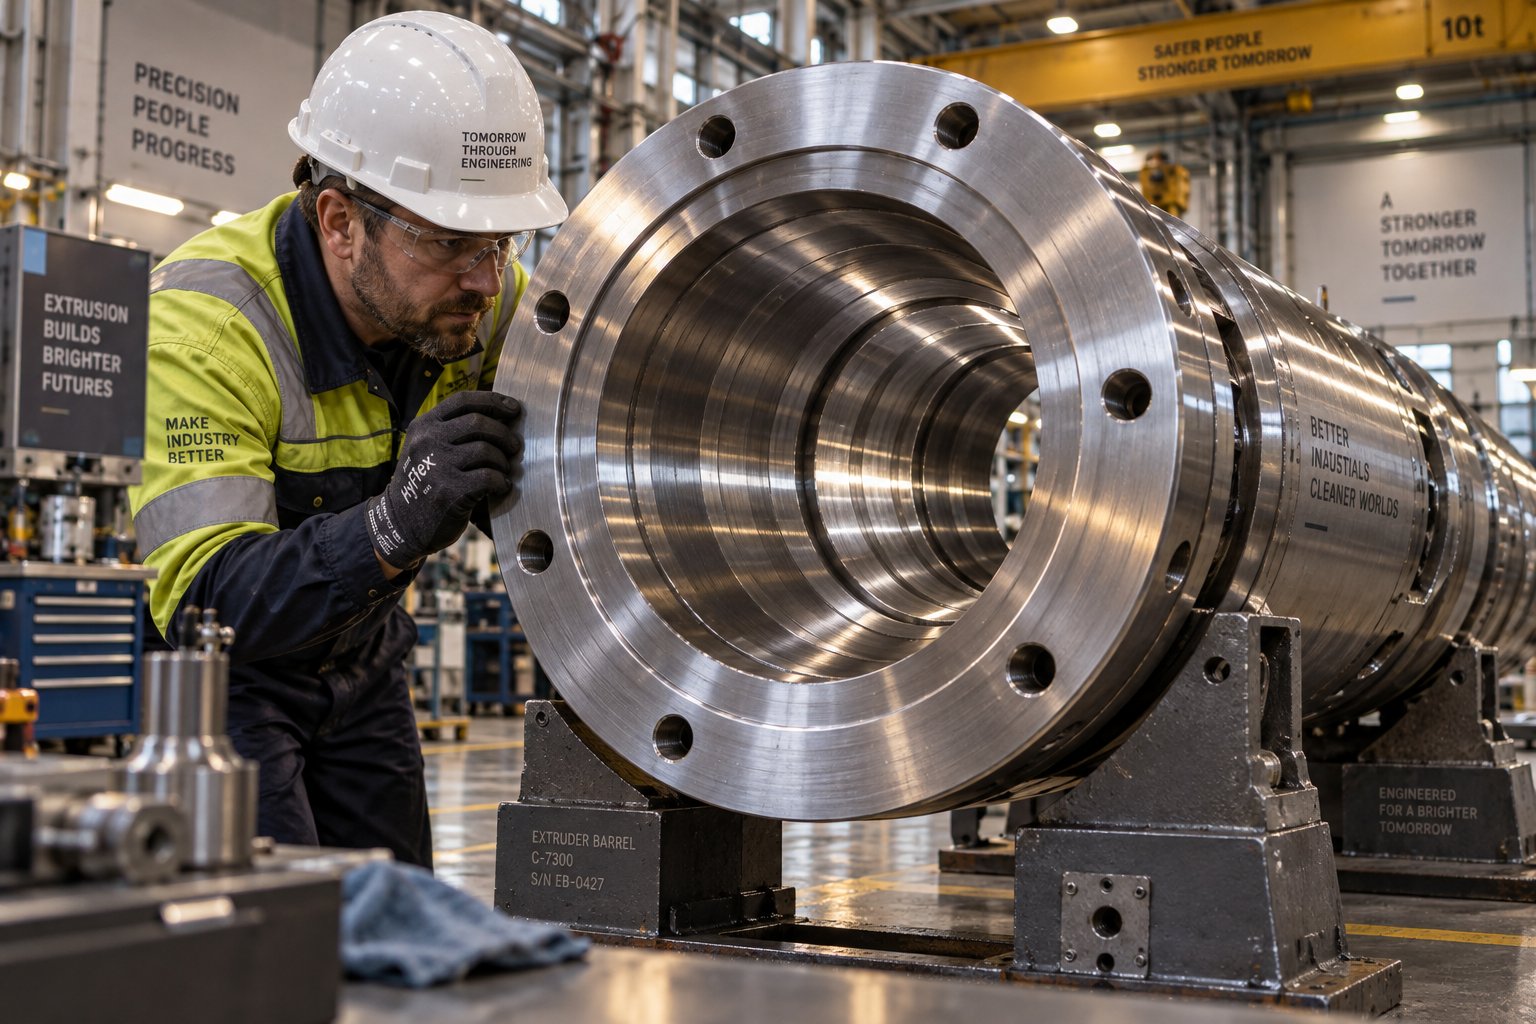
Understanding Worn Extruder Barrel Repair and Why It Demands Separate Attention
Worn extruder barrel repair is the process of restoring a degraded barrel bore to its original dimensional tolerances and surface integrity through techniques such as alloy spray welding, thermal spraying, weld overlay, or bimetallic relining — rather than simply discarding the barrel and buying a new one. It is a distinct maintenance discipline with its own metallurgical requirements, measurement protocols, and process decisions that differ fundamentally from screw rebuilding.
If you manage a production floor or keep extrusion lines running, you already know the frustration. Output slips. Melt temperatures creep upward without anyone touching a setpoint. Motor amperage rises. Product quality drifts. And somewhere in the back of your mind, you suspect the barrel — but every resource you find online lumps screw and barrel work together as if they are the same job.
They are not. This guide is written from your perspective — the plant engineer's and maintenance manager's perspective — not from a repair vendor's sales pitch. It covers the full barrel repair lifecycle: diagnosis, bore measurement, repair method selection, repair execution, post-repair validation, and preventive maintenance to delay the next intervention.
What Worn Extruder Barrel Repair Actually Involves
Barrel repair encompasses bore restoration, not barrel replacement. The goal is to return the internal diameter to nominal specifications and apply a surface treatment that matches or exceeds the original wear resistance. Techniques range from thermal spray deposition of hardened alloys to complete bimetallic relining. Each method addresses different wear mechanisms — abrasive, corrosive, or adhesive — and the right choice depends on what caused the damage in the first place.
Why This Guide Focuses Exclusively on Barrels
Most industry resources treat extruder barrels as an afterthought to screw repair. Yet barrel work involves entirely different tolerances, base metallurgy considerations, and process trade-offs. A screw can often be rebuilt three to four times during its service life through flight restoration and regrinding. Extruder barrels, by contrast, present a thinner-walled, longer-bore challenge where repair viability hinges on remaining wall thickness and the uniformity of wear along the full length. Conflating extruder screws and barrels into a single maintenance conversation leads plant teams to overlook the barrel-specific decisions that actually determine whether a repair holds — or fails within months.
Barrel bore condition is the single most important variable in maintaining extrusion process consistency. Every other process adjustment — screw speed, temperature profile, back pressure — compensates for bore degradation rather than solving it.
The real cost of ignoring barrel wear is not just the repair bill. It is the energy penalty from compensating for lost conveying efficiency, the scrap from inconsistent melt quality, and the unplanned downtime that always arrives at the worst possible moment. A throughput reduction of just 15% — a common threshold flagged during capacity testing — signals that the screw-to-barrel clearance has already shifted well beyond optimal, and the barrel is silently draining your margins every shift it runs.
Recognizing that damage early, however, depends on knowing exactly what to look for — and most wear does not announce itself with a dramatic failure.
Recognizing the Warning Signs of Extruder Barrel Wear
Barrel wear is a gradual thief. It does not trip alarms or throw fault codes. Instead, it shows up as a slow erosion of performance that operators instinctively compensate for — bumping screw speed a little higher, nudging setpoints, accepting slightly wider dimensional tolerances on the finished product. By the time someone formally raises the issue, the barrel bore has often been degrading for months. Knowing which barrel wear symptoms to watch for, and understanding the mechanical reason behind each one, transforms reactive troubleshooting into deliberate repair planning.
Production Symptoms That Signal Barrel Wear
When the clearance between extruder screws and the barrel bore widens, melt leaks backward over the screw flights instead of being pumped forward. This leakage flow is the root cause behind nearly every production symptom associated with barrel wear. As Plastics Technology notes, operators typically see a reduction in throughput alongside an increase in melt temperature, forcing higher RPM and energy consumption just to maintain the desired rate.
Here is how that single mechanical change — increased clearance — cascades through your process:
- Reduced throughput at the same screw speed. The extrusion screw can no longer build adequate pumping pressure because melt slips past the flight lands. You need more RPM to hit the same output, which adds shear heat and accelerates further wear.
- Rising melt temperature without setpoint changes. Material recirculating through the enlarged gap experiences excessive shear. The result is hotter melt that degrades physical properties and narrows your processing window.
- Higher motor amperage. The drive works harder to compensate for lost conveying efficiency. Tracking amp draw against throughput over time is one of the simplest trend indicators available to any maintenance team.
- Inconsistent melt pressure. Pressure fluctuations at the die or screen changer point to uneven pumping — a hallmark of worn metering zones where the barrel bore has gone oval or developed localized scoring.
- Degraded product quality. Gels, unmixed pigment streaks, black specks, and dimensional variation all trace back to poor melt homogeneity. When barrel-to-screw clearance grows, the mixing and shearing action that produces a uniform melt breaks down.
A critical detail many plant teams miss: higher-viscosity resins like PE mask the effects of wear longer than lower-viscosity materials like PP. Two extruders with identical bore wear can show dramatically different throughput losses depending on what resin they are running. This means extruder barrel wear signs may surface suddenly when you switch materials — even though the physical damage has been building for a long time.
Visual and Physical Indicators During Maintenance Inspections
Production data tells you something is wrong. A hands-on inspection during scheduled downtime tells you exactly where the damage is and how severe it has become. When the screw is pulled, your maintenance team should examine the barrel bore opening with a strong light source and look for these telltale signs:
- Scoring or grooves visible along the bore surface, especially in the transition and metering zones where pressures are highest.
- Discoloration or pitting from corrosive attack — common when processing PVC, fluoropolymers, or flame-retardant compounds that release acidic byproducts.
- Asymmetric material buildup or carbon deposits on one side of the bore, suggesting misalignment between the barrel and gearbox or a deflected screw dragging against the wall.
These visual clues are valuable, but they only reveal conditions near the bore opening. Full assessment requires internal bore measurement — a procedure covered in the next section. Still, even a quick visual check during a screw pull can flag problems early enough to plan a repair rather than react to a failure.
To help your team prioritize their response, the following progression ranks extruder barrel wear signs from the earliest detectable warnings to indicators of critical failure:
- Slight increase in motor amperage at constant output — often the very first measurable deviation, easily caught with trend logging.
- Gradual throughput decline requiring periodic RPM increases — the operator compensates without necessarily reporting it.
- Melt temperature running consistently above setpoint — shear heating from leakage flow overtakes the barrel temperature controller's ability to maintain profile.
- Intermittent melt pressure fluctuations — pumping consistency breaks down as clearance becomes uneven along the barrel length.
- Visible product defects: gels, streaks, dimensional instability — the melt is no longer homogeneous enough to produce acceptable parts.
- Frequent black specks or degraded material in the extrudate — material is hanging up in worn pockets and thermally degrading before being flushed out.
- Scoring or grooves visible during screw pull inspection — physical bore damage confirms that the barrel has moved well past the early-intervention window.
- Inability to maintain output even at maximum screw speed — the barrel is at or near critical wear, and most repair options become limited or unviable.
The pattern here is important. By the time you reach item five or six on this list, the barrel has already consumed a significant portion of its remaining repairability. Earlier intervention — ideally at stages one through three — preserves the widest range of restoration options and keeps repair costs at their lowest. Waiting until throughput collapses or product quality fails inspection means the bore may have worn past the point where cost-effective repair is still on the table.
Catching these signals, however, is only half of the equation. The other half is quantifying the damage with precise bore measurements — data that determines whether a repair, a reline, or a full replacement is the right call.
Barrel Bore Measurement Procedures and Wear Pattern Interpretation
Suspecting barrel wear and proving barrel wear are two very different things. Production symptoms and visual inspections during a screw pull give you direction, but they do not give you numbers. And without numbers — precise bore diameter readings taken at specific locations along the barrel length — every downstream decision becomes a guess. Should you repair or replace? Is the wear localized enough for a targeted fix? How fast is the bore degrading? The answers live inside the measurement data.
Surprisingly, this is the most neglected step in the entire worn extruder barrel repair process. Most industry resources jump straight from "your barrel might be worn" to "here are your repair options" without ever explaining how to quantify the damage. That gap leaves plant teams flying blind when they need to justify a repair budget, compare vendor quotes, or simply decide whether the barrel can survive another production campaign.
How to Perform Barrel Bore Measurements with a Telescoping Gauge or Bore Gauge
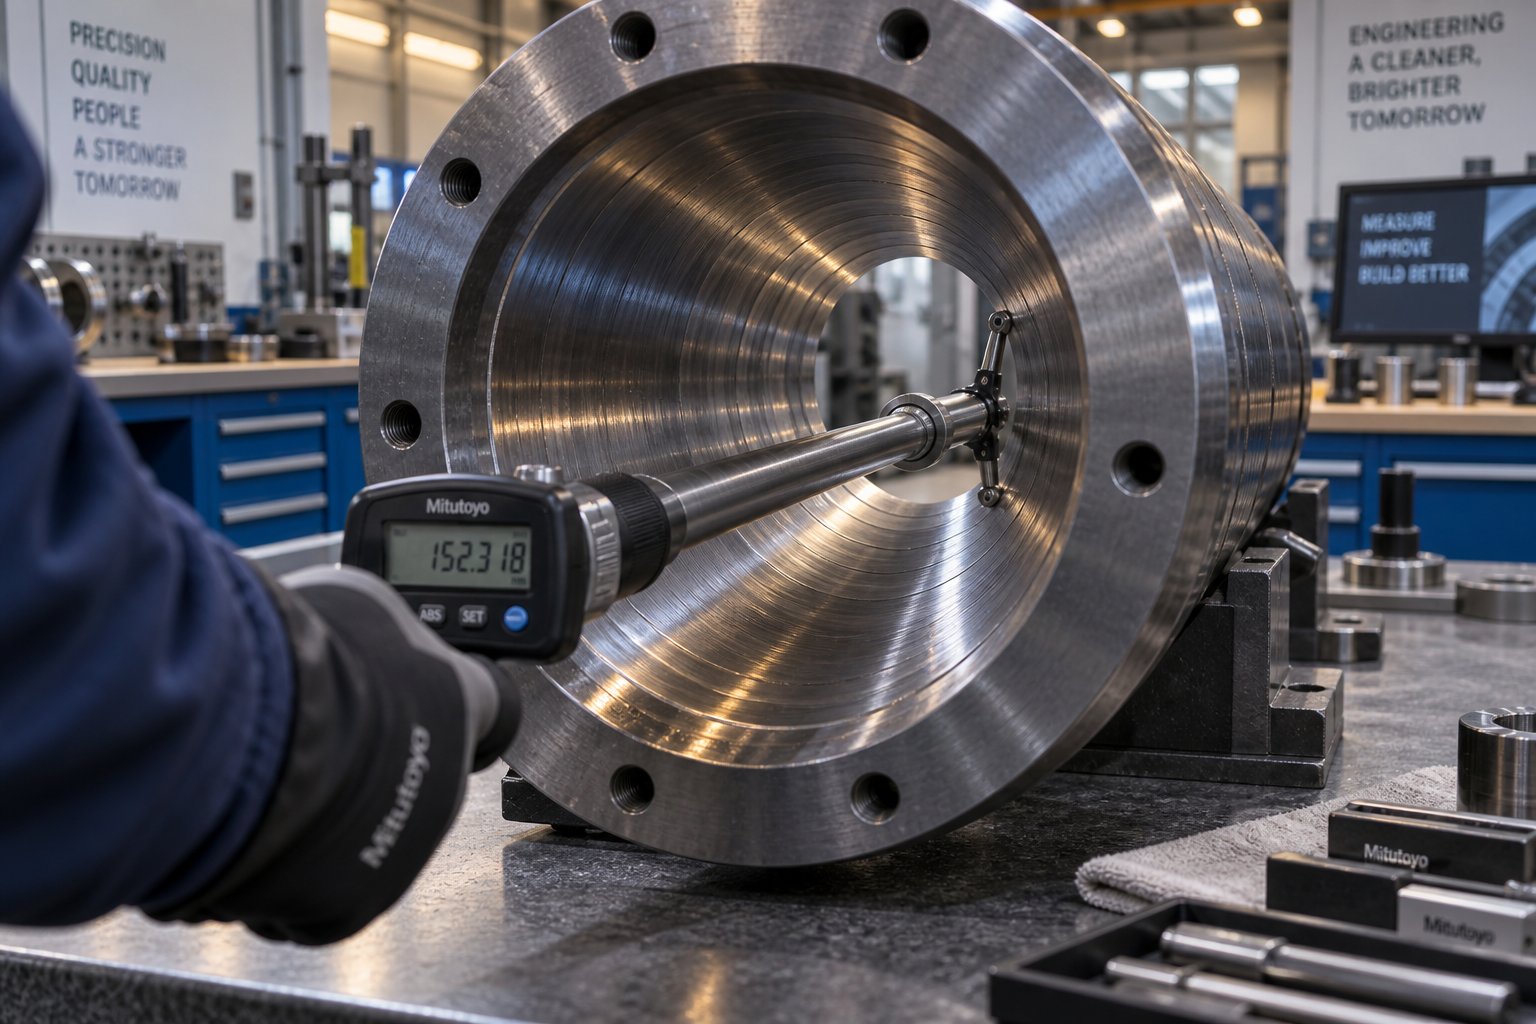
Two primary tools handle barrel wear measurement: the telescoping gauge (paired with an outside micrometer for the final reading) and the precision bore gauge (which provides a direct dial or digital readout). Both can deliver the accuracy you need — typically within 0.001 inches — but each demands a disciplined technique to produce reliable results.
Imagine you have just pulled the screw and the barrel is cooling to a stable temperature. Here is the step-by-step process for capturing a complete bore profile:
- Allow the barrel to reach a stable, uniform temperature. Thermal expansion can skew readings by several thousandths of an inch. Ideally, measure at ambient shop temperature. If that is not practical, record the barrel temperature alongside every measurement so the data can be normalized later.
- Clean the bore thoroughly. Residual polymer, carbon deposits, and surface debris all interfere with accurate contact. A bore brush followed by solvent wipe removes material that would otherwise inflate your diameter readings. As Penn Tool Co. emphasizes, accuracy starts with cleanliness — any chips or residue inside the bore will throw off readings by several thousandths.
- Select measurement locations along the barrel length. Divide the extrusion barrel into its functional zones — feed, transition (compression), and metering — and take readings at intervals no wider than one nominal bore diameter apart. For a 4.5-inch barrel, that means a measurement station roughly every 4.5 inches along the full length. At minimum, capture readings at the start, middle, and end of each zone.
- Measure at multiple clock positions at each station. At every axial location, take diameter readings at 12 o'clock, 3 o'clock, 6 o'clock, and 9 o'clock orientations. Comparing the 12-to-6 reading against the 3-to-9 reading reveals ovality — a condition where the bore has worn into an oval shape rather than remaining perfectly round. Ovality is a critical data point because it often signals mechanical causes like screw deflection or barrel misalignment.
- Use the correct gauging technique. If you are using a telescoping gauge, insert it at a slight angle, allow the spring-loaded plungers to expand against the bore wall, then gently rock the handle through the bore's center to find the true diameter — the widest point of the arc. Lock the gauge and transfer the captured dimension to an outside micrometer. This "rocking" technique is the key to accurate bore readings; skipping it introduces canting errors that can easily reach 0.002 to 0.003 inches.
- Record every reading in a structured log. Document each measurement with its axial position (distance from the feed throat), clock orientation, and the date. This data becomes the foundation for wear rate tracking over time.
A precision bore gauge simplifies the process by providing a direct reading without the transfer step, but it requires correctly sized anvils or contact heads for your barrel's nominal diameter. Either tool works — what matters most is consistency in technique and thoroughness in coverage.
Interpreting Wear Patterns Along the Barrel Length
Raw diameter numbers are useful. Wear patterns are even more useful. Where the bore has enlarged — and by how much relative to adjacent zones — tells you not just that wear occurred, but why it occurred. That root cause insight directly shapes which repair method will hold up longest.
Different zones of the barrel extruder experience different mechanical and chemical conditions. The feed zone handles solid pellets under relatively low pressure. The transition zone subjects material to rapidly increasing pressure as it compresses and begins to melt. The metering zone moves fully molten polymer at the highest pressures and temperatures. Each zone wears differently depending on the dominant stress.
| Barrel Zone | Typical Wear Pattern | Likely Root Cause | Recommended Repair Approach |
|---|---|---|---|
| Feed Section | Heavy abrasive wear, often with visible scoring; may show ovality if misalignment is present | Abrasive infeed materials (glass-filled, mineral-filled, or contaminated regrind); barrel-to-gearbox misalignment forcing the screw against one side | Alloy spray welding or weld overlay with abrasion-resistant alloy; correct alignment before reinstalling |
| Transition (Compression) Zone | Localized enlargement, sometimes asymmetric; grooves or galling marks | High-pressure melt leakage over flight lands; solids wedging at the end of the melting section creating momentary blockages and side forces that push the screw into the barrel wall | Bore restoration via thermal spray or hardfacing; evaluate screw design to reduce compression-zone pressure spikes |
| Metering Zone | Uniform bore enlargement; surface pitting, etching, or roughening rather than smooth polishing | Corrosive attack from polymer degradation byproducts (HCl from PVC, HF from fluoropolymers); adhesive wear from high-temperature metal-to-polymer interaction | Corrosion-resistant alloy relining or nickel-based thermal spray coating; review processing temperatures and purge protocols |
| Full Length (Uniform) | Even enlargement across all zones with no localized hot spots | General end-of-life wear from extended service; may also indicate low-level abrasion from standard unfilled resins over very long run times | Full bimetallic reline or barrel replacement, depending on remaining wall thickness |
Notice how the pattern dictates the response. A barrel showing heavy feed-section wear but a metering zone still within tolerance is an excellent candidate for a localized repair — saving significant cost compared to a full reline. Conversely, uniform enlargement across the entire length typically means the bore surface is exhausted everywhere, and a targeted patch will not solve the problem.
Clearance Thresholds and When Measurements Cross the Line
So how much wear is too much? The answer depends on your specific extruder, the resin you run, and how critical your application's quality requirements are — but there are widely accepted guidelines.
For plasticating single-screw extruders, the nominal flight clearance when new is typically the screw diameter divided by 1,000. A 3.5-inch extruder, for example, carries roughly 0.004 inches of clearance per side between the screw flight OD and the barrel ID. The barrel ID itself is usually the nominal diameter with a tolerance of about 0.001 inches oversize. Any clearance beyond that combined baseline is wear.
Industry practitioners commonly reference several threshold benchmarks:
- 2x original clearance: The point at which critical-duty processes — medical tubing, precision film, tight-tolerance profiles — begin to show measurable quality degradation. For these applications, repair evaluation should start here.
- 4x original clearance: A widely cited rule-of-thumb trigger for screw replacement or refurbishment. At this level, throughput loss and melt temperature increase become significant even for general-purpose extrusion.
- Total diametrical clearance exceeding 0.8-1.0% of nominal bore diameter: A general industry guideline indicating significant barrel wear that warrants immediate action regardless of application criticality.
These are guidelines, not absolute rules. A corrugated pipe line might tolerate clearance levels that would be catastrophic on a medical extrusion line. Your OEM documentation — if available — provides the most reliable specifications for your specific machine. When OEM data is not accessible, the thresholds above offer a defensible starting point for repair planning conversations.
The real power of barrel wear measurement, though, is not in any single data point. It is in the trend. A barrel that gained 0.002 inches of bore diameter over 4,000 operating hours is on a very different trajectory than one that gained the same 0.002 inches in 800 hours. Documenting measurements at regular intervals — tied to operating hours or material throughput milestones — lets you calculate a wear rate and predict when the bore will cross your threshold. That predictive capability is what transforms barrel maintenance from emergency firefighting into a planned, budgeted activity.
Armed with a complete measurement profile and a clear understanding of the wear pattern, the logical next question shifts from "how bad is it" to "why did it happen" — because repairing a barrel without addressing the root cause virtually guarantees you will be measuring the same damage again far sooner than the repair should have lasted.
Root Cause Analysis to Prevent Repeat Barrel Failures
Here is a scenario that plays out in plants every year: the maintenance team pulls a worn barrel, sends it out for repair, reinstalls it — and within six to twelve months, the bore measurements are right back where they started. The repair itself was fine. The problem is that nobody asked why the barrel wore out in the first place.
Worn extruder barrel repair without root cause analysis is like patching a tire without removing the nail. The fix holds just long enough to lull you into thinking the issue is resolved. Then the same wear pattern reappears, the same production losses stack up, and you are paying for the same repair twice — or worse, buying a new barrel because the second round of damage pushed the bore past the point of restoration.
A structured root cause investigation does not require exotic tools or outside consultants. It requires asking the right questions, examining the wear pattern data you already collected during bore measurement, and connecting that physical evidence to the specific conditions that caused the damage. Three dominant mechanisms account for the vast majority of premature barrel wear: abrasive wear, corrosive wear, and mechanical or alignment-related wear. Each leaves a distinct forensic signature, and each demands a different preventive response.
Abrasive Wear from Filled and Reinforced Resins
Abrasive barrel wear is, as Plastics Technology describes, the most common type of wear in plastics machinery. It happens whenever hard particles — whether intentional additives or unwanted contaminants — are dragged between the rotating plastic extruder screw flights and the barrel bore surface. Those particles act like microscopic grinding media, removing material from whatever surface is softer.
Glass-filled nylons are among the most aggressive offenders. The glass fibers used to reinforce the polymer are extremely hard, and as Protolabs notes, glass-filled nylon is "quite abrasive, causing increased wear on tools" and "can erode mated parts due to increased friction." Inside an extruder barrel, this abrasiveness is relentless. Every screw revolution drags glass fibers across the bore surface under pressure, and the cumulative effect over thousands of operating hours carves away the barrel lining.
Mineral-filled compounds — calcium carbonate, talc, mica, wollastonite — create similar problems, though the severity depends on the mineral hardness, the filler loading percentage, and the particle geometry. Sharp, angular particles cut more aggressively than rounded ones. Higher filler concentrations multiply the number of abrasive contact events per revolution. And recycled materials introduce a wildcard: contaminated regrind often contains metal fragments, sand, paint chips, or other hard particles that accelerate wear far beyond what the base resin alone would produce.
The wear pattern from abrasive fillers is distinctive. It concentrates in the feed and compression zones, where solid pellets and loose filler particles have not yet been fully incorporated into the melt. As Jim Frankland explains, abrasive filler wear tends to produce a surface that appears "almost polished" because millions of microscopic scratches smooth the bore rather than gouging it with visible grooves. The flights also tend to round off rather than showing sharp edges. This polished appearance can actually fool inexperienced inspectors into thinking the barrel is in acceptable condition — until bore gauge measurements reveal the diameter has grown well beyond tolerance.
Some of the most aggressive fillers can reduce an extruder screw and barrel's useful life by 50% or more. If your wear rate data shows the barrel consuming bore clearance far faster than expected, and you are processing filled or reinforced resins, the filler is almost certainly the primary driver. The repair response must include selecting a harder bore surface — tungsten carbide composites or high-carbide bimetallic liners — that can resist the abrasive mechanism the original barrel lining could not.
Corrosive Wear from Polymer Degradation and Off-Gassing
Corrosive wear attacks barrels from the inside out through chemical reaction rather than mechanical abrasion. It occurs when the polymer being processed — or the additives blended into it — generates acidic or otherwise chemically aggressive byproducts at processing temperatures.
PVC is the most widely cited example. When polyvinyl chloride degrades thermally, it releases hydrochloric acid (HCl) gas. That acid attacks iron-rich barrel surfaces aggressively, dissolving the metal matrix that holds wear-resistant carbides in place. Once the matrix erodes, the carbides fall out, and the bore surface deteriorates rapidly. Fluoropolymers present an even more dangerous scenario: thermal decomposition produces hydrofluoric acid (HF), one of the most corrosive substances found in industrial processing, capable of attacking nearly any metallic surface.
Flame-retardant compounds add another layer of chemical aggression. Halogenated flame retardants release corrosive gases during processing, and certain stabilizer packages can break down at elevated temperatures to form acidic species. Even standard engineering resins can become corrosive when processed at temperatures above their recommended window — excessive residence time or hot spots along the barrel accelerate polymer degradation and increase off-gassing.
The forensic signature of corrosive wear differs markedly from abrasion. Instead of the polished, smoothed appearance of abrasive barrel wear, corrosion typically leaves a pitted, etched, or roughened bore surface. The damage tends to appear uniformly across the metering zone, where melt temperatures are highest and the polymer has the longest exposure to elevated heat. Unlike abrasive wear, which concentrates where solid particles exist, corrosive wear follows the temperature gradient — it is worst wherever the barrel is hottest and the melt has been resident the longest.
Addressing corrosive wear during repair means specifying a bore surface with high corrosion resistance — typically nickel-rich alloys with low iron content — rather than simply choosing the hardest available material. A tungsten carbide lining that excels against glass-fiber abrasion may actually fail faster than the original barrel if the real problem is HCl attack on its iron-based binder. Matching the repair material to the actual wear mechanism is the entire point of root cause analysis.
Mechanical and Alignment-Related Wear
The third major cause of premature barrel wear has nothing to do with what resin you are running. It is purely mechanical: the barrel and the screw are not properly aligned, creating metal-to-metal contact that galls and scores the bore surface at localized points.
Barrel-to-gearbox misalignment is, according to industry veterans at Glycon Corp., extremely common. After more than 20 years of aligning plastics processing machines, the company reports having seen "very few machines that did not require an alignment when checked." When the barrel centerline does not coincide with the gearbox output shaft, the screw is forced to bend slightly with every revolution. That bending loads the flight OD against the barrel bore on one side, producing asymmetric wear — often visible as a distinct wear stripe or scoring pattern along the bottom or one side of the bore.
Deflected screws create the same problem from a different angle. A screw that is not perfectly straight — whether from manufacturing error, prior damage, or thermal distortion during operation — will ride against the barrel wall at predictable points along its length. As Jim Frankland points out, a barrel expands as it is heated, so a screw that slides in easily when cold can become wedged when the system reaches operating temperature. If the barrel cannot expand in a perfectly straight line due to inadequate support or a downstream component constraining movement, "severe flight wear will develop instantly."
Thermal cycling compounds the issue. Every heat-up and cool-down cycle subjects the barrel to expansion and contraction stresses. Without proper barrel support brackets — positioned to allow longitudinal thermal growth while maintaining lateral alignment — repeated cycling can gradually distort the barrel. That distortion introduces the very misalignment that drives localized contact wear, creating a self-reinforcing cycle of damage.
The key distinction with alignment-related wear is its localized, asymmetric character. Where abrasive wear produces relatively uniform bore enlargement across a zone, and corrosive wear creates uniform pitting, mechanical wear shows up as one-sided damage — often with visible galling marks, score lines, or hardfacing material torn from the screw flight and embedded in the barrel bore.
Before committing to any repair method, a thorough root cause investigation should answer the following diagnostic questions:
- What resin, filler type, filler loading percentage, and additives were being processed through this barrel?
- Was the barrel properly aligned to the gearbox, and when was alignment last verified?
- What were the actual barrel zone temperatures compared to the setpoints — and were there any hot spots, cold spots, or heater band failures during the barrel's service life?
- Was there evidence of screw deflection, flight damage, or hardfacing delamination when the screw was pulled?
- Was contaminated regrind or recycled material run through this barrel, and what quality controls were in place on the feedstock?
- Has the barrel been previously repaired, and if so, what repair method and alloy were used?
- Does the wear pattern — location, severity, and character — match the expected mechanism for the materials and conditions involved?
These questions connect the physical evidence from your bore measurements to the operating conditions that caused the damage. The answers do more than explain the past — they directly inform which repair method will deliver the longest service life going forward. A barrel that wore from glass-fiber abrasion needs a different surface treatment than one that corroded from PVC off-gassing, and both need a different intervention than a barrel that scored because it was misaligned with the gearbox. Without this diagnostic step, you are choosing a repair method based on availability or price rather than on the actual demands the barrel will face when it goes back into service.
With the root cause identified and documented, the decision shifts to a more strategic question: given the type of wear, the extent of damage, and the barrel's remaining wall thickness, does it make more sense to repair this barrel, reline it, or replace it entirely?
The Repair vs. Replace Decision Framework for Worn Barrels
You have the bore measurements. You know the wear pattern. You understand the root cause. The next question feels simple — fix it or buy a new one — but in practice, it is anything but. A hasty decision here either wastes money on a repair that will not last or wastes far more money replacing a barrel that had years of serviceable life left in it with the right restoration.
The problem is that most plant teams approach barrel repair vs replacement as a gut call. There is no structured framework, no checklist of variables, no clear thresholds guiding the decision. That gap leads to inconsistent outcomes: one maintenance manager repairs a barrel that should have been scrapped, while another across the hall orders an extruder barrel replacement for damage that a straightforward bore restoration could have addressed at a fraction of the cost and lead time.
A disciplined decision framework eliminates that inconsistency. It evaluates the same set of variables every time, weighs them against each other, and points clearly toward repair, reline, or replace — depending on the barrel's actual condition.
Key Variables in the Repair or Replace Decision
Five factors carry the most weight when deciding how to handle a worn barrel. Evaluating all five together — rather than fixating on any single one — produces the most reliable outcome.
Remaining wall thickness after wear. This is the non-negotiable starting point. The repair process itself removes additional material from the bore — boring out the worn surface to accept a new liner or to prepare a clean substrate for thermal spray deposition. If the barrel wall is already thin from prior wear or a previous repair, there may not be enough steel left to safely contain process pressure after the restoration. As Nordson Xaloy's Randy Elliott explains, the repair process requires boring the inner wall to approximately 1.0 inch larger than the original bore diameter to install a new bimetallic liner. That means the barrel must have sufficient wall stock to lose roughly half an inch of radial thickness and still maintain structural integrity under full operating pressure.
Extent and distribution of wear along the barrel. A barrel with heavy wear isolated in one zone — say, the metering section near the discharge — is a strong repair candidate. A localized fix, sometimes called a "short sleeve" repair, addresses only the damaged section and leaves the rest of the barrel untouched. Conversely, a barrel showing uniform severe wear across its entire length has no undamaged zones to anchor a partial repair. It needs either a full-length reline or outright replacement.
Compatibility of the base metallurgy with available repair processes. Not every barrel steel accepts every repair technique equally well. Older extrusion barrels manufactured from lower-alloy steels may not bond reliably with modern thermal spray coatings or may develop heat-affected zone cracking during weld overlay. The repair provider needs to know the base material — or at minimum, needs to test a sample — before committing to a process.
Previous repair history. A barrel that has already been repaired once carries less remaining wall thickness and potentially compromised metallurgy at the repair interface. Second repairs are sometimes viable but demand more careful evaluation. A barrel on its third repair attempt is approaching a practical limit — the cumulative material removal and thermal cycling from multiple interventions degrade the base steel's structural properties.
Criticality of the application. A screw and barrel set running commodity pipe or sheet can tolerate modest imperfections in a repaired bore. A barrel feeding a medical tubing line or a precision optical film line cannot. Higher-criticality applications push the decision toward replacement or full-length relining, even when a localized repair might technically be possible, because the quality consequences of a marginal repair are too severe.
Cost and Downtime Considerations
Economics matter — but the calculation is more nuanced than simply comparing the repair quote to the price of a new barrel. You need to weigh four dimensions: upfront cost, expected post-repair service life, turnaround time, and the hidden cost of production disruption during the barrel's absence.
On cost alone, repair typically wins. Refurbishing a worn injection barrel can save 25% to 50% compared to a new barrel, though the savings vary significantly depending on barrel size and type. Injection molding barrels, which tend to be more expensive than extrusion barrels, offer the largest margin for repair savings — especially when only a short sleeve at the discharge end needs replacement. For standard extrusion barrels, the cost gap between repair and new is narrower, and in some cases the economics favor replacement outright. However, very large or elaborately equipped extrusion barrels — water-jacketed, pin-type, or large rubber mixers — can cost significantly less to repair relative to the original equipment price.
Turnaround time is the second dimension. A repair or reline typically ships faster than a new barrel manufactured from scratch, particularly for non-standard sizes or specialized configurations. That time advantage can be decisive when an unplanned failure takes a production line down and every day of downtime bleeds revenue.
This is exactly why maintaining a spare barrel changes the entire equation. With a spare on hand, you can swap in the backup immediately and send the worn barrel out for repair on your schedule — not under the pressure of a production emergency. The repair provider has time to do the job right, you have time to negotiate pricing, and your line stays running. Without a spare, every repair decision is made under duress, and the temptation to cut corners — or to overspend on expedited service — is enormous.
| Factor | Repair (Spray Welding / Weld Overlay) | Reline (Bimetallic Sleeve Insert) | Replace (New Barrel) |
|---|---|---|---|
| Typical Cost Relative to New Barrel | Significantly lower — often 25% to 50% of new barrel cost for injection barrels; narrower savings margin for standard extrusion barrels | Moderate — approaches new barrel cost for full-length relines due to the manufacturing steps involved | Full cost (baseline) |
| Expected Service Life Restoration | Partial to full, depending on alloy selection and whether the wear mechanism is matched; can exceed original barrel life if upgraded alloy is used | Near-original or better, since a new bimetallic liner provides a fresh wear surface equivalent to a new barrel bore | Full original service life |
| Best-Fit Wear Types | Localized abrasive or corrosive wear confined to one or two zones; minor-to-moderate bore enlargement | Moderate-to-severe wear across a longer section or the full barrel length; corrosive environments where the original lining chemistry was inadequate | Severe uniform wear across full length; structural damage; barrels with insufficient wall thickness for any repair process |
| Turnaround Time | Shortest — typically days to a few weeks depending on barrel size and provider capacity | Moderate — liner manufacturing, machining, and heat-shrink installation add time; comparable to some new barrel lead times for full-length work | Longest — new barrel manufacturing from raw billet, especially for non-standard sizes or bimetallic configurations |
| Applicable Barrel Condition | Adequate remaining wall thickness; no structural cracking; base metallurgy compatible with the overlay process | Sufficient wall thickness to accept a bored-out bore approximately 1.0 inch larger than original; barrel must be straight and structurally sound | No restrictions — starts from new material |
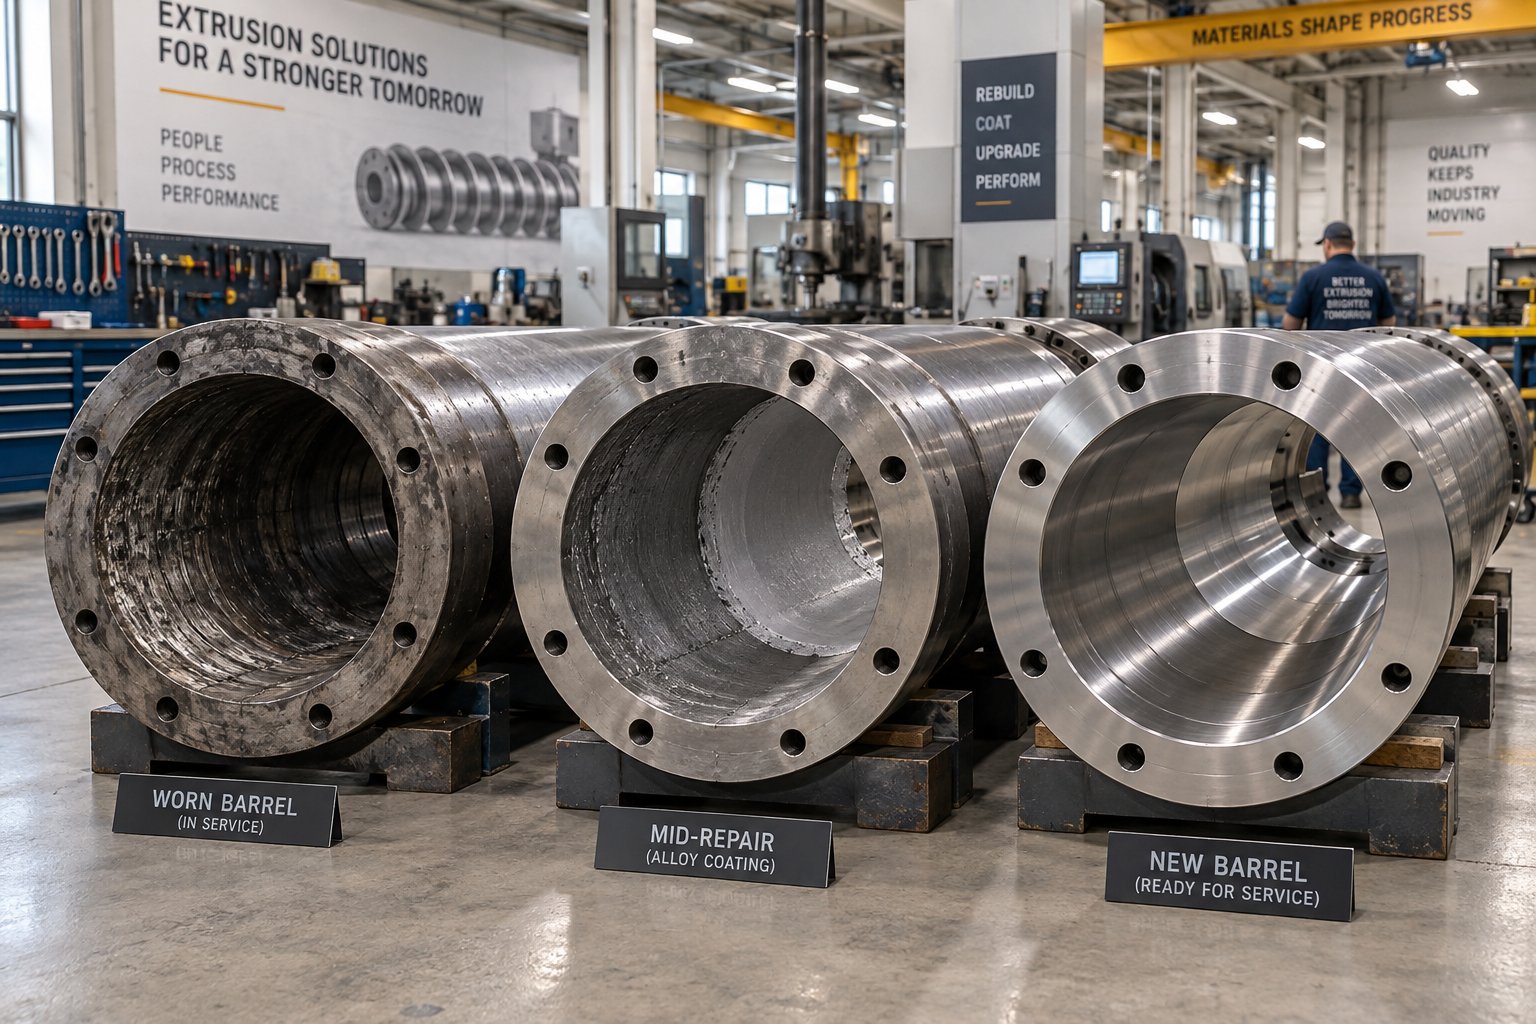
Notice the pattern in the table: as the severity and extent of wear increase, the viable options shift rightward from repair toward replacement. A barrel with a worn metering zone and healthy feed section sits firmly in repair territory. A barrel with moderate wear across its entire length occupies the reline zone. And a barrel with damage so extensive or structural so compromised that no amount of bore restoration can safely return it to service belongs in the replacement column.
When Replacement Is the Only Option
Repair is not always on the table. Some conditions make restoration either physically impossible or economically irrational, and recognizing those conditions early saves you the cost of a failed attempt.
Wall thickness below safe minimums. If boring out the worn surface to accept a liner or prepare for thermal spray would reduce the barrel wall below the thickness required to safely contain operating pressure, the barrel cannot be repaired. This is especially common with smaller-diameter barrels, where the wall is inherently thinner to begin with, and with barrels that have already undergone one or more prior repairs.
Extensive cracking. Stress cracks — whether from fatigue, thermal cycling, or over-pressurization — compromise the barrel's structural integrity in ways that a bore restoration cannot fix. A new lining inside a cracked shell does not restore burst strength. Cracks also create leak paths for molten polymer, which can penetrate behind a new liner and undermine the repair from behind.
Barrel distortion. A barrel that has warped from uneven heating, inadequate support, or thermal shock may no longer have a straight bore axis. As the Plastics Technology article on barrel repair cautions, even when produced under the most exacting conditions, a repaired barrel never quite achieves the degree of straightness available with a new one. Starting with a distorted barrel amplifies that limitation — the repaired bore will inherit the parent barrel's curvature, leading to accelerated wear and potential screw contact from the day it goes back into service.
Outdated metallurgy. Some older barrels were manufactured from steel grades or with bimetallic linings that are no longer compatible with modern repair materials. If the base steel cannot form a reliable metallurgical bond with current thermal spray alloys or liner materials, the repair may delaminate or fail prematurely. When the barrel's chemistry is unknown and cannot be determined through testing, replacement eliminates the uncertainty.
Performance demands that exceed the original barrel's capabilities. Sometimes the real issue is not just restoring what was there — it is that the original barrel was never adequate for the application. If you have shifted to more abrasive resins, increased throughput targets, or tightened quality requirements since the barrel was first installed, a like-for-like repair returns you to a barrel that was already underperforming before it wore out. In that scenario, replacing with a barrel engineered for your current — not your original — operating conditions is the smarter investment.
The repair-versus-replace decision is ultimately a risk management exercise. You are balancing the certain cost of a new barrel against the probable service life of a restored one, filtered through the specific conditions your process imposes. A well-structured framework makes that judgment repeatable and defensible — whether you are presenting it to a plant manager, a finance team, or simply documenting the rationale in your maintenance records.
Choosing to repair, of course, raises the immediate follow-up question: which repair method? The answer depends on the wear mechanism, the severity of damage, and the surface properties needed to survive whatever caused the barrel to wear in the first place. Each technique — alloy spray welding, bimetallic relining, and weld overlay — brings different strengths to the table.
Barrel Repair Methods and Surface Restoration Techniques Explained
A barrel that qualifies for repair still needs the right repair method — and "right" is defined entirely by the wear mechanism, the extent of damage, and the service conditions the barrel will face when it returns to production. Choosing a technique based on cost alone, or defaulting to whatever a vendor happens to specialize in, is how plant teams end up with a beautifully restored bore that fails again in under a year.
Three primary approaches dominate the barrel restoration landscape: alloy spray welding (a thermal spray barrel repair process), bimetallic barrel relining, and traditional weld overlay hardfacing. Each works differently, applies different materials, and suits different damage profiles. Understanding the mechanics behind each one lets you match the method to the problem — not the other way around.
Alloy Spray Welding and Thermal Spray Processes
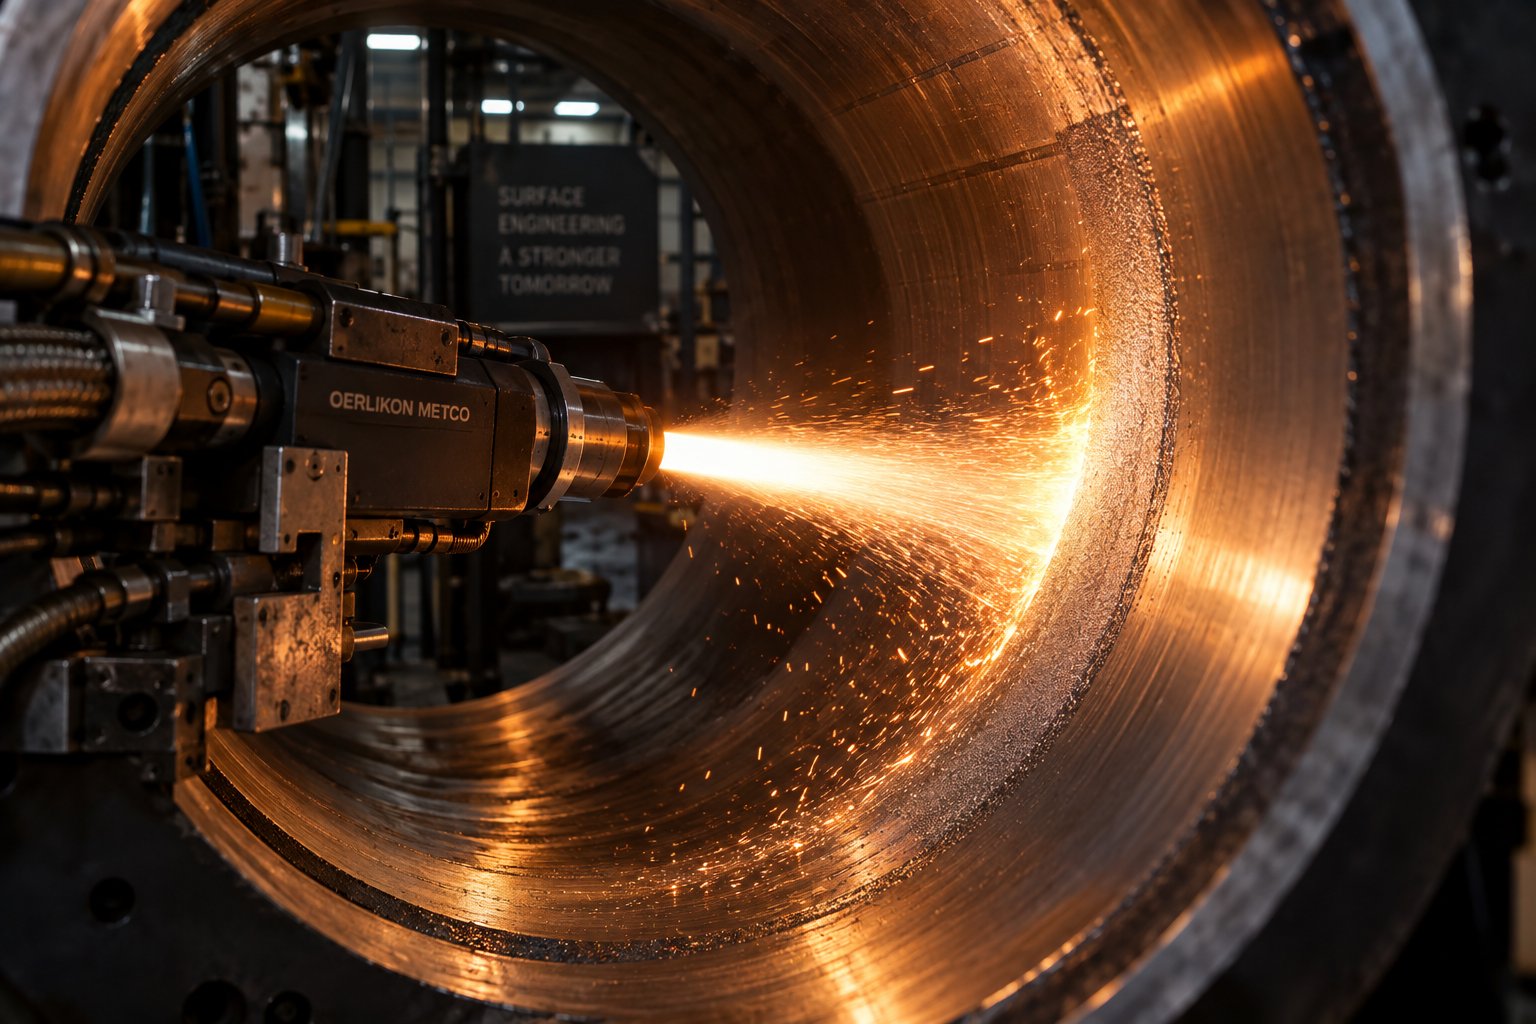
Alloy spray welding is a thermal surface treatment process that deposits a layer of high-performance alloy material directly onto the worn barrel bore. Specialized spray welding equipment heats alloy powders to a molten or semi-molten state, then propels them onto the prepared substrate. The result is a metallurgically bonded protective layer that restores the bore to nominal diameter after precision grinding.
What makes this technique particularly versatile is the dual-alloy approach. A base layer is applied first to ensure strong adhesion to the barrel's steel substrate. Then an outer working layer — engineered for the specific wear or corrosion challenge — is deposited on top. This separation of functions means the bonding layer can be optimized for adhesion while the surface layer is optimized purely for performance.
Material selection for the working surface drives the repair's long-term durability:
- Nickel-based alloys — excellent corrosion resistance, making them the first choice for barrels processing PVC, fluoropolymers, or flame-retardant compounds that generate acidic off-gassing. These alloys protect against the chemical attack that iron-rich surfaces cannot withstand.
- Cobalt-based alloys (such as Stellite formulations) — strong performance against both adhesive wear and moderate corrosion. These are well suited for barrels running engineering resins at elevated temperatures where metal-to-polymer interaction drives surface degradation.
- Tungsten carbide composites — the highest hardness option, designed specifically for severe abrasive environments. Barrels processing glass-fiber-filled nylons, mineral-filled compounds, or contaminated recycled feedstock benefit most from this category. Coating thickness typically ranges from 0.5 mm to 3 mm, providing substantial material to absorb abrasive wear before the base steel is exposed.
The process itself follows a controlled sequence — surface preparation, preheating to prevent thermal shock, precision alloy application, gradual cooling to relieve internal stresses, CNC grinding to final tolerances, and comprehensive final inspection including hardness testing and dimensional verification. Each step matters; skipping or rushing any one of them compromises the coating's integrity.
One significant advantage of alloy spray welding over some competing methods is its applicability to both new and worn components. A new barrel can receive a spray-welded surface upgrade from day one — specifying a harder or more corrosion-resistant surface than the stock lining — while a worn barrel can be restored and simultaneously upgraded to a surface that outperforms the original metallurgy. Providers like NANHAIYA offer this dual capability for extrusion and injection molding operators, supporting both barrel wear restoration and service-life extension through wear-resistant surface treatments tailored to the specific materials being processed — whether that is glass-fiber-reinforced plastics, corrosive PVC compounds, or abrasive recycled feedstock.
For plant teams dealing with localized wear confined to one or two barrel zones, alloy spray welding barrel restoration is often the fastest and most cost-effective option. The technique does not require boring the barrel out to accept a separate liner, which preserves more of the original wall thickness — a critical advantage for barrels that have limited remaining steel to sacrifice.
Bimetallic Relining
Bimetallic barrel relining takes a fundamentally different approach. Instead of depositing material onto the existing bore surface, the process machines out the worn bore entirely — typically boring it approximately one inch larger than the original diameter — and inserts a new bimetallic liner that becomes the barrel's working surface.
The liner itself is manufactured through centrifugal casting: a lining alloy, usually 1 mm to 2 mm thick, is bonded to the inside of a pre-machined steel sleeve. As Santa Fe Machine Works describes, the barrel is heated until the lining material melts, then rotated at high RPM and cooled — centrifugally casting the alloy onto the inner surface to achieve an inseparable metallurgical bond.
The range of available liner chemistries is broad and application-specific:
- Iron-boron alloys — general-purpose liners suitable for unfilled and lightly filled resins. They provide a meaningful step up from bare nitrided steel at a moderate cost.
- Nickel-boron alloys — higher corrosion resistance for PVC and chemically aggressive processing environments.
- Nickel-based with tungsten carbide — engineered for high-abrasion applications. Specialized formulations are rated for glass-fiber loadings ranging from under 15% up to 50% or higher, with carbide content scaled to match the abrasive severity.
- Zero-iron-content nickel alloys (produced via Hot Isostatic Pressing) — the most aggressive corrosion resistance available, designed for severe chemical environments where even trace iron content would be attacked.
Bimetallic barrel relining essentially gives a worn barrel a brand-new bore surface — the restored service life is near-original or better, depending on whether the new liner chemistry is an upgrade over what was originally installed. The trade-off is cost and turnaround time. Full-length relining involves significant machining, liner manufacturing, heat-shrink installation, and final honing, which pushes both price and lead time higher than a targeted spray welding repair. For barrels with moderate-to-severe wear distributed across most of their length, though, relining delivers the most durable result short of buying an entirely new barrel.
Weld Overlay and Hardfacing
Traditional barrel hardfacing techniques deposit material directly onto the worn bore surface through arc welding processes — MIG, TIG, or PTA (Plasma Transfer Arc) — then machine and hone the bore to final dimensions. The overlay is metallurgically bonded to the substrate, meaning the deposited material and the base steel fuse together at a molecular level.
Each welding method brings different strengths:
- MIG (GMAW) welding — the most accessible process, using a consumable electrode as the overlay material. It handles steels, stainless steels, nickel alloys, and hardfacing wires effectively. However, as HTS Coatings notes, MIG can be difficult to maintain at consistent temperature and arc quality, requiring skilled operators to produce a uniform overlay. It is also limited in positioning — vertical or overhead application is generally not feasible.
- TIG (GTAW) welding — uses a non-consumable tungsten electrode with a separate filler rod, providing better temperature control and the ability to apply cobalt-based alloys like Stellite 6 as well as nickel and tungsten carbide compositions. TIG is slower than PTA but offers good versatility across overlay materials and can be performed in most positions.
- PTA (Plasma Transfer Arc) welding — the most advanced of the three, using a powder filler material and a specialized nozzle to create a plasma arc. PTA delivers the fastest deposition rate, excellent process parameter control, and a smaller heat-affected zone than MIG or TIG despite its high operating temperature (approximately 50,000 degrees Fahrenheit). It can apply the full range of hardfacing alloys — stainless steels, nickel-based alloys, cobalt-based alloys, and tungsten carbide composites.
The critical concern with any weld overlay process is the heat-affected zone (HAZ) — the region of the barrel's base steel adjacent to the weld that is altered by the process heat without actually melting. This zone loses the desirable properties of the original substrate but does not gain the properties of the overlay, creating a weakened intermediate layer. Higher heat input means a larger HAZ. Among the weld overlay methods, PTA produces the smallest HAZ due to faster cooling and quenching of the overlay material, making it the preferred choice when heat distortion or substrate degradation is a concern.
Weld overlay thicknesses typically range from approximately 0.05 inches to 0.1 inches (roughly 1.3 mm to 2.5 mm), providing a substantial working surface. The technique is well suited for localized repairs where bore damage is confined to a specific zone and the base steel is in good condition. For full-length barrel restoration, however, the cumulative heat input from overlaying the entire bore can introduce distortion risks that make bimetallic relining or alloy spray welding a safer choice.
The following table compares all three repair methods across the factors that matter most when selecting an approach for your specific barrel condition:
| Factor | Alloy Spray Welding | Bimetallic Relining | Weld Overlay / Hardfacing |
|---|---|---|---|
| Applicable Wear Types | Abrasive, corrosive, adhesive, and combination wear; highly versatile due to dual-alloy material selection | All wear types; liner chemistry is selected to match the dominant mechanism | Abrasive and adhesive wear primarily; corrosion resistance depends on filler alloy selected |
| Typical Restored Thickness | 0.5 mm to 3 mm coating applied to the existing bore surface | 1 mm to 2 mm centrifugally cast liner bonded inside a bored-out barrel | Approximately 1.3 mm to 2.5 mm (0.05 to 0.1 inches) deposited via arc welding |
| Relative Cost | Lower — significantly less than full replacement; no need to bore out the barrel to accept a separate liner | Moderate to high — approaches new barrel cost for full-length relines due to machining and liner manufacturing | Low to moderate — economical for localized repairs; cost rises with full-length overlay due to labor intensity |
| Surface Hardness Range | Wide range depending on alloy selection — from corrosion-optimized nickel alloys to high-hardness tungsten carbide composites | Varies by liner chemistry — iron-boron for general purpose up to high-carbide nickel alloys for extreme abrasion | Moderate to high — dependent on filler material; PTA and TIG can apply the hardest alloys including Stellite and Colmonoy families |
| Best-Fit Applications | Localized or moderate wear in one or two zones; barrels with limited remaining wall thickness; new barrels requiring surface upgrades; both extrusion and injection molding barrels | Moderate-to-severe wear across the full barrel length; applications requiring a complete bore surface reset equivalent to a new barrel | Localized damage with accessible bore geometry; situations where metallurgical bonding is critical and thermal spray is not available |
| Key Limitation | Coating thickness is thinner than a full bimetallic liner, so severely worn bores may require multiple passes or an alternative method | Requires boring approximately 1 inch oversize — barrel must have sufficient wall thickness to absorb this material removal | High heat input (especially MIG) can create a large heat-affected zone and risk barrel distortion on full-length applications |
Notice that no single method is universally superior. Alloy spray welding excels when you need fast turnaround, versatile alloy options, and minimal material removal from the barrel wall. Bimetallic barrel relining delivers the most complete restoration for barrels with extensive full-length wear. And barrel hardfacing techniques through weld overlay provide a proven, metallurgically bonded solution for targeted repairs where the base steel is sound and heat input can be managed.
The method you select, however, is only as good as the provider executing it. The quality controls applied during repair — metallurgical analysis, process parameter documentation, post-repair dimensional inspection, and surface hardness verification — determine whether a technically sound method produces a technically sound result. And that distinction brings a different kind of evaluation into focus: not which method, but which provider.
How to Evaluate and Select a Barrel Repair Service Provider
A flawless repair method applied by an unqualified provider is a contradiction. The alloy chemistry can be perfect, the technique textbook-correct, and the turnaround impressively fast — but if the provider skipped incoming inspection, failed to verify bore straightness before coating, or ground the finished bore three thousandths out of round, you are reinstalling a barrel that will underperform from day one. Choosing the right barrel repair service provider matters as much as choosing the right repair method, and the evaluation process starts before you ever pick up the phone.
What Information to Prepare Before Contacting a Repair Provider
Imagine calling a doctor and describing your symptoms as "I don't feel great." You would get a vague answer — or no answer at all. The same principle applies to barrel repair quotes. The more specific and complete your data package, the more accurate and comparable the quotes you receive will be. Vague requests produce vague estimates, and vague estimates lead to scope changes, cost overruns, and finger-pointing when results disappoint.
Before reaching out to any provider, assemble the following information:
- Barrel OEM and model number — identifies the barrel's original specifications, materials of construction, and any proprietary design features the repair provider needs to account for.
- Nominal bore diameter — the baseline dimension that defines what "restored to specification" actually means for your barrel.
- Bore measurement data with zone locations — the detailed diameter readings you captured at feed, transition, and metering zones (at multiple clock positions). This is the single most valuable piece of information you can provide. It tells the provider exactly where the damage is, how severe it is, and whether ovality is present.
- Material processed and filler content — resin type, filler type, loading percentage, and any additives or flame retardants. This drives the alloy selection for the repair surface.
- Type of wear observed — abrasive, corrosive, mechanical, or a combination, along with any visual evidence such as scoring, pitting, or asymmetric patterns.
- Barrel metallurgy if known — base steel grade and any existing bimetallic lining composition. If unknown, let the provider know so they can plan for material testing upon arrival.
- Previous repair history — has this barrel been repaired before? What method was used? When? This affects remaining wall thickness and influences whether another repair cycle is viable.
Providing this complete data package upfront accomplishes two things. It gives credible providers the information they need to deliver a meaningful quote. And it immediately exposes providers who are willing to quote without asking any of these questions — which, as you will see shortly, is a major red flag.
Evaluating Repair Capabilities and Barrel Repair Quality Control
Not every shop that owns a welding torch is qualified to perform worn extruder barrel repair. The difference between a competent barrel repair service provider and an inadequate one shows up in the engineering rigor behind the work — the steps that happen before, during, and after the actual material deposition.
Look for these capabilities when evaluating providers:
In-house metallurgical analysis. A credible provider can identify your barrel's base steel composition and existing lining chemistry — either through spectrographic analysis, hardness profiling, or other metallurgical testing. This is not optional. Without knowing what they are bonding to, they cannot guarantee adhesion or compatibility of the repair material. Providers who skip this step are guessing, and guesses do not hold up under 5,000 PSI of melt pressure.
Documented repair procedures. Ask for a written description of their process — surface preparation steps, preheat protocols, alloy specifications, cooling procedures, and machining tolerances. A provider with a mature extruder barrel rebuild process will have this documented and be willing to share it. One that improvises each job differently is a risk you do not need to take.
Post-repair dimensional inspection reports. After the bore is restored and ground to final size, the provider should measure and document the finished bore diameter at the same multiple locations and clock positions you used for your incoming measurements. You should receive a formal inspection report — with actual numbers, not just a "passed" stamp — that you can compare against the nominal specification and verify independently when the barrel arrives back at your plant.
Hardness testing of applied surfaces. The deposited alloy layer should be hardness-tested and the results documented. This confirms that the coating achieved the specified metallurgical properties and was not compromised by overheating, insufficient bonding, or contamination during application.
A professional-grade workflow follows a pattern similar to what Glycon describes for screw rebuilding: the component arrives, undergoes a complete physical inspection with detailed measurements, gets reviewed by engineering to determine the full scope of work, and only then does the provider issue a quote specifying exactly what will be done, at what cost, and on what timeline. That arrival-to-quote discipline — where engineering review precedes the commercial discussion — is the hallmark of a provider who prioritizes repair quality over sales volume.
Providers like NANHAIYA, which supports extrusion and injection molding operators with alloy spray welding and wear-resistant surface treatment capabilities, exemplify the kind of technical depth to look for: the ability to match alloy chemistry to your specific wear mechanism, support for both new barrel surface upgrades and worn barrel restoration, and a process built around the barrel's actual condition rather than a one-size-fits-all approach. When evaluating any provider, the key question is whether they treat your barrel as a unique engineering problem or as just another cylinder to coat.
Red Flags When Evaluating Repair Quotes
Knowing what good looks like makes it easier to spot what bad looks like. Several warning signs should immediately disqualify a provider from consideration — or at minimum, trigger much deeper scrutiny before committing:
- Quoting without requesting measurement data. If a provider offers a firm price based solely on barrel length and diameter — without asking for bore measurements, wear patterns, or processing history — they are pricing a generic job, not your job. The repair they deliver will be equally generic.
- Inability to specify the alloy composition they will apply. You should receive a specific alloy designation or at least a defined chemistry class (nickel-based, cobalt-based, tungsten carbide composite) matched to your wear mechanism. "We use our standard alloy" is not an answer — it is an admission that they do not tailor the repair to the application.
- No post-repair inspection documentation. A provider who cannot or will not furnish a dimensional inspection report and hardness test results is asking you to accept their work on faith. In a barrel repair quality control context, that is unacceptable. You need verifiable data to confirm the bore meets specification before you invest the labor and downtime to reinstall it.
- Unusually fast turnaround promises. Quality barrel repair involves controlled heating, cooling, and machining steps that cannot be safely rushed. A provider promising dramatically shorter lead times than competitors may be cutting corners on preheat, cooling, or final finishing — shortcuts that show up as premature coating failure months after reinstallation.
- No questions about your process conditions. A provider who never asks what resin you run, what fillers are involved, or what temperatures the barrel operates at is not engineering a repair — they are performing a commodity service. The alloy selection, coating thickness, and surface finish should all be informed by your operating environment.
Think of the evaluation process this way: the provider's questions tell you more about their competence than their answers do. A shop that asks detailed, probing questions about your barrel's history, your process conditions, and your performance expectations is a shop that understands the variables driving repair durability. A shop that asks only for dimensions and a purchase order number is selling you a coating, not a solution.
Selecting the right provider and specifying the right repair method gets you a restored barrel with documented dimensions and verified surface properties. The final variable — and the one most plant teams overlook entirely — is what happens between the moment that barrel arrives back at your facility and the moment it reaches full production speed. The reinstallation and break-in process determines whether the repair's potential translates into actual performance.
Post-Repair Validation and Break-In Procedures for Restored Barrels
A repaired barrel arrives back at your plant with an inspection report, fresh bore dimensions, and a hardness certificate. It looks good on paper. But here is the uncomfortable truth: the repair provider's quality controls end when the barrel ships. Everything that happens from that point forward — incoming verification, reinstallation, break-in, and the critical first production run — falls entirely on your maintenance team. And this is precisely where most plants drop the ball.
Skip the post-repair barrel validation step, and you are trusting a third party's paperwork without independent confirmation. Rush the break-in, and you risk damaging a freshly applied coating before it has a chance to seat properly. Neglect to capture baseline data during the first run, and you lose the reference point you need to track wear rate going forward — which means you are back to guessing when the next repair will be needed.
The post-repair lifecycle is not complicated. It is just disciplined. And that discipline is what separates a repair that delivers its full expected service life from one that disappoints within months.
Pre-Installation Validation of a Repaired Barrel
Think of this step as your incoming inspection — the same concept manufacturing quality programs apply to any critical component before it enters production. The repair provider measured the bore after finishing. You need to verify those measurements independently before investing the labor and downtime to install the barrel.
Start with the bore diameter. Using the same telescoping gauge or bore gauge technique you applied during your initial wear assessment, measure the finished bore at multiple stations along the barrel length — feed zone, transition zone, and metering zone at minimum — and at the same clock positions (12, 3, 6, 9 o'clock) to check for ovality. Compare your readings directly against the provider's inspection report. Minor discrepancies within measurement uncertainty are expected. Readings that diverge by more than a thousandth of an inch from the documented values warrant a conversation with the provider before proceeding.
Beyond dimensional verification, inspect the bore surface finish visually and by feel. The repaired surface should be uniformly smooth, free of tool marks from the final grinding or honing operation, and consistent in appearance across the full length. Look for:
- Roughness or texture variation that could indicate an incomplete finishing pass or inconsistent coating adhesion.
- Discoloration or oxidation spots that may suggest the barrel was not properly protected during shipping and storage.
- Pinholes or porosity in the applied surface — tiny voids that can become stress concentrators and initiate premature coating failure under operating pressure.
While the bore is accessible, verify that all heating and cooling passages are unobstructed. Repair processes involving high heat — particularly weld overlay and some thermal spray applications — can introduce spatter, scale, or thermal distortion that partially blocks cooling channels or distorts heater band seats. Run a visual check through cooling bores with a flashlight, and confirm that heater bands seat flush against the barrel OD without rocking or gaps.
Finally, confirm thermocouple port alignment and barrel zone registration. If the barrel uses thermocouple wells drilled into the wall, verify that these were not affected by the bore machining or coating process. A thermocouple well that has been thinned or displaced will produce inaccurate temperature readings — and inaccurate temperature data leads directly to process drift that mimics barrel wear symptoms all over again.
Break-In Procedures After Barrel Repair
You would not buy a precision engine, skip the break-in protocol, and immediately run it at redline. A repaired extruder barrel deserves the same consideration. The freshly applied surface — whether alloy spray welding, bimetallic liner, or weld overlay — benefits from a controlled initial loading sequence that allows the coating to seat, stabilize thermally, and establish a proper melt film before full production demands are applied.
The barrel break-in procedure follows a deliberate ramp-up sequence:
Step 1: Heat soak at operating temperature without material. Bring the barrel up to its normal operating temperature profile gradually, following the OEM-recommended heat-up rate. As Davis-Standard advises for restart procedures, the most important consideration is that the polymer be completely molten before any material is introduced — and the size of the extrusion system directly affects the heat-soak time needed to reach uniform temperature throughout the barrel wall. For a repaired barrel, this soak is doubly important: it allows the coating and substrate to expand together at their respective thermal rates, relieving any residual stress from the repair process before mechanical load is applied.
Step 2: Slow-speed startup with unfilled resin. Introduce a clean, unfilled base resin — the simplest material your line can run — at low screw speed. The goal is to establish a stable melt film across the entire bore surface before subjecting the coating to the abrasive or corrosive demands of your production resin. Running unfilled material first eliminates the risk of hard filler particles scoring a fresh surface that has not yet developed its working surface profile. Maintain low RPM for 15 to 30 minutes, monitoring motor amperage and melt temperature for stability.
Step 3: Gradual ramp to full production speed. Increase screw speed in measured increments — roughly 20% to 25% steps, holding at each level for several minutes — until you reach normal operating RPM. If your production material is filled or reinforced, transition from the unfilled break-in resin to the production material during this ramp, not before it. Watch melt pressure and motor load closely during the transition. Any sudden spike or instability suggests the bore surface is encountering unexpected resistance — possibly from a dimensional issue, a surface finish anomaly, or an alignment problem that was not caught during pre-installation validation.
This entire break-in sequence typically takes one to two hours, depending on barrel size and the complexity of the transition to production material. That is a small investment compared to the cost of the repair itself — and compared to the cost of damaging a freshly restored bore surface by skipping directly to full-rate production with glass-filled nylon at maximum RPM.
Monitoring During the First Production Run
The first full production shift after reinstalling a repaired extruder barrel is not just another shift. It is a data collection event — the point at which you establish every baseline measurement that will govern future wear tracking for this barrel's new service life. Treat it accordingly, and you build the foundation for predictive maintenance. Treat it as routine, and you lose the reference point you need to make informed decisions next time.
During the first production shift, your team should work through the following repaired extruder barrel inspection checklist systematically:
- Track motor amperage versus your pre-repair baseline. A properly restored bore should show lower amperage at the same throughput compared to the worn barrel's last readings. If amperage is equal to or higher than before the repair, something is wrong — misalignment, a bore dimension issue, or a screw that has also worn and needs attention.
- Record melt temperature at multiple barrel zones. Compare zone-by-zone readings against the setpoints and against your historical data from the barrel's pre-repair operation. The repaired barrel should hold closer to setpoint because leakage flow — and the shear heating it generates — has been eliminated by restoring proper clearances.
- Monitor melt pressure stability. Pressure fluctuations at the die or screen changer were likely among the symptoms that flagged the wear problem originally. The first production run should show steadier pressure with reduced amplitude of variation. Log the pressure range — peak-to-peak variation over a representative time window — as your new baseline.
- Check product dimensions and surface quality against pre-repair benchmarks. Measure parts from the first production run using the same gauging and inspection criteria you applied before the repair. Dimensional consistency, surface finish, and absence of defects like gels, streaks, or unmixed pigment all confirm that the restored bore is delivering the melt homogeneity the repair was intended to recover.
- Document the baseline bore measurements for future wear tracking. This step is easy to overlook in the rush to resume production — and it is arguably the most important data point of the entire post-repair process. Record the as-installed bore diameters (from your pre-installation validation) alongside the date, the operating hour counter reading, and the cumulative throughput counter if available. These numbers become your time-zero reference. Every future bore measurement will be compared against them to calculate wear rate in the repaired barrel.
If any parameter during this first run falls outside expectations — amperage too high, melt temperature not tracking setpoint, pressure instability persisting, or product quality not meeting pre-repair benchmarks — stop and investigate before running additional shifts. Problems caught during the first run are almost always easier and cheaper to resolve than problems discovered after 500 hours of production have passed.
The data you collect during the first production shift after barrel reinstallation becomes the new reference point for tracking future wear rate — skip it, and every future maintenance decision on this barrel is a guess.
With post-repair validation complete, break-in executed properly, and first-run data captured and documented, the restored barrel enters its productive service life with a clean measurement baseline and a clear trajectory for monitoring. The remaining variable — and the one that ultimately determines whether this barrel reaches its full potential service life or returns to the repair shop prematurely — is the preventive maintenance program that protects it going forward.
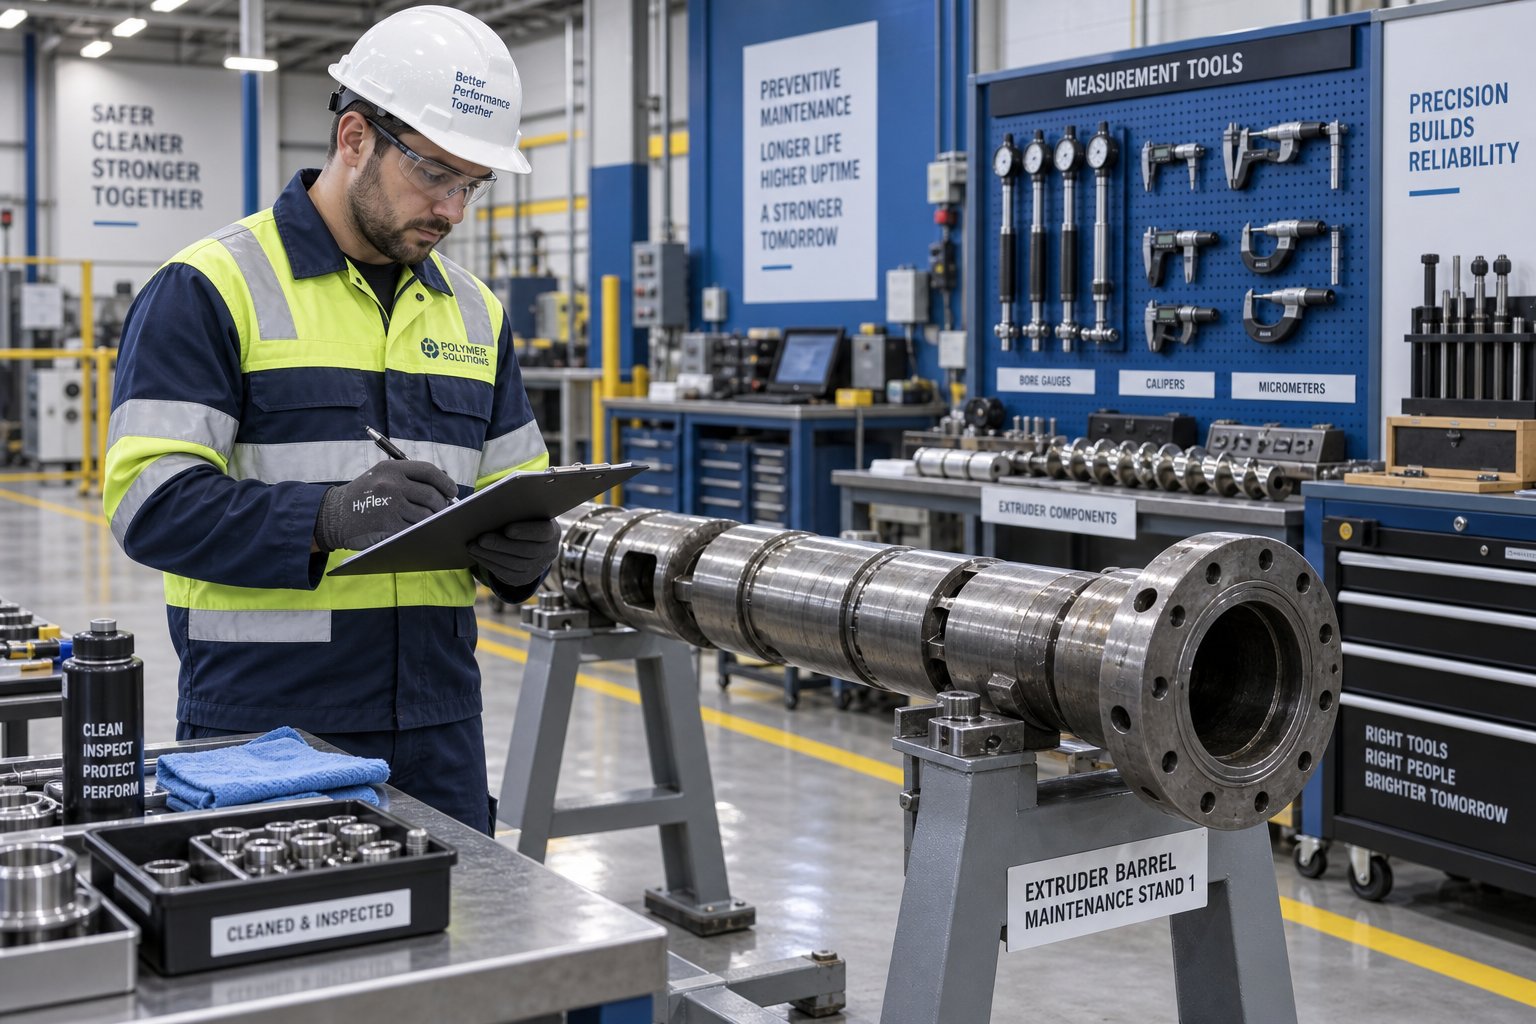
Preventive Maintenance Strategies to Maximize Barrel Service Life
You have invested real money in a barrel repair — the alloy selection, the provider evaluation, the careful break-in, the first-run data collection. The bore is restored, the baseline measurements are logged, and production is running smoothly again. So what happens next? In most plants, the answer is "nothing" — at least until the same symptoms reappear months or years later and the whole cycle restarts.
That reactive pattern is exactly how plants end up paying twice for the same problem. The repair itself is only half the equation. The other half is extruder barrel preventive maintenance — a structured, ongoing program that slows wear, catches degradation early, and turns barrel care from an emergency expense into a predictable, budgeted activity. The good news is that the most effective barrel wear prevention measures are not expensive or complicated. They are just consistent.
Scheduled Measurement and Wear Tracking Programs
The bore measurement data you captured during post-repair validation is not just a quality check — it is the starting line for a wear tracking program that can predict your next maintenance window with surprising accuracy.
Establish a barrel bore measurement schedule tied to a meaningful operational milestone. For high-throughput lines processing abrasive materials, that milestone might be every 2,000 to 3,000 operating hours. For lines running unfilled resins at moderate speeds, intervals of 5,000 to 8,000 hours may be sufficient. Material throughput — measured in total pounds or kilograms processed — works equally well as a trigger, particularly when production hours vary significantly due to shift patterns or seasonal demand.
At each scheduled interval, pull the screw and repeat the same bore measurement protocol you used during your initial assessment: multiple axial stations, four clock positions at each station, readings recorded in a structured log alongside the date, operating hours, and cumulative throughput. The consistency of technique matters more than the frequency — if you change measurement methods or locations between intervals, the trend data becomes unreliable.
With two or more data points, you can calculate a wear rate: bore diameter increase per operating hour or per thousand pounds of material processed. That rate is the single most powerful number in your barrel maintenance toolkit. It lets you project forward — at the current pace of wear, when will the bore cross your clearance threshold? If the answer is "in 6,000 hours," you can plan the next repair during a scheduled shutdown eight months from now instead of scrambling when throughput collapses on a Tuesday afternoon. As Plastics Technology notes, with good record keeping, shutdowns for screw and barrel changes can be predicted with relative accuracy — the life of the components can be optimized, and "running to failure" as well as unplanned downtime can be avoided.
Even on larger machines where pulling the screw at regular intervals is impractical, you can build a proxy wear tracking system from process data. Record and chart adjustments to operating parameters — screw speed increases, barrel temperature changes, back pressure tweaks — against production output and product quality metrics. These incremental compensations, as the same source explains, are often made gradually and go unnoticed until they dramatically impact part quality or productivity. Logging them systematically creates reference points where production efficiency correlates directly to component wear, letting you establish a "point of diminishing returns" that signals when measurement or intervention is due.
Process Adjustments That Reduce Barrel Wear
Your barrel does not wear in a vacuum. The process conditions surrounding it — temperatures, pressures, screw geometry, purging habits, and alignment practices — either accelerate or slow the rate at which the bore degrades. Several actionable process changes can meaningfully extend extruder barrel life without requiring capital investment.
Optimize barrel temperature profiles to minimize cold-feeding abrasion. A feed zone running too cold forces solid pellets and filler particles to grind against the barrel wall under high friction before the polymer begins to melt and lubricate the bore surface. Ensuring that your temperature profile allows early softening of the resin — particularly in the feed and early transition zones — reduces the mechanical contact intensity that drives abrasive wear in those sections. This does not mean running the feed zone excessively hot, which introduces other problems. It means verifying that the profile matches the resin's actual melting behavior rather than relying on a legacy setpoint that may have been appropriate for a different material.
Purge properly when switching between abrasive and non-abrasive materials. Glass-filled nylon residue left in the barrel bore when you transition to unfilled polypropylene continues to abrade the surface until every last fiber is flushed. A thorough purge with an appropriate purging compound — or at minimum, a sufficient volume of the incoming resin at moderate speed — removes abrasive particles trapped in dead spots and along the barrel wall. As Sai Extrumech emphasizes, always purge corrosive or filled resins before shutting down the machine to prevent carbon buildup, black specks, and corrosive wear that accumulates during idle periods. Many processors also use heat-stable purging compounds during shutdowns to reduce oxidation and prevent startup contamination.
Verify screw-to-barrel alignment during every reassembly. Every time a screw is pulled and reinstalled — whether for inspection, replacement, or a routine cleaning — the barrel-to-gearbox alignment should be checked. Misalignment drives one-sided mechanical wear that no amount of metallurgical upgrades can prevent. As Glycon Corp. reports, after decades of aligning plastics processing machines, they have seen very few that did not require an alignment when checked. Making alignment verification a standard step in your reassembly procedure costs minutes and saves months of accelerated bore wear.
Select the correct screw geometry for the resin being processed. A screw designed for one polymer but used on a different resin with a different melting rate can cause solids wedging — where unmelted material plugs the channel and forces the screw against the barrel wall. The resulting galling damages both the screw flight and the barrel bore simultaneously. If your production mix has changed since the screw was originally specified, evaluate whether the screw design still matches the application before assuming the barrel is the only component that needs attention.
Material Handling and Feed Quality Controls
What goes into the barrel determines how fast the barrel wears out. Contaminated feedstock is one of the most preventable — and most commonly ignored — accelerators of bore degradation. Controlling feed quality is barrel wear prevention at its most cost-effective.
Contaminated regrind is a frequent culprit. As Slide Products cautions, reprocessed resin introduces risks including cross-contamination, inconsistent particle geometry, and lower bulk density compared to uniform virgin pellets. Metal fragments from grinder blades, bolts, and other foreign objects find their way into regrind streams with alarming regularity — and once inside the barrel, they cause immediate, severe scoring damage. Moisture trapped in oversized regrind particles creates steam pockets that contribute to corrosive conditions and erratic melt behavior.
Even virgin materials contribute to barrel wear when handling is poor. Hygroscopic resins like nylon, polycarbonate, and PET absorb atmospheric moisture that flashes to steam inside the barrel, accelerating both corrosion and process instability. Filler particle size distribution matters too — oversized filler particles hit the barrel bore with greater force per impact, concentrating abrasive energy at fewer contact points and accelerating localized wear.
Implement these preventive actions as standard operating procedures:
- Pre-dry all hygroscopic resins to the manufacturer's specification — not "close enough," but to the actual recommended moisture content, verified with a moisture analyzer. Underdrying is one of the most common processing errors in the industry, and its effects on barrel life are cumulative.
- Screen all regrind for metal contamination using feed-throat magnets and inline metal detectors. Magnets catch ferrous debris; metal detectors catch non-ferrous contaminants like aluminum shavings or stainless steel fragments that magnets miss. Both should be cleaned and inspected on a regular schedule.
- Verify filler particle size distribution with suppliers — request certificates of analysis and spot-check incoming lots. An out-of-spec filler shipment with oversized particles can cause weeks of accelerated barrel wear before anyone connects the two events.
- Keep grinders, hoppers, and feed systems clean — cross-contamination between materials accumulates over time, introducing abrasive or corrosive particles into feedstock that is nominally "clean."
- Maintain hopper covers and sealed feed systems to prevent environmental contaminants — dust, metal shavings from nearby machining operations, or moisture from ambient humidity — from entering the barrel.
Every dollar spent on preventive barrel maintenance — scheduled measurements, proper purging, alignment checks, and feed quality control — returns multiples in avoided repair costs and unplanned downtime.
The math behind that principle is straightforward. A complete barrel bore measurement takes a few hours of maintenance labor during a planned screw pull. A proper purge cycle between material changeovers costs a modest amount of purging compound and 20 to 30 minutes of machine time. An alignment check during reassembly adds perhaps an hour. These are small, predictable expenses. Compare them to the cost of an emergency barrel repair — the repair itself, the expedited shipping, the unplanned production downtime, the scrap produced while the line ran with a degraded bore — and the return on preventive investment becomes obvious.
Worn extruder barrel repair done right is a one-time correction. Done without the supporting infrastructure of root cause analysis, proper validation, and ongoing preventive maintenance, it becomes a recurring expense that compounds with every cycle. The title of this article posed the choice directly: fix it once, or keep paying twice. The difference between those two outcomes is not the repair method or the provider or the alloy chemistry — it is whether the plant treats barrel care as a system rather than an event. Measurement programs, process discipline, feed quality controls, and alignment verification are not extras bolted onto the repair process. They are the repair process, extended across the barrel's entire service life.
Frequently Asked Questions About Worn Extruder Barrel Repair
1. How do I know when my extruder barrel needs repair?
The earliest measurable sign is a gradual increase in motor amperage at constant output, followed by declining throughput that requires periodic screw speed increases. As wear progresses, melt temperature rises above setpoints due to shear heating from leakage flow, melt pressure becomes unstable, and product defects like gels, unmixed pigment, and dimensional variation appear. Tracking these parameters over time — rather than waiting for visible bore damage during a screw pull — gives your maintenance team the widest range of cost-effective repair options. A bore clearance exceeding roughly twice the original specification typically warrants formal repair evaluation for precision applications.
2. What is the difference between barrel repair, relining, and replacement?
Barrel repair through methods like alloy spray welding or weld overlay deposits wear-resistant material directly onto the existing bore surface, then machines it to nominal diameter — best suited for localized or moderate wear. Relining involves boring the barrel approximately one inch oversize and inserting a new centrifugally cast bimetallic liner, essentially providing a brand-new bore surface for barrels with widespread damage. Replacement means purchasing an entirely new barrel, which is necessary when wall thickness is too thin for any restoration, the barrel is cracked or distorted, or the original metallurgy cannot accept modern repair materials. Providers like NANHAIYA offer alloy spray welding services that restore barrel geometry while applying surface coatings tailored to specific wear mechanisms.
3. How much does it cost to repair a worn extruder barrel compared to buying a new one?
Repair costs vary significantly based on barrel size, wear severity, and the restoration method selected. As a general benchmark, refurbishing a worn barrel through spray welding or weld overlay can save 25% to 50% compared to new barrel pricing, with injection molding barrels offering the largest savings margin due to their higher replacement cost. Full-length bimetallic relining approaches new barrel pricing because of the machining and liner manufacturing involved. Beyond direct cost, turnaround time favors repair — a restored barrel typically ships faster than a new one manufactured from raw billet, which can be critical when unplanned downtime is bleeding revenue.
4. What causes premature extruder barrel wear?
Three primary mechanisms drive premature barrel degradation. Abrasive wear — the most common type — results from hard particles like glass fibers, mineral fillers, or metal contaminants in regrind being dragged between screw flights and the bore surface. Corrosive wear occurs when polymers such as PVC or fluoropolymers release acidic byproducts (hydrochloric or hydrofluoric acid) that chemically attack the barrel lining, typically concentrated in the metering zone. Mechanical wear stems from barrel-to-gearbox misalignment or screw deflection creating localized metal-to-metal contact. Identifying which mechanism caused the damage is essential before selecting a repair method, because a surface optimized for abrasion resistance may fail rapidly under corrosive conditions, and vice versa.
5. How can I extend barrel life after a repair?
A structured preventive maintenance program is the most effective way to maximize post-repair service life. Start by establishing a bore measurement schedule tied to operating hours or throughput milestones, tracking wear rate over time to predict future maintenance windows. Optimize barrel temperature profiles to reduce cold-feeding abrasion in the feed zone, purge thoroughly when switching between abrasive and non-abrasive materials, and verify screw-to-barrel alignment during every reassembly. On the material handling side, pre-dry hygroscopic resins to specification, screen regrind with magnets and metal detectors, and verify filler particle size with suppliers. These low-cost, consistent practices convert barrel care from an emergency expense into a predictable, budgeted activity.
Written by
Nanhaiya Technical Team
Zhoushan Nanhaiya Plastic Machinery Co., Ltd.
The Nanhaiya technical team supports screw and barrel manufacturing projects through application review, technical communication, custom manufacturing coordination, and production and quality control.
Discuss Your Application
Related Articles
More insights on screw barrel technology and plastics processing.

What Nobody Tells You About Screw Barrel For Plastic Machine Design
Oct 10, 2026
Learn how screw barrel for plastic machine design affects melt quality, throughput, and wear life. Covers geometry, resin matching, troubleshooting, and sourcing.
Read Article
Single Screw Extruder for Sheet: Stop Guessing, Start Specifying
Oct 9, 2026
Learn how to specify a single screw extruder for sheet production. Covers screw geometry, resin-specific processing, troubleshooting, and maintenance best practices.
Read Article
PE Pipe Extruder Machine: What Datasheets Won't Tell You
Oct 9, 2026
Learn how a PE pipe extruder machine works, key specs explained, material grade selection, maintenance tips, and buyer guidance beyond the datasheet.
Read ArticleLooking for something else?
Search by material, symptom or product and jump straight to the relevant page.
These are navigation suggestions based on keyword matching — not a quotation, not a delivery commitment, and not a substitute for engineering review. Final specification is confirmed by our engineers against your drawings and processed material.
Need help with screw barrel selection?
Share your machine model, processed material and application. Our team can help with pricing and technical support.