

What Is a Sheet Extrusion Machine and Why It Matters
Defining the Sheet Extrusion Machine
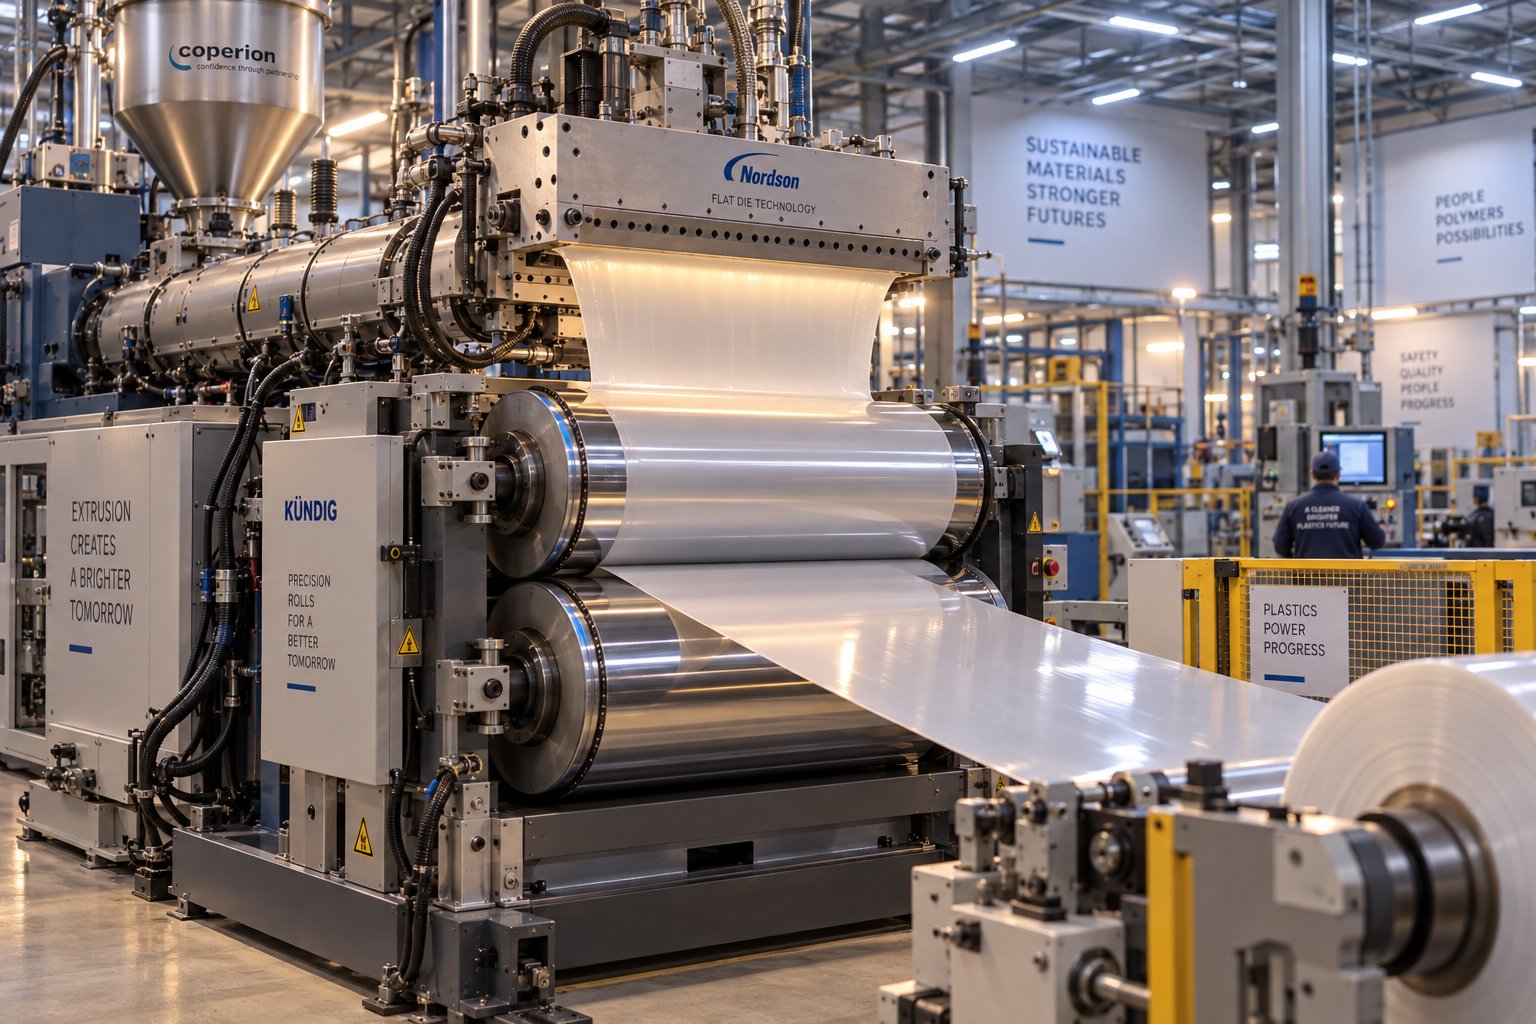
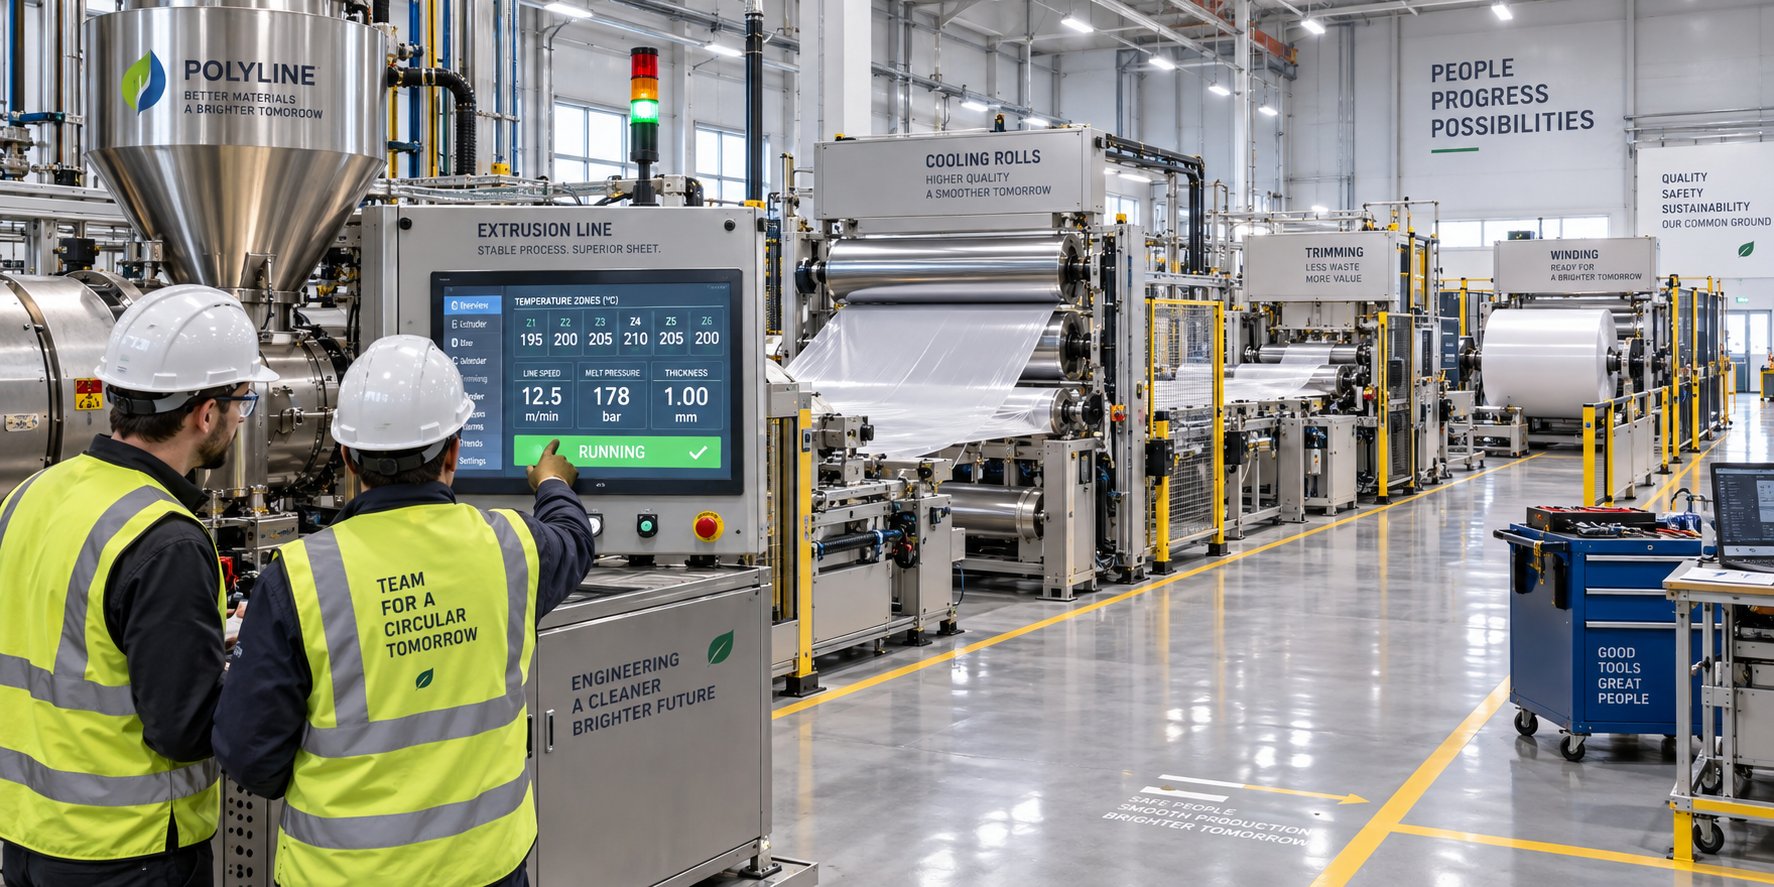
A sheet extrusion machine is a continuous thermoplastic processing system that melts raw polymer pellets and forces them through a flat die to produce uniform, flat sheets of controlled thickness — typically ranging from 0.2 mm to 15 mm. It combines a heated barrel-and-screw assembly, a precision die, a chill-roll cooling stack, and downstream finishing equipment into a single integrated production line.
Imagine feeding a hopper full of tiny plastic pellets at one end and pulling out a smooth, wide, perfectly flat sheet at the other — all without stopping. That continuous operation is exactly what makes plastic sheet extrusion so efficient for high-volume manufacturing. Unlike injection molding, which fills a closed mold to create discrete three-dimensional parts one cycle at a time, or blow molding, which inflates a parison inside a mold to form hollow containers, sheet extrusion produces an uninterrupted ribbon of flat material that can be wound into rolls or cut into panels. The process never pauses to open a mold or eject a part, so throughput stays consistently high.
This fundamental distinction matters when you're deciding how to manufacture a product. If you need complex 3D geometry with tight tolerances, injection molding is the clear choice. If you need hollow bottles or tanks, blow molding wins. But when the goal is wide, flat material at scale — the kind that feeds thermoforming lines, lamination stations, and fabrication shops — a sheet extrusion machine is the right tool for the job.
Industries and Applications That Depend on Sheet Extrusion
Every extruded plastic sheet starts on the same type of line, yet it can end up in remarkably different places. The breadth of end-use sectors reflects the versatility of the process itself:
- Food packaging — Thermoformed trays, blister packs, clamshell containers, and yogurt cup lids made from PET, PP, and PS sheet.
- Construction — Waterproof membranes, roofing panels, protective glazing, and decorative wall cladding produced from PVC, PC, and polyolefin sheets.
- Automotive — Interior door panels, trunk liners, underbody shields, and dashboard components formed from ABS and PP sheet.
- Medical devices — Sterile packaging, thermoformed instrument trays, and cleanroom enclosures requiring precise gauge control and regulatory compliance.
- Signage and displays — Point-of-purchase displays, illuminated sign faces, and protective screen covers made from acrylic, PC, and PETG sheet.
The scale of this market is substantial. The global plastic films and sheets market was valued at $149.4 billion in 2025 and is projected to reach $237.3 billion by 2033, driven by rising demand across packaging, construction, and electronics sectors. That growth keeps plastic sheet extrusion at the center of modern manufacturing.
Why Understanding This Equipment Matters
Here's the business reality: the specific configuration of your sheet extrusion line — screw diameter, L/D ratio, die width, cooling stack design, automation level — directly determines product quality, maximum throughput, and operating cost per kilogram. A machine optimized for amorphous PET behaves very differently from one tuned for semi-crystalline polypropylene, and choosing the wrong setup leads to scrap, downtime, and margin erosion.
Whether you're specifying a new plastic sheet extrusion machine, upgrading an aging line, or evaluating a supplier's capabilities, a solid technical understanding of how these systems work gives you a decisive advantage. The sections ahead break the process down stage by stage — from raw pellet to finished sheet — so you can make those decisions with confidence.
How a Sheet Extrusion Machine Works Step by Step
Picture a single plastic pellet — roughly the size of a peppercorn. Within seconds of entering a sheet extrusion line, that pellet will be melted, pressurized, spread across a die several feet wide, cooled into a solid sheet, measured for accuracy, trimmed, and stacked or wound into a roll. Every stage in the sequence builds on the one before it, and a misstep at any point ripples through to the finished product. Here's how each stage works, laid out in the order the polymer actually travels through the system.
- Raw material feeding and drying — Pellets, granules, or regrind enter a hopper mounted on top of the extruder barrel. Gravimetric feeders meter the material at a precise rate to prevent surges or starvation, both of which cause thickness swings downstream. Hygroscopic resins like PET and nylon must pass through a desiccant dryer first; PET typically requires drying at 65-180 degrees C to remove absorbed moisture that would otherwise trigger hydrolytic degradation during melting.
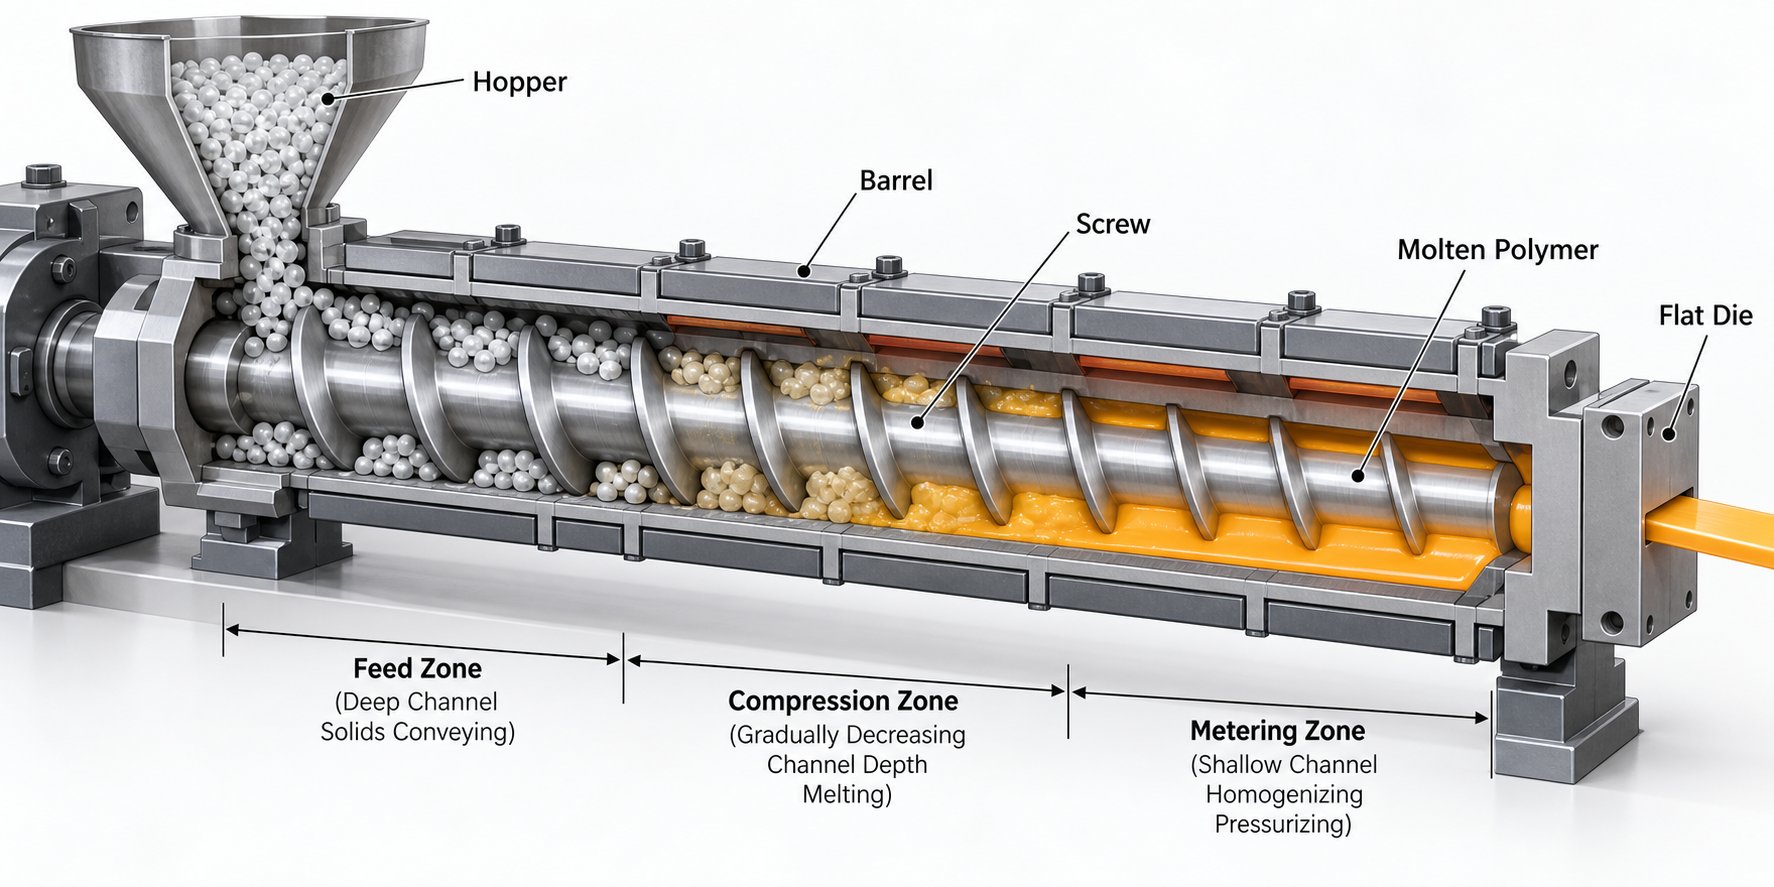
- Plasticating inside the barrel and screw — The rotating screw conveys material forward through a heated barrel, converting solid pellets into a homogeneous melt. This happens across three distinct functional zones (detailed below).
- Melt filtration — The molten polymer passes through a screen pack and breaker plate that trap contaminants, unmelted particles, and gels before they can reach the die.
- Flat-die distribution — A coat-hanger or T-slot die spreads the filtered melt uniformly across the full sheet width, forming a continuous curtain of molten polymer.
- Chill-roll calendering — A three-roll polishing stack immediately quenches the molten curtain, setting thickness, surface finish, and flatness in one pass.
- Inline thickness measurement — Beta-gauge or X-ray sensors scan the sheet cross-directionally, feeding real-time data back to the die for closed-loop profile control.
- Edge trimming and scrap reclaim — Rotary knives remove the uneven bead edges, and inline granulators chop the trim back into regrind for immediate reuse.
- Winding or cut-to-length stacking — Thin-gauge sheet is wound onto rolls; heavier rigid sheet is cut by a guillotine or flying shear and stacked on pallets.
Each of these stages deserves a closer look, because the details inside every zone are what separate a high-quality extrusion sheet line from a mediocre one.
From Pellet Hopper to Molten Polymer
The heart of any plastic sheet extrusion line is the extruder itself — specifically, the screw rotating inside a temperature-controlled barrel. The screw isn't just a conveyor; it's a precision-engineered pump that simultaneously transports, compresses, melts, and mixes the polymer. It accomplishes all four tasks through three geometrically distinct zones:
- Feed zone — Deep screw flights accept solid pellets from the hopper and begin pushing them forward. Barrel temperatures here are set relatively low — just warm enough to start softening the resin without causing premature melting that blocks the feed throat.
- Compression zone — The screw channel gradually becomes shallower, compressing the material against the heated barrel wall. This mechanical compression, combined with frictional and conducted heat, progressively melts the polymer. The compression ratio — the depth of the feed zone channel divided by the depth of the metering zone channel — varies by resin. Polyolefins like PE and PP perform best at 3:1 to 4:1, while shear-sensitive rigid PVC requires a gentler 1.8:1 to 2.5:1 to avoid thermal degradation.
- Metering zone — The shallowest section of the screw homogenizes the fully molten polymer and builds consistent pressure to push it through the screen pack and into the die. Uniform melt temperature and pressure at this point are essential — any variation here translates directly into thickness inconsistencies in the finished sheet.
Barrel temperature profiles are typically set in ascending zones from feed throat to die adapter, though the exact setpoints depend heavily on the resin. PP might run at 200-280 degrees C, while rigid PVC stays in a tighter 160-210 degrees C window. Screw geometry and barrel heating work as a team: get one wrong, and even perfect settings on the other can't fully compensate.
Die Distribution and Sheet Formation
Once the melt clears the screen pack, it enters the flat die — arguably the most critical piece of tooling on the entire extrusion line. The die's job sounds simple: spread a round stream of molten polymer into a perfectly uniform curtain that may be 1,000 mm to over 3,500 mm wide. In practice, achieving that uniformity is an engineering challenge.
The most common design is the coat-hanger die, named for the shape of its internal manifold channel. A teardrop or parabolic cross-section tapers from the center of the die toward the edges, compensating for the decreasing flow rate as melt travels outward. This geometry ensures each point across the die width receives an equal volume of polymer per unit time.
Even with a well-designed manifold, fine-tuning is still necessary. Two adjustment mechanisms handle this:
- Choker bar — Positioned upstream of the die lip, it provides coarse flow adjustment by locally restricting or opening the channel height across the die width.
- Flex lip bolts — Spaced roughly 25 mm apart along the die exit, these bolts deflect the lip to make fine adjustments to the final gap. On an automated sheet extrusion line, heat-expandable bolts can be driven by feedback from the downstream thickness gauge, creating a closed-loop system that corrects the profile without operator intervention.
Why does this matter so much? Because a die-lip gap variation of just a few hundredths of a millimeter can push the sheet outside its thickness tolerance. In thermoforming, that means rejected parts. In packaging, it means wasted resin. Tight die-lip control is the single most important lever for cross-directional gauge uniformity.
Cooling, Gauging, and Finishing
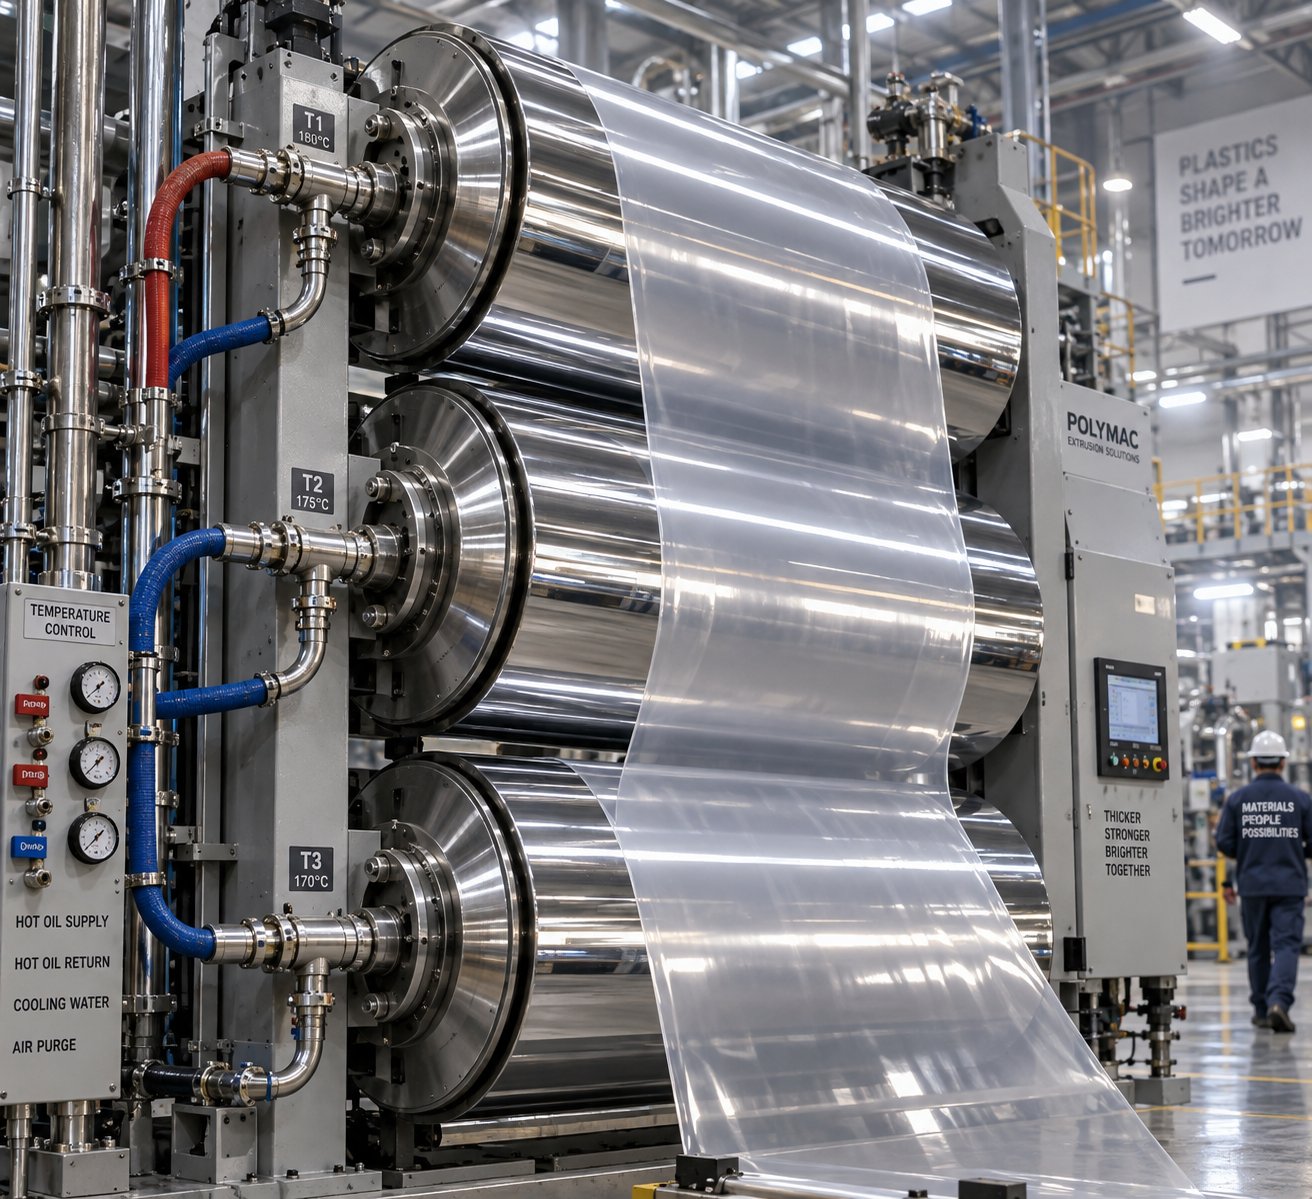
The moment the molten curtain exits the die, it meets the three-roll chill stack — sometimes called the polishing stack or calender. Imagine three large, chrome-plated steel rolls arranged vertically or at an angle. The top roll and middle roll form a nip that captures the hot sheet, sets its thickness, and imparts a surface finish. The bottom roll completes the cooling and ensures flatness.
You'll notice that different surface finishes come from different roll surfaces: a highly polished chrome roll produces a glossy sheet, a matte-textured roll creates a satin finish, and an engraved roll can emboss patterns directly into the surface during cooling. Roll temperatures are controlled to within plus or minus 0.5 degrees C using circulating fluid, and even slight speed differentials between the three rolls influence optical properties and residual stress in the sheet.
After the chill stack, the sheet passes under an inline thickness gauge — typically a beta-transmission or X-ray scanning system that traverses back and forth across the full width. This gauge generates a real-time cross-directional thickness profile and feeds it back to the die-lip actuators for automatic correction. The result is a continuously tightening loop: measure, adjust, re-measure. Manufacturers using closed-loop profile control have reduced thickness margins from 200 micrometers down to 20 micrometers — a 90 percent reduction in material overuse on some lines.
Edge trimming follows immediately. Rotary slitters remove the uneven bead edges that form where the die flow meets its boundaries. These trimmings aren't wasted — inline granulators chop them into regrind that feeds directly back into the hopper, keeping material utilization high.
Finally, the finished sheet reaches the end of the line. Thin-gauge sheet — common for thermoforming applications — is wound onto large-diameter rolls. Thicker, more rigid sheet is cut to length by a guillotine or flying shear and stacked onto pallets. Haul-off speed relative to extruder output is the final control variable for sheet thickness: increasing line speed thins the sheet, while slowing it down produces heavier gauge.
Every one of these finishing steps contributes to the dimensional accuracy and consistency that downstream converters depend on. And yet, the extruder screw and barrel at the front of the line remain the performance foundation — a topic that leads directly into how single-screw and twin-screw configurations compare for sheet production.
Single-Screw vs Twin-Screw Sheet Extruders Compared
The screw and barrel sit at the very front of the production line, yet the type of extruder you choose shapes everything that happens downstream — output rate, melt consistency, energy draw, and even what resins you can process. Most buyers of plastic extrusion machines face a straightforward question early in the specification process: single screw or twin screw? The answer depends less on which design is "better" in the abstract and more on what your specific application demands.
Here's the short version: the vast majority of sheet extruders in commercial operation today are single-screw machines. They dominate because most sheet production starts with pre-compounded resin pellets that simply need to be melted and pumped — a job single-screw extruders handle with excellent energy efficiency, mechanical simplicity, and lower upfront cost. Twin-screw extruders earn their place on the line when the process itself requires mixing, compounding, or devolatilization that a single screw can't deliver.
Let's break both configurations down so you can match the right sheet extruder machine to your operation.
How Single-Screw Extruders Drive Sheet Production
A single-screw plastic sheet extruder uses one rotating screw inside a cylindrical barrel to convey, melt, and pressurize the polymer. It sounds simple — and mechanically, it is. That simplicity is a major advantage. Fewer moving parts mean fewer failure points, lower maintenance labor, and a more predictable operating envelope.
For sheet extrusion, screw length-to-diameter (L/D) ratios typically fall in the 30:1 to 36:1 range. Why that window? A 24:1 screw — common decades ago — simply doesn't provide enough barrel length to fully melt, homogenize, and pressure-build in a single pass at the high throughputs modern sheet lines demand. The extra length gives the feed section room to work while extending the compression and metering zones for better melt quality. Some specialized applications push beyond 36:1, but as extrusion authority Jim Frankland has pointed out, a screw that's too long for the processing situation can actually limit output by generating excessive melt temperatures that degrade the polymer.
Beyond geometry, the metallurgy of the screw and barrel is a decisive performance factor. Sheet lines running glass-filled PP, mineral-loaded compounds, or post-consumer recyclate with abrasive contaminants chew through standard nitrided steel faster than you might expect. Bimetallic barrel liners and hardened screw flights extend wear life and maintain the tight clearances that keep melt pressure consistent and output rate stable. When clearances open up due to wear, you see declining throughput at constant RPM, rising melt temperature, and gauge variation in the finished sheet — all of which increase scrap and energy cost per kilogram.
This is where component quality becomes a strategic decision, not just a purchasing line item. NANHAIYA, for example, specializes in custom and replacement single screw barrels engineered specifically for sheet extrusion lines. Their product range covers pipe, film, sheet, pelletizing, recycling, and general-purpose applications, giving processors a single source for wear components regardless of the line type. Having a reliable barrel supplier with proven metallurgical options — and fast turnaround on replacements — directly reduces unplanned downtime and keeps sheet quality inside specification.
When Twin-Screw Extruders Are the Right Choice
If single-screw machines handle most sheet production, when does a twin-screw extruder earn its higher price tag? The answer almost always involves one or more of these scenarios:
- In-line compounding — When you want to skip the separate pelletizing step and go directly from raw ingredients to finished sheet, a co-rotating twin-screw extruder provides the intense distributive and dispersive mixing that blending additives, fillers, or color concentrates into a base resin requires. Think PP compounded with 40% talc and extruded directly into automotive interior sheet.
- Processing highly contaminated recycled flake — Post-consumer PET or HDPE bales arrive with moisture, label fragments, and adhesive residue. A twin-screw's segmented barrel design allows multiple vacuum venting ports that strip volatiles, moisture, and odor compounds from the melt in ways a single-screw setup can't match.
- Reactive extrusion — Processes like chain extension for recycled PET or grafting maleic anhydride onto polyolefin backbones require precise residence-time control and thorough mixing of small additive concentrations — exactly the self-wiping, modular capability twin-screw sheet extruders provide.
- Devolatilization — Removing solvents, unreacted monomers, or excess moisture from the melt stream mid-process is far more efficient on a vented twin-screw machine, which offers superior exhaust and venting performance compared to single-screw designs.
The trade-off? Twin-screw plastic extrusion machines carry significantly higher capital costs — often 1.5 to 3 times the price of a comparable single-screw setup. Their gearboxes are more complex, screw elements must be individually configured and periodically replaced, and energy consumption per kilogram of standard resin is generally higher. For a processor running pre-compounded HIPS pellets into thermoforming sheet, that added complexity brings no benefit.
Choosing the Right Configuration for Your Application
The decision boils down to what's happening inside the barrel. If your feedstock arrives as clean, pre-compounded pellets and you're producing single-layer sheet, a well-configured single-screw extruder is almost certainly the smarter investment. If you need to compound on the fly, process heavily contaminated recyclate, or run reactive chemistries, the twin-screw design justifies its premium.
The comparison table below lays out the key dimensions side by side:
| Comparison Dimension | Single-Screw Extruder | Twin-Screw Extruder |
|---|---|---|
| Capital cost | Lower (baseline) | 1.5x to 3x higher |
| Maintenance complexity | Simpler — fewer wear parts, single screw and barrel replacement | More complex — segmented screws, multiple barrel sections, gearbox servicing |
| Throughput for standard resins | Excellent — highly efficient melt conveying and pressurization | Good, but energy per kg is typically higher for simple melting tasks |
| Mixing and compounding ability | Limited — adequate for pre-compounded resins only | Superior — modular screw elements enable distributive and dispersive mixing |
| Suitability for recycled content | Moderate — works well with clean regrind; struggles with high contamination | High — multiple venting zones remove volatiles, moisture, and contaminants |
| Energy consumption (per kg output) | Lower for standard sheet production | Higher due to intensive mixing and additional drive requirements |
| Best suited for | Pre-compounded PP, PS, HIPS, PE, PET, ABS sheet | Direct compounding, reactive extrusion, high-filler formulations, heavy recycled content |
Whichever route you take, remember that the extruder is only as capable as its weakest wear component. A high-end drive and control package paired with a worn-out barrel delivers inconsistent melt — and inconsistent sheet. Investing in quality screw and barrel assemblies, whether for a new build or as scheduled replacements, protects throughput and product quality over the full life of the line.
Of course, the extruder type is only half the equation. The resin you feed into it introduces its own set of demands — processing temperatures, drying requirements, crystallinity behavior, and even corrosion risks — that shape how the entire line must be configured.
Material Compatibility Guide for Sheet Extrusion Machines
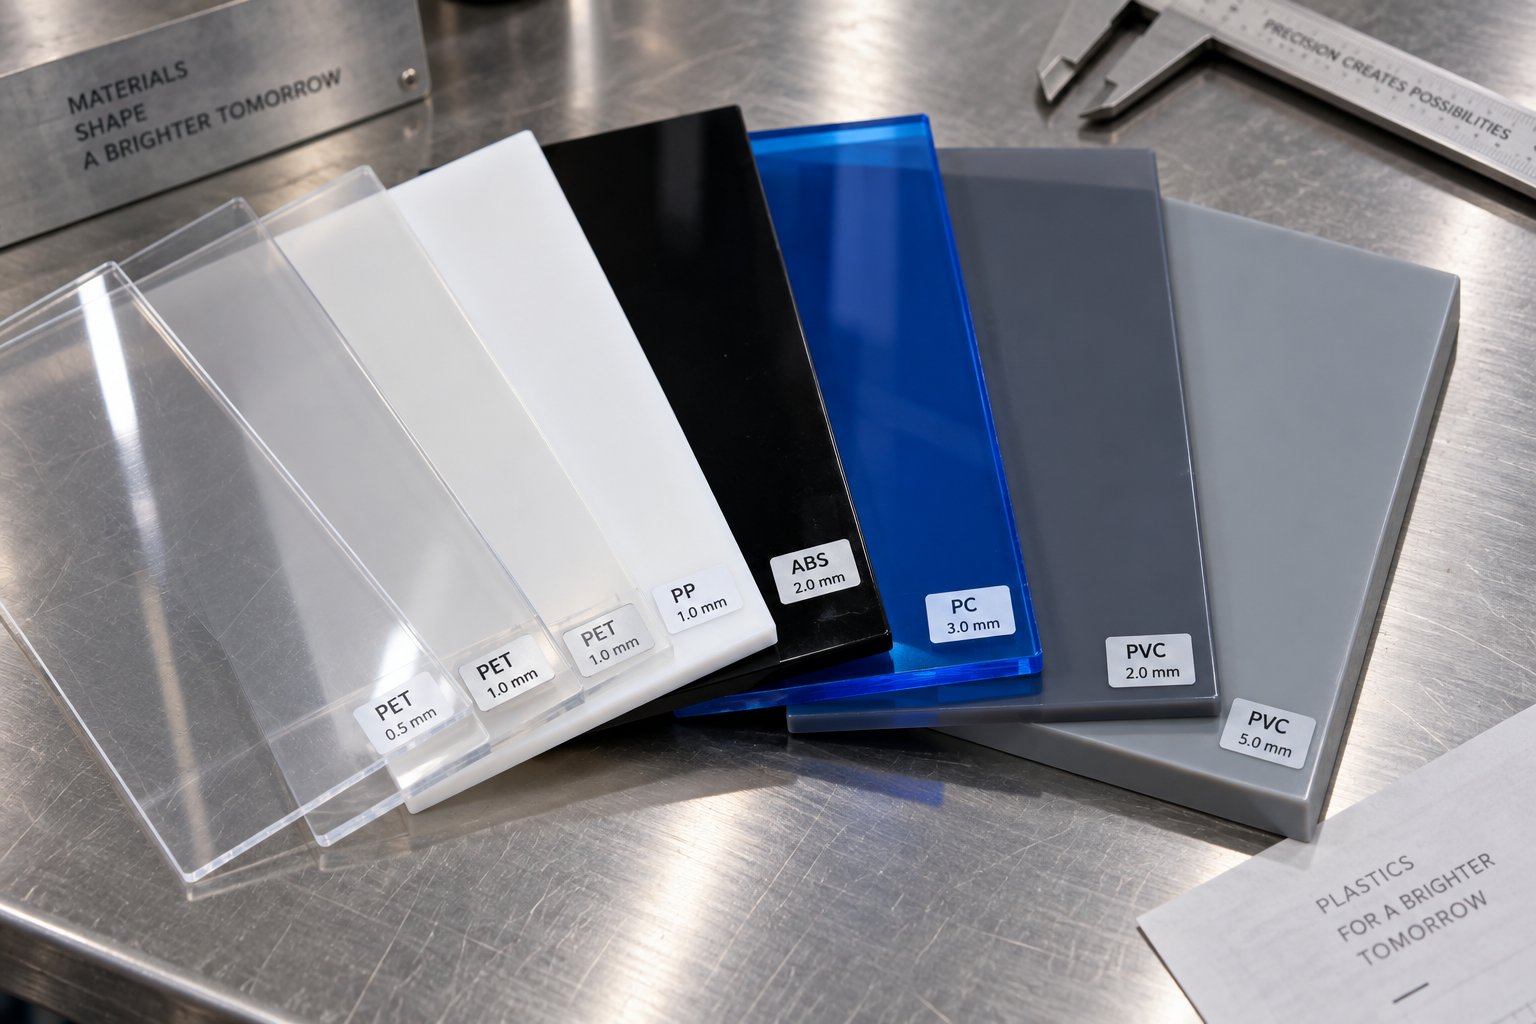
Every resin has a personality. Polypropylene behaves nothing like polycarbonate on a sheet extrusion machine, and feeding PVC through a barrel designed for PET is a recipe for corrosion, degradation, or both. The polymer you process dictates barrel temperature profiles, screw geometry, drying protocols, chill-roll settings, and even the metallurgy of the components that touch the melt. Ignore those differences and you'll fight quality problems that no amount of downstream adjustment can fix.
This section maps the most common resins used on sheet extrusion lines to the machine configuration adjustments each one demands — giving you a practical reference whether you're quoting a new pp ps sheet extrusion line or troubleshooting an existing setup.
Commodity Resins for High-Volume Sheet Production
If you walk through any thermoforming plant producing food containers, disposable cups, or refrigerator liners, you'll find two polymer families running the show: polypropylene and polystyrene (including its high-impact cousin, HIPS). Together, they account for the bulk of commodity sheet output worldwide — and they behave very differently on the same equipment.
The reason comes down to molecular structure. PP is a semi-crystalline polymer, meaning its molecular chains pack into organized regions during cooling. That ordered structure gives PP excellent chemical resistance and stiffness, but it also means the polymer has a sharply defined melting point and shrinks anisotropically — less in the direction of flow, more in the transverse direction. On a pp sheet extrusion line, chill-roll temperatures must be carefully managed to control how much crystallinity develops in the sheet. Run the rolls too cold and you get a brittle, hazy sheet with excessive internal stress. Run them too warm and crystallinity increases to the point where thermoformability suffers. Typical melt temperatures for PP sheet fall in the 232-249 degrees C range, with compression ratios around 3:1 to 4:1 to deliver thorough melting of the semi-crystalline pellets.
PS and HIPS, on the other hand, are amorphous. Their molecular chains are arranged randomly — picture tangled spaghetti rather than neatly folded ribbons. There's no crystalline melting point, just a gradual softening above the glass transition temperature. This makes amorphous styrenics more forgiving on the chill stack: you'll get consistent clarity (in general-purpose PS) or uniform matte impact performance (in HIPS) across a wider range of roll temperatures. Processing temperatures for HIPS typically run 200-240 degrees C, and the screw design doesn't need to work as hard to homogenize an amorphous melt. Standard barrier screws with 30:1 to 34:1 L/D ratios handle both PS and HIPS efficiently.
PE — particularly HDPE and LDPE — rounds out the commodity group. HDPE sheet appears in chemical tanks, cutting boards, and playground equipment, processed at 200-235 degrees C. Like PP, it's semi-crystalline and requires close attention to cooling rate to balance stiffness and impact strength. LDPE sheet tends toward thinner gauges and flexible applications, though it's less common in rigid sheet production.
PET and Engineering Resins for Performance Applications
When the application demands optical clarity, elevated temperature resistance, or superior mechanical properties, processors step beyond commodities into PET, ABS, and polycarbonate territory. Each brings distinct rewards — and distinct headaches.
PET is the dominant clear-sheet material for food packaging and medical thermoformed trays. A pet sheet extrusion line must prioritize one thing above all else: moisture control. PET is highly hygroscopic, and even a few hundred parts per million of residual moisture triggers hydrolytic chain scission during melting. The result is a dramatic drop in intrinsic viscosity, which shows up as hazy, brittle sheet that won't thermoform cleanly. Pre-drying at 160-180 degrees C in a desiccant dryer for four to six hours is non-negotiable. Vented barrels or vacuum-assisted screws provide a second line of defense by stripping residual volatiles from the melt. Screws with L/D ratios of 30:1 to 36:1 and moderate compression ratios work best, because excessive shear generates heat that pushes PET toward thermal degradation. On the chill stack, rapid quenching keeps the sheet amorphous and crystal-clear — slow cooling allows crystallization that turns the sheet opaque and unusable for see-through packaging. A pet sheet extruder machine, in short, demands tighter process discipline than a comparable polyolefin line.
ABS is an amorphous blend of acrylonitrile, butadiene, and styrene that delivers a rare combination of impact resistance, surface finish, and dimensional stability. You'll find ABS sheet in automotive interior trim, electronics housings, and luggage shells. It processes at roughly 220-260 degrees C, benefits from moderate pre-drying (80 degrees C for two to four hours), and responds well to standard single-screw extruders with barrier-flight designs.
PC occupies the high end of the engineering-resin spectrum. Sheet extrusion with polycarbonate requires barrel temperatures in the 280-320 degrees C range — significantly hotter than most other resins on this list. PC is also sensitive to moisture-induced degradation, so thorough drying at 120 degrees C for at least four hours is essential. The payoff is outstanding impact strength and optical clarity, making PC sheet the go-to choice for machine guards, riot shields, and architectural glazing panels.
PVC Sheet Extrusion Considerations
PVC stands apart from every other resin on this list — not because it's difficult to process, but because it's unforgiving of mistakes. When PVC overheats, it doesn't just degrade quietly. It releases hydrochloric acid (HCl), which corrodes standard steel barrels and screws, contaminates the melt, and can damage downstream tooling.
A dedicated pvc sheet extrusion line addresses this with several specific design features. First, barrels and screws must be made from corrosion-resistant materials — stainless steel, nickel alloys, or bimetallic liners with hard coatings that withstand HCl attack. Second, PVC's narrow processing window demands extremely precise temperature control across every barrel zone. Push too high and degradation begins; stay too low and the melt remains inhomogeneous. Melt temperatures typically sit between 160 and 200 degrees C — considerably lower than PP, PET, or PC.
Screw design also diverges from the standard. PVC requires a low compression ratio — typically 1.5:1 to 2.5:1 — to avoid the localized shear heating that triggers degradation. Barrier-type screws with gentle mixing zones outperform aggressive high-shear designs. Many PVC sheet producers opt for conical or parallel twin-screw extruders rather than single-screw machines, because twin screws offer better heat distribution, shorter residence times, and integrated degassing ports that vent HCl vapors before they accumulate. The barrel itself often includes dedicated gas evacuation systems to remove those corrosive byproducts in real time.
The table below pulls all seven resin families together in a single quick-reference format:
| Resin | Processing Temp Range | Typical L/D Ratio | Drying Required? | Common End Products |
|---|---|---|---|---|
| PP | 232-249 °C | 30:1 - 36:1 | No (recommended for some grades) | Thermoformed food trays, cups, automotive liners |
| PS / HIPS | 200-240 °C | 30:1 - 34:1 | No | Disposable cups, yogurt containers, refrigerator liners |
| HDPE | 200-235 °C | 24:1 - 30:1 | No | Chemical tanks, cutting boards, playground panels |
| PET | 260-280 °C | 30:1 - 36:1 | Yes (160-180 °C, 4-6 hrs) | Clear food packaging, medical trays, blister packs |
| ABS | 220-260 °C | 30:1 - 34:1 | Yes (80 °C, 2-4 hrs) | Automotive trim, electronics housings, luggage shells |
| PC | 280-320 °C | 30:1 - 36:1 | Yes (120 °C, 4+ hrs) | Machine guards, riot shields, architectural glazing |
| PVC | 160-200 °C | 20:1 - 26:1 | No | Credit cards, signage, construction cladding, blister packs |
Notice the pattern: amorphous resins like PS, ABS, and PC are generally more forgiving on the chill stack and offer a wider processing window, while semi-crystalline materials like PP, PE, and PET demand tighter control over cooling rate and crystallinity development. PVC is in a category by itself, requiring corrosion-resistant hardware and a cautious thermal approach that other resins simply don't need.
Matching the right machine configuration to your resin isn't optional — it's the foundation of consistent sheet quality. But resin choice also raises a closely related question that trips up many newcomers to the industry: at what point does "sheet" end and "film" begin, and why does that boundary matter for equipment selection?
Sheet Extrusion vs Film Extrusion Differences Explained
Both processes start the same way — polymer pellets melted inside an extruder and pushed through a die to form a continuous flat product. So why does the industry draw a hard line between film and sheet extrusion, and why should you care? Because that line determines which equipment you buy, how you cool the product, what speeds your line runs, and what your customers can do with the finished material.
The conventional thickness boundary is 0.25 mm (roughly 10 mil). Material below that threshold is classified as film; material above it is classified as sheet. It sounds arbitrary, but it reflects a genuine shift in physical behavior. Below 0.25 mm, the product is flexible enough to be collapsed, folded, and wound at high speed. Above it, the material develops enough rigidity to resist folding — and that rigidity changes everything about how the line handles it.
Key Technical Differences Between Sheet and Film Lines
Imagine standing beside a sheet plastic extrusion line and then walking over to a blown-film tower in the same plant. The contrast is immediately visible. The sheet line feeds a wide, flat coat-hanger die, and a molten curtain drops vertically into a polished chill-roll stack that quenches and calendars the product in a single pass. The blown-film line, by comparison, pushes melt through an annular die, inflates the resulting tube into a bubble with internal air pressure, cools it with an external air ring, collapses it through nip rolls, and winds the flattened tube onto a roll.
Cast film lines share the flat-die approach with sheet lines, but they run at significantly higher linear speeds and produce much thinner gauge material. Here's where the practical differences really show up:
- Die design — Sheet lines and cast film lines both use flat T-dies or coat-hanger dies, but blown-film lines rely on annular dies that shape the melt into a tube. Die-lip tolerances on sheet dies must be tighter because the thicker product makes any cross-directional variation more visible and costly.
- Cooling method — Sheet lines depend on polished chill-roll stacks that simultaneously cool, set thickness, and control surface finish. Blown-film lines cool with an air ring (and sometimes internal bubble cooling), while cast film lines use a single chill roll followed by secondary cooling. The chill stack on a sheet line is typically the largest and most expensive piece of downstream equipment — and for good reason, since it directly governs surface quality, crystallinity, and dimensional tolerance.
- Line speed and mass throughput — This is a counterintuitive point. Film lines run at much higher linear speeds — hundreds of meters per minute in some cases — because the product is thin and cools quickly. Sheet lines run slower in terms of meters per minute, but their higher gauge means the mass throughput (kilograms per hour) is often comparable or even greater. A sheet extrusion line producing 2 mm PP at 10 meters per minute moves far more polymer than a blown-film line producing 25-micron LDPE at 150 meters per minute.
Overlapping Applications and When Lines Blur
In theory, the 0.25 mm boundary is clean. In practice, a gray zone exists between roughly 0.15 mm and 0.50 mm where "thin-gauge sheet" and "heavy-gauge film" overlap. Thermoformers producing lightweight cups, lids, and blister packs often work in this range — extruding material that's technically sheet but thin enough to behave almost like film on the winder.
This overlap explains why some processors invest in versatile extrusion lines capable of handling both territories. A well-designed flat-die line with adjustable chill-roll gaps, variable-speed haul-off, and both winding and stacking capability can swing between 0.15 mm and several millimeters, covering thin-gauge thermoforming stock and rigid extruded plastic sheets on the same equipment. That flexibility reduces capital expenditure for operations that serve diverse customer bases.
The comparison table below pulls the key parameters together for quick reference:
| Parameter | Sheet Extrusion | Film Extrusion (Blown) | Film Extrusion (Cast) |
|---|---|---|---|
| Typical gauge range | 0.25 mm - 15 mm | 0.01 mm - 0.25 mm | 0.01 mm - 0.25 mm |
| Primary die type | Flat (coat-hanger / T-die) | Annular | Flat (coat-hanger / T-die) |
| Cooling method | Polished chill-roll stack | Air ring / internal bubble cooling | Chill roll |
| Typical line speed | Lower linear speed, higher mass throughput | High linear speed | High linear speed |
| Output form | Rigid or semi-rigid sheets (rolls or cut panels) | Flexible film (collapsed tube on rolls) | Flexible film (flat wound on rolls) |
| Common end uses | Thermoformed trays, automotive panels, signage, construction cladding | Grocery bags, agricultural film, shrink wrap | Stretch wrap, barrier packaging, lamination film |
The takeaway is straightforward: if your end product needs rigidity, thermoformability, or heavy gauge, an extrusion sheet line built around a chill-roll stack is the right platform. If you need flexible, lightweight material at high speed, film extrusion — blown or cast — is the better fit. And if your product mix straddles the boundary, a versatile flat-die line can serve both worlds without doubling your equipment investment.
Regardless of which side of the thickness line your product falls on, one reality holds true for every flat-die line: the extruder is just the starting point. What happens after the melt leaves the die — cooling, gauging, trimming, winding — ultimately determines whether the finished product meets specification or ends up as scrap.
Essential Downstream Equipment in a Sheet Extrusion Line
Here's a reality that surprises many first-time buyers: the extruder itself — screw, barrel, motor, and all — typically represents less than half the total capital cost of a complete plastic extrusion line. The rest goes into everything that sits between the die exit and the finished pallet of sheet. Chill-roll stacks, thickness scanners, edge trimmers, granulators, haul-offs, winders, stackers — these downstream components collectively determine whether the sheet you produce is sellable or scrap.
Think of it this way. The extruder creates a consistent melt. The die shapes it. But it's the downstream sheet extrusion equipment that locks in dimensional accuracy, surface quality, and production speed. A perfectly homogeneous melt pushed through a flawlessly adjusted die will still produce reject-quality sheet if the chill rolls are misaligned, the thickness gauge is uncalibrated, or the winder introduces tension wrinkles. Every meter of your extruder line after the die lip is earning — or losing — you money.
Chill-Roll Stacks and Calendering Units
The moment molten polymer exits the die, it's a soft, pliable curtain with no structural integrity. The three-roll polishing stack — sometimes called a calender or chill stack — is the piece of equipment that transforms that curtain into a solid, dimensionally stable sheet with a controlled surface finish. It's arguably the most important single investment in any sheetline after the extruder itself.
Imagine three large chrome-plated steel rolls arranged in a vertical or angled configuration, each independently temperature-controlled by circulating oil or water. The sheet enters the nip between the top and middle rolls, wraps partially around the middle roll, then passes over the bottom roll before exiting toward the haul-off. During that brief journey — lasting only seconds — several critical things happen simultaneously:
- Thickness setting — The nip gap between the top and middle rolls establishes the final sheet gauge. Hydraulic or servo-driven roll positioning allows adjustments down to a few hundredths of a millimeter, giving operators precise control over caliper across the full width.
- Surface finish control — The roll surface determines the sheet's appearance. A mirror-polished chrome roll produces high-gloss sheet. A matte-textured roll imparts a satin or frosted finish. Engraved rolls can emboss patterns — leather grain, geometric textures, or anti-glare surfaces — directly into the sheet as it solidifies. Swapping rolls between production runs lets a single line produce multiple surface variants.
- Crystallinity management — For semi-crystalline resins like PP and PET, roll temperature directly governs how much crystalline structure develops during cooling. Lower roll temperatures quench the sheet rapidly, suppressing crystallinity to preserve clarity and thermoformability. Higher temperatures allow more crystalline growth, increasing stiffness and heat resistance but reducing transparency. Getting this balance right is essential for downstream forming performance.
Roll temperature zoning adds another layer of control. Each roll in the stack can be set to a different temperature — the top roll might run warmer to prevent premature skinning, the middle roll at an intermediate temperature for controlled solidification, and the bottom roll cooler to complete the quench. Some advanced stacks even provide cross-roll temperature zoning, where the ends of a roll run at a slightly different temperature than the center to compensate for edge effects. Temperature uniformity of plus or minus 0.5 degrees C across the roll face is the benchmark for quality sheet production — anything worse shows up as gauge bands or optical inconsistencies.
Roll speed matters just as much as temperature. A slight speed differential between the top and middle rolls creates a polishing effect that improves surface gloss. Too much differential, however, introduces internal stress and can cause sheet warping after it cools to room temperature. The ratio of chill-stack speed to extruder output is also the primary mechanism for final thickness control: speed the rolls up and the sheet draws thinner; slow them down and gauge increases.
Thickness Gauging and Automatic Profile Control
You can't control what you can't measure — and in sheet extrusion, thickness variation is the single most costly quality defect. Industry data suggests that 12-15% scrap rates caused by thickness variations are still common in facilities running without real-time measurement. That's a staggering amount of wasted resin and machine time.
Inline thickness gauging systems solve this by continuously scanning the sheet as it travels down the line. A measurement head — typically using low-energy X-ray, beta-transmission, or millimeter-wave technology — traverses back and forth across the full sheet width on a scanning frame mounted after the chill stack. On each pass, it builds a complete cross-directional (CD) thickness profile while simultaneously tracking machine-direction (MD) trends over time.
The real power emerges when that measurement data feeds back into the die. In a closed-loop automatic profile control (APC) system, the scanner identifies which zones across the die width are running thick or thin and sends correction signals to the corresponding die-lip actuators — either motorized push-pull bolts or thermal expansion bolts. The system continuously refines the profile, tightening the thickness distribution with every scan cycle. As Gauge Advisor notes, the decision to install a scanning gauge isn't simply about having better technology — it's about whether delayed or incomplete measurement is costing more than the plant realizes, through resin giveaway, slow startups, hidden cross-web variation, or off-spec rolls.
There's an important distinction between MD and CD control worth understanding. Machine-direction variation — the whole average drifting up or down over time — is corrected by adjusting global variables like line speed or extruder output. Cross-direction variation — individual lanes running thick or thin — requires localized die-bolt adjustments. A complete gauging system addresses both, but the CD profile control is the more complex engineering challenge because each die zone interacts with its neighbors. Independent research published in Automatica confirms that CD control is fundamentally a spatial problem requiring careful mapping of scanner data to actuator positions, accounting for transport delay and zone-to-zone interaction.
For processors weighing the investment, even measurement-only installations — without full automatic control — deliver value by exposing hidden profile problems, shortening startup times, and providing the roll-level traceability that customers increasingly demand.
Edge Trimming, Winding, and Stacking Systems
Every sheet that exits a flat die has imperfect edges. The bead — a thickened, uneven strip where the melt flow meets the die boundary — must be removed before the product is usable. Rotary slitting knives, positioned on both sides of the sheet path, shear off these edges cleanly and consistently at line speed.
What happens to that trim matters more than you might think. On a well-designed plastic extrusion line, the edge strips are routed immediately to an inline granulator — a compact, high-speed unit that chops the trim back into uniform regrind pellets. These pellets feed directly back into the extruder hopper, often via a pneumatic conveying system, for immediate reuse. Manufacturers like Rapid Granulator offer purpose-built systems with roll feeders that match the extrusion line speed, ensuring continuous, hands-free scrap reclaim with no material ending up on the floor. This closed-loop trim recovery can reclaim 100% of edge scrap, keeping material utilization rates above 95% on many lines.
At the end of the line, the sheet reaches its final destination — either a winder or a cut-to-length stacker, depending on gauge:
- Sheet winders — Thin-gauge sheet destined for thermoforming is wound onto large-diameter cores for delivery to the forming machine. Tension control is critical here; too much tension stretches the sheet and introduces residual stress, while too little allows telescoping and loose rolls that won't track properly on the customer's unwind stand. Dual-turret winders allow automatic roll changeover without stopping the line, eliminating the scrap and downtime associated with manual changes.
- Cut-to-length stackers — Heavier rigid sheet — the kind used for signage, construction panels, and automotive components — can't be wound without cracking. Instead, a guillotine shear or flying cutoff saw slices the continuous sheet into individual panels at programmed lengths. Automated stacking arms then place each panel onto a pallet, building neat stacks ready for shrink-wrapping and shipping. High-speed stackers on modern lines handle cycle times fast enough to keep pace with even the most productive extruder lines.
Haul-off units — rubber-covered pull rolls or vacuum belt conveyors positioned between the chill stack and the end-of-line equipment — maintain consistent tension and line speed throughout this finishing section. Without a properly calibrated haul-off, neither the winder nor the stacker can do its job accurately.
For quick reference, here's a summary of every major downstream component and its role in the line:
- Three-roll chill stack — Quenches molten sheet, sets thickness, controls surface finish and crystallinity.
- Inline thickness gauge (scanner) — Measures cross-directional and machine-direction thickness for process monitoring or closed-loop die control.
- Automatic profile control (APC) — Feeds gauge data back to die-lip actuators for continuous cross-web thickness correction.
- Edge-trim slitters — Remove uneven bead edges from both sides of the sheet.
- Inline granulator — Chops edge trim into regrind for immediate reclaim back into the extruder hopper.
- Haul-off unit — Maintains consistent line tension and speed between the chill stack and winder or stacker.
- Sheet winder — Winds thin-gauge sheet onto cores with controlled tension; dual-turret designs enable non-stop changeover.
- Cut-to-length stacker — Guillotine or flying shear cuts rigid sheet into panels; automated arms stack panels onto pallets.
Every one of these components earns its place on the line by solving a specific quality or efficiency problem. Skip or undersize any of them, and the bottleneck shows up as wasted material, slower changeovers, or customer complaints about dimensional accuracy. Investing in capable downstream equipment is just as important as selecting the right extruder — and increasingly, that investment extends beyond mechanical hardware into energy-efficient drives, intelligent controls, and sustainability-focused technologies that are reshaping how modern sheet lines operate.
Energy Efficiency and Innovation in Modern Sheet Extrusion
Energy is the single largest variable cost on most sheet extrusion lines — often exceeding raw material waste as a margin killer when older equipment is involved. The good news? Machine builders have been targeting energy consumption aggressively, and the latest generation of equipment delivers measurably more kilograms of finished sheet per kilowatt-hour than lines built even a decade ago. At the same time, sustainability pressures from brand owners, regulators, and consumers are pushing processors to run higher percentages of recycled content and adopt multi-layer structures that optimize material use. These two trends — efficiency and sustainability — are reshaping how modern sheet lines are specified and operated.
Servo-Driven Systems and Optimized Barrel Heating
The biggest efficiency gains come from the drive system. Older sheet extrusion lines typically rely on fixed-speed AC motors that run at full power regardless of load, wasting energy whenever the process doesn't demand peak output. Modern lines replace these with direct-drive servo motors or high-efficiency permanent-magnet motors that modulate speed and torque in real time, matching power draw precisely to process demand. The result is a measurable reduction in electricity consumption — particularly during startups, grade changes, and reduced-speed operation.
Barrel heating is the other major energy sink. Conventional resistance band heaters radiate a significant portion of their heat outward into the plant environment rather than into the barrel. Two technologies address this waste:
- Insulated barrel heater jackets — Wrapping existing band heaters with high-temperature insulation blankets recaptures radiated heat, cutting barrel heating energy by up to 30% on some installations. It's one of the simplest, lowest-cost upgrades available.
- Infrared barrel heating — Infrared heating elements deliver energy more efficiently to the barrel surface with faster response times, enabling tighter temperature control and reduced overshoot during zone adjustments.
Beyond the extruder itself, innovations like Battenfeld-Cincinnati's solEX NG platform demonstrate how holistic machine redesign pays off — that series delivers roughly 25% higher output on HDPE and up to 40% higher output on PP compared with earlier designs, which directly translates to lower energy per kilogram of sheet produced. Newer internal water-cooling systems on gearboxes and motors further reduce parasitic losses and extend component life.
Processing Recycled Content and Sustainability Trends
Brand owners across food packaging, consumer goods, and automotive are committing to minimum recycled-content targets — 25%, 50%, even 100% post-consumer recycled (PCR) material in some product categories. For sheet processors, that commitment creates real technical challenges. PCR PET and PP arrive with inconsistent melt viscosity from batch to batch, residual contaminants like adhesive fragments and label inks, and elevated moisture levels that trigger degradation in a standard pet extruder if not addressed.
Modern pet extrusion lines tackle these issues through a combination of hardware upgrades:
- Vented barrels — One or two vacuum-assisted vent ports along the barrel length strip moisture and volatile organic compounds (VOCs) directly from the melt, reducing or even eliminating the need for energy-intensive pre-drying. Battenfeld-Cincinnati's Dual Vent Technology (DVT), for instance, uses two independent degassing zones to pull more volatiles from the melt, allowing processors to run untreated regrind without sacrificing quality.
- Advanced melt filtration — Continuous screen changers with automatic backflush cycles handle the higher contamination loads found in PCR streams without requiring line stops for screen replacement. This keeps throughput steady even with variable-quality feedstock.
- Optimized screw designs — Screws engineered for recycled content use deeper feed sections and extended mixing zones to compensate for inconsistent pellet geometry and density. The goal is to deliver the same melt homogeneity from recycled flake that processors expect from virgin pellets.
Innovations like Erema's Volex water-stripping degassing push the envelope further. By dosing water into the melt at a precise point, the evaporating water multiplies the exposed melt surface area roughly 1,000-fold, boosting surface renewal rates by up to 320% and cutting VOCs in finished recycled pellets by up to 40%. Technologies like this let a pet sheet extrusion machine produce food-contact-grade sheet from PCR feedstocks that would have been unsuitable just a few years ago.
Co-Extrusion and Multi-Layer Sheet Technology
What if you could use recycled material where it doesn't show and virgin material where it matters? That's exactly the premise behind co-extrusion — a technique that creates multi-layer sheets by feeding separate extruders into a shared feedblock or multi-manifold die, producing a unified sheet where each layer serves a distinct purpose.
The most common configuration for sustainability-driven applications is an A/B/A or A/B/C structure. Imagine a three-layer PP sheet: virgin food-contact-approved material forms the outer skin layers, while a core of 100% PCR PP provides the bulk of the structure. The finished sheet meets regulatory requirements for direct food contact on both surfaces while maximizing recycled content — often reaching 60-70% or more by weight. The same principle applies to PET, where a PETG/APET/PETG composite structure combines the transparency and strength of an APET core with PETG outer layers that facilitate heat sealing and thermoforming.
Each layer in a co-extruded sheet requires its own dedicated pet extruder machine or polyolefin extruder, its own gravimetric feeder, and its own temperature profile. The melt streams converge inside a feedblock — where internal channels merge them into a laminar multi-layer flow before entering a standard flat die — or inside a multi-manifold die, where separate flow paths merge near the die exit for independent layer control. Multi-manifold dies offer superior process control when combining polymers with substantially different viscosities, though they carry a higher capital cost and greater maintenance complexity.
Co-extrusion also enables functional layering beyond recycled content. Barrier layers like EVOH can be sandwiched between structural polyolefin skins to create oxygen-barrier packaging sheet. UV-stabilized cap layers protect a cost-effective core from weathering in construction applications. Color layers can be applied only to the visible surface, reducing pigment consumption. The versatility is enormous — and each new layer configuration is an opportunity to engineer performance while controlling material cost.
These energy and sustainability innovations represent the direction the industry is heading, but they only deliver their full potential when the equipment is properly maintained. A servo motor saves nothing if a worn screw wastes the efficiency gains, and a co-extrusion line can't hold layer ratios if die lips are fouled or miscalibrated. Keeping all of that hardware in peak condition is its own discipline — one that deserves a dedicated conversation.
Maintenance Best Practices for Sheet Extrusion Machines
A servo-driven extruder with an optimized screw design and closed-loop profile control is a powerful investment — but only as long as every component stays within specification. Maintenance is the discipline that protects that investment, and neglecting it is the fastest way to turn a high-performance sheet extrusion machine into a source of scrap, unplanned downtime, and spiraling repair bills. The irony is that maintenance practices for sheet extrusion machinery receive almost no attention in industry literature, even though they directly determine total cost of ownership.
What follows is a practical breakdown of the three maintenance domains that matter most — screw and barrel wear management, die care, and operator competence — along with a ready-to-use task checklist you can adapt for your own plant.
Preventive Maintenance Schedules for Screw and Barrel
The screw and barrel are the highest-wear components on any plastic sheet extruder machine, and their condition quietly governs everything downstream. As Davis-Standard's maintenance guidance emphasizes, wear doesn't happen overnight — it develops slowly and consistently under continuous operating conditions. The screw diameter gradually decreases while the barrel bore gradually increases, widening the clearance between the two. That growing gap reduces conveying efficiency, introduces melt temperature variation, and eventually shows up as declining output at constant RPM and inconsistent sheet gauge.
Catching wear before it causes production problems requires a structured measurement routine. Here's what that looks like in practice:
- Pull the screw on a scheduled basis — Frequency depends on run hours and resin abrasiveness. Lines processing glass-filled PP or heavily contaminated recycled flake may need inspection every 2,000-3,000 hours; clean virgin HIPS lines can stretch to 5,000-8,000 hours.
- Clean thoroughly, but gently — Remove all solidified polymer residue using brass tools and copper gauze. Steel wire brushes and aggressive abrasives damage flight surfaces, creating rough spots that accelerate future wear.
- Allow the screw to cool to room temperature — Thermal expansion skews diameter readings. Accurate measurement requires ambient conditions.
- Measure every flight with an OD bar micrometer — Record the outside diameter at each flight position and plot the results against the original factory dimensions. This creates a visual wear map that shows exactly where degradation is concentrated — typically in the compression zone and at the metering section entrance.
- Measure barrel bore diameter — Use a telescoping bore gauge or snap gauge at multiple points along the barrel length. Compare readings to the original bore specification.
- Evaluate against replacement criteria — Davis-Standard publishes diametrical wear guidelines categorized by screw size: low wear may only cause a slight output drop, medium wear signals that replacement planning should begin, and high wear means the screw should be rebuilt or replaced immediately.
Processors running used plastic extruders should pay especially close attention to this process during commissioning. Pre-owned equipment often arrives with unknown wear history, and baseline measurements taken on day one become the reference point for all future monitoring. A machine that tests within specification at purchase but has never been measured is a gamble — one that a few hours of careful gauging can eliminate entirely.
For lines processing corrosive polymers on dedicated pvc extrusion equipment, wear monitoring takes on an additional dimension: corrosion. HCl released during PVC processing attacks standard steel, so barrel liners and screw surfaces must be inspected not just for dimensional wear but for pitting, surface roughness changes, and coating breakdown. Catching corrosion early — before it penetrates a bimetallic liner — avoids far more expensive barrel replacement down the road.
Die Maintenance and Calibration
If the screw and barrel are the engine, the die is the precision instrument that shapes the final product. Even minor fouling or mechanical drift in the die translates directly into cross-directional thickness variation, streaks, and surface defects that no amount of downstream adjustment can fix.
Effective die maintenance involves three recurring activities:
- Die-lip cleaning — Carbon buildup, degraded polymer residue, and oxidized material accumulate on die-lip surfaces over time, particularly at the land area where molten polymer exits. Precision Die Systems recommends routine chemical cleaning using solvents compatible with the die material, supplemented by gentle mechanical cleaning for stubborn deposits. Hot water or steam cleaning can dissolve organic residues without risking surface damage. The key rule: never use tools harder than the die surface itself.
- Die-bolt torque patterns — Flex-lip bolts must be adjusted in a consistent, documented pattern — typically working from the center outward to both edges — to avoid localized distortion. Re-torquing after thermal cycling is essential because repeated heating and cooling cycles cause bolt relaxation. A bolt that was correctly set last week may be loose today.
- Periodic re-chroming or re-coating — The die land surface — the final few millimeters of internal channel before the melt exits — must remain smooth and defect-free. Scratches, pitting, or worn chrome plating create drag marks on the sheet surface. Re-chroming or applying hard coatings like tungsten carbide restores the surface and extends die life significantly.
As Precision Die Systems notes, investing in structured die maintenance doesn't just preserve product quality — it exposes early signs of wear that, left unchecked, escalate into costly repairs or complete die replacement.
Operator Training and Process Documentation
Even the best-maintained sheet extrusion machinery underperforms when operators lack the knowledge to run it properly. Training isn't a one-time event — it's a continuous discipline. Industry experts emphasize that training shouldn't be limited to new hires; there is a constant need to train and re-train equipment operators and maintenance teams to ensure consistent procedures across shifts, lines, and facilities.
Three areas deliver the highest return on training investment:
- Standardized startup and shutdown sequences — Improper procedures are a leading cause of avoidable wear and material waste. Running the screw at high speed in an empty or partially filled barrel, for instance, eliminates the "bearing effect" that product normally provides — the screw rests on the barrel floor, causing accelerated metal-to-metal contact. Best practice dictates brief, low-speed operation whenever the barrel isn't fully charged with material. Each resin grade should have a documented startup and shutdown recipe that specifies temperatures, speeds, and purge procedures.
- Grade and color change procedures — Changeovers are where scrap rates spike. A documented procedure — specifying purge compound type, purge volume, temperature adjustments, and quality checkpoints — can cut transition waste by 30-50% compared with ad hoc methods.
- Process documentation and data logging — Every run should generate a record of barrel temperatures, screw speed, melt pressure, die settings, and gauge readings. This data becomes invaluable when troubleshooting a quality deviation, qualifying a new resin, or training a new operator. It also provides the baseline against which maintenance-driven performance changes become visible.
A staggered training approach works best: initial off-site sessions at the equipment manufacturer's facility, hands-on training during installation and commissioning, and periodic refresher audits — ideally annually — where the supplier's technicians work alongside your mechanics to reinforce best practices and address new challenges.
Maintenance Task Checklist for Sheet Extrusion Lines
The following checklist consolidates the critical tasks into a frequency-based format you can post on the shop floor or incorporate into a computerized maintenance management system:
- Daily
- Inspect die lips for buildup or damage; clean if needed
- Verify barrel zone temperatures match recipe setpoints
- Check melt pressure readings for stability; investigate sudden shifts
- Confirm hopper and feeder levels; inspect for bridging or contamination
- Inspect chill-roll surfaces for scratches, debris, or condensation
- Review inline thickness gauge data for profile drift
- Weekly
- Inspect edge-trim granulator blades for sharpness; replace or rotate as needed
- Check haul-off roll condition and nip pressure
- Lubricate bearings, gear drives, and guide rails per manufacturer schedule
- Verify winder or stacker alignment and tension settings
- Clean screen changer and inspect breaker plate for blockage
- Monthly
- Calibrate inline thickness gauge against known reference samples
- Inspect die-bolt torque; re-torque using documented center-out pattern
- Check barrel heater band connections for hot spots or loose terminals
- Review motor current and drive load trends for gradual increases indicating wear
- Inspect cooling water flow rates and temperature control on chill rolls
- Annually (or per run-hour interval)
- Pull screw for full OD measurement, visual inspection, and wear mapping
- Measure barrel bore diameter at multiple points; compare against factory spec
- Inspect die internals — manifold, land surfaces, and choker bar — for wear or corrosion
- Full machine alignment check: motor, gearbox, barrel, and die adapter
- Evaluate gearbox oil condition; replace per manufacturer recommendation
- Schedule re-chroming or re-coating of die and chill-roll surfaces as needed
- Conduct refresher training for operators and maintenance staff
Processors that focus on maintenance on a continuous basis have the most reliable equipment. Maintenance does not simply mean fixing what is broken — it's being proactive.
A disciplined maintenance program doesn't just prevent breakdowns — it generates the performance data and operational consistency that feed directly into smarter purchasing decisions. Whether you're evaluating a brand-new line or considering pre-owned equipment, knowing what to measure, what to inspect, and what to expect from well-maintained components gives you a concrete framework for making the right choice.
How to Evaluate and Choose the Right Sheet Extrusion Machine
Maintenance data tells you where your current equipment stands. But what happens when the wear maps show a screw beyond recovery, when throughput targets outgrow an aging line, or when a new product launch demands capabilities your existing setup simply can't deliver? At that point, the question shifts from "how do I keep this running?" to "what should I buy next?" — and the answer requires a structured evaluation framework, not a gut feeling or a vendor's sales pitch.
Choosing a sheet extrusion machine is a capital decision you'll live with for fifteen to twenty years. Get it right and the line becomes a profit engine. Get it wrong — overspecified, underspecified, or paired with the wrong support network — and you're locked into years of compromised output, excessive downtime, or inflated operating costs. The framework below breaks the decision into three actionable stages: technical specification, supplier evaluation, and the new-versus-used calculus.
Critical Technical Criteria for Machine Selection
Before you request a single quotation, you need a clear picture of what the line must do — not just today, but over the next decade of production. Sounds obvious? Yet experienced equipment engineers consistently report that buyers either over-specify systems they never fully utilize or under-specify machines that hit their ceiling within eighteen months. A disciplined requirements list prevents both mistakes.
Use the following checklist as your starting point:
- Output capacity requirements — Define your target in kilograms per hour at your primary resin and gauge, then add 20-30% headroom. A machine rated for 1,000 kg/h runs most comfortably — and most efficiently — at 750-800 kg/h. Sizing too close to peak demand leaves no margin for feed inconsistency, filter pressure buildup, or recipe changes.
- Material versatility — Will you run a single resin family or switch between PP, PET, HIPS, and ABS? Multi-resin operations demand broader temperature control ranges, interchangeable screw configurations, and potentially corrosion-resistant barrel options if PVC is in the mix.
- Screw L/D ratio and diameter matching — Sheet production typically calls for L/D ratios between 30:1 and 36:1. Screw diameter determines maximum throughput; larger diameters move more material per revolution but cost more and consume more energy. Match both parameters to your output target and resin portfolio, not to the largest available option.
- Maximum sheet width — Specify the narrowest die width that covers ninety percent of your forecasted orders. Wider dies demand thicker roll shells, larger cooling capacity, and heavier frame structures — all of which inflate cost and energy consumption without adding value if you rarely use the full width.
- Die flexibility — Flex-lip dies with automatic deckle adjustment accelerate width changeovers. If your product mix involves frequent format changes, this feature pays for itself quickly in reduced transition scrap.
- Automation level — Gravimetric feeding, closed-loop thickness control, recipe management via HMI, and dual-turret winding all increase capital cost but reduce labor dependency, startup scrap, and batch-to-batch variation. Match the automation tier to your production complexity and labor availability.
A practical tip: document these requirements in a formal User Requirement Specification (URS) before engaging any supplier. That document becomes your objective benchmark for comparing quotations side by side — and it protects you from scope creep driven by impressive-sounding features you don't actually need.
Evaluating Manufacturers and Suppliers
A technically perfect specification is worthless if the company building the machine can't support it over its operational life. When you're vetting plastic sheet extrusion machine manufacturers, the evaluation must extend well beyond catalog specs and sticker price. Here's a practical framework:
- Technical support responsiveness — How quickly can the supplier deploy a process engineer to your site when a problem exceeds your team's capability? Ask for guaranteed response times and verify them with reference customers. A 48-hour phone response is not the same as a 48-hour on-site intervention.
- Spare parts availability and lead times — Machinery downtime directly hurts production schedules and delivery commitments. Confirm whether critical spares — barrel segments, screw assemblies, heater bands, die components — are stocked in your region or whether you'll wait weeks for international freight.
- Installation and commissioning services — A machine delivered without proper cold and hot alignment, die-centering verification, and hands-on operator training will underperform for years. Make sure your purchase agreement includes on-site commissioning by qualified process engineers who understand polymer rheology — not just mechanical technicians who bolt the frame together and leave.
- Reference installations — Ask for contacts at facilities running similar materials at similar outputs. If the vendor can't provide them, treat that as a red flag. Speaking directly with existing users reveals real-world reliability, support quality, and hidden costs that no brochure will mention.
- Customization capability — Verify whether the manufacturer can adapt extruder layouts, cooling configurations, and automation frameworks to your specific floor plan and process needs, rather than offering only standard catalog configurations.
Here's a point many buyers overlook: component suppliers — especially barrel and screw manufacturers — are equally important to the overall equipment evaluation. These are the highest-wear parts on any sheet extruder, and their quality directly impacts uptime, output consistency, and operating cost per kilogram. A premium extruder paired with a commodity-grade barrel delivers inconsistent melt, accelerated wear, and frequent unplanned stops.
NANHAIYA is a strong example of a specialized component supplier worth building into your support network. They offer custom and replacement single screw barrels engineered specifically for sheet extrusion lines, with coverage spanning pipe, film, sheet, pelletizing, recycling, and general-purpose applications. Having a reliable barrel supplier with proven metallurgical options and fast turnaround on replacements means that when your wear measurements cross the replacement threshold — and they will, eventually — you're ordering from a known source rather than scrambling for a compatible part on an emergency timeline. That reliability directly reduces unplanned downtime and keeps sheet quality within specification between scheduled maintenance windows.
New vs Used Sheet Extrusion Equipment
Not every line purchase needs to be a brand-new build. The market for used extrusion equipment is active, and for the right buyer in the right situation, pre-owned machinery offers a legitimate path to production capacity. The decision hinges on what you're willing to trade off.
Purchasing used extruders for sale makes practical sense in several scenarios:
- Budget constraints — A startup or small converter with limited capital can acquire proven production capacity at 40-60% of new-equipment cost, freeing cash flow for tooling, raw materials, or working capital.
- Proven technology — A five-year-old line from a reputable builder has a known track record. You can inspect it, run test material through it, and verify output quality before committing — something you can't do with a machine that doesn't exist yet.
- Shorter lead time — New extrusion lines for complex configurations can take six to twelve months from order to commissioning. A used line available for immediate sale can be installed and running in a fraction of that time.
The trade-offs are real, though. Used equipment carries older drive technology, higher energy consumption per kilogram, and limited or no warranty coverage. Hidden wear — particularly in screws, barrels, gearboxes, and die internals — may not be apparent without thorough inspection. And customization is essentially off the table: you're buying what exists, not what you ideally need.
When browsing a plastic extruder machine for sale or a complete extrusion line for sale, apply the same inspection rigor outlined in the maintenance section: pull the screw, measure barrel bore, check gearbox oil analysis records, and verify die-lip condition before negotiating price. A machine that looks clean but measures worn is not a bargain — it's a deferred maintenance bill.
Investing in new equipment, by contrast, delivers the latest energy-efficient drives, full manufacturer warranty, and the ability to specify every component to your exact requirements. For processors targeting high recycled content, multi-layer co-extrusion, or tight-tolerance medical or optical sheet, new-build lines are typically the only viable option because the required technology simply didn't exist on older platforms.
When researching plastic extruder machine price for either route, remember that the initial quotation is only the beginning. Total cost analysis must include installation, commissioning, operator training, spare parts inventory, energy consumption over a ten-year horizon, and projected maintenance expenditure. A line that costs fifteen percent more upfront but consumes eight percent less energy and generates four percent less scrap will recover its premium long before the first barrel replacement.
The comparison table below lays out the key dimensions to weigh:
| Evaluation Dimension | New Equipment | Used Equipment |
|---|---|---|
| Initial cost | Higher (full specification and build cost) | 40-60% of new price depending on age and condition |
| Energy efficiency | Latest servo drives, insulated barrels, optimized gearboxes | Older fixed-speed motors; higher kWh per kg of output |
| Warranty coverage | Full manufacturer warranty (typically 12-24 months) | Limited or none; dependent on seller terms |
| Lead time | 6-12 months for engineered lines | Immediate to 2-3 months (transport and installation) |
| Customization options | Fully configurable — screw design, die width, automation, co-extrusion capability | Fixed configuration; retrofitting is expensive and limited |
| Technology level | Current-generation controls, IoT-ready, advanced profile control | Previous-generation; may lack modern automation integration |
| Maintenance risk | Low — all components at zero hours with known provenance | Higher — unknown wear history unless thoroughly inspected |
| Best suited for | High-volume production, tight tolerances, recycled content, multi-layer sheet | Budget-conscious startups, proven single-layer applications, capacity expansion |
Whether you're scanning listings of extrusion equipment for sale or commissioning a custom-built line from a tier-one manufacturer, the evaluation framework stays the same: define your technical requirements first, vet the supplier's support capabilities second, and run the total-cost-of-ownership math before you sign anything. A plastic extruder for sale at a compelling headline price means nothing if spare parts take six weeks, energy costs eat your margins, or the barrel needs immediate replacement.
The processors who make the best equipment decisions are the ones who treat the purchase not as a transaction but as a partnership — with the machine builder, with component suppliers like barrel and screw specialists, and with their own maintenance and operations teams who will keep the line running for the next two decades.
Frequently Asked Questions About Sheet Extrusion Machines
1. What is a sheet extrusion machine and how does it work?
A sheet extrusion machine is a thermoplastic processing system that melts polymer pellets inside a heated barrel-and-screw assembly, forces the molten resin through a flat die to form a continuous ribbon of material, then cools it on a polished chill-roll stack to produce flat sheets ranging from 0.2 mm to 15 mm thick. The process runs continuously without pausing to open or eject molds, which makes it highly efficient for large-volume production of packaging, automotive panels, signage, and construction materials.
2. What is the difference between sheet extrusion and film extrusion?
The conventional dividing line is 0.25 mm (10 mil). Material produced above that thickness is classified as sheet and is typically rigid enough to be cut into panels or wound under low tension. Film falls below 0.25 mm, is flexible, and is often produced on blown-film towers using annular dies and air-ring cooling. Sheet lines use flat coat-hanger dies paired with three-roll chill stacks and generally run at lower linear speeds but higher mass throughput than film lines. Equipment, cooling methods, and downstream handling differ significantly between the two processes.
3. Should I choose a single-screw or twin-screw extruder for sheet production?
For most sheet production using pre-compounded resin pellets, a single-screw extruder is the preferred choice due to lower capital cost, simpler maintenance, and excellent energy efficiency. Twin-screw extruders justify their 1.5x to 3x higher price tag only when the process requires in-line compounding, reactive extrusion, heavy devolatilization, or processing of highly contaminated post-consumer recyclate. Matching the extruder type to your feedstock and application avoids overspending on unnecessary complexity. Equally important is sourcing quality wear components — specialists like NANHAIYA (nhyscrews.com) supply custom single screw barrels engineered for sheet lines to maintain consistent output over time.
4. What plastics can be processed on a sheet extrusion machine?
Common resins include PP and PS/HIPS for thermoformed food containers, PET for clear food and medical packaging, ABS for automotive trim and electronics housings, PC for machine guards and architectural glazing, HDPE for chemical tanks and cutting boards, and PVC for signage and construction cladding. Each resin demands specific barrel temperatures, screw compression ratios, drying protocols, and chill-roll settings. PVC additionally requires corrosion-resistant barrel liners and low-shear screw designs to prevent thermal degradation and HCl release.
5. How do I maintain a sheet extrusion machine to maximize its lifespan?
Effective maintenance centers on three areas: screw and barrel wear monitoring, die care, and operator training. Pull the screw on a scheduled basis — every 2,000 to 8,000 run hours depending on resin abrasiveness — and measure flight diameters and barrel bore against factory specs. Clean die lips daily, re-torque flex-lip bolts monthly using a documented center-out pattern, and re-chrome land surfaces when wear appears. Train operators on standardized startup, shutdown, and grade-change procedures to minimize scrap and prevent accelerated component wear caused by improper operation.
Written by
Nanhaiya Technical Team
Zhoushan Nanhaiya Plastic Machinery Co., Ltd.
The Nanhaiya technical team supports screw and barrel manufacturing projects through application review, technical communication, custom manufacturing coordination, and production and quality control.
Discuss Your Application
Related Articles
More insights on screw barrel technology and plastics processing.
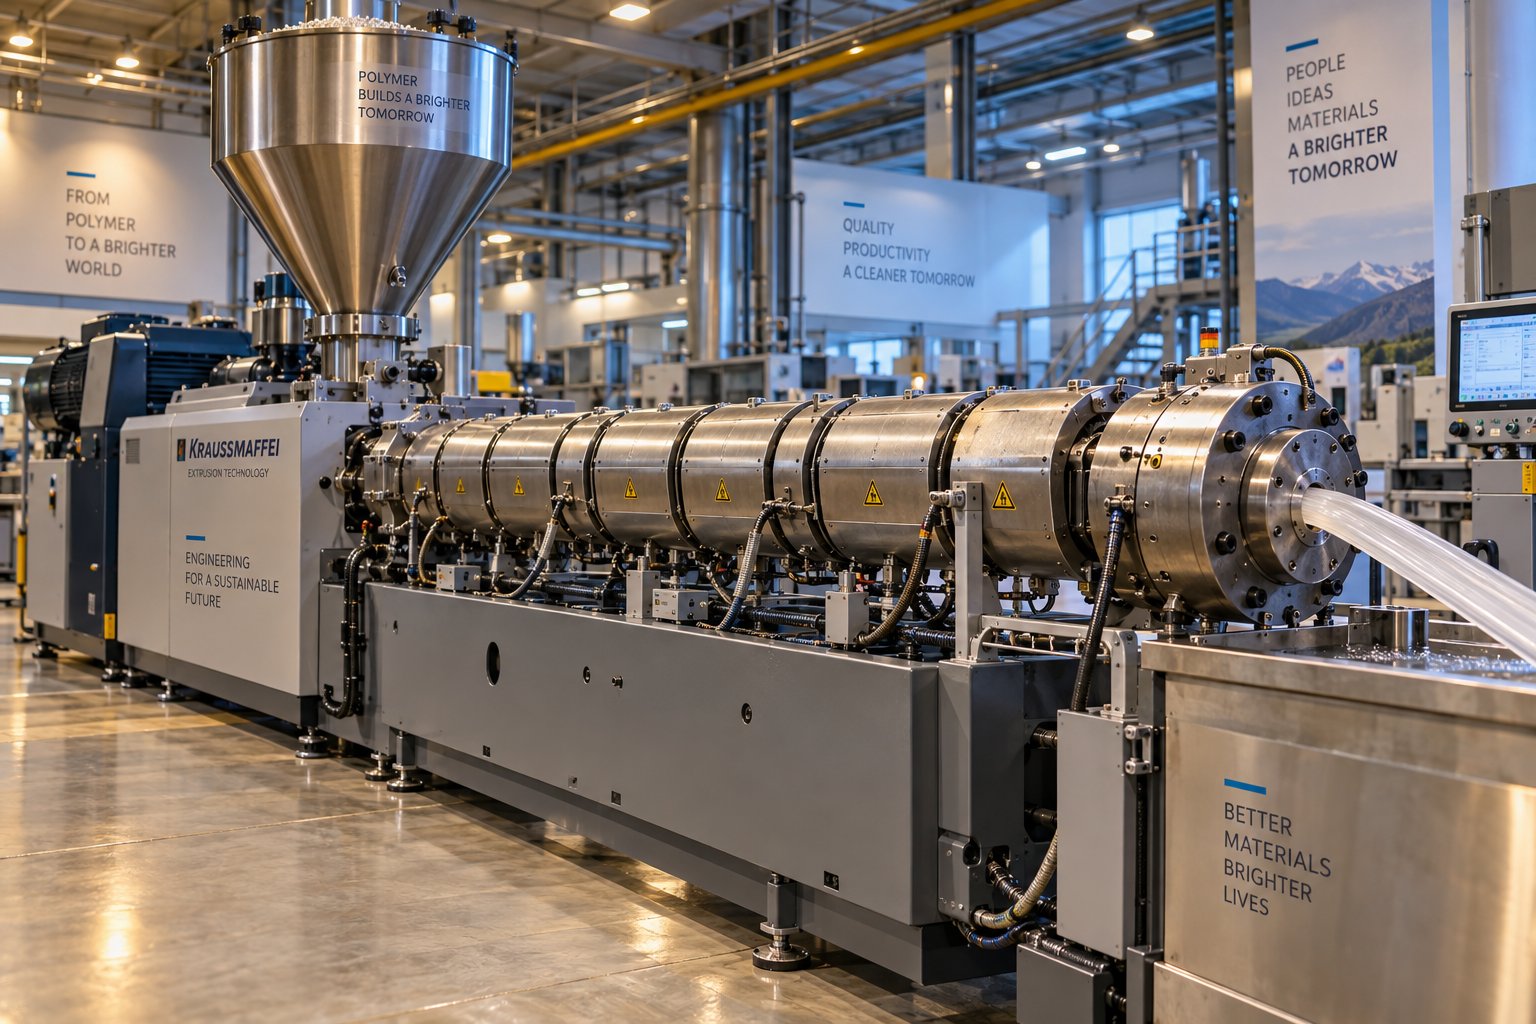
Extruder Machine Decoded: From Raw Pellet To Finished Product
Oct 6, 2026
Learn how an extruder machine works, compare single-screw vs. twin-screw types, and get expert guidance on specs, troubleshooting, and selection.
Read Article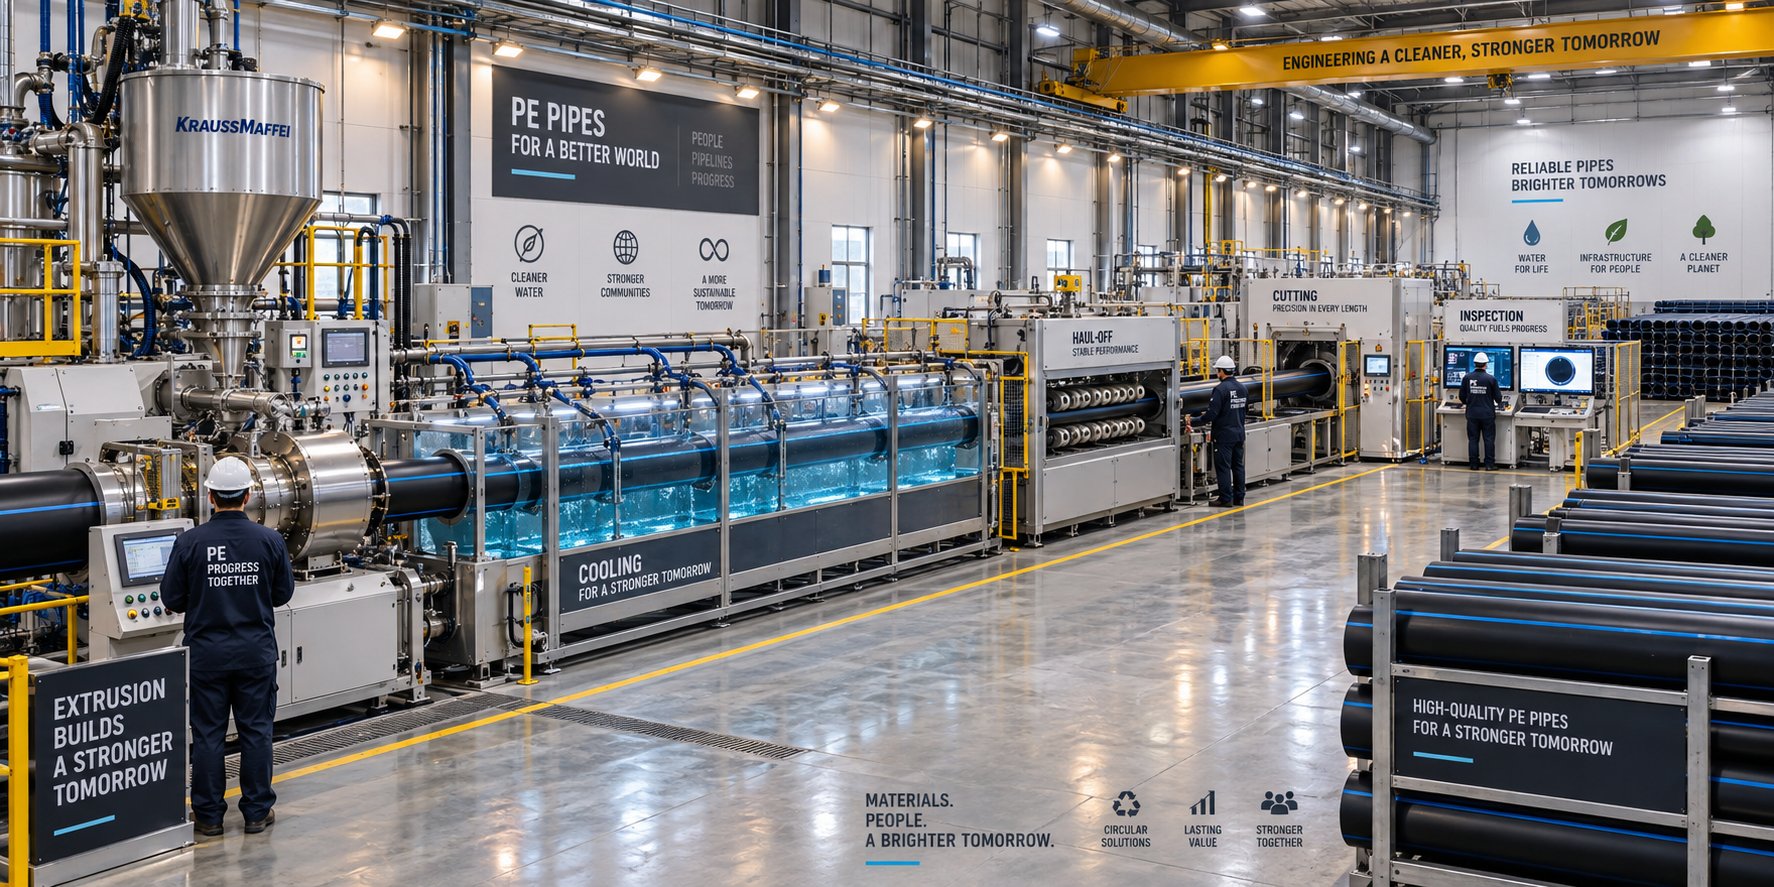
PE Pipe Making Machine Decoded: From Raw Resin to Flawless Pipe
Oct 4, 2026
Learn how a PE pipe making machine works, from resin to finished pipe. Covers components, material grades, automation, troubleshooting, and buyer selection tips.
Read Article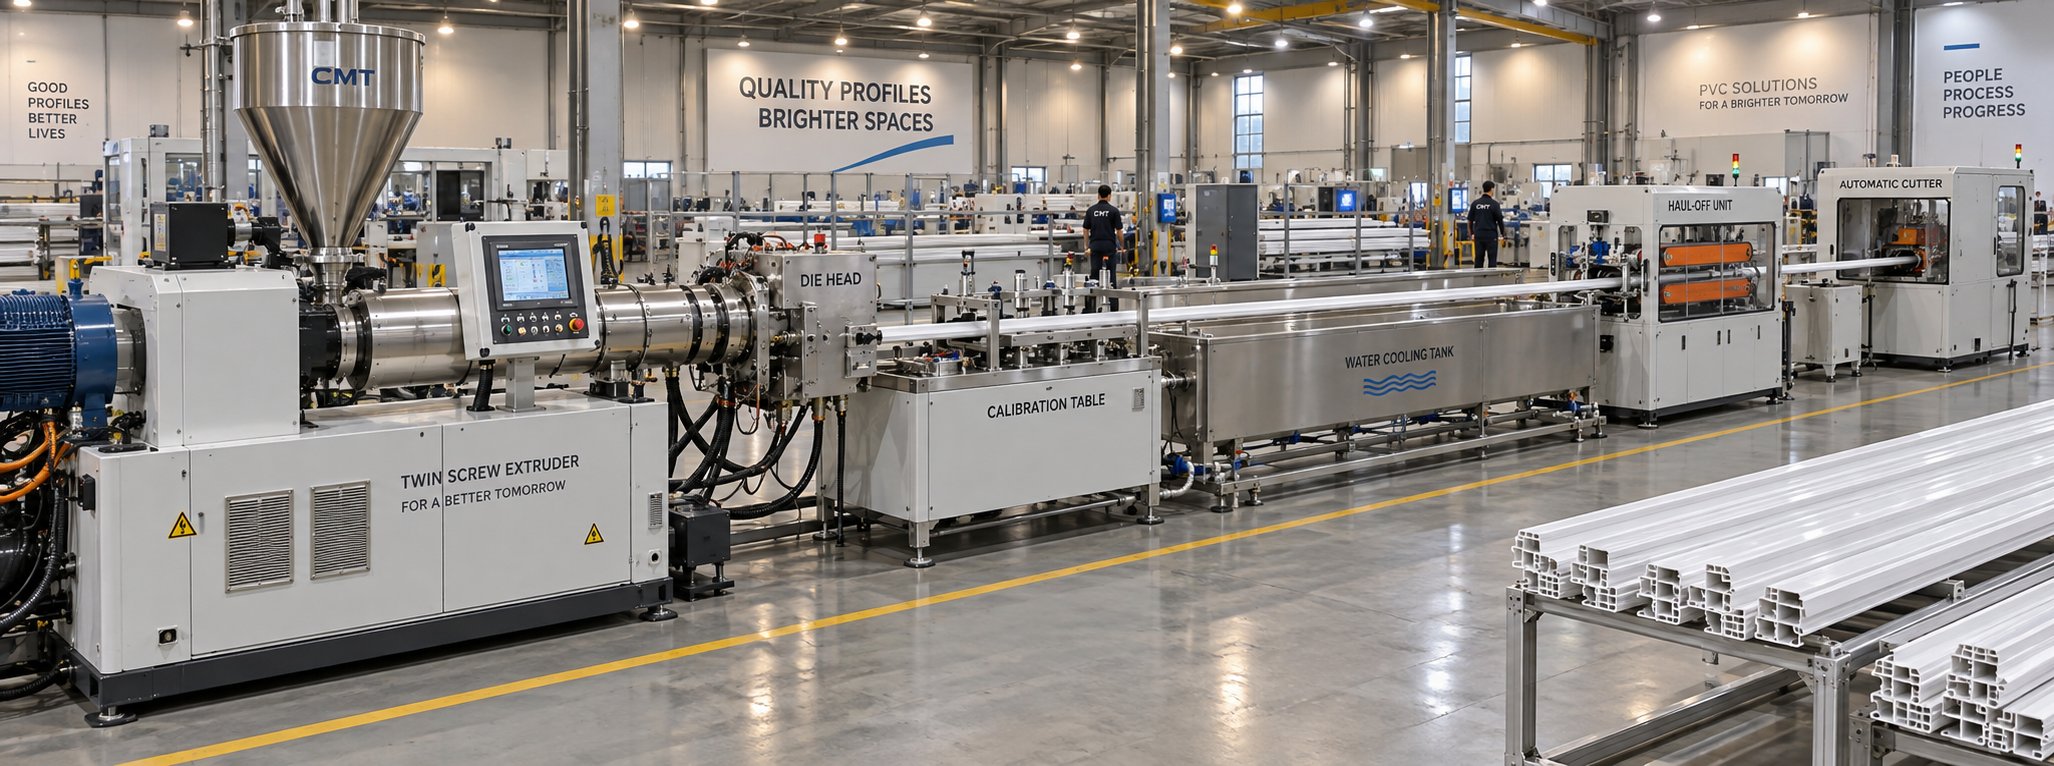
PVC Profile Making Machine Decoded: From Raw Resin To Profit
Oct 3, 2026
Learn how a PVC profile making machine works — extrusion process steps, key technical parameters, die design, calibration methods, maintenance, and total cost of ownership.
Read ArticleLooking for something else?
Search by material, symptom or product and jump straight to the relevant page.
These are navigation suggestions based on keyword matching — not a quotation, not a delivery commitment, and not a substitute for engineering review. Final specification is confirmed by our engineers against your drawings and processed material.
Need help with screw barrel selection?
Share your machine model, processed material and application. Our team can help with pricing and technical support.