

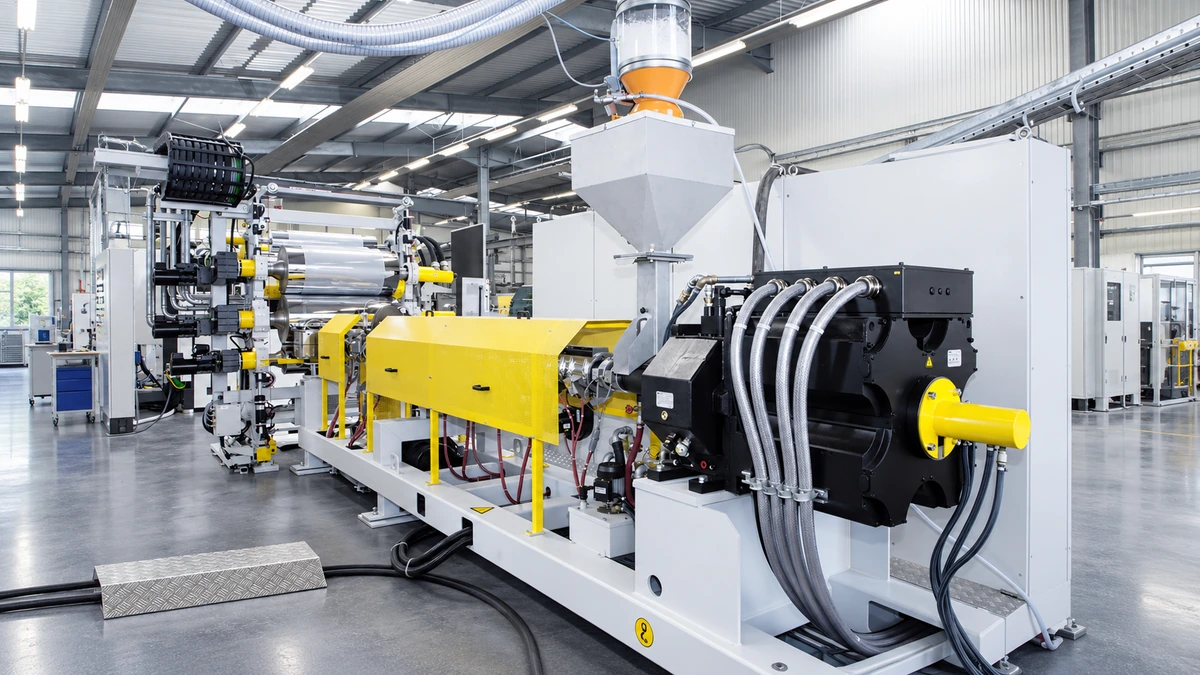
What Is a Sheet Extruder Machine and Why It Matters
Imagine a system that takes tiny plastic pellets, melts them down, and transforms them into perfectly flat, continuous sheets — all in one uninterrupted process. That is exactly what a sheet extruder machine does, and it sits at the heart of some of the most essential products you encounter every day, from the food tray in your refrigerator to the dashboard panel in your car.
What a Sheet Extruder Machine Actually Does
A sheet extruder machine is a specialized plastics processing system that melts raw polymer resin and forms it into continuous flat sheets of controlled width and thickness. It combines a single-screw or twin-screw extruder with a flat die, a set of temperature-controlled calendering rolls, a cooling system, and downstream cutting or winding equipment to produce thermoplastic sheets. The resulting sheets typically range from 0.25 mm up to several millimeters thick, distinguishing them from thinner flexible films produced by blown or cast film processes.
In practical terms, the machine works as a chain of precisely coordinated stages. Pellets or regrind enter a hopper, travel through a heated barrel where a rotating screw melts and pressurizes them, exit through a flat die that shapes the molten polymer across a set width, and then pass over polished chrome rolls that cool, smooth, and size the sheet to its final dimensions. Edge trimmers recycle excess material, and a winder or guillotine cutter finishes the product for shipment or downstream thermoforming.
Why Sheet Extrusion Matters in Modern Manufacturing
The range of industries that depend on this process is remarkably broad. Packaging leads the way — thermoformed food trays, blister packs, and clamshell containers all start as extruded sheet. Automotive manufacturers rely on extruded ABS and polycarbonate sheets for interior panels, trunk liners, and protective covers. In construction, you'll find extruded PVC and polycarbonate sheets used for wall cladding, roofing glazing, and insulation panels. Signage and point-of-purchase displays use clear or colored sheets for durable, weather-resistant graphics. Medical device companies depend on extruded sheet for sterile packaging trays and protective housings that meet strict hygiene standards.
The economic scale reflects this versatility. The global plastic extrusion sheet market was valued at approximately USD 87 billion in 2023 and is projected to reach USD 139 billion by 2033, growing at a CAGR of 4.80%. Packaging applications alone account for over 30% of that demand, with building and construction, automotive, and electronics close behind. Meanwhile, the broader plastic films and sheets market was valued at $149.4 billion in 2025 and is expected to reach $237.3 billion by 2033.
Sheet extrusion is one of the highest-volume plastics conversion processes globally, yet most buyers lack structured guidance on how the machines work and how to evaluate them.
That gap between market scale and buyer knowledge is exactly what makes understanding your equipment so critical. Whether you're exploring used extruders, pricing a complete sheetline, or comparing an extrusion line for sale from different suppliers, the decisions you make depend on grasping how each component — from screw geometry to die design — influences the sheet that rolls off the end of the line. The components themselves, and how they interact, determine everything from surface finish and dimensional accuracy to energy consumption and long-term maintenance costs.
How a Sheet Extruder Machine Works Step by Step
Every flat plastic sheet — whether it becomes a thermoformed food container or a rigid automotive panel — follows the same basic journey through the machine. The difference between a flawless sheet and one headed for the scrap bin comes down to how well each stage is controlled. So what actually happens inside a sheet extruder machine from the moment raw pellets hit the hopper to the instant a finished sheet rolls off the line?
Here is the complete polymer sheet extrusion sequence, broken into its core stages:
- Raw material feeding and dosing
- Plasticizing (melting and homogenizing) in the screw and barrel
- Melt filtration through the screen pack and breaker plate
- Die forming — distributing melt across the full sheet width
- Calendering — setting thickness, surface finish, and flatness
- Cooling and solidification
- Edge trimming and scrap reclaim
- Thickness measurement and quality inspection
- Winding or cut-to-length stacking
Each of these stages feeds directly into the next, so a disruption at any single point cascades through the entire line. Let's walk through them in detail.
Raw Material Feeding and Plasticizing
The process starts at the hopper, where thermoplastic pellets — or a blend of virgin resin and regrind — enter the extruder's feed throat. Sounds simple, but feeding consistency has an outsized impact on everything downstream. Unstable or interrupted feeding causes pressure surges inside the barrel, which translate directly into thickness fluctuations in the finished sheet. That is why many production lines use gravimetric feeders that weigh material in real time, adjusting feed rate automatically to maintain a constant mass flow. Volumetric feeders offer a simpler and lower-cost alternative, though they are less precise when handling materials with varying bulk density.
The feed throat itself is typically water-cooled to prevent pellets from softening and bridging before they reach the screw. Once inside the barrel, the rotating screw takes over, and the real transformation begins.
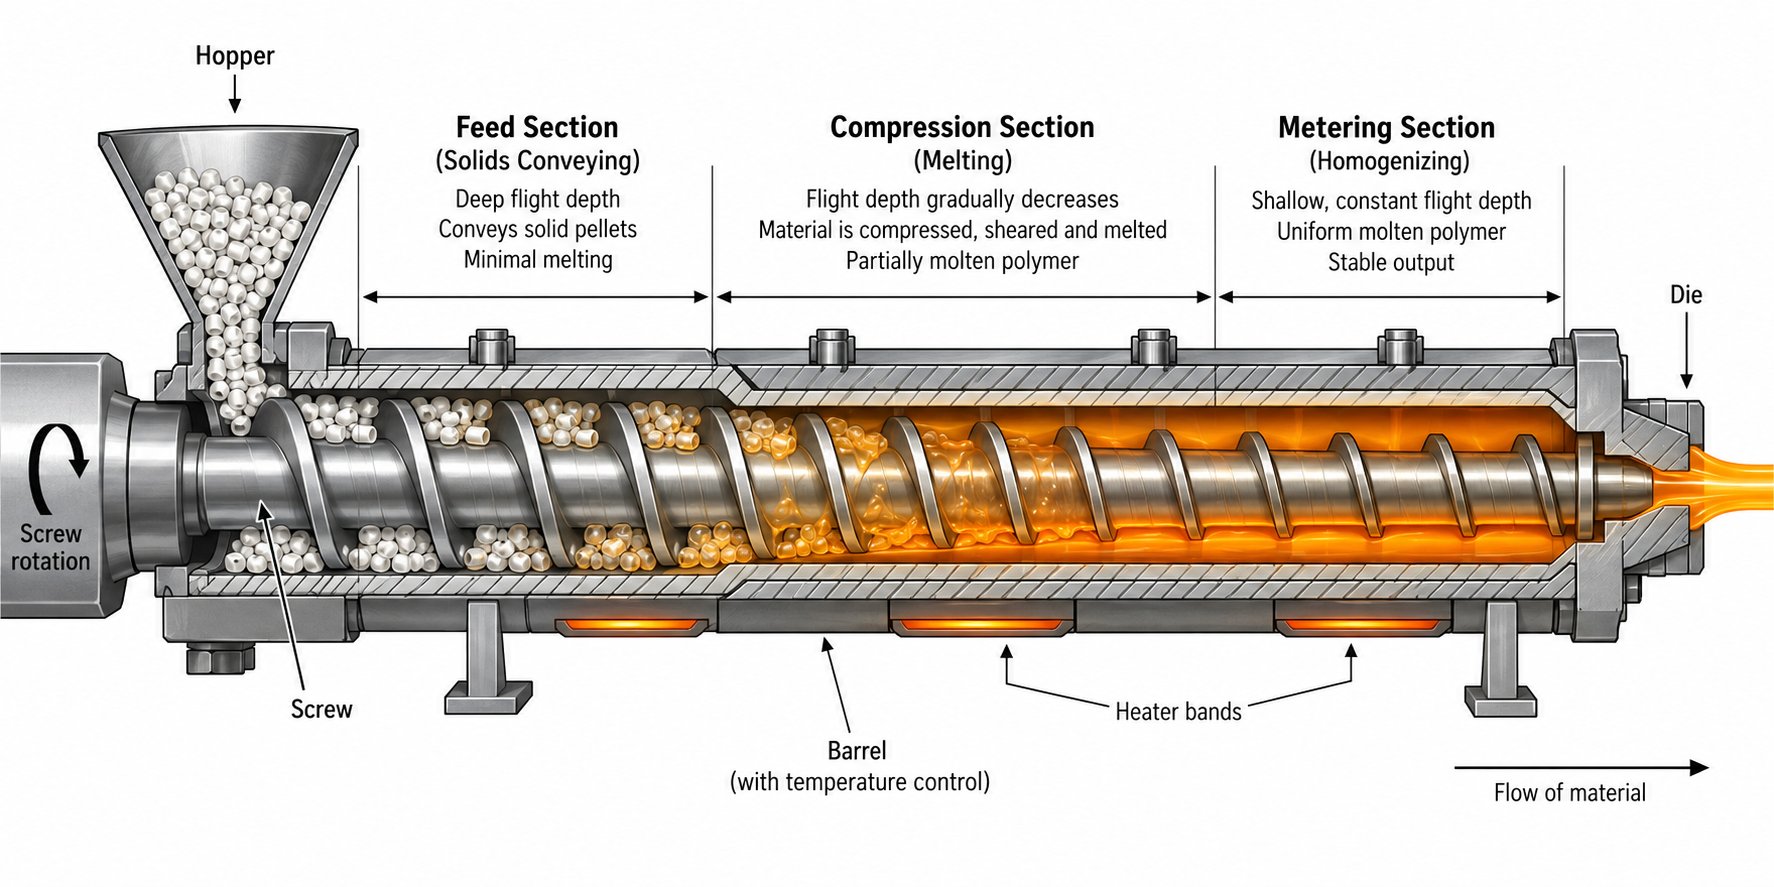
Picture the screw as three functional zones working in series:
- Feed zone: Deep screw flights grab solid pellets and convey them forward. The channel is deepest here to maximize material intake.
- Compression (transition) zone: The channel depth gradually decreases, compressing the pellets against the heated barrel wall. This combination of mechanical shear and external heat melts the polymer progressively. Compression ratios typically range from 2.5:1 to 4.5:1 depending on the resin.
- Metering zone: The shallowest section of the screw, where the now-homogeneous melt is conveyed at constant pressure toward the die. Consistency here is critical — any variation in melt pressure shows up as gauge bands in the sheet.
Barrel temperatures are managed across multiple independently controlled heating zones, allowing the polymer to be heated progressively rather than shocked. Screw speed controls throughput but also generates shear heat, so running too fast can overheat temperature-sensitive resins, while running too slowly increases residence time and risks thermal degradation. Screw L/D ratios of 24:1 to 36:1 are common for sheet lines, giving the melt enough time and working length for thorough plasticization.
Before the melt reaches the die, it passes through a screen pack supported by a breaker plate. The screens filter out solid contaminants — unmelted particles, degraded resin, or foreign matter — while also breaking up rotational flow patterns imparted by the screw. Pressure transducers on either side of the screen pack let operators monitor filter condition; a clogging screen raises back pressure and can shift sheet gauge if left unchecked.
Die Forming and Calendering
This is where molten polymer transforms into something that actually looks like a sheet. The melt enters a flat die — most commonly a coat-hanger die or T-slot die — designed to distribute flow uniformly across the full width of the sheet.
A coat-hanger die uses a teardrop-shaped internal manifold that narrows progressively from center to edges. This geometry ensures an equal pressure drop at every point across the die width, producing even flow distribution. T-slot dies use a constant cross-section manifold, which can cause polymer to stall or "hang up" near the die ends — making coat-hanger designs the preferred choice for most sheet applications.
Fine-tuning happens at the die lips. Adjustable push-pull bolts — or in more advanced systems, thermally actuated die bolts — allow operators to open or close the lip gap at specific points across the width. The lip gap is set slightly wider than the target sheet thickness to account for die swell and the draw-down that occurs between die exit and the calender nip.
Immediately after exiting the die, the still-molten extrudate enters the calender stack — typically three temperature-controlled, chrome-plated rolls arranged in a vertical or angled configuration. You'll sometimes hear this called a polishing roll stack, and its job is threefold:
- Thickness control: The nip gap between rolls determines the final gauge of the sheet.
- Surface finish: Chrome-polished rolls impart a high-gloss surface, while textured rolls can create matte or embossed finishes.
- Flatness and stress relief: Even roll temperatures and consistent nip pressure minimize internal stresses that would otherwise cause warping or curling after the sheet cools.
Roll temperature settings matter more than many operators realize. Lower roll temperatures increase surface gloss and reduce crystallinity in semi-crystalline polymers like PP, while higher temperatures can reduce the tendency for sheet to block (stick together) during storage. The ratio of haul-off speed to extruder output is the primary lever for final gauge — speed up the haul-off and the sheet stretches thinner; slow it down and thickness increases.
Cooling, Trimming, and Winding
After the calender stack, the sheet is partially solidified but still warm. Additional cooling rolls or air-knife systems bring it down to a temperature stable enough for handling and stacking. Rushing this step introduces internal stress; cooling too slowly reduces line speed and throughput. Finding the right balance depends on the polymer, sheet thickness, and desired crystallinity.
Edge trimmers then remove the uneven borders on both sides of the sheet. These trimmed strips are typically granulated inline and fed back into the hopper as regrind — a simple but effective way to minimize material waste. For most operations, regrind can be blended back at controlled ratios, often 15-25%, without significant impact on sheet quality.
Before the sheet reaches the end of the line, in-line thickness measurement gauges — either contact-based or non-contact scanning systems — verify that gauge stays within tolerance across the full width. Modern lines use this data in closed-loop feedback systems that automatically adjust die lip bolts or line speed to correct drift before it compounds into larger defects. Without this feedback loop, even a well-calibrated line will gradually wander out of spec.
Finally, the sheet either winds onto a roll for later thermoforming or passes through a guillotine cutter that cross-cuts it into individual flat sheets stacked on a pallet. The choice between winding and cutting depends on downstream requirements — roll stock suits continuous thermoforming operations, while cut sheets work better for printing, laminating, or direct fabrication.
Every parameter in the process — temperature, pressure, screw speed, die gap, roll temperature, and haul-off speed — interacts with the others. Change one, and you shift the balance across the entire line.
That interconnectedness is what makes polymer sheet extrusion both powerful and demanding. A highspeed extrusion machine supplier may offer impressive throughput numbers, but those numbers only translate into usable product when every stage of the line is calibrated as a system. The real complexity, however, multiplies when you move beyond single-layer sheet and start exploring multi-layer co-extrusion configurations — each adding extruders, feedblocks, and entirely new material variables into the equation.
Types of Sheet Extrusion Lines Compared
Not every sheet extruder machine is built the same way — and for good reason. The product rolling off the end of your line might be a simple clear PP tray destined for a grocery store, a multi-layer barrier sheet protecting sensitive pharmaceuticals, or a lightweight foam cup replacing polystyrene. Each of those products demands a different line configuration, and choosing the wrong one costs you money, quality, or both. So how do you match your production goals to the right type of film and sheet extrusion line?
Three broad categories cover the vast majority of configurations on the market. Let's break each one down.
Single-Layer Cast Sheet Lines
This is the simplest setup: one extruder feeds one flat die, which delivers a single molten layer onto a calender stack. You'll find these lines running commodity resins like PP, PS, and PE for general-purpose packaging — think disposable cups, food trays, lids, and point-of-purchase displays. The equipment footprint is compact, the controls are straightforward, and the capital investment is the lowest of any sheet line type.
When does a single-layer line make sense? If your application doesn't require barrier properties, multiple surface textures, or layered material combinations, this configuration handles the job efficiently. It's also the most common setup you'll encounter when shopping for used extrusion lines or a used extruder for sale — many secondhand single-layer lines are available because they've been upgraded to co-extrusion by their original owners as product demands evolved.
The limitation is equally clear: a single-layer line can only process one material at a time. You can't bury a recycled core layer under virgin skin layers or add an oxygen-barrier resin in the middle. For those capabilities, you need a second category of equipment entirely.
Multi-Layer Co-Extrusion Lines
Imagine two or three extruders running simultaneously, each plasticizing a different resin — or the same resin at different formulations — and merging their melt streams into a single unified sheet inside a feedblock or multi-manifold die. That's co-extrusion, and it opens up a world of possibilities that single-layer lines simply can't touch.
The most common layer structures are:
- A/B (two-layer): One functional layer paired with a structural or cost-saving layer. Less common for sheet but used in specific applications.
- A/B/A (three-layer, symmetric): Identical skin layers sandwich a different core. A classic example is PETG/APET/PETG (GAG) sheet, where PETG skins provide superior thermoformability and heat-seal capability while an APET core contributes rigidity and transparency exceeding 90%.
- A/B/C (three-layer, asymmetric): Three distinct materials, each serving a unique function. This configuration lets you place a barrier resin like EVOH in the core for oxygen protection while using polyolefin skins for heat-sealing and cost efficiency.
Why go through the added complexity? The reasons are both technical and economic:
- Barrier properties: Oxygen, moisture, or UV barriers can be placed exactly where they're needed — in a thin functional layer — rather than throughout the entire sheet thickness.
- Cost optimization: Expensive specialty resins occupy only the layers where they add value. Virgin material forms the outer skins while recycled content fills the core, reducing raw material costs without compromising surface quality.
- Surface control: Different gloss levels, colors, or textures can be applied to each face of the sheet independently.
A three-layer A/B/A system typically uses two extruders (one for the skins, one for the core), while an A/B/C system requires three separate extruders. The melt streams converge in either a feedblock — which merges layers upstream of the die — or a multi-manifold die that keeps each stream in its own channel until just before the die exit. Multi-manifold dies offer better independent control of each layer's thickness and suit polymers with significantly different viscosities, though they carry higher tooling costs and require more complex maintenance.
Specialty Lines — Foam and Rigid Sheet
Some applications call for line designs that go well beyond standard flat-sheet configurations.
Foam sheet extrusion introduces a gas — either through chemical foaming agents blended into the resin or via physical injection of nitrogen or CO2 directly into the barrel — to create a cellular structure within the sheet. The result is a significantly lighter product with excellent insulation properties. A typical foamed PET A/B/A structure, for instance, features a foam core comprising up to 85% of the sheet thickness that weighs half as much as rigid sheet. Physical foaming with nitrogen or carbon dioxide is generally cleaner and less expensive than chemical foaming, and changeovers between foamed and rigid production are faster because there's no chemical residue to purge. These lines increasingly target the replacement of difficult-to-recycle PS foam with mono-material foamed PET or PP — a shift driven by both recycling infrastructure advantages and regulatory pressure.
Rigid PVC sheet lines represent a different kind of specialty. PVC's narrow thermal processing window and tendency to release corrosive hydrogen chloride gas at elevated temperatures demand specific hardware: corrosion-resistant barrels and screws (often bimetallic or nickel-alloy lined), lower shear screw designs to minimize heat buildup, and precise multi-zone temperature control across every section of the line. You can't simply run PVC on a general-purpose PP sheet line without risking equipment damage and hazardous degradation.
Choosing the Right Configuration for Your Goals
The table below puts all three categories side by side so you can quickly compare their strengths and best-fit applications:
| Line Type | Typical Materials | Layer Structure | Key Advantages | Best Applications |
|---|---|---|---|---|
| Single-Layer Cast Sheet | PP, PS, PE, HIPS | Monolayer | Lowest capital cost; simple operation; widely available as used equipment | Commodity food trays, cups, lids, signage, general-purpose packaging |
| Multi-Layer Co-Extrusion | PET/PETG, PP, PE, ABS, EVOH barrier | A/B, A/B/A, or A/B/C | Barrier properties; cost savings via recycled core layers; independent surface control | Barrier food packaging, GAG thermoforming sheet, recycled-content packaging, ABS luggage sheet |
| Foam Sheet | PET, PP, PS | Monolayer or A/B/A with foam core | Up to 50% weight reduction; thermal insulation; PS replacement potential | Hot-beverage cups, insulated food trays, protective packaging |
| Rigid PVC Sheet | PVC, CPVC | Monolayer (occasionally co-extruded) | Excellent chemical resistance; flame retardancy; stiffness at low cost | Chemical tank liners, building cladding, credit card cores, blister packaging |
Your material, your product's functional requirements, and your target cost per kilogram of finished sheet should drive this decision — not the other way around. A buyer producing high-clarity GAG sheet for pharmaceutical blister packs has fundamentally different line requirements than one running commodity HIPS for disposable food containers, even though both are technically making "sheet."
Yet the line configuration is only half the picture. The specifications embedded in each component — screw diameter, L/D ratio, motor power, die width — ultimately determine whether a given machine delivers on its promised capability or falls short under real production conditions.
Key Technical Specifications Every Buyer Should Understand
You've found a sheet extruder machine listing that looks promising. The datasheet reads: "120 mm screw, 33:1 L/D, 800 kg/hr output, 1,500 mm die width, 200 kW main drive." Sounds impressive — but what do those numbers actually mean for your production floor? And more importantly, how do you know whether they're overkill, a perfect match, or dangerously undersized for the sheet you need to produce?
These specifications aren't just marketing figures. Each one maps directly to a specific production capability, and misunderstanding even one can lead to an expensive mismatch between machine and application. Let's decode them one at a time.
Screw Diameter and L/D Ratio Explained
The screw diameter — measured across the outermost edge of the screw flights — is the single most fundamental size indicator of any extruder. For dedicated sheet lines, you'll typically see diameters ranging from 60 mm on smaller specialty systems up to 150 mm or more on high-volume production lines. Why does this number matter so much? Because extrusion volume is roughly proportional to the square of the screw diameter. That means a jump from a 90 mm to a 120 mm screw doesn't just increase output by a third — it nearly doubles it. Even a modest increase in diameter yields a capacity boost that often exceeds the effect of simply raising screw speed.
The L/D ratio — length-to-diameter ratio — tells you how long the screw's working section is relative to its diameter. A 120 mm screw with a 33:1 L/D ratio has a functional length of roughly 3,960 mm. Sheet extrusion lines commonly use ratios between 30:1 and 36:1, and that range isn't arbitrary.
A longer L/D ratio provides more barrel length for the polymer to absorb heat, experience shear, and reach a fully homogeneous melt state. This extra residence time benefits materials that need thorough mixing — filled compounds, color concentrates, or resins with wide melting ranges. However, pushing the L/D ratio too high introduces real trade-offs: higher energy consumption to drive the longer screw, greater manufacturing precision requirements, and increased risk of shaft deflection that can score the barrel wall and shorten component life.
For thermally sensitive polymers like PVC, a shorter L/D ratio is actually preferred. A longer screw means longer residence time at elevated temperature, which risks thermal degradation — exactly the opposite of what you want. So when you see an L/D ratio on a datasheet, don't assume bigger is automatically better. The right ratio depends on what you're processing.
Output Capacity, Line Speed, and Sheet Dimensions
Output capacity, measured in kilograms per hour (kg/hr), represents the mass of polymer the extruder can plasticize and deliver to the die in a given timeframe. A pet sheet extruder rated at 600 kg/hr, for example, can theoretically melt and push 600 kilograms of PET resin through the die every hour under optimal conditions.
But here's the nuance most datasheets don't explain: rated output and actual usable output are rarely the same number. Real-world extrusion output depends on multiple interacting factors — screw design, material density, processing temperature, die resistance, and downstream equipment speed. A machine rated at 800 kg/hr might only deliver 600 kg/hr when running a high-viscosity ABS at conservative temperatures to avoid surface defects. The same machine could hit or exceed its rated throughput with a lower-viscosity PP.
Line speed — typically measured in meters per minute — connects directly to sheet thickness. Imagine the extruder delivers a fixed mass of polymer per minute. If the haul-off pulls the sheet faster, the same mass gets stretched thinner. Slow it down, and the sheet gets thicker. This relationship means that a machine producing thin-gauge PP packaging sheet at 0.3 mm runs at a significantly higher line speed than one producing 3 mm ABS panels, even if both extruders have identical throughput ratings.
Die width determines the maximum sheet width your line can produce. Common widths range from 800 mm for narrow specialty sheet up to 2,500 mm or wider for large-format applications like construction cladding or automotive panels. Keep in mind that the usable sheet width is always narrower than the die itself — edge trim on both sides typically consumes 50 to 100 mm per side.
Motor power, expressed in kilowatts (kW), drives the screw and directly limits throughput. Higher motor power allows higher screw speeds and larger production volumes. But the type of drive matters just as much as the raw power figure. Modern AC servo-driven extruders deliver significantly better energy efficiency than older standard AC or hydraulic drive systems — often reducing electricity consumption by 20-30% at the same output level. For a machine running around the clock, that difference translates into substantial annual savings.
How Specifications Translate to Production Capability
Here's where everything comes together. A buyer producing thin PP food-packaging sheet at high volume needs a very different specification profile than a buyer producing thick ABS panels at lower volume. The first buyer prioritizes high throughput, a wide die, and a fast downstream line. The second needs a robust screw design that handles ABS without overheating, a heavy-duty calender stack for thick gauge control, and a motor powerful enough to push viscous melt at moderate speed without straining.
The table below maps every critical specification to its practical meaning and the range you'll encounter across most sheet lines:
| Specification | What It Measures | Typical Range for Sheet Lines | Why It Matters |
|---|---|---|---|
| Screw Diameter | Physical size of the screw; primary indicator of extruder capacity | 60 mm – 150 mm+ | Output scales with the square of diameter — small increases yield large capacity gains |
| L/D Ratio | Working length of the screw relative to its diameter | 30:1 – 36:1 | Longer ratios improve melt homogeneity; shorter ratios suit heat-sensitive resins like PVC |
| Output Capacity | Mass of polymer the extruder can plasticize per hour | 150 – 1,500+ kg/hr | Must match your target production volume; actual output varies by material and conditions |
| Die Width | Maximum possible sheet width at the die exit | 800 mm – 2,500 mm+ | Determines product width; usable width is narrower after edge trimming |
| Sheet Thickness Range | Minimum and maximum gauge the line can produce | 0.2 mm – 12 mm | Must cover your full product portfolio; thinner sheets require faster line speeds |
| Main Motor Power | Drive energy available to rotate the screw | 75 kW – 500 kW+ | Limits maximum throughput; servo drives cut energy cost by 20-30% vs. standard AC motors |
| Line Speed | Speed at which sheet travels through the downstream section | 1 – 30+ m/min | Inversely related to thickness at constant output — faster speed means thinner sheet |
| Number of Calender Rolls | Rolls in the polishing/cooling stack | 3 – 5 rolls | More rolls provide better surface finish, thickness control, and cooling capacity |
Use this table as a checklist when reviewing any datasheet or marketplace listing. If a supplier quotes impressive output numbers but doesn't specify screw diameter, L/D ratio, or motor power, you have no way to verify whether those numbers are realistic for your material and thickness range. Likewise, a user-friendly plastic profile extruders supplier might offer equipment that looks appealing on paper, but if the die width caps out below your product requirements, no amount of throughput capacity compensates for that limitation.
Understanding specifications prevents two costly mistakes: overspending on an oversized machine that idles at half capacity, or underperforming with an undersized one that can't meet your production targets.
A high-efficiency extrusion machine supplier will always size equipment to your specific production scenario — target material, sheet dimensions, shifts per day, and annual volume. If they recommend a machine without asking those questions first, that's a red flag worth noting. The specifications tell you what a machine can do; the material you intend to run through it determines what it actually will do — and that relationship between resin properties and machine capability deserves its own detailed examination.
Material Selection Guide for Sheet Extrusion
A sheet extruder rated for 800 kg/hr doesn't care what resin you pour into the hopper — but the resin absolutely cares what kind of machine it runs through. Every polymer has its own melting behavior, thermal sensitivity, viscosity profile, and moisture tolerance. Feed the wrong material through the wrong configuration, and you'll get anything from surface haze and brittle edges to a barrel full of degraded, smoking resin. The material you choose shapes every hardware decision you'll make — screw geometry, barrel metallurgy, drying systems, die design, and downstream cooling strategy.
So before you spec a machine, you need to spec your material. Here's how the most common sheet plastic extrusion resins stack up.
Commodity Resins — PP, PS, PE, and PVC
These four polymers account for the majority of global sheet output, and each brings a distinct processing personality to the line.
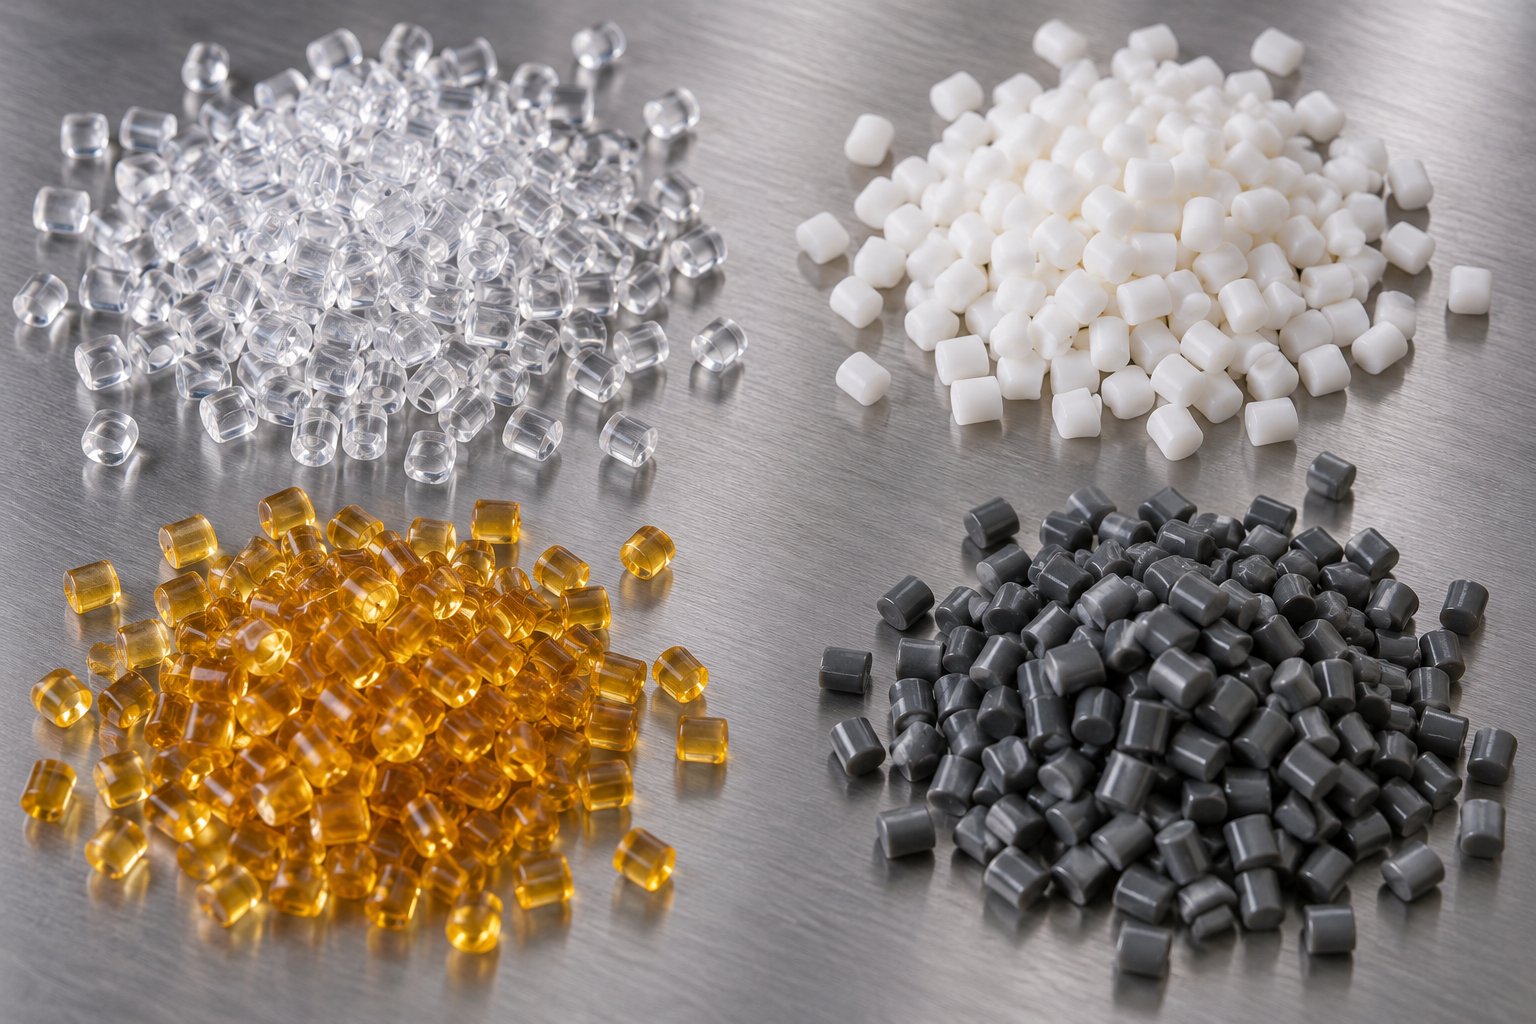
Polypropylene (PP) and polystyrene (PS) dominate thermoforming applications — cups, trays, lids, and clamshell containers. PP melts in the 200-260°C range, flows easily, and works well with standard nitrided barrels and barrier screw designs at a 30:1 L/D ratio. PS is even more forgiving, processing at lower temperatures (180-240°C) with minimal shear sensitivity. HIPS (high-impact polystyrene) benefits from a mild mixing section on the screw to disperse its rubber phase evenly, but otherwise runs on straightforward equipment.
Polyethylene (PE) — both HDPE and LDPE — is common for chemical-resistant liners and industrial sheet. PE's low melting point and non-corrosive nature make it gentle on hardware, though LDPE requires a slightly more open screw profile to avoid overheating and blistering from excessive shear.
PVC is a different animal entirely. It has the narrowest thermal processing window of any commodity resin — push it just 10-15°C above its ideal range and it releases corrosive hydrogen chloride gas that attacks barrel and screw surfaces. Successful PVC sheet lines demand corrosion-resistant alloy barrels, low-shear screw designs with no dead spots where material can stagnate and degrade, and shorter L/D ratios (typically 20:1 to 25:1) to minimize residence time. If you're evaluating a general-purpose PP line with plans to "also run a little PVC," stop — the chemistry won't forgive the shortcut.
Engineering and Specialty Resins — PET, ABS, PETG, and PC
Step up from commodity resins and the machine requirements get more demanding — and more specific.
PET is one of the most widely extruded sheet materials for clear food packaging and thermoformed trays, but it's also one of the most process-sensitive. A pet sheet extruder machine must address two critical challenges. First, PET is hygroscopic — it absorbs moisture from the air, and that moisture causes hydrolysis during melt processing, reducing intrinsic viscosity (IV) and destroying mechanical properties. A crystallization dryer is mandatory, typically bringing moisture content below 50 ppm before the resin enters the barrel. Second, PET benefits from vented or vacuum-degassing barrel sections that extract residual moisture and volatile compounds during plasticization, improving transparency and reducing bubble defects. Screw designs run low-shear with shallow flights at L/D ratios of 32:1 to 35:1, and barrel metallurgy should resist PET's mildly acidic melt.
ABS requires consistent mixing of its three polymer components — acrylonitrile, butadiene, and styrene — making a mixing-head screw with medium flight depth the standard choice. It processes in the 220-260°C range and, while more forgiving than PET, still demands a gradual heating profile to avoid charring and discoloration. PETG, a glycol-modified PET, offers easier processing with wider thermal tolerance and no crystallization drying requirement, making it popular for clear rigid packaging and signage. Polycarbonate (PC) runs hotter (260-310°C), requires thorough drying, and needs high-torque extruders capable of handling its elevated melt viscosity.
Recycled and Reclaimed Materials
The fastest-growing segment in sheet plastic extrusion isn't a new polymer — it's old ones getting a second life. Recycled PET (rPET) and recycled PP (rPP) are increasingly specified by brand owners chasing sustainability targets and regulatory mandates. The EU's Packaging and Packaging Waste Regulation, for instance, mandates 30% PCR content in PET beverage bottles by 2030, and similar requirements are expanding to thermoformed sheet packaging.
Processing recycled feedstock introduces variability that virgin resin simply doesn't have. Batch-to-batch swings in melt viscosity, contamination from mixed polymer types, label adhesives, inks, and inconsistent moisture levels all put extra stress on the equipment. A sheet extruder handling rPET or rPP needs robust melt filtration — often continuous screen changers rather than manual slide plates — to catch contaminants before they reach the die. Vented barrel sections become even more critical, since recycled material carries higher levels of trapped moisture and volatiles than virgin pellets. Screw designs with strong mixing elements help homogenize variable feedstock, and gravimetric feeding systems compensate for the bulk density fluctuations common with regrind and flake.
Many processors blend recycled content into co-extruded structures, placing rPET or rPP in the core layer where its slightly inferior surface quality is hidden beneath virgin skin layers. This approach satisfies recycled-content targets without compromising the appearance or food-contact compliance of the finished sheet — a practical strategy that, as noted by manufacturers like American Maplan extruders and others, continues to drive co-extrusion line adoption.
Material-to-Machine Requirements at a Glance
The table below maps each major resin to its processing parameters and the equipment features your line will need:
| Material | Processing Temp Range | Key Machine Requirements | Primary Applications |
|---|---|---|---|
| PP | 200-260°C | Barrier screw; 30:1 L/D; nitrided barrel with hard chrome coating | Thermoformed trays, cups, lids, automotive liners |
| PS / HIPS | 180-240°C | Low-shear open screw; 25:1-30:1 L/D; standard nitrided barrel | Disposable food containers, dairy cups, signage |
| PE (HDPE/LDPE) | 180-240°C | Deep-flighted screw; 25:1-28:1 L/D; nitrided barrel | Chemical-resistant liners, industrial sheet, pond liners |
| PVC | 160-190°C | Low-shear smooth-flight screw; 20:1-25:1 L/D; corrosion-resistant alloy barrel; temperature-controlled screw | Building cladding, credit card cores, blister packaging |
| PET | 250-280°C | Low-shear shallow-flight screw; 32:1-35:1 L/D; crystallization dryer; vented/vacuum barrel; corrosion-resistant alloy | Clear food trays, blister packs, thermoformed containers |
| ABS | 220-260°C | Mixing-head screw; 30:1-32:1 L/D; wear-resistant coated barrel; gradual heating profile | Automotive panels, luggage shells, appliance housings |
| PETG | 220-260°C | General-purpose screw; 30:1 L/D; no crystallization dryer needed; standard barrel | Clear rigid packaging, POP displays, medical trays |
| PC | 260-310°C | High-torque drive; desiccant dryer; high-temperature barrel seals | Safety glazing, electronic covers, optical sheet |
| rPET / rPP | Same as virgin (with tighter control) | Continuous screen changer; vented barrel; strong mixing screw elements; gravimetric feeding | Recycled-content food packaging, co-extruded core layers, industrial sheet |
Think of this table as your compatibility checklist. Before you evaluate any machine — new, refurbished, or a used unit from the secondary market — confirm that its screw design, barrel material, drying capabilities, and filtration systems align with the resin you intend to run. A sheet extruder perfectly suited for PP will struggle with PET, and one engineered for PET may be entirely unsuitable for PVC. Getting this match right from the start eliminates the most common and most expensive source of production problems — and it also explains why, when something does go wrong on the line, the root cause so often traces back to how the material and the machine interact under real processing conditions.
Common Sheet Extrusion Defects and Troubleshooting
A perfectly configured sheet extrusion machine running the right resin with the right screw should produce flawless sheet every time — in theory. In practice, defects show up. They appear as faint lines running the length of your sheet, as thickness swings that ruin thermoforming yields, or as mysterious bubbles that only emerge on humid Tuesday mornings. The frustrating part? Most of these problems are entirely preventable, and the clues to their origin are hiding in plain sight if you know where to look.
Whether you're running a PP sheet extrusion line, a PVC sheet extrusion line, or a multi-layer co-extrusion setup, the categories of defects are remarkably consistent. They fall into three groups: surface defects, dimensional defects, and moisture-related defects. Each traces back to a specific process variable — and each has a fix.
Surface Defects — Die Lines, Roughness, and Gels
Surface quality is the first thing a customer notices and the fastest way to lose a sale. Three surface defects dominate the rejection reports of plastic extruder manufacturers and processors alike.
Die lines are the most common complaint. They appear as continuous streaks running in the machine direction, visible under angled light even when the rest of the sheet looks fine. The cause is almost always mechanical: a nick, scratch, or buildup of degraded polymer on the die lip. Even a tiny imperfection at the die exit gets dragged across every meter of sheet the line produces. Regular die lip cleaning and periodic polishing eliminate the issue, but only if operators inspect the lips at every startup and after every material changeover.
Surface roughness — sometimes called "orange peel" or shark skin — points to a melt fracture condition. When the polymer is pushed through the die gap faster than its molecular structure can relax, the surface tears at a microscopic level. You'll see this more often at high output rates, with high-viscosity resins, or when die temperatures are set too low. Reducing extrusion speed, raising die zone temperature, or widening the die gap slightly can restore a smooth surface. Some operators add a small amount of processing aid to the formulation, which lubricates the die-polymer interface and delays the onset of melt fracture.
Gels and fish eyes are the defects that keep quality managers up at night. These small, transparent or opaque specks embedded in the sheet are caused by unmelt particles, cross-linked polymer fragments, or foreign contamination that passed through the screen pack. They signal that the screw isn't achieving complete melting — perhaps due to worn flights, an incorrect compression ratio, or a feed rate that exceeds the screw's plasticizing capacity. Upgrading melt filtration to a finer mesh and ensuring the screw's mixing section is properly designed for the resin in use are the most effective long-term solutions. A comprehensive PET troubleshooting guide from ACERETECH confirms that contaminated recycled material and inadequate filtration are among the top causes of black specks and gel defects in sheet production.
Dimensional Defects — Uneven Thickness and Warping
When your sheet varies by 0.05 mm across its width, it might not sound like a crisis — until you discover that your thermoforming customer just scrapped an entire pallet of trays because the corners were too thin and the sidewalls too thick. Dimensional consistency is the backbone of usable sheet, and two problems dominate this category.
Uneven thickness across the sheet width typically traces to one of two root causes. The first is a non-uniform die-lip gap — if one side of the die is open wider than the other, more polymer flows through the wider section, creating a thicker edge. Manual die-bolt adjustment can correct this, but it's slow and operator-dependent. Automatic die-bolt systems use feedback from an inline thickness gauge to make real-time adjustments, maintaining gauge uniformity without constant human intervention. The second cause is inconsistent melt temperature. If the polymer is hotter on one side of the die than the other, its viscosity drops in that region, and it flows faster — producing the same thickness imbalance even when the die gap is mechanically perfect. Checking barrel heater function zone by zone and verifying that the die's internal flow channels are free of partial blockages usually resolves temperature-driven variation.
Warping and curling appear after the sheet leaves the calender stack, sometimes not becoming visible until the sheet reaches the customer's warehouse. The root cause is uneven cooling that locks residual stress into the sheet structure. If the top surface of the sheet cools faster than the bottom — or the left edge faster than the right — the differential shrinkage creates internal tension that pulls the sheet out of flat. Balancing calender roll temperatures across all rolls, ensuring uniform air-knife coverage, and maintaining consistent ambient conditions around the cooling section are the primary corrective actions. For thicker sheets, slowing the line speed to allow more gradual, even cooling often eliminates curling entirely.
Moisture-Related Defects and How to Prevent Them
This category deserves special attention because the defects it produces are severe, the cause is invisible to the naked eye, and the fix is entirely upstream of the sheet extrusion machine itself.
Hygroscopic materials — PET, nylon, polycarbonate, ABS — absorb moisture from the air during storage and handling. When that moisture-laden resin enters the heated barrel, water turns to steam at processing temperatures. The result is a cascade of visual and structural damage: bubbles trapped inside the sheet body, splay marks (silver streaks radiating from the die exit), surface haze that destroys clarity, and in the worst cases, hydrolytic chain scission that permanently degrades the polymer's mechanical strength.
PET is especially unforgiving. It requires drying to below 50 ppm moisture content before extrusion — a target that demands a desiccant dryer operating at -40°C to -50°C dew point with four to six hours of residence time at 160-170°C. Even brief exposure of dried pellets to ambient air during transfer from dryer to extruder feed throat can reintroduce enough moisture to cause defects, which is why closed-loop conveying systems with dry air purging are standard on serious PET lines.
The critical takeaway: most moisture defects are not machine failures. They are process discipline failures. A perfectly maintained sheet extrusion machine will still produce defective sheet if the material entering it carries excess moisture. No amount of downstream adjustment compensates for wet feedstock.
Quick-Reference Defect Troubleshooting Guide
Use the following defect-cause-solution reference to diagnose the most common problems on your line:
- Die lines — Cause: damaged, dirty, or scored die lips. Solution: clean and polish die lips; inspect at every startup; replace lips if scoring is too deep to polish out.
- Surface roughness / shark skin — Cause: melt fracture from excessive output rate or low die temperature. Solution: reduce line speed, raise die zone temperature, or add processing aid.
- Gels / fish eyes — Cause: unmelt particles, cross-linked contamination, or inadequate filtration. Solution: upgrade screen pack mesh, verify screw mixing performance, improve raw material quality control.
- Black specks — Cause: carbonized material in barrel or die dead spots. Solution: purge regularly, reduce processing temperature in stagnant zones, schedule preventive cleaning.
- Uneven thickness (cross-web) — Cause: non-uniform die-lip gap or inconsistent melt temperature. Solution: adjust die bolts (manual or automatic), verify heater zone function, check for die flow-channel obstructions.
- Warping / curling — Cause: uneven cooling or residual stress from asymmetric calender roll temperatures. Solution: balance roll temperatures, ensure uniform air-knife coverage, slow line speed for thicker sheets.
- Bubbles — Cause: moisture in hygroscopic resin or insufficient vacuum degassing. Solution: dry material to specification, verify dew point of dryer air, seal transfer lines from dryer to extruder.
- Splay marks (silver streaks) — Cause: moisture vaporizing at the die exit. Solution: improve drying residence time and temperature, install inline moisture sensor at dryer discharge.
- Haze / poor transparency — Cause: residual moisture, material degradation, or poor filtration. Solution: verify drying parameters, optimize melt temperature, upgrade filtration mesh, maintain consistent cooling.
- Yellowing / discoloration — Cause: thermal degradation from excessive melt temperature or prolonged residence time. Solution: reduce barrel temperatures, maintain stable production speed, limit regrind ratio.
Every sheet defect is a message from the process. Learn to read that message, and most problems resolve themselves before they become costly rejects.
Notice how many of these defects point back to one component: the screw. Gels trace to insufficient mixing. Melt fracture relates to shear generated by screw and die geometry. Temperature inconsistency reflects how well the screw plasticizes the polymer. Even moisture defects tie into whether the barrel includes vented sections for degassing. The screw isn't just a conveying device — it's the component where most sheet quality is won or lost, and its design deserves far more attention than it typically receives.
The Critical Role of Screw Design in Sheet Quality
The screw inside a sheet extruder machine doesn't just move plastic forward. It melts, mixes, pressurizes, and homogenizes every gram of polymer that will eventually become your finished sheet. Get the screw design right, and you get consistent melt temperature, uniform output, and defect-free product. Get it wrong, and you're fighting gels, thickness variation, and temperature spikes that no amount of downstream adjustment can fix. Yet for all its importance, screw design remains the least understood component among most equipment buyers — a blind spot that costs processors real money every production day.
Three major screw categories dominate sheet extrusion applications, each engineered to solve a different processing challenge. Understanding what separates them is the first step toward matching your equipment to your material and quality goals.
Barrier Screws, Mixing Screws, and Vented Screws
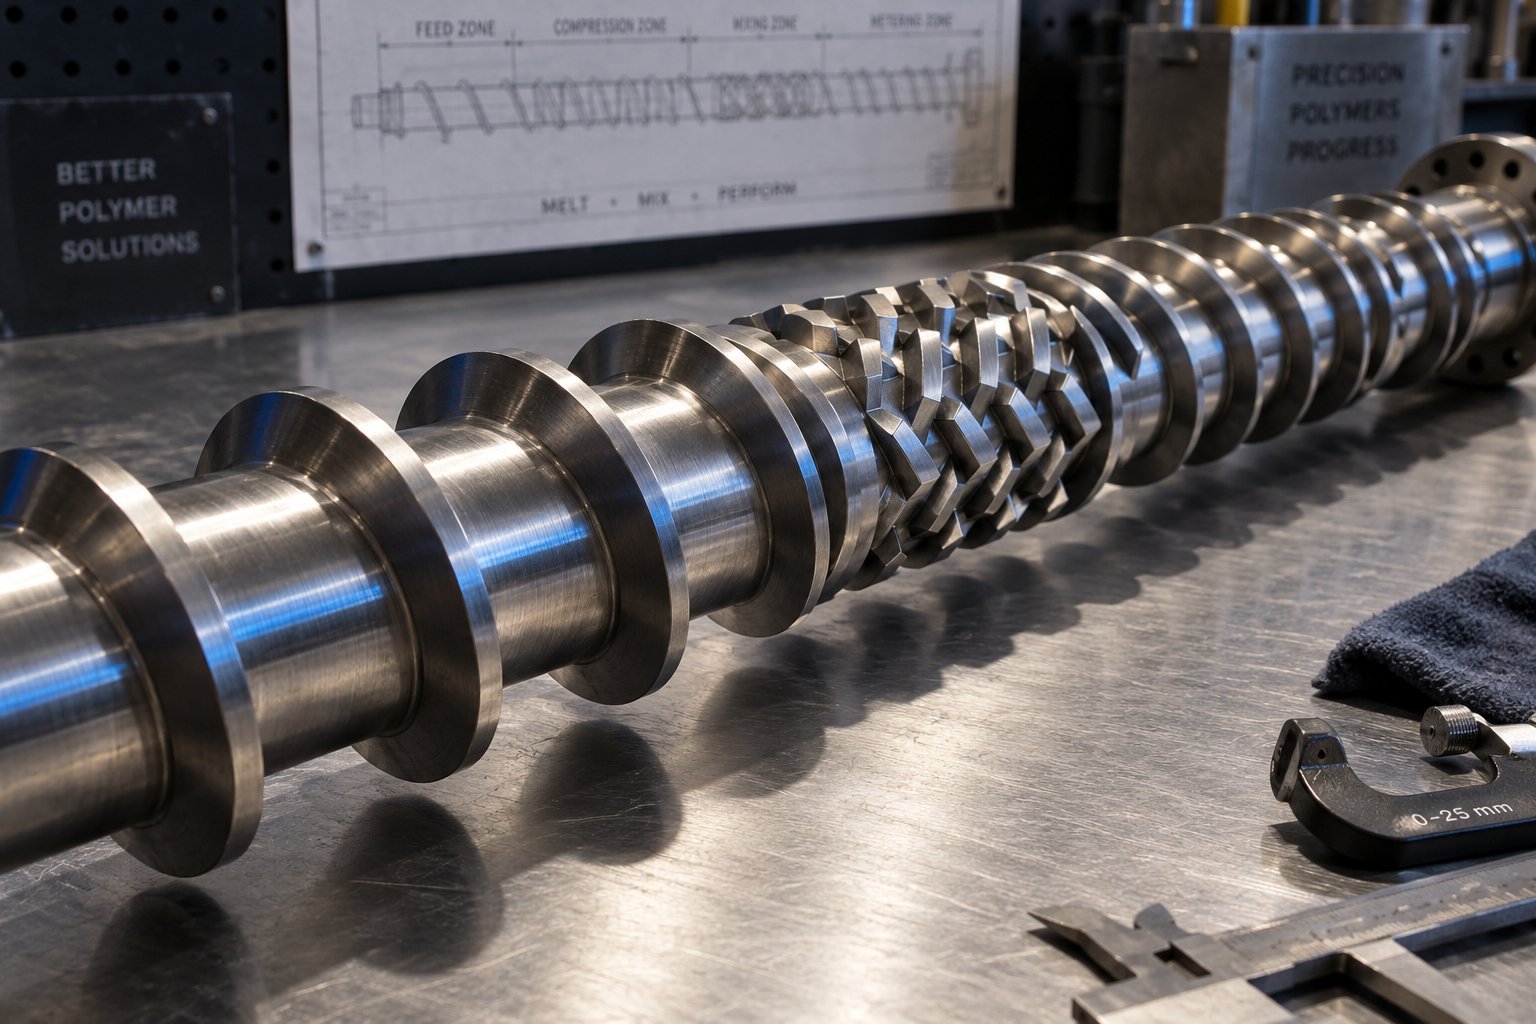
Barrier screws tackle the most fundamental challenge in any extruder line: separating solid polymer from molten polymer during plasticization. A conventional single-flight screw relies on the solid bed gradually melting against the barrel wall, but as screw speed increases, solid fragments can break away and travel downstream before fully melting — showing up as gels or fish eyes in the finished sheet. A barrier screw adds a secondary flight within the transition zone that physically channels molten resin into a dedicated melt pool while keeping unmelted solids confined to a separate channel. The result is more uniform melting, fewer unmelt particles, and higher output consistency. As GS Extruder's technical guide notes, barrier screws are especially effective for crystalline polymers like polyethylene and polypropylene — two of the most common resins on any sheet line.
Mixing screws address a different problem: homogeneity. When you're running color concentrates, additive masterbatches, or filled compounds, the base resin and its additives need to be blended at a molecular level before reaching the die. Mixing screws incorporate specialized elements — dispersive sections like Maddock-style mixers that force melt through narrow clearances to break apart agglomerates, or distributive sections with pin or spiral geometries that repeatedly split and recombine the melt stream. A study published in the Journal of Plastic Film & Sheeting confirmed that properly designed Maddock-style mixers can trap, melt, and disperse solid polymer fragments that would otherwise create defects in film and sheet products — effectively rescuing output quality even at elevated screw speeds.
Vented (degassing) screws solve the moisture and volatile problem that plagues hygroscopic resins and recycled feedstock. These screws feature a decompression zone — a section where the channel depth suddenly increases, dropping the melt pressure to near zero. A vacuum port connected to this zone extracts trapped moisture, air, and volatile organic compounds before the melt re-compresses and moves toward the die. For PET sheet extrusion, venting is practically mandatory. Leybold's vacuum system documentation highlights that significant amounts of water vapor, monomers, and oligomers must be removed during PET processing — and that dry mechanical vacuum pumps paired with properly designed vent zones deliver stable, non-fluctuating vacuum levels independent of ambient conditions. Without effective degassing, you're left with bubbles, splay marks, and haze that no amount of drying alone can fully eliminate.
Why Screw Geometry Drives Sheet Quality
Beyond the broad category — barrier, mixing, or vented — the specific geometry of the screw determines how your polymer behaves under real production conditions. Three parameters matter most: compression ratio, flight depth, and channel geometry.
The compression ratio describes the relationship between the feed channel depth and the metering channel depth. It dictates how aggressively the screw compacts and melts the incoming pellets. Experimental research on LLDPE resin using five different compression ratio screws (ranging from 2.0 to 3.6) demonstrated that a 2.8 compression ratio was optimal for LLDPE pellet feedstocks, delivering the highest specific rate without excessive solid polymer fragments in the discharge. Screws with ratios below 2.4 couldn't develop sufficient internal pressure at low speeds, while ratios above 3.0 drove more material into the extruder than the melting zone could handle — producing the exact kind of unmelt defects covered in the previous section. That same study found discharge temperatures climbed 5 to 10°C higher with deeper-fed, higher compression ratio screws at elevated speeds, a direct consequence of increased energy dissipation from higher channel pressures.
Imagine what this means in practice. A sheet processor running PP at moderate speeds with a 3.2 compression ratio screw may see acceptable results — until production demand increases and screw speed ramps up. Suddenly, unmelt particles appear, surface quality degrades, and the operator blames the material when the real culprit is a compression ratio mismatched to the higher throughput condition.
Flight depth in the metering zone controls shear rate. Shallower flights create higher shear, which generates more viscous heating inside the melt. For heat-sensitive resins like PVC, excessive shear leads directly to thermal degradation. For tougher polymers like ABS or PC, deeper flights reduce shear heating but may compromise mixing quality. The balance is resin-specific, and there is no universal "best" depth.
Channel geometry — the width, helix angle, and number of flights — influences residence time distribution and melt-temperature uniformity across the screw's cross-section. A wider channel moves more material per revolution but provides less shear per unit volume. Narrower channels improve mixing intensity at the cost of throughput. Double-flighted metering sections can improve output stability but increase manufacturing complexity and cost.
The screw is often the single most impactful component in any sheet extruder machine — and the one most frequently mismatched to the application it's asked to serve.
Choosing the Right Screw for Your Application
Screw selection isn't a one-size-fits-all decision. It depends on three intersecting factors: the material you're processing, the output rate you need, and the quality standard your customers demand.
A processor running virgin PP for commodity thermoforming may do perfectly well with a standard barrier screw at a 2.8:1 compression ratio and 30:1 L/D. Switch that same line to rPET flake — with its variable moisture content, contamination risk, and viscosity swings — and you'll need a vented screw with strong dispersive mixing elements, higher L/D, and a barrel section connected to a vacuum system. Running both materials on the same line? You might need two screws and a changeover strategy, or a compromise design that handles both adequately but neither optimally.
This is precisely why many processors benefit from working with specialized screw barrel manufacturers who engineer application-specific designs rather than relying on the generic screw that shipped with the original plastic extrusion machines. A screw designed specifically for your resin, your throughput target, and your quality requirements outperforms a general-purpose design in output consistency, energy efficiency, and wear life. For sheet extrusion applications, suppliers like NANHAIYA provide custom and replacement single screw barrels engineered to match specific polymers and processing conditions — an option worth exploring when your current screw struggles with a new material or can't maintain quality at higher production speeds.
When evaluating screw options, consider building a brief specification profile that includes:
- Primary resin — crystalline, amorphous, or moisture-sensitive?
- Secondary materials — regrind, recycled flake, or filled compounds?
- Target output — kg/hr at your planned operating screw speed?
- Quality threshold — visual surface finish, gel count tolerance, thickness uniformity?
- Barrel condition — new barrel, or existing barrel with known wear pattern?
A specialized manufacturer can use this profile to recommend compression ratio, flight geometry, mixing elements, and surface treatment (nitrided, bimetallic, or tungsten carbide coated) that align with your actual production reality — not just a generic recommendation from a catalog.
The screw defines what your extruder line can achieve, but it doesn't operate in isolation. Every hardware decision feeds into a larger economic equation — one where capital cost, energy consumption, material waste, and maintenance schedules determine whether your machine makes money or quietly drains it.
Energy Efficiency and Total Cost of Ownership
Here's a scenario that plays out more often than anyone in the industry likes to admit: a buyer finds a plastic sheet extruder at an attractive price, signs the purchase order, installs the line — and then watches electricity bills, scrap rates, and unplanned maintenance quietly devour the savings they thought they'd locked in. The sticker price was right. The total cost of ownership was not.
A sheet extruder machine is not a one-time purchase. It's an ongoing financial commitment that spans a decade or more of production. The capital invoice is just the opening chapter. Energy consumption, raw material efficiency, wear-part replacement, and downtime losses write the rest of the story — and those chapters are far longer and far more expensive. Understanding this full cost picture before you commit is what separates a smart investment from a regrettable one.
Capital Cost Factors and What Drives Price Variation
If you've requested quotes from multiple suppliers, you've probably noticed something striking: pricing for seemingly comparable equipment can vary by a factor of three or more. A complete extrusion sheet line might range from $400,000 to $3 million depending on configuration and capacity. That's not random — it reflects real differences in what you're getting.
The primary variables driving capital cost include:
- Extruder size: A 90 mm single-screw system costs considerably less than a 150 mm machine. Since output scales with the square of the screw diameter, larger extruders command premium pricing that reflects their proportionally higher production capability.
- Number of extruders: A single-layer line requires one extruder. An A/B/C co-extrusion line needs three — plus a feedblock or multi-manifold die to merge the melt streams. Each additional extruder adds hardware, controls, and integration complexity.
- Automation level: Manual die-bolt adjustment, hand-loaded winders, and basic PLC controls keep costs down. Automatic die-bolt systems with closed-loop thickness feedback, gravimetric dosing, servo-driven haul-offs, and SCADA-level process monitoring push costs up — but also reduce labor requirements and improve consistency.
- Brand origin: European and Japanese machines typically carry higher price tags than Chinese or Taiwanese equivalents, reflecting differences in component sourcing, engineering depth, and after-sales infrastructure. That premium doesn't always translate into proportionally better performance for every application, but it often correlates with tighter manufacturing tolerances and longer component life.
- Downstream equipment: The calender stack, cooling section, edge-trim system, thickness gauge, and winder or cutter collectively represent 30-40% of the total line cost. Skimping here to save on the initial purchase often backfires in sheet quality and production flexibility.
Used extruders for sale offer a lower entry point — sometimes 40-60% below new equipment pricing — but the trade-offs are real. Older machines typically consume more energy per kilogram of output, may lack modern control systems, and come with limited or no warranty coverage. Wear on the screw and barrel — the highest-wear components on any line — may not be visible without a physical inspection. If you're considering used equipment, request a bore measurement report for the barrel and a flight-diameter check on the screw before committing. Worn components that need immediate replacement can erase the purchase price advantage quickly.
Regardless of whether you're buying new or used, request itemized quotations that separate the extruder, die, calender stack, downstream equipment, controls, installation, and commissioning costs. Bundled pricing hides imbalances — you might be overpaying for the extruder and getting underspecified downstream equipment, or vice versa.
Operating Costs — Energy, Materials, and Maintenance
Capital cost gets the attention. Operating cost determines the outcome. For most sheet extrusion operations, the monthly cost of running the line dwarfs the monthly depreciation charge on the equipment itself.
Energy is typically the largest variable operating cost after raw materials. The extruder's main drive motor and barrel heaters consume the bulk of electricity, with calender roll heating, cooling pumps, and downstream equipment adding to the total. How much energy does a sheet line actually use? The metric that matters is specific energy consumption — kilowatt-hours per kilogram of output (kWh/kg). Modern servo-driven sheet lines with optimized screw designs typically achieve 0.25-0.40 kWh/kg. Older or less efficient equipment often runs at 0.40-0.60 kWh/kg. That gap sounds modest until you multiply it by production volume.
Consider a line producing 500 kg/hr and running 6,000 hours per year. At 0.30 kWh/kg, annual electricity consumption is 900,000 kWh. At 0.50 kWh/kg, it's 1,500,000 kWh — a difference of 600,000 kWh. At an industrial electricity rate of $0.10/kWh, that's $60,000 per year in excess energy cost. Over a 10-year machine life, the inefficient line burns through $600,000 more in electricity alone. Suddenly, the cheaper purchase price of that older machine doesn't look so cheap.
Raw materials represent 55-70% of total operating cost for most sheet processors. Resin price volatility — especially for PET, PP, and PVC — introduces uncertainty that no equipment choice can eliminate, but your machine does influence how efficiently you convert resin into sellable product. Scrap rate is the critical variable here. Every kilogram of edge trim, startup waste, off-spec sheet, or purge material that doesn't make it into a finished product is money lost. Well-designed lines with stable process control, effective edge-trim reclaim systems, and quick changeover capability keep total waste rates below 5%. Poorly controlled lines or machines with frequent quality excursions can push waste above 10-15%, turning material cost from a competitive factor into a profit killer.
Maintenance breaks into two categories: planned and unplanned. Planned preventive maintenance — screw and barrel inspection, die lip refinishing, calender roll resurfacing, bearing replacement, and control system calibration — typically costs 2-4% of equipment acquisition value annually. For a $1 million line, that's $20,000 to $40,000 per year in scheduled upkeep. Unplanned maintenance — emergency breakdowns, failed heaters, seized bearings, or a cracked barrel — adds unpredictable spikes that experienced operators mitigate through condition monitoring and spare parts inventory.
Screw and barrel replacement deserves special mention because these are the highest-wear components on the line. A worn screw loses pumping efficiency, increases melt temperature variability, and degrades sheet quality progressively — often so gradually that operators don't notice until defect rates have already climbed. Budgeting for periodic screw and barrel replacement (or resleeving) as a standard maintenance item, rather than treating it as an emergency expense, keeps both quality and cost predictable.
Calculating Throughput and Return on Investment
Before signing any purchase order, model your production economics. The exercise doesn't require an MBA — just honest numbers and a willingness to stress-test your assumptions.
Start with your expected output in kg/hr, then multiply by planned operating hours per month. Factor in realistic capacity utilization — 70-80% in the first year is a conservative and prudent assumption, ramping to 85-90% once operators optimize the process and startup scrap declines. First-year yields typically fall 3-5% below steady-state levels as the team learns the line.
Then build out the revenue side: selling price per kilogram (or per square meter) of finished sheet, multiplied by your net salable output after subtracting scrap and waste. Subtract all operating costs — resin, energy, labor, maintenance, and overhead — and you have your annual net cash flow. Divide total capital investment by annual net cash flow, and you get your payback period. Most plastics converters target payback within 2-4 years for new equipment; anything longer faces increasing difficulty securing approval.
For a more rigorous analysis, calculate Net Present Value (NPV) by discounting future cash flows back to today's dollars using your company's cost of capital. A positive NPV means the investment creates real value above your required rate of return. Internal Rate of Return (IRR) identifies the discount rate at which NPV hits zero — investments with IRR exceeding your company's hurdle rate (typically 15-25% for capital-intensive manufacturing) merit serious consideration.
When comparing machines — or comparing a new line against used extrusion equipment — don't stop at the purchase price. Run both options through the same financial model with realistic assumptions about energy cost, scrap rate, maintenance burden, and capacity utilization. The machine with the lower sticker price frequently loses when the full picture comes into focus.
Key Cost Categories to Request From Suppliers
When you reach the quoting stage, make sure every supplier provides information on these cost-critical items:
- Equipment purchase price — itemized by major component (extruder, die, calender, downstream, controls)
- Installation and commissioning cost — including mechanical erection, electrical hookup, and startup engineering
- Site preparation requirements — floor reinforcement, utility connections, cooling water capacity
- Specific energy consumption — kWh/kg for your target material and thickness at rated output
- Expected scrap rate — during startup and at steady-state production
- Recommended spare parts inventory — especially screw, barrel, die components, and wear items
- Preventive maintenance schedule and estimated annual cost
- Warranty terms — duration, coverage scope, and what's excluded
- Operator labor requirements — number of operators per shift at different automation levels
- Training — included or extra, and how many days of on-site commissioning support
Any supplier who can't — or won't — provide these figures is asking you to make a six- or seven-figure decision in the dark. The best equipment partners welcome this level of scrutiny because their machines perform well under it.
The cheapest machine to buy is rarely the cheapest machine to own. Total cost of ownership reveals the true price — and it's the number that determines whether your investment generates profit or quietly consumes it.
Armed with a clear picture of costs, the next challenge is equally consequential: structuring the decision itself. How do you define your production requirements, evaluate machine builders, weigh new against used equipment, and assemble all of those variables into a selection framework that actually leads to the right machine for your operation?
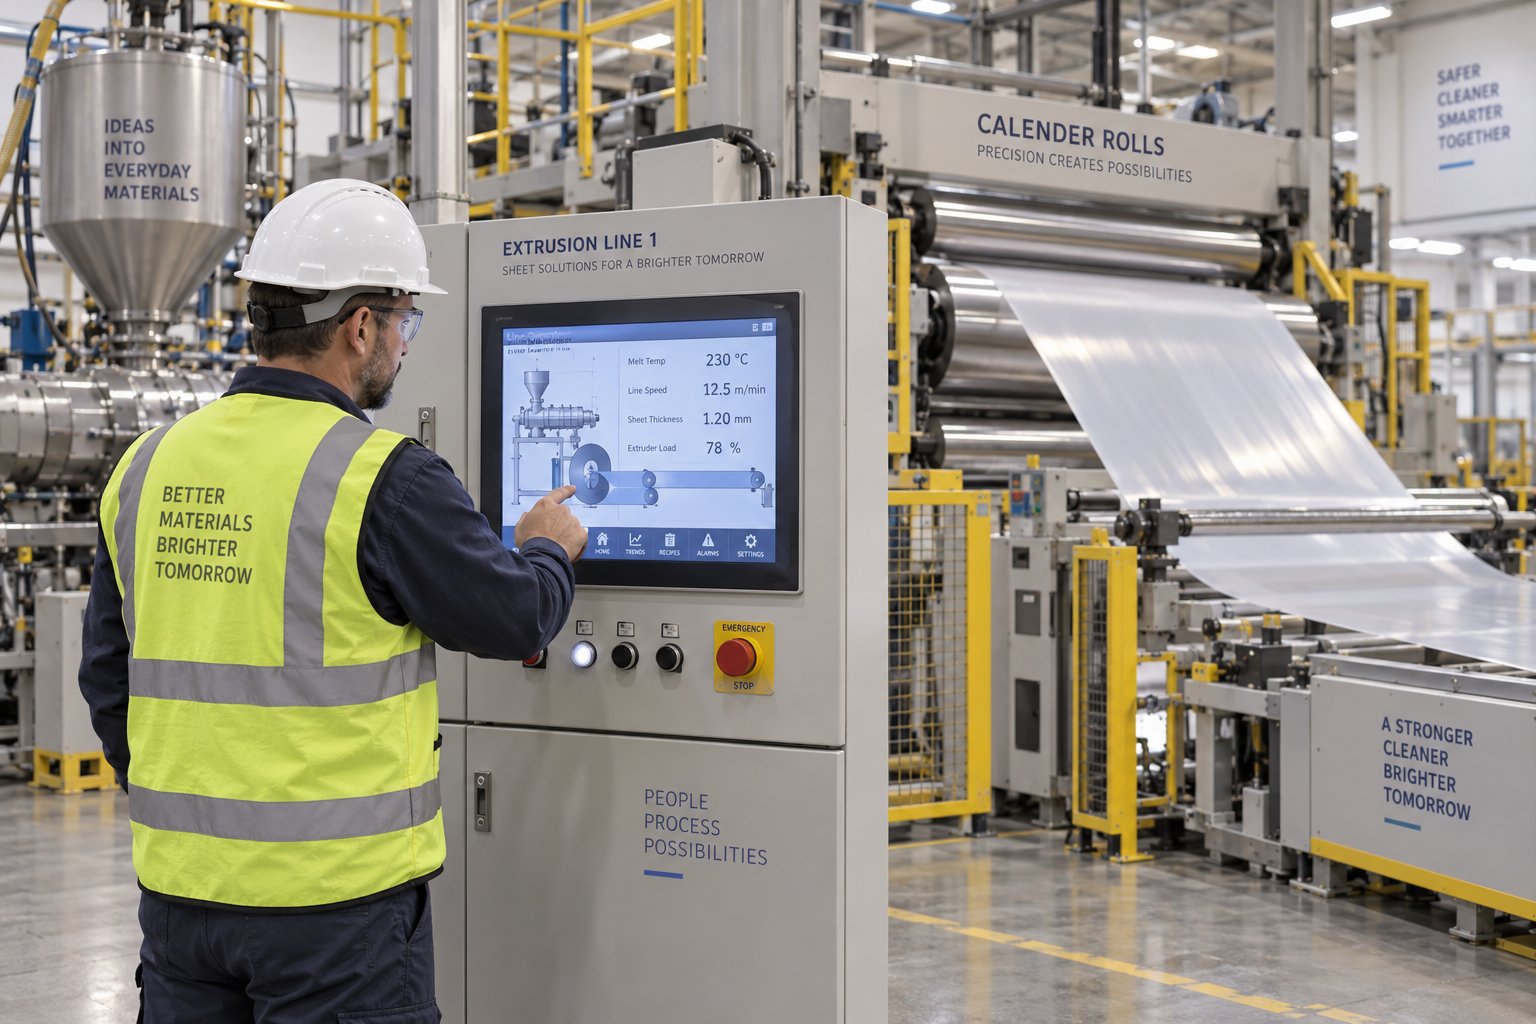
How to Choose the Right Sheet Extruder Machine
You've studied the process, compared line configurations, decoded the specifications, and mapped materials to machine requirements. You understand screw design, defect troubleshooting, and the full cost picture. The question that remains is deceptively simple: how do you take all of that knowledge and turn it into a confident purchasing decision?
Most buyers skip this step. They jump straight to requesting quotes, compare sticker prices, and pick the supplier who answers emails fastest. That approach works about as well as buying a car based solely on paint color. A structured evaluation framework — one that starts with your own production reality and works outward toward equipment and suppliers — prevents the costly mismatches that plague this industry. Here's how to build that framework from the ground up.
Defining Your Production Requirements
Before you contact a single supplier, you need to answer a set of questions that will shape every recommendation you receive. Skip any of them, and you're inviting proposals that look attractive on paper but fall apart on your production floor.
Start with material. What resin will you process as your primary product? Will you also run secondary materials — recycled content, alternative polymers, or filled compounds? As the material selection guide earlier in this article made clear, a machine optimized for PP performs very differently when asked to handle PET or PVC. If your business plan includes multiple resins, that fact must be on the table from the first conversation.
Move to dimensions. What sheet width does your end product require? What thickness range — minimum and maximum — will you need to cover? A plastic sheet extrusion line rated for 1,200 mm width cannot produce 1,800 mm sheet no matter how skillfully it's operated. Likewise, a line designed for thin-gauge thermoforming sheet at 0.3 mm may lack the calender stack rigidity and cooling capacity to produce 6 mm rigid panels.
Quantify your output target. How many kilograms per hour do you need at steady state? How many operating hours per day, and how many shifts? A single-shift operation running five days a week has fundamentally different equipment requirements than a 24/7 continuous production facility — not just in throughput, but in durability, automation level, and maintenance accessibility. A machine that performs perfectly at eight hours per day may reveal cooling system limitations, bearing fatigue, or control system instabilities when pushed to round-the-clock operation.
Finally, define your quality standard. Are your customers specifying tight thickness tolerances, high optical clarity, or food-contact compliance? Or is the application more forgiving — industrial liner sheet, for example, where visual appearance matters less than dimensional consistency? Your quality threshold directly influences how much automation, process control, and downstream measurement equipment you need.
Write these answers down before you request a single quote. They become your evaluation filter — every machine, every supplier, and every configuration gets measured against this baseline.
Evaluating Machine Builders and Component Suppliers
With production requirements defined, you're ready to evaluate who can actually deliver equipment that meets them. This evaluation splits into two parallel tracks: the line builder who integrates the complete system, and the component suppliers whose parts determine long-term performance.
For machine builders, focus on these criteria:
- Track record and installed base: How many plastic sheet extrusion lines has the builder delivered in the last five years? Can they provide references from customers running similar materials and products? An installed base of working lines is the strongest proof that a design actually performs outside the factory showroom.
- After-sales support: What happens when something breaks at 2 AM on a Saturday? Does the builder offer remote diagnostics, on-site service engineers, and a dedicated spare parts warehouse — or does support consist of an email address and a 72-hour response window? Industry buyer checklists consistently identify after-sales support as the single most overlooked evaluation factor, yet it determines whether unexpected downtime lasts hours or weeks.
- Spare parts availability: Request a recommended spare parts list and pricing before purchase. If critical wear items — heaters, thermocouples, bearings, seals — require 8-12 weeks lead time from the builder's home country, you need a local stocking strategy or a different supplier.
- Certifications: CE marking confirms compliance with European safety, machinery, and electromagnetic compatibility directives. ISO 9001 certification indicates documented quality management systems in the builder's manufacturing process. These aren't just bureaucratic checkboxes — they signal a level of engineering discipline that correlates with build quality and reliability.
The second evaluation track — component suppliers — is equally important and far less often scrutinized. The line builder assembles the system, but individual components like the screw and barrel, the flat die, the calender rolls, and the control system often come from specialized manufacturers. The quality of these components directly affects long-term performance, maintenance costs, and your ability to get replacements when wear eventually demands them.
Take the screw and barrel as a prime example. As the preceding chapter demonstrated, screw geometry drives melt quality, output consistency, and defect rates. A line builder might offer a "standard" screw that handles a broad range of materials adequately — but if your application demands optimized performance for a specific resin or requires processing recycled feedstock with high contamination variability, a purpose-engineered screw from a specialist delivers measurably better results. Suppliers like NANHAIYA, for instance, manufacture custom and replacement single screw barrels specifically engineered for sheet extrusion applications, offering designs tailored to individual polymers and processing conditions. Knowing who supplies the critical wear components — and whether replacements are available without going back to the original line builder — gives you leverage and options throughout the machine's operational life.
When evaluating any supplier, ask not just what they sell, but what they know. A manufacturer who asks detailed questions about your material, your output targets, and your quality standards before quoting a price is demonstrating the kind of application expertise that prevents mismatches. One who quotes a standard configuration without asking those questions is selling hardware, not solutions.
New vs. Used Equipment Considerations
This decision generates strong opinions on both sides, and the honest answer is that neither option is universally superior. The right choice depends on your budget, your timeline, your technical capabilities, and your tolerance for risk.
A used extruder can save 30-55% off the cost of a comparable new installation — a significant capital reduction for startups or manufacturers entering plastic sheet extrusion from an adjacent segment. Used extrusion equipment is also available with shorter lead times, typically 8-16 weeks versus 20-36 weeks for custom new lines, which matters when production capacity is needed quickly. But those savings come with conditions that every buyer must weigh honestly.
The table below compares the two paths across the factors that matter most:
| Factor | New Machine | Used Machine |
|---|---|---|
| Warranty | Full manufacturer warranty (typically 12-24 months mechanical, 6-12 months electrical/controls) | Limited or no warranty; buyer assumes repair risk from day one |
| Energy Efficiency | Current-generation servo drives, optimized heaters, and modern insulation; specific energy 0.25-0.40 kWh/kg | Older drive technology; often 10-20% higher energy consumption per kg of output |
| Customization | Fully configurable to your material, sheet dimensions, automation level, and plant layout | Fixed configuration; modifications possible but add cost and lead time |
| Lead Time | 20-36 weeks for custom-built lines | 8-16 weeks including inspection, disassembly, transport, and reinstallation |
| Price | Full market price; higher upfront investment | 30-55% below comparable new equipment |
| Technology Level | Current PLC/HMI controls, automatic die-bolt adjustment, laser thickness gauging, IoT-ready | May include discontinued control components; retrofit possible but adds cost |
| Screw and Barrel Condition | New components with full design-life expectancy | Unknown wear condition unless inspected; replacement may be needed immediately |
| Commissioning Support | Manufacturer-supervised startup with operator training and documented process recipes | Typically self-commissioned by buyer; limited or no OEM support |
| Regulatory Compliance | Meets current CE, UL, and regional safety standards | May require safety upgrades to meet current standards; pre-purchase audit recommended |
One point deserves special emphasis regardless of which path you choose: inspect the screw and barrel condition before finalizing any purchase. These are the highest-wear components on any sheet extrusion line, and their condition determines both immediate output quality and near-term maintenance cost. For a used machine, request bore diameter measurements along the barrel's full length and flight diameter checks on the screw. Wear beyond manufacturer tolerance — typically 0.1-0.2 mm on the barrel bore and a similar loss on screw flight OD — means replacement is imminent. For a new machine, verify that the screw design matches your material and confirm the barrel metallurgy suits your resin's processing characteristics. A corrosion-resistant bimetallic liner is essential for PVC; standard nitrided steel suffices for polyolefins.
Refurbished equipment from reputable sources represents a middle path — offering some warranty coverage and updated components at pricing between new and secondhand. If you explore this route, request a detailed scope of refurbishment. A cosmetic cleanup and a fresh paint job are not the same as a rebuilt gearbox, a new screw and barrel, and upgraded PLC controls. The value of refurbished equipment depends entirely on the depth and quality of the rebuild.
Your Sheet Extruder Machine Selection Checklist
Pull all of these decision threads together into a single sequential process. Follow these steps in order, and you'll arrive at a shortlist of well-matched options rather than a confusing pile of incomparable quotes:
- Document your material requirements — primary resin, secondary materials, recycled content targets, and any material changes planned for the next 3-5 years.
- Define your product specifications — sheet width, thickness range, surface finish requirements, and any regulatory or food-contact compliance needs.
- Establish output and schedule targets — kg/hr, operating hours per day, shifts per week, and annual volume goals.
- Set your quality threshold — thickness tolerance, optical clarity, gel count limits, and any customer-specific acceptance criteria.
- Determine your budget envelope — total capital available, acceptable payback period, and financing structure (purchase, lease, or loan).
- Identify candidate machine builders — evaluate track record, installed base, certifications, and after-sales support infrastructure.
- Evaluate critical component suppliers — confirm screw and barrel source, die manufacturer, and control system platform; verify replacement availability independent of the line builder.
- Request itemized quotations — insist on component-level pricing, energy consumption data, scrap rate estimates, recommended spare parts lists, and maintenance cost projections.
- Compare total cost of ownership — model 10-year costs including acquisition, energy, materials waste, maintenance, and downtime for each option.
- Conduct reference checks and site visits — speak with existing customers running similar materials and products; visit at least one operating installation if possible.
- Inspect screw and barrel condition — mandatory for used equipment; verify design suitability and metallurgy for new equipment.
- Negotiate warranty and commissioning terms — ensure startup support, operator training, and documented process parameters are included in the contract.
The best sheet extruder machine for your operation is not the one with the most impressive specifications or the lowest price tag — it's the one that matches your material, your product, your volume, and your quality standard while delivering the lowest total cost per kilogram of salable sheet.
That match doesn't happen by accident. It happens through the kind of structured evaluation outlined in this guide — starting with a clear understanding of how these machines work, what separates good configurations from poor ones, which specifications matter for your application, and how screw design, material selection, and operating economics interact to determine whether your line becomes a profit center or a source of frustration. Take the time to get the decision right. The machine you choose will be shaping sheet — and shaping your bottom line — for the next decade.
Sheet Extruder Machine FAQs
1. What materials can a sheet extruder machine process?
A sheet extruder machine can process a wide range of thermoplastics, including commodity resins like PP, PS, PE, and PVC, as well as engineering resins such as PET, ABS, PETG, and polycarbonate. Each material demands specific machine configurations — for example, PET requires a crystallization dryer and vented barrel sections, while PVC needs corrosion-resistant alloy barrels and low-shear screw designs due to its narrow thermal processing window. Recycled materials like rPET and rPP can also be processed but require robust melt filtration, strong mixing screw elements, and gravimetric feeding systems to handle batch-to-batch variability in viscosity and contamination levels.
2. How much does a sheet extruder machine cost?
A complete sheet extrusion line typically ranges from $400,000 to $3 million depending on extruder size, number of extruders (single-layer vs. co-extrusion), automation level, brand origin, and downstream equipment. Used or refurbished machines can reduce upfront cost by 30-55%, though buyers should account for potentially higher energy consumption and limited warranty coverage. Beyond the purchase price, total cost of ownership includes energy (often the largest variable cost at 0.25-0.50 kWh/kg), raw material waste, and annual maintenance at roughly 2-4% of equipment value. Requesting itemized quotations and modeling 10-year operating costs helps reveal the true investment picture.
3. What is the difference between single-layer and co-extrusion sheet lines?
A single-layer sheet line uses one extruder feeding one flat die to produce monolayer sheet — ideal for commodity packaging in PP, PS, or PE where barrier properties are not required. Co-extrusion lines use two or three extruders feeding a feedblock or multi-manifold die to create multi-layer structures such as A/B/A or A/B/C configurations. Co-extrusion enables barrier layers for oxygen or moisture protection, cost optimization by placing recycled content in hidden core layers, and independent control of surface properties on each face. The added complexity increases capital cost and operational demands but unlocks product capabilities that single-layer lines cannot achieve.
4. Why is screw design so important in sheet extrusion?
The screw is the component most directly responsible for melt quality, output consistency, and defect prevention in any sheet extruder machine. Barrier screws separate solid and molten polymer to eliminate unmelt particles, mixing screws homogenize color concentrates and additives, and vented screws extract moisture and volatiles critical for PET and recycled resin processing. Key geometric parameters — compression ratio, flight depth, and channel width — determine shear rate, melt temperature uniformity, and maximum achievable throughput. A mismatched screw causes gels, thickness variation, and temperature spikes that downstream adjustments cannot correct. Specialized manufacturers like NANHAIYA (nhyscrews.com) engineer custom single screw barrels tailored to specific resins and production targets for optimized results.
5. What are the most common defects in sheet extrusion and how do you fix them?
The most frequent sheet extrusion defects fall into three categories. Surface defects include die lines (caused by damaged die lips — fix by cleaning and polishing), surface roughness from melt fracture (reduce speed or raise die temperature), and gels from unmelt particles (upgrade filtration and verify screw mixing performance). Dimensional defects such as uneven thickness stem from non-uniform die-lip gaps or inconsistent melt temperature, correctable through automatic die-bolt adjustment and heater zone verification. Warping results from uneven cooling and is addressed by balancing calender roll temperatures. Moisture-related defects — bubbles, splay marks, and haze — occur when hygroscopic resins like PET are insufficiently dried, requiring desiccant dryers operating at -40 to -50 degree C dew point with proper residence time.
Written by
Nanhaiya Technical Team
Zhoushan Nanhaiya Plastic Machinery Co., Ltd.
The Nanhaiya technical team supports screw and barrel manufacturing projects through application review, technical communication, custom manufacturing coordination, and production and quality control.
Discuss Your Application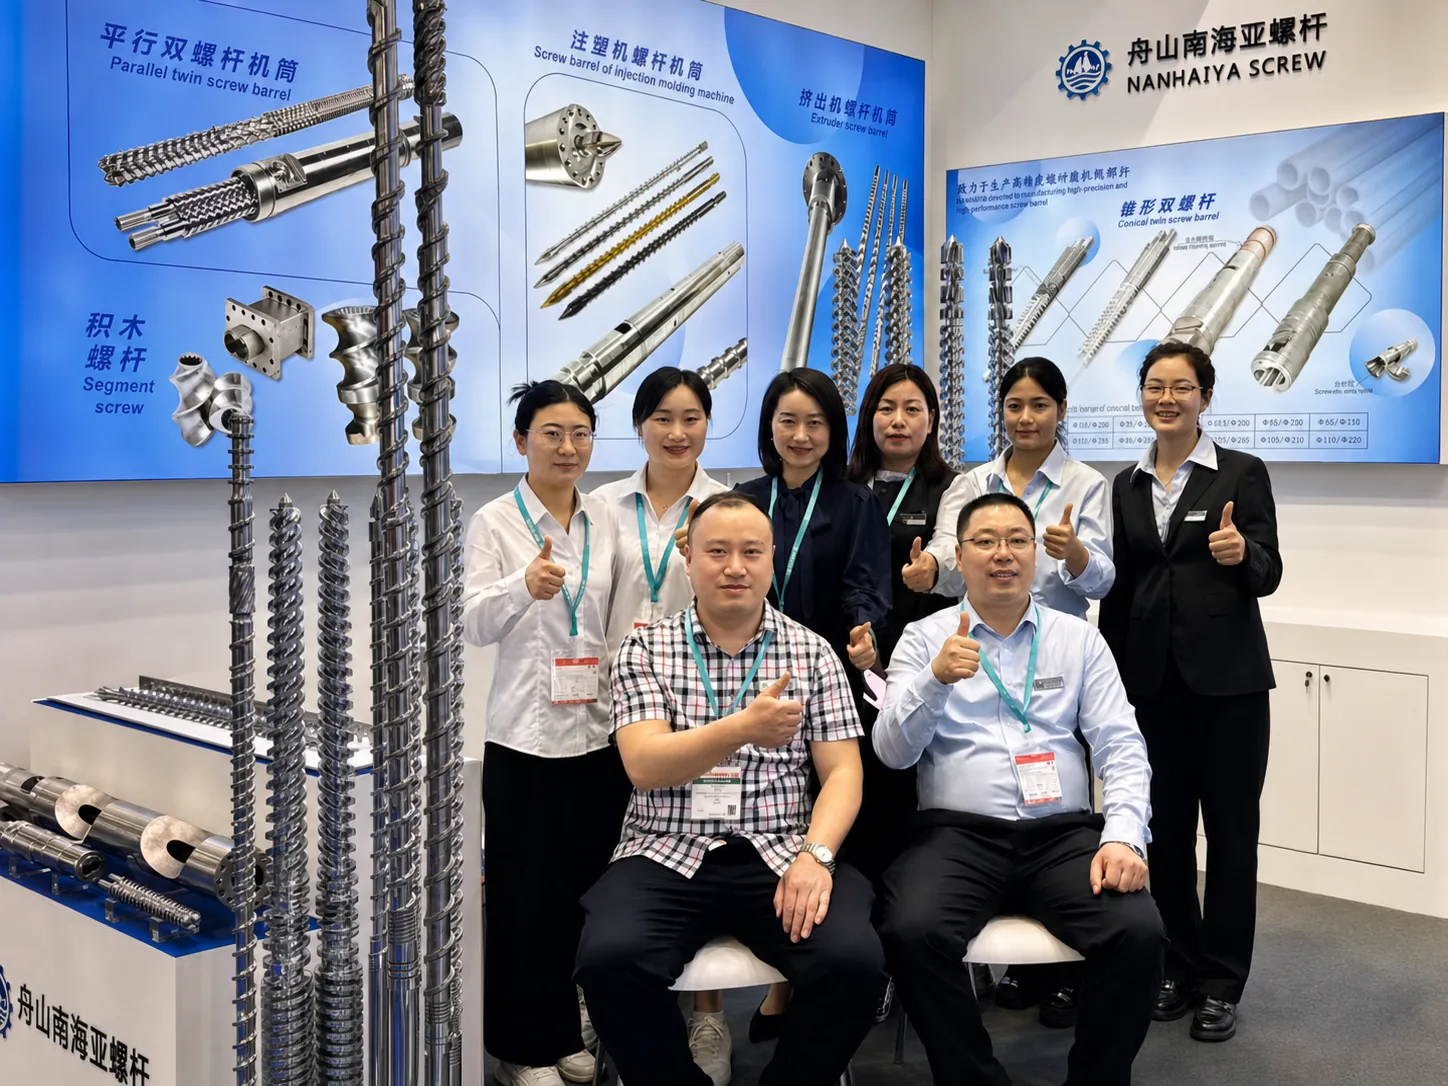
Related Articles
More insights on screw barrel technology and plastics processing.
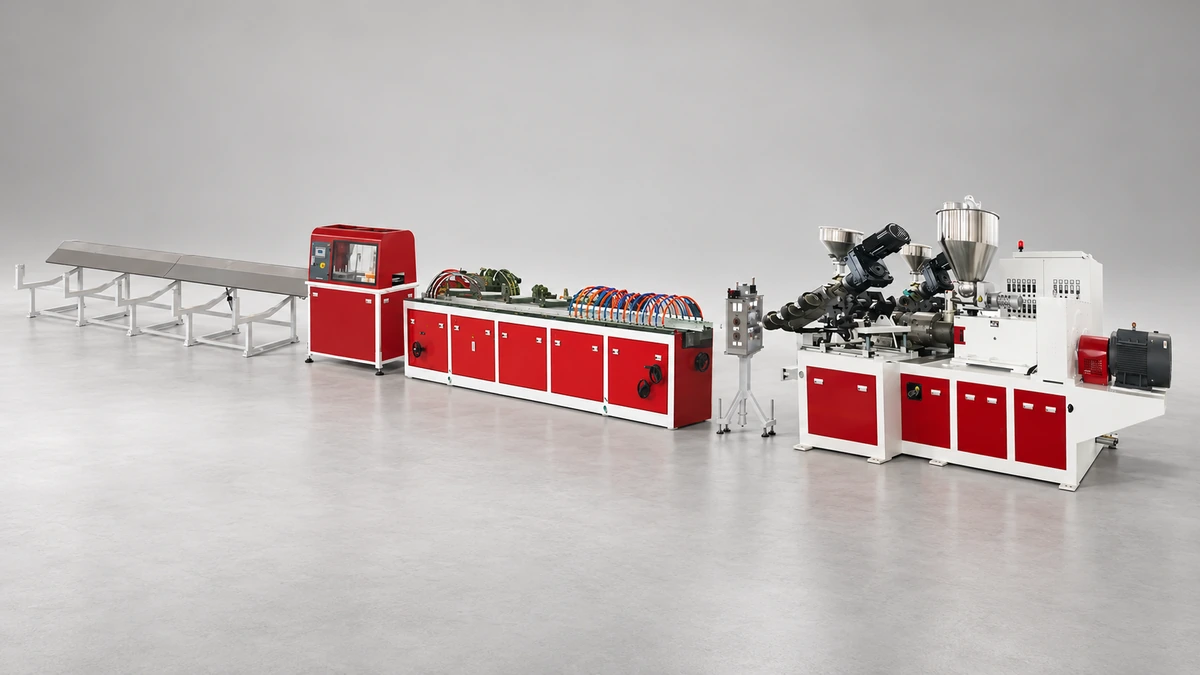
Extrusion Line Decoded: From Screw Geometry to Factory ROI
Oct 30, 2026
Learn how an extrusion line works — from screw geometry and line configurations to automation, troubleshooting, and ROI. A complete, vendor-neutral guide.
Read Article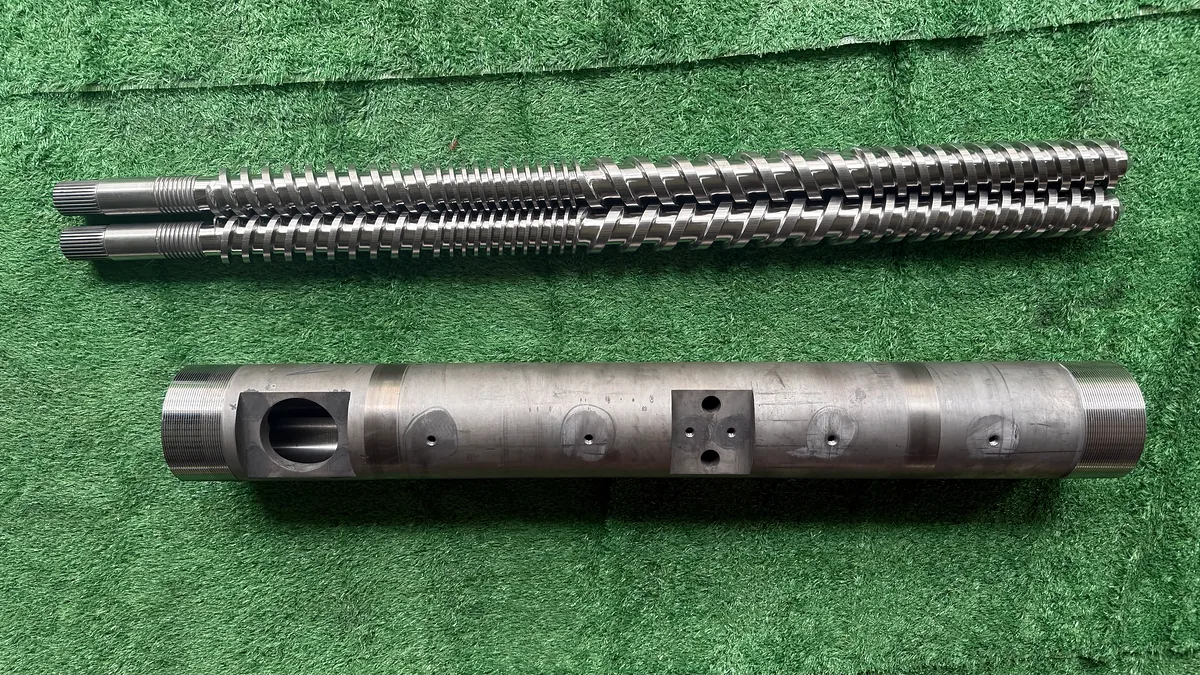
Parallel Twin Screw Extruder Parts That Fail First—And Why
Oct 29, 2026
Learn which parallel twin screw extruder parts fail first, how wear patterns reveal process issues, and how to source quality replacement screw elements and kneading blocks.
Read Article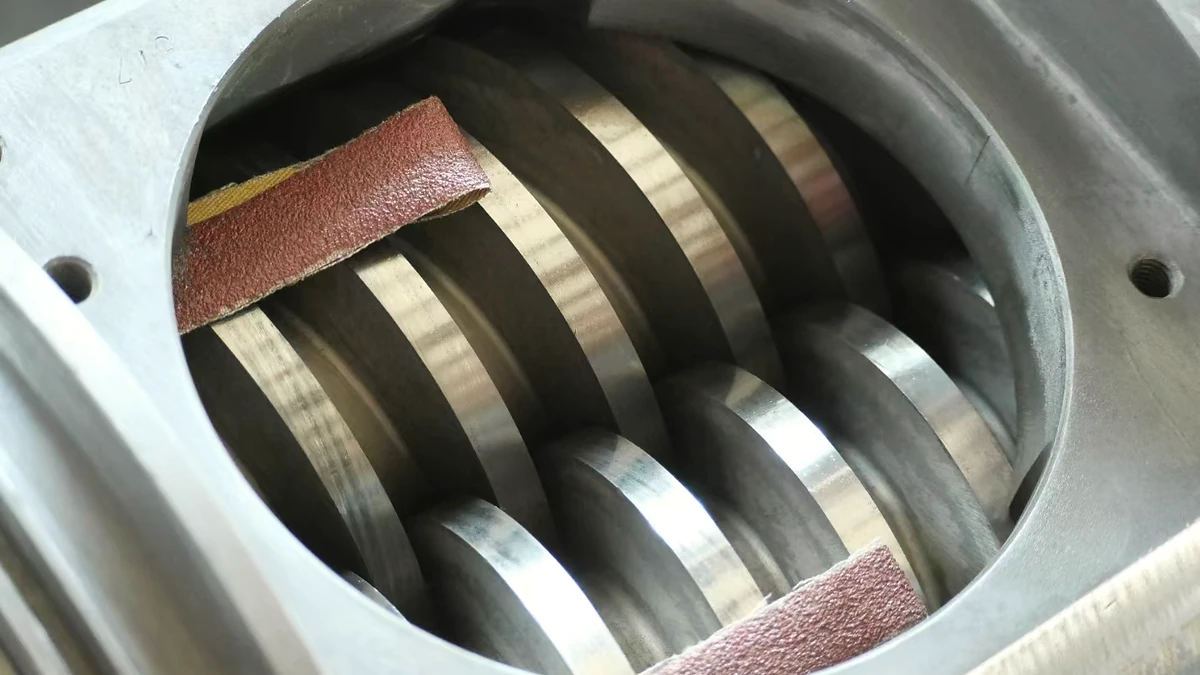
Why Your Conical Twin Screw Extruder Parts Wear Out Too Fast
Oct 28, 2026
Learn why conical twin screw extruder parts wear out fast. Full anatomy, wear analysis, material science, and maintenance checklist for PVC extrusion.
Read ArticleLooking for something else?
Search by material, symptom or product and jump straight to the relevant page.
These are navigation suggestions based on keyword matching — not a quotation, not a delivery commitment, and not a substitute for engineering review. Final specification is confirmed by our engineers against your drawings and processed material.
Need help with screw barrel selection?
Share your machine model, processed material and application. Our team can help with pricing and technical support.