

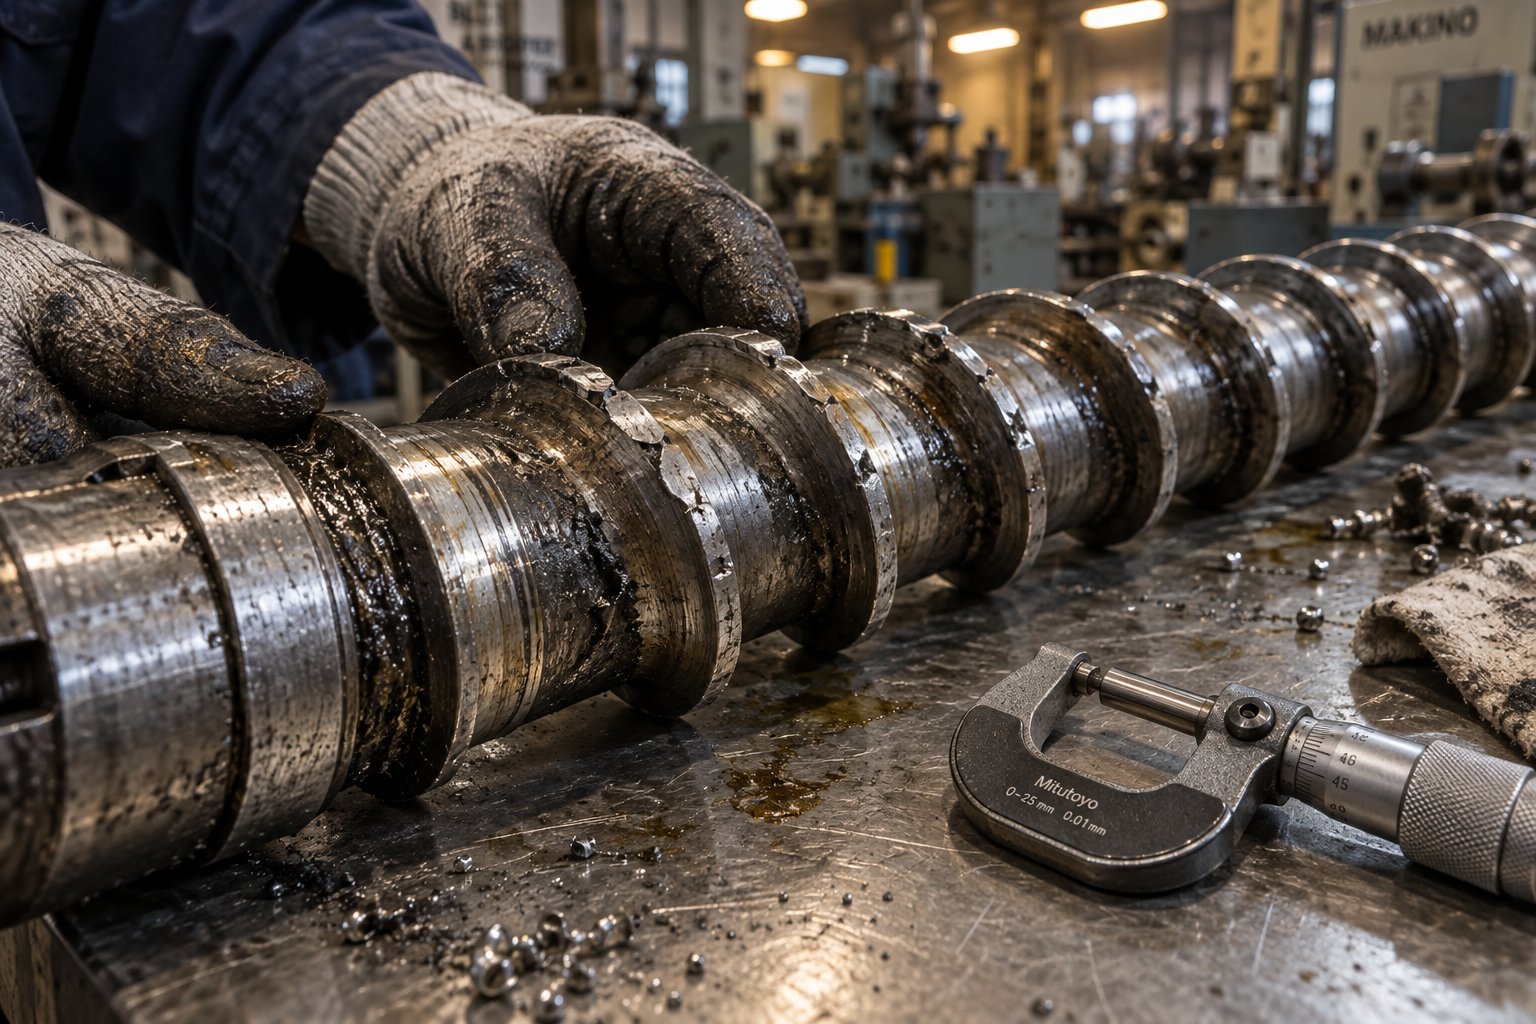
What Screw and Barrel Repair Really Means and Why It Matters
Screw and barrel repair is the process of restoring worn or damaged plasticating components — feedscrews, barrel bores, check rings, and related assemblies — to original equipment specifications through techniques such as weld buildup, hard-facing, relining, grinding, and surface treatment. It is not a stopgap measure reserved for emergencies. It is a structured maintenance discipline that, when applied correctly, returns production performance to like-new levels at a fraction of the cost of full component replacement.
Imagine your extruder gradually losing throughput over several months. Operators bump up screw speed and barrel temperatures to compensate. Energy bills climb. Scrap rates tick upward. By the time someone pulls the screw for inspection, wear may be so severe that rebuilding becomes difficult — or impossible. This scenario plays out across plastics extrusion, injection molding, and blow molding operations every day. The plasticating unit is the heart of every one of these processes, and as Glycon Corp.'s Jeff Kuhman has noted, the feedscrew and barrel should deliver maximum melting efficiency at the original clearances — often as tight as 0.001 in. per side, per inch of diameter. The moment rotation begins, wear starts eroding those tolerances.
Defining Screw and Barrel Repair Across Machine Types
This discipline spans every major category of plastics processing equipment, though each brings unique challenges:
- Single-screw extruders — the workhorses of film, sheet, profile, and pipe production — experience wear concentrated in the transition section and the final turns of the metering zone, where pressures and temperatures peak.
- Twin-screw extruders used in compounding face aggressive abrasive wear from high-filler-content formulations and demand specialized element repair or replacement strategies.
- Injection molding machines add the complexity of non-return valve (check ring) wear, which directly affects shot consistency and part quality.
- Blow molding equipment shares many of the same plasticating unit concerns but introduces additional alignment and throughput considerations.
In every case, the economic stakes are significant. Unplanned downtime halts production entirely. Rising energy consumption from compensating for worn clearances quietly drains margins. Higher scrap rates from inconsistent melt quality waste both material and labor. And as industry expert Stephen Surley has pointed out, screw wear is a gradual process that often goes unnoticed until performance is greatly reduced — by which point, the hidden costs have already accumulated substantially.
Why This Guide Exists
Search for information on injection molding screw and barrel repair or extruder screw and barrel repair and you'll find two types of content: thin blog posts that scratch the surface, or thinly veiled sales pages dressed up as education. Neither helps you make a real decision. This guide fills that gap. It is a vendor-neutral, decision-support resource that walks you through the complete lifecycle — from recognizing wear symptoms and diagnosing wear types, to selecting the right repair method and maintaining your components after they are restored.
Repairing a worn screw or barrel can restore up to original equipment performance at a fraction of replacement cost — but only when the right repair method is matched to the right type of wear.
That matching process — wear type to repair technique — is exactly what most available resources fail to deliver. The sections ahead change that, starting with the production-floor warning signs that tell you intervention is overdue.
Warning Signs Your Screw and Barrel Need Repair
Worn plasticating components rarely announce themselves with a single dramatic failure. Instead, they whisper — through slowly declining output, creeping energy costs, and subtle quality shifts that operators learn to work around. The danger is that these workarounds mask the real problem long enough for wear to cross the line from repairable to replaceable. Knowing what to look for, and when those signs cross from "monitor" to "act," is the difference between a cost-effective barrel and screw repair and an emergency purchase order.
The symptoms below are organized by category so you can cross-reference what you're observing on the production floor against the most likely root causes. Keep in mind that no single symptom proves wear on its own. Hopper bridging, a failed heater band, wet resin, or a viscosity shift in your incoming material can all mimic wear-related issues. The key is pattern recognition: when multiple symptoms from different categories appear simultaneously and persist after basic process checks, it is time to pull and inspect.
Output and Quality Indicators
The first signs you'll notice typically show up in your product and your throughput numbers. As clearance between the screw flights and the barrel bore increases, melt leaks backward over the flights instead of being pushed forward. This backflow — sometimes called "leakage flow" — directly reduces pumping efficiency and process stability.
Here is what that looks like in practice:
- Declining throughput at the same screw speed — If your kg/h per RPM ratio is dropping over time, the screw is losing its ability to convey and pressurize material efficiently. This is one of the most reliable early indicators.
- Inconsistent melt temperature — Worn clearances disrupt the balance between shear heating and conductive heating. You may see wider melt temperature swings shot to shot or across the extrudate cross-section.
- Poor color mixing or additive dispersion — When the metering section loses its pumping seal, mixing quality degrades. Color streaks, uneven pigment distribution, and inconsistent additive blending all point to a loss of shear and pressure uniformity.
- Surface defects on molded or extruded parts — Roughness, flow lines, burn marks from degraded material, or dimensional inconsistencies can all trace back to an unstable melt stream caused by excessive wear.
- Short shots in injection molding — When the non-return valve (check ring) is worn, material slips past it during the injection phase. The machine loses its cushion and its ability to maintain packing pressure, resulting in incompletely filled cavities. As industry processing experts have documented, shot-to-shot variation is an early indicator of a leaking check ring — and what seems negligible at first will worsen over a relatively short time.
Mechanical and Energy Warning Signs
Sometimes the machine itself tells you something is wrong before the product does. Pay close attention to these operational signals:
- Increased energy consumption for the same output — Tracking your kg/kWh ratio over time is one of the simplest and most underused diagnostic tools. As wear progresses, operators compensate with higher screw speeds and elevated temperatures, both of which consume more energy to produce the same volume of product.
- Rising barrel temperature setpoints needed to maintain melt quality — If you find yourself steadily increasing zone temperatures to achieve adequate melting, the screw may no longer be generating sufficient shear heat due to enlarged clearances. The barrel heaters are picking up the slack — inefficiently.
- Unusual noises — Metallic scraping, grinding, or knocking sounds during operation can indicate metal-to-metal contact between the screw and barrel. This signals either severe wear, misalignment, or a bent screw — all of which demand immediate inspection before the damage escalates to the barrel, gearbox, or drive system.
- Material leakage past the non-return valve — In injection molding, a worn check ring allows melt to slip backward during the injection stroke. You'll see the screw creep forward beyond its normal cushion position, and packing pressure becomes difficult to control consistently.
Any of these mechanical signs appearing alongside the output and quality issues described above strengthens the case for pulling components and performing a dimensional inspection. Industry guidelines emphasize that conditions like metal fragments in the purge, grinding noises, or sudden current spikes warrant stopping and investigating immediately rather than waiting for a planned inspection window.
Measurable Wear Tolerance Thresholds
Symptoms and observations get you to the inspection stage. Measurements tell you whether barrel and screw repair is needed — or whether you can continue monitoring. Two critical dimensions drive the decision:
- Screw flight outside diameter (OD) — Measured at defined axial positions using a micrometer. As abrasive or adhesive wear removes material from the flight tips, the OD shrinks.
- Barrel bore inside diameter (ID) — Measured with a calibrated bore gauge at multiple positions along the barrel and at several angular orientations to detect localized enlargement and ovality.
The critical calculation is straightforward: diametral clearance = measured barrel ID minus measured screw OD. For example, a measured barrel ID of 100.30 mm and a screw OD of 99.80 mm yields a diametral clearance of 0.50 mm and a radial clearance of 0.25 mm. This example illustrates the math — it is not a universal pass/fail threshold.
There is no single "replace at X clearance" number that applies across all machines. Allowable clearance depends on barrel diameter, screw geometry, polymer viscosity, operating pressure, surface coatings, and product tolerance requirements. A clearance that is perfectly acceptable on a large, low-pressure pipe extrusion line may be completely unacceptable on a small precision medical-device molder. The OEM specification for your specific machine and screw design is always the authoritative reference. When OEM data is unavailable, a qualified repair specialist can evaluate measurements against established engineering principles for your application.
The table below consolidates the warning signs discussed in this section into a quick-reference diagnostic tool. Use it alongside your production data to build the case for inspection — or to confirm that your components still have life left in them.
| Category | Symptom | Likely Cause | Severity |
|---|---|---|---|
| Output | Declining kg/h at constant screw RPM | Enlarged flight-to-bore clearance reducing pumping efficiency | Moderate to High |
| Output | Short shots or inconsistent shot weight | Worn non-return valve (check ring) allowing melt backflow | High |
| Quality | Poor color mixing or additive dispersion | Loss of shear and pressure uniformity in metering section | Moderate |
| Quality | Surface defects (flow lines, roughness, burn marks) | Unstable melt stream from excessive clearance or degraded material | Moderate to High |
| Mechanical | Metallic grinding or scraping noises | Screw-to-barrel contact from misalignment, bending, or severe wear | Critical |
| Mechanical | Loss of injection cushion (injection molding) | Check ring wear allowing material slip during injection stroke | High |
| Energy | Rising kWh per kg of output | Compensating for wear with higher speeds and temperatures | Moderate |
| Energy | Barrel zone temperatures trending upward over time | Reduced shear heating from worn screw flights; heaters compensating | Moderate |
| Visual | Black specks or degraded material in purge or product | Material hang-up in worn check ring area or scored barrel surfaces | Moderate to High |
| Visual | Visible scoring or galling on pulled screw flights | Metal-to-metal contact, contamination, or abrasive filler damage | High |
A single "moderate" symptom might justify shortening your next inspection interval. Multiple "high" or "critical" signals appearing together — especially when basic process variables have been ruled out — point toward a component pull and dimensional assessment. That assessment, in turn, hinges on understanding what type of wear caused the damage in the first place, because the wear mechanism dictates the repair approach.
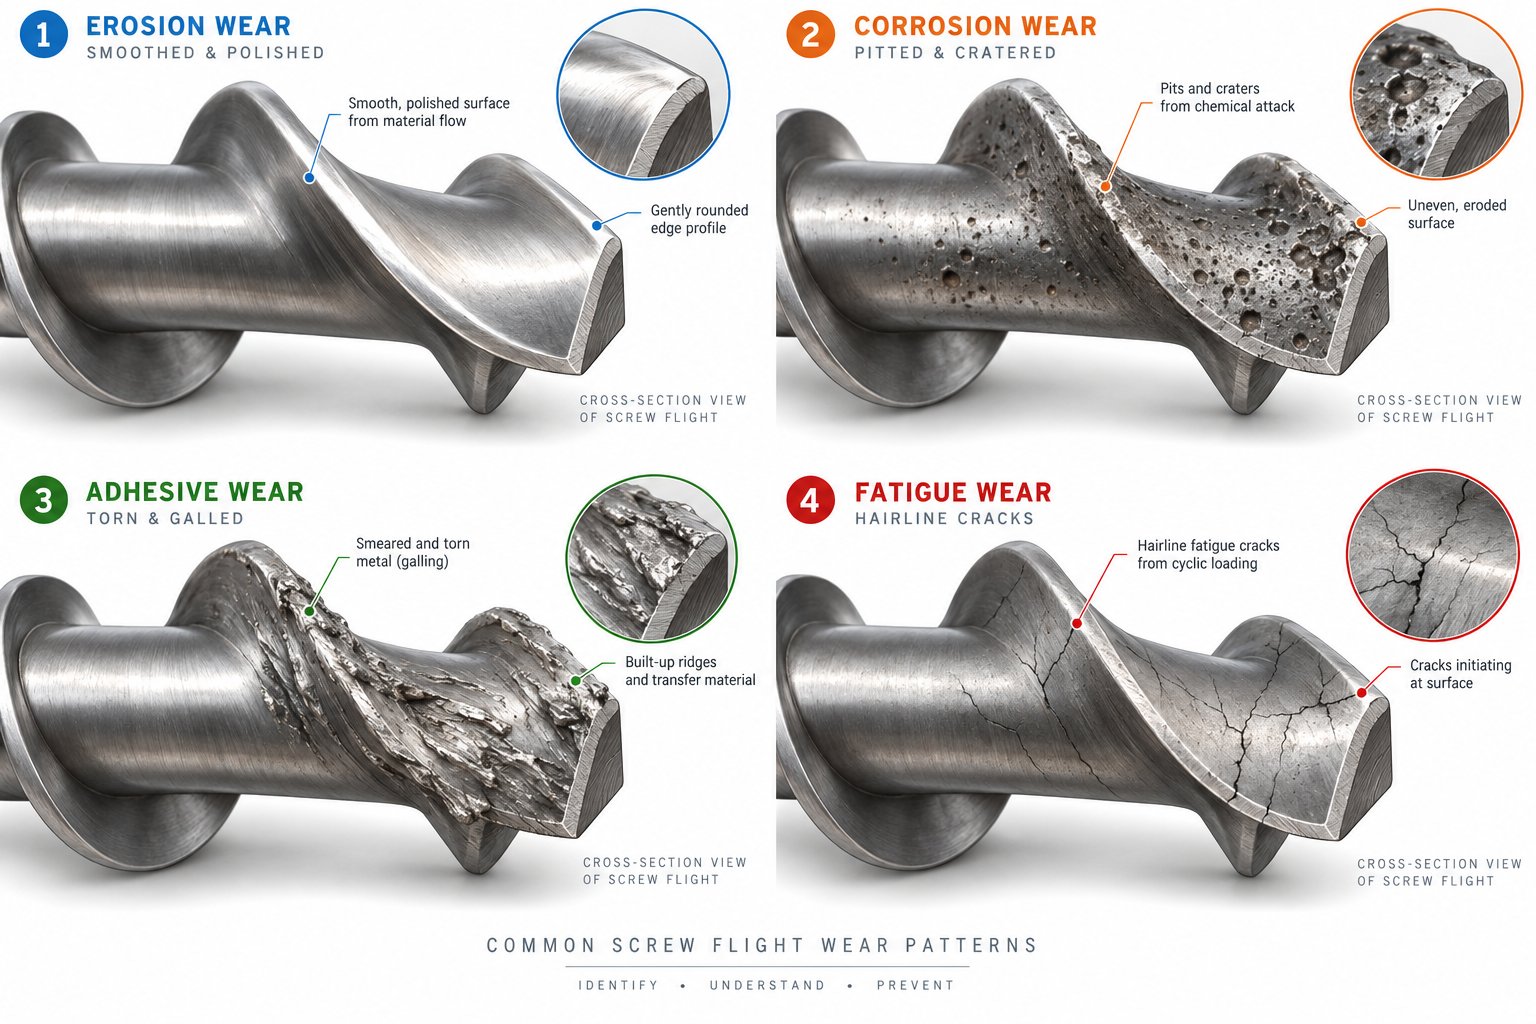
Understanding the Four Types of Screw and Barrel Wear
Pulling a worn screw from a barrel is like looking at the aftermath of a crime scene. The damage is obvious, but the cause is not always what you'd expect. A polished, rounded flight tip tells a very different story than a flight with ragged, torn edges or a pitted, cratered surface. Each pattern points to a specific wear mechanism — and each mechanism demands a different repair strategy. Choosing the wrong fix for the wrong wear type is one of the most expensive mistakes a processor can make.
What follows is a practical classification framework you can use to categorize the wear you find on your own components. Whether you're managing screw and barrel repair in Lafayette, LA, or troubleshooting a production line in Oklahoma City, OK, or sourcing rebuild services in Baton Rouge, LA, the physics of wear don't change. Four mechanisms account for virtually all plasticating component degradation: abrasive wear, corrosive wear, adhesive wear, and fatigue wear. Each one leaves a distinct fingerprint — and each one has identifiable root causes you can address.
Abrasive Wear From Filled and Reinforced Resins
This is the most common form of damage in plastics processing equipment. Abrasive wear occurs when hard particles — glass fibers, mineral fillers, metal oxides, calcium carbonate, or contaminants in recycled feedstock — physically erode the metal surfaces they contact. The result is a gradual removal of material from screw flight lands, barrel bore walls, and check-ring sealing surfaces.
You'll recognize abrasive wear by its characteristic appearance. As extrusion expert Jim Frankland has described, the worn flight surface will appear almost polished, and the particles tend to round the flight edges. This happens because abrasive fillers attack the softer matrix material that holds the harder carbides or borides in place, wearing it away through millions of microscopic scratches invisible to the naked eye. The damage is most pronounced in the feed and compression sections, where loose fillers have not yet been fully incorporated into the melt.
The severity of abrasive wear depends on several interacting factors. Glycon Corp. has documented that some of the most aggressive fillers can reduce screw and barrel useful life by 50% or more. Harder particles cause faster erosion, higher filler loadings increase contact frequency, and elevated screw speeds accelerate the rate of material removal.
Common root causes of abrasive wear include:
- Material selection factors — Processing glass-fiber-reinforced resins (particularly long-fiber grades), mineral-filled compounds, or post-consumer recyclate containing grit, sand, or metallic contaminants
- Processing parameters — Running excessive screw speeds that increase the velocity and frequency of particle contact with metal surfaces, or using inadequate backpressure that prevents proper filler wetting
- Contamination — Foreign materials entering through the hopper, including metal shavings, loose bolts, grinder blade fragments, or degraded hardfacing that has delaminated from upstream flights
- Inadequate component metallurgy — Using standard tool steel screws or unlined barrels for filled resin applications instead of specifying wear-resistant hardfacing alloys and bimetallic barrel liners designed for abrasive service
Corrosive Wear From Chemical Attack
Corrosive wear is fundamentally different from abrasion. Rather than physically scraping material away, it destroys metal surfaces through chemical reaction. The processing environment inside a barrel can be surprisingly aggressive: temperatures exceeding 400 degrees Fahrenheit, pressures in the thousands of psi, and — depending on the polymer — an atmosphere rich in hydrochloric acid, hydrofluoric acid, or other highly reactive byproducts.
The visual signature is distinct from abrasion. Instead of polished surfaces, you'll see pitting, cratering, and a roughened, dimpled texture on barrel walls and screw surfaces. Xtrutech notes that corrosion makes the surface of the metal appear dimpled or pitted — a clear departure from the smooth, rounded profile left by abrasive particles.
What makes corrosive wear particularly insidious is its synergy with mechanical wear. The chemical attack weakens and roughens the surface, which then becomes far more vulnerable to abrasion and adhesive damage. This combination — often called corrosion-erosion — accelerates total wear far beyond what either mechanism would produce alone.
Common root causes of corrosive wear include:
- Chemically aggressive resins — PVC releases hydrochloric acid during processing; fluoropolymers such as PTFE and FEP can generate hydrofluoric acid; certain flame-retardant compounds release corrosive halogenated gases at elevated temperatures
- Moisture-related degradation — Hygroscopic polymers like nylon, PET, and polycarbonate that are insufficiently dried undergo hydrolysis during processing, releasing acidic byproducts that attack metal surfaces from within the melt
- Processing temperature errors — Overheating resin beyond its thermal stability window accelerates chemical decomposition and increases the concentration of corrosive gases in contact with barrel and screw surfaces
- Extended residence time — Material left sitting at processing temperature during prolonged shutdowns or in oversized barrels degrades and generates corrosive compounds that concentrate in stagnant zones
- Condensation on cold barrel sections — Moisture forming on the interior surfaces of chilled barrel zones, particularly during startup or in humid environments, can create localized corrosion even with non-corrosive resins
Adhesive and Fatigue Wear Mechanisms
The first two wear types result from the material being processed attacking the machine. Adhesive wear flips the equation — it is the machine attacking itself. This mechanism occurs when the screw flight lands and the barrel bore come into direct metal-to-metal contact. The extremely high localized stresses at the point of contact cause microscopic welding between the two surfaces, followed immediately by fracture as the screw continues rotating. The telltale evidence is unmistakable: burrs or "rolling over" of the trailing edge of the flight land, scored or galled barrel bore surfaces, and in severe cases, hardfacing material that has been torn completely off the flight tips.
Frankland's analysis of screw wear patterns is particularly instructive here. He describes how unbalanced high-pressure areas in the screw can force the screw against the barrel with enormous force, creating instantaneous localized pressures exceeding 10,000 psi. The result is a lip of deformed hardfacing extending off the back of the flight — ragged and sharp — a hallmark of what the industry calls "solids wedging."
Common root causes of adhesive wear include:
- Machine misalignment — A barrel that does not remain straight when heated forces the screw to bend continuously as it rotates, pressing flight tips into the barrel wall along its entire length. Frankland points out that a 200-inch screw can grow by nearly half an inch at operating temperature. If the barrel cannot expand in a straight line, severe flight wear develops almost instantly.
- Poor screw design — An overly aggressive compression ratio can cause the channel to plug with unmelted solids, creating extreme localized pressure that forces the screw off-center and into the barrel wall. This condition, known as solids wedging, often occurs when a screw designed for one resin is run on a different polymer with a different melting rate.
- Improper startup procedures — Starting screw rotation before the barrel has reached sufficient temperature to form a melt film between the flights and the bore eliminates the lubrication layer that normally prevents direct contact
- Incompatible metallurgy — Softer screw materials paired with harder barrel linings increase the tendency to gall; careful matching of flight hardfacing alloys to barrel lining composition is essential for compatible operation
- Insufficient screw support — In twin-screw extruders, the screws are rigidly fixed at the gearbox end and supported by the molten resin during production. Running screws at high speed between production batches, when little or no melt is present for support, promotes contact and accelerates adhesive wear
Fatigue wear operates on a different timescale. Rather than immediate surface damage, it is the result of repeated cyclic loading — the millions of pressure fluctuations and thermal cycles a screw endures over its service life. Each cycle applies and releases stress at points of geometric discontinuity: the roots of flight channels, the transition from one diameter to another, and high-pressure zones in the compression and metering sections. Over time, microscopic cracks nucleate at these stress concentrations and propagate through the metal. Fatigue damage is dangerous precisely because it is invisible during routine dimensional inspection until the cracks reach a critical length and the component fails suddenly.
Root causes of fatigue wear include:
- High-pressure cycling — Injection molding screws experience severe pressure swings between injection, packing, and recovery phases, with each cycle contributing to cumulative fatigue damage
- Thermal cycling — Repeated startup-shutdown cycles subject the screw to thermal expansion and contraction stresses that accelerate crack initiation
- Pre-existing stress risers — Machining marks, weld defects, or surface pitting from corrosion act as nucleation points for fatigue cracks
- Operational overload — Running sustained high backpressure or processing high-viscosity materials at extreme screw speeds imposes cyclic loads beyond the design fatigue limit
What makes real-world diagnosis challenging is that these four wear types rarely act in isolation. A glass-filled PVC compound, for example, subjects components to simultaneous abrasive and corrosive attack. A misaligned extruder processing recycled material with metal contamination experiences adhesive wear compounded by abrasion. The root-cause analysis framework above — covering material selection, processing parameters, machine alignment, and contamination — gives you a systematic way to trace each damage pattern back to its origin, regardless of how many mechanisms are at play.
Categorizing the wear is only the diagnostic half of the equation. The real value comes in translating each wear type into a specific, proven repair technique — a mapping that determines whether your components get hard-faced, relined, nitrided, or replaced entirely.
Matching Each Wear Type to the Right Repair Technique
Diagnosing the wear mechanism is half the battle. The other half — the half most resources skip entirely — is translating that diagnosis into a specific, proven repair method. Pick the wrong technique and you'll spend money restoring a screw or barrel to dimensions that deteriorate again within weeks. Match the repair to the wear type, and you get a component that performs at or near original specifications for a full service cycle. Whether you're sourcing screw and barrel repair in Amarillo, TX, or coordinating a rebuild from Albuquerque, NM, or Austin, TX, this mapping applies universally because it's rooted in metallurgy and materials science, not geography.
Think of this section as the bridge between the diagnostic framework above and the specific alloys and coatings discussed in the next section. Here, you'll learn which repair process suits each damage pattern — and just as importantly, which combinations to avoid.
Repair Methods for Abrasive Wear
Abrasive wear strips material from flight lands and barrel bores through physical erosion. Restoring these surfaces demands repair methods that rebuild lost dimensions with materials harder than the abrasive particles causing the damage in the first place. Three primary approaches handle the job:
- Hard-facing and weld overlay — This is the workhorse repair for flight land restoration. Tungsten carbide composite overlays and Stellite (cobalt-based) alloys are deposited directly onto the worn flight tips through welding processes, rebuilding the outer diameter to specification. Tungsten carbide composites deliver extreme hardness for glass-fiber-reinforced and heavily filled applications, while Stellite alloys offer a strong combination of abrasion resistance and moderate corrosion protection. The welded material is then precision-ground to final tolerances.
- Barrel relining with bimetallic liners — When the barrel bore has enlarged beyond its acceptable tolerance range, relining replaces the worn interior surface with a centrifugally cast bimetallic liner — typically iron-boron or nickel-based alloys engineered specifically for abrasion resistance. This restores the bore to original dimensions and often exceeds the wear resistance of the original barrel lining.
- Hard chrome plating — For moderate abrasive wear cases where flight lands have lost material but the base metal remains structurally sound, hard chrome plating can rebuild surfaces economically. Chrome provides a smooth, hard finish that resists abrasion and reduces friction. However, it has limitations: as metallurgical engineers have noted, chromium has a different coefficient of thermal expansion than the base steel and may exfoliate from the surface at elevated temperatures, making it less suitable for high-temperature applications or screws processing engineering thermoplastics near their thermal limits.
The key decision point is severity. Light, uniform abrasive wear across the flight lands? Chrome plating may be sufficient and cost-effective. Heavy erosion concentrated in the compression and metering zones from glass-filled nylon or mineral-loaded compounds? Hard-facing with tungsten carbide composites and pairing it with a bimetallic barrel reline is the more durable path.
Repair Methods for Corrosive Wear
Corrosive damage requires a fundamentally different repair philosophy. Hardness alone won't solve the problem — you need chemical resistance. The alloys and surface treatments selected for corrosive wear repair must withstand the specific acids and reactive gases generated by the polymers being processed.
- Corrosion-resistant weld overlays — Nickel-based alloys such as Colmonoy are the standard choice for rebuilding screw flights damaged by corrosive resins like PVC, fluoropolymers, and flame-retardant compounds. These alloys resist chemical attack from hydrochloric acid, hydrofluoric acid, and halogenated decomposition gases far better than cobalt-based or iron-based alternatives. They also offer reasonable abrasion resistance, making them practical for the common scenario where corrosion and abrasion occur together.
- Nitriding for surface hardening — Ion/plasma nitriding and gas nitriding offer a distinct advantage for corrosive environments: they harden the surface through nitrogen diffusion without adding a separate coating layer, which means there is no interface that can delaminate or spall. The nitrided layer contains chromium nitrides (CrN) that are thermally very stable and can endure the elevated temperatures used in extruding and forming plastics. For screws made from materials like H-13 or Nit135M steel, ion nitriding can produce surface hardness exceeding 70 HRc equivalent — rivaling the hardness of dedicated hardfacing alloys while maintaining excellent dimensional stability since the process adds no measurable thickness to the part.
- Alloy spray welding — Spray welding deposits corrosion-resistant alloy compositions onto worn surfaces through a thermal spray process. The alloy composition can be tailored to the specific chemical environment — nickel-chromium-boron formulations for general corrosion resistance, or more specialized compositions for extreme chemical exposure. This method is particularly versatile for rebuilding both screws and barrel bores with customized metallurgy.
One critical nuance: nitriding is a surface treatment, not a dimensional rebuild. It hardens existing surfaces to prevent future corrosive attack, but it cannot restore material that has already been lost. For screws with significant dimensional loss from corrosion, the typical approach combines weld buildup with a corrosion-resistant alloy first, followed by nitriding of the rebuilt surface for additional protection.
Addressing Adhesive and Fatigue Damage
Adhesive and fatigue wear present structural challenges that go beyond surface restoration. When metal has been torn, galled, or cracked, the repair must address both geometry and mechanical integrity.
- Straightening — A bent screw caused by misalignment or solids wedging must be straightened before any surface repair is attempted. This is typically done through controlled mechanical or hydraulic straightening, followed by careful runout measurement to verify the screw meets the original straightness specification. Attempting to hard-face or re-chrome a bent screw is a waste of money — the root cause will simply drive the new coating into the barrel wall again.
- Stress-relief heat treatment — Fatigue cracks develop from accumulated cyclic stress. Before repairing cracks, and after any major weld buildup, stress-relief heat treatment reduces residual stresses trapped in the component. This step is essential to prevent the repaired area from cracking again under the same operating loads.
- Crack repair via PTA welding — Plasma Transferred Arc (PTA) welding is particularly well-suited for repairing cracked or severely galled flight surfaces. Unlike conventional welding, PTA welding creates a metallurgical bond between the deposited alloy and the base material — the alloy layer becomes an integral part of the component rather than simply adhering to the surface. This bond withstands the demanding cyclic loads that caused the original fatigue failure. Different alloy systems can be selected based on the operating environment: cobalt-based alloys for corrosion-prone applications, nickel-chromium systems for balanced wear and corrosion resistance, or nickel-chromium-tungsten formulations for enhanced abrasion resistance in reinforced plastic processing.
- OD and ID grinding to restore dimensional accuracy — After weld buildup, hard-facing, or any thermal repair process, the component must be precision-ground to final dimensions. For screws, this means OD grinding of flight lands to restore proper clearance. For barrels, ID honing or grinding brings the bore back to specification. This step is non-negotiable — even the best weld overlay is useless if the final dimensions are out of tolerance.
Some specialized repair shops also employ proprietary methods. The Electro Metal Treating Process, for example, uses electrolytic deposition to build up worn areas on screws and barrels with specific metals, offering an alternative path for dimensional restoration in certain applications. While less widely discussed than conventional welding and hard-facing approaches, these emerging and specialized processes continue to expand the toolkit available for addressing complex wear patterns — particularly where multiple damage mechanisms have combined to create both surface degradation and structural compromise.
The table below consolidates this entire wear-to-repair mapping into a single reference. Use it alongside your diagnostic findings from the previous section to narrow your options before engaging a repair provider.
| Wear Type | Recommended Repair Techniques | Suitable Alloys / Coatings | Most Common Machine Applications |
|---|---|---|---|
| Abrasive | Hard-facing weld overlay; barrel relining with bimetallic liner; hard chrome plating (moderate cases) | Tungsten carbide composites; Stellite (cobalt-based); iron-boron bimetallic liners; hard chrome | Single-screw extruders processing glass-filled or mineral-filled resins; injection molding with reinforced engineering plastics; twin-screw compounding extruders |
| Corrosive | Corrosion-resistant weld overlay; ion/plasma or gas nitriding; alloy spray welding | Colmonoy (nickel-based); nickel-chromium-boron spray alloys; CrN nitrided layers on H-13 or Nit135M substrates | Extruders processing PVC, fluoropolymers, or flame-retardant compounds; injection molding with hygroscopic resins (nylon, PET, PC) |
| Adhesive | Straightening; PTA weld repair; OD/ID grinding; metallurgy re-matching (flight hardfacing to barrel liner) | Cobalt-based PTA alloys; nickel-chromium PTA alloys; compatible hardfacing selected to avoid galling with barrel liner | Single-screw extruders with alignment issues; injection molding machines after improper cold starts; any machine with mismatched screw/barrel metallurgy |
| Fatigue | Stress-relief heat treatment; PTA weld crack repair; non-destructive testing (dye penetrant / magnetic particle) to verify repair integrity; OD grinding | Nickel-chromium-tungsten PTA alloys for high-stress zones; base material matched weld rod for structural crack filling | Injection molding screws subject to high-pressure cycling; high-throughput extrusion lines with extended service intervals; blow molding screws under sustained high backpressure |
A few practical notes on reading this table. First, real-world wear is rarely a single type — a glass-filled PVC application, for instance, demands a repair strategy that addresses both abrasive and corrosive mechanisms simultaneously, which is why a nickel-based alloy like Colmonoy with added carbide content often outperforms a pure abrasion-focused tungsten carbide overlay in such environments. Second, the machine type column reflects where each repair is most frequently applied, not a hard limitation. PTA welding, for example, is equally effective on extrusion and injection molding screws.
Choosing between these techniques is not purely a metallurgical decision, though. The alloys and coatings themselves — their hardness, chemical resistance, thermal stability, and cost — play a decisive role in whether a repair delivers six months of service life or six years. Understanding what each material actually does at the molecular level turns a good repair decision into a great one.
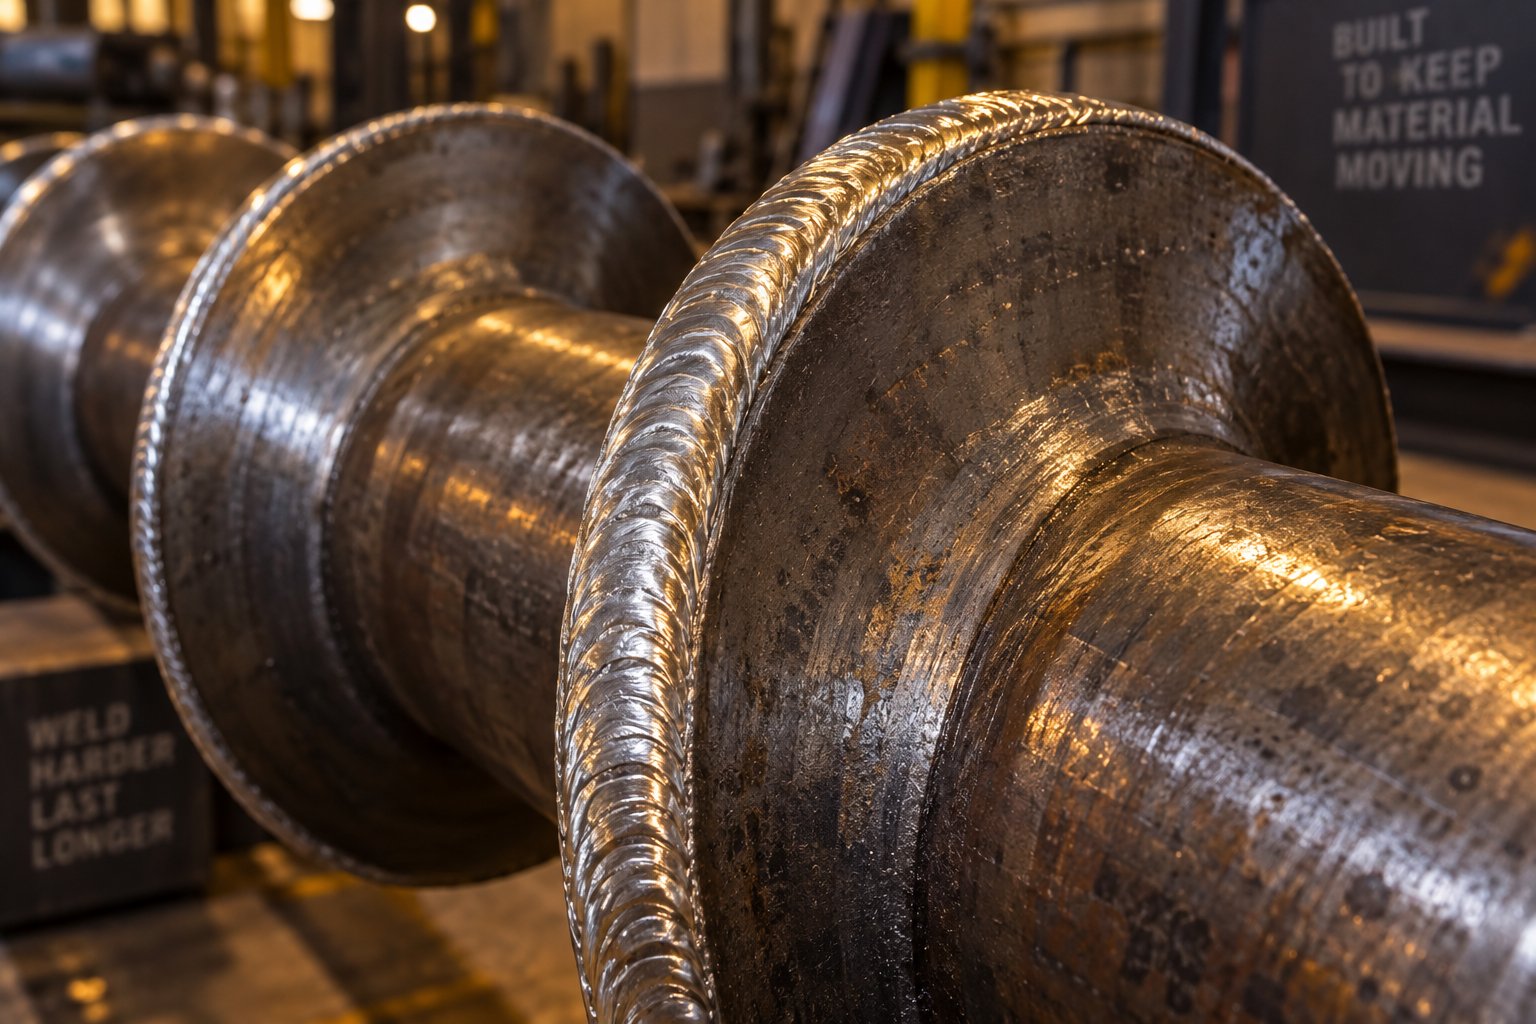
The Material Science Behind Screw and Barrel Repair Coatings and Alloys
Alloy names like Stellite, Colmonoy, and tungsten carbide get dropped into repair conversations constantly — yet almost nobody explains what these materials actually do, why one outperforms another in a given application, or how to choose between them. That gap turns a material selection decision into a guessing game. Whether you're evaluating screw and barrel repair in Dallas, TX, or comparing quotes from shops in Fort Worth, TX, or Houston, TX, you'll encounter these terms on every proposal. Knowing what's behind them puts you in control of the conversation.
Hard-Facing Alloys and Their Properties
Hard-facing alloys are deposited onto worn screw flight lands and other high-wear surfaces to rebuild dimensions and add a protective layer that outlasts the original base metal. Three families dominate the field, each engineered for a different balance of abrasion resistance, corrosion resistance, and cost.
Stellite (cobalt-based alloys) — Stellite alloys derive their hardness from a cobalt-chromium-tungsten matrix rich in complex carbides. They typically deliver surface hardness in the range of 38 to 55 HRc depending on the specific grade, and they retain that hardness at elevated temperatures — a critical property when processing engineering thermoplastics at barrel temperatures exceeding 600 degrees Fahrenheit. Stellite provides excellent resistance to abrasive wear and moderate protection against corrosive attack, making it a versatile default choice for general-purpose flight rebuilds. Its limitation is that it falls short in severely corrosive environments — PVC, fluoropolymers, and halogenated flame-retardant compounds can still degrade cobalt-based alloys over time.
Colmonoy (nickel-based alloys) — Where Stellite leads with abrasion resistance, Colmonoy leads with chemical resistance. These nickel-chrome-boron alloys are specifically formulated to withstand the acids generated during processing of corrosive polymers. Colmonoy 56, a widely used grade, protects screws against mildly corrosive and mildly abrasive resins at a moderate cost. Colmonoy 83 offers significantly greater protection for more aggressive environments, though at a higher price point. The nickel-rich matrix resists attack from hydrochloric acid (PVC processing), hydrofluoric acid (fluoropolymer processing), and the decomposition gases released by flame-retardant additives. Hardness values generally range from 35 to 60 HRc depending on the grade, with the higher-hardness versions incorporating additional boride and carbide phases for improved abrasion resistance alongside their chemical durability.
Tungsten carbide composites — When abrasion is the dominant threat, tungsten carbide composites are the heavy armor. These materials embed extremely hard tungsten carbide particles within a softer metallic matrix — typically nickel or cobalt-based — creating a surface that resists erosion from glass fibers, mineral fillers, and contaminated recycled streams better than any other commonly available hardfacing. Surface hardness can reach 60 HRc and beyond, with the carbide particles themselves exceeding 70 HRc. The tradeoff is reduced corrosion resistance compared to pure nickel-based alloys and a higher material cost. Tungsten carbide overlays are the go-to choice for screws processing glass-filled nylon, glass-filled polypropylene, and other heavily reinforced compounds where flight land erosion is the primary failure mode.
Surface Treatments and Liner Technologies
Hard-facing alloys rebuild and protect screw flights, but they are not the only tools in the materials toolbox. Surface treatments and liner technologies address barrel bore protection, whole-component hardening, and economical restoration of moderate wear — each with distinct advantages and limitations.
Use the selection guide below to compare each coating or treatment against the resin types, wear conditions, and budget constraints relevant to your operation:
- Hard Chrome Plating
- Ideal resin types: Unfilled polyolefins, ABS, polystyrene, and other non-abrasive, non-corrosive commodity resins
- Wear resistance: Moderate — effective against light abrasion and friction reduction, but insufficient for glass-filled or mineral-loaded compounds
- Corrosion resistance: Low to moderate — not recommended for fluoropolymers and limited against acid-generating resins, since even small holes or cracks in the plating expose the base steel to chemical attack
- Relative cost: Low — the most economical surface restoration option, making it practical for commodity processing where wear rates are manageable
- Nitriding (Ion/Plasma or Gas)
- Ideal resin types: Engineering thermoplastics, PVC, mildly corrosive compounds, and applications where dimensional precision cannot tolerate added coating thickness
- Wear resistance: Moderate to high — the nitrogen-diffused case produces chromium nitrides with surface hardness exceeding 70 HRc equivalent on suitable substrates like H-13 steel
- Corrosion resistance: Moderate to high — the CrN layer is thermally stable and resists chemical attack from many processing-generated acids, though extreme environments (fluoropolymers) may still demand nickel-based alloys
- Relative cost: Moderate — more expensive than chrome plating but offers superior durability and adds no measurable thickness, eliminating post-treatment grinding
- Bimetallic Barrel Liners
- Ideal resin types: Glass-filled engineering plastics, mineral-filled compounds, recycled feedstock with contaminants, and corrosive polymers (when nickel-based liner alloys are selected)
- Wear resistance: High to very high — centrifugally cast iron-boron liners excel against abrasive fillers, while nickel-rich boron alloys with molybdenum and a matrix of borides and carbides provide HIP-level protection against both abrasion and corrosion
- Corrosion resistance: Varies by alloy — standard iron-boron liners offer limited corrosion protection; nickel-based and HIP liners resist even fluoropolymer-generated acids
- Relative cost: Moderate to high — iron-boron liners are cost-effective for abrasion-only applications; nickel-based and HIP liners carry a significant premium but dramatically extend service life in corrosive environments
- Alloy Spray Welding
- Ideal resin types: Versatile across a broad range — the alloy composition is tailored to the specific application, from nickel-chromium-boron for general corrosion resistance to tungsten-enriched formulations for abrasive service
- Wear resistance: Moderate to high — depends entirely on the selected alloy system; tungsten-enriched compositions rival conventional hardfacing in abrasion resistance
- Corrosion resistance: Moderate to high — nickel-based spray alloys provide strong chemical resistance; the ability to customize the alloy composition is the method's primary advantage
- Relative cost: Moderate — competitive with conventional weld overlay for screw rebuilds and offers the added flexibility of composition tuning for mixed-wear environments
A few selection principles tie this guide together. First, always match the coating or alloy to the resin family you process most. A shop running 90% glass-filled nylon needs tungsten carbide flights and a bimetallic barrel liner — chrome plating would be a waste of money. Second, remember that corrosion-resistant alloys have a lower coefficient of thermal expansion than standard steel, which can cause screw-to-barrel clearance changes at operating temperature. As industry material specialists have documented, mismatched CTE between screw and barrel can cause binding and severe damage — so pairing the right screw metallurgy with the right barrel liner is just as important as selecting the right hardfacing grade. Third, don't overlook the economics of layered protection: combining a moderate-cost weld buildup with a nitrided surface finish often delivers better total performance than either approach alone, at a lower cost than premium single-layer solutions.
Understanding what these materials do — and what they can't do — equips you to evaluate repair proposals critically rather than accepting whatever a shop recommends by default. That critical evaluation becomes even more important in the next decision you'll face: whether repairing the component makes financial sense at all, or whether the smarter move is to replace it outright.
Repair vs. Replace – A Decision Framework That Saves Money
You know what type of wear you're dealing with. You know which alloys and coatings can fix it. The question that stops most processors cold is simpler — and harder: should you fix it at all, or is replacement the smarter investment? Surprisingly, almost no technical resource provides a structured way to answer that question. Decisions get made on gut feeling, whoever answers the phone first at a repair shop, or — worst of all — whoever quotes the lowest number. That approach leaves money on the table in both directions: paying to repair a component that should have been replaced, or scrapping one that had years of serviceable life left in it.
Whether you're managing equipment in Little Rock, AR, coordinating maintenance in Memphis, TN, or sourcing components in Mobile, AL, the decision logic is the same. Here's a systematic framework you can apply before committing a dollar.
Key Factors in the Repair vs. Replace Decision
Six variables drive the decision. Evaluate each one individually, then weigh them together — because no single factor tells the whole story.
- Degree of wear relative to OEM tolerances — How far has the component drifted from its original dimensions? Nordson Xaloy's engineering team identifies a general threshold of 0.020 in. of wear in injection barrels as the point where action is needed, with critical molding applications demanding intervention as early as 0.003 in. Extrusion barrels, by contrast, can tolerate significantly more wear — up to 0.250 in. in select applications — before performance degrades unacceptably. The wider the gap between current dimensions and OEM specification, the more material must be rebuilt, and the closer the repair cost creeps toward replacement cost.
- Type of wear — surface vs. structural — Surface degradation from abrasion or corrosion is generally repairable because the base metal remains mechanically sound. Structural damage — deep fatigue cracks, warping, severe bending, or bore distortion — compromises the component's ability to withstand operating pressures and temperatures even after surface restoration. A screw with polished-down flight tips is a repair candidate. A screw with propagating cracks through the root diameter may not be.
- Remaining usable substrate thickness — Every repair process removes some existing material before adding new material. Boring out a barrel for relining, for example, enlarges the bore by approximately 1.0 in. beyond original diameter to accept the new liner. If the barrel wall doesn't have sufficient remaining thickness to support that process while maintaining structural integrity under operating pressures, relining isn't viable.
- Cost comparison — Repair can save anywhere from 25% to 50% compared with a new barrel, according to industry sources. However, this range depends heavily on barrel type and size. Standard extrusion barrels are relatively inexpensive to manufacture new, so the repair margin is thin. Large, complex, or elaborately equipped barrels — water-jacketed, pin-type, or oversized rubber mixers — offer substantially more favorable repair economics because their replacement cost is significantly higher.
- Lead time and production urgency — A new custom barrel may require weeks or months to manufacture. Repair turnaround is typically shorter, especially for localized fixes like short-sleeving or flight rebuilds. If an unplanned shutdown is costing you thousands per hour, the faster option may justify a premium — or conversely, having a spare screw in rotation eliminates the time pressure entirely.
- Expected post-repair service life — A properly executed repair can restore a component to near-original performance, but it's important to understand the limits. As Nordson Xaloy's engineering supervisor has noted, even under the most exacting conditions, a repaired barrel never quite achieves the degree of straightness, concentricity, strength, or heat transfer available with a new one. The practical question is whether that slight performance gap matters for your specific application and quality requirements.
When Barrel Relining Beats Full Replacement
Barrel relining occupies a middle ground between surface-level repair and full replacement. It involves boring out the worn barrel interior and installing a new bimetallic liner — essentially giving the barrel a brand-new working surface while retaining the original outer shell, heating provisions, and mounting features.
Relining is viable when the barrel meets three conditions: the bore wear is relatively uniform along its length (no severe localized gouging), the barrel body shows no cracking or warping, and sufficient wall thickness remains after boring to maintain structural integrity and adequate heat transfer. The new liner — typically a centrifugally cast alloy with a wall thickness of approximately 0.5 in. — is machined to tight OD tolerances and secured inside the bored-out barrel through an interference fit achieved via heat-shrinking.
In injection molding, relining frequently targets only the discharge end of the barrel near the check ring, an area especially susceptible to wear and leakage. This "short-sleeve" approach is faster and less costly than full-length relining, though it does introduce a seam where the sleeve meets the existing inlay — a potential hang-up point for polymer degradation that processors should be aware of.
For liner material selection, the same principles from the previous section apply. Industry comparisons show that bimetallic liners with boron-nickel-chromium alloys — typically 1.5 to 3.0 mm thick in new barrels — can extend service life by two to three times compared to standard nitrided surfaces, particularly in abrasive or corrosive applications. A relined barrel using these alloy systems can match or exceed the wear performance of the original component, making relining a compelling alternative to purchasing new.
Replacement becomes the only sound option in several clear scenarios:
- Severe structural damage — Cracked barrel bodies, significant warping from thermal abuse, or corrosion that has penetrated through the barrel wall cannot be addressed by relining alone.
- Obsolete geometry — If you're upgrading screw designs, switching to a different L/D ratio, or changing machine configurations, the existing barrel may not accept the new geometry regardless of its condition.
- Cumulative repair history — A barrel that has been relined once may accept a second reline if wall thickness allows, but each iteration reduces the structural margin. When cumulative repair costs approach 60% to 75% of replacement cost, the economic case for a new barrel strengthens considerably.
- Performance-critical applications — Medical devices, tight-tolerance automotive components, and optical-grade parts demand the highest possible concentricity and heat transfer uniformity. For these applications, the slight performance compromises inherent in any repair may be unacceptable.
The table below summarizes the three paths — repair, reline, and replace — across the dimensions that matter most when you're making the call.
| Dimension | Repair (Hard-face / Re-chrome / Nitriding) | Reline (New Bimetallic Liner) | Replace (New Barrel) |
|---|---|---|---|
| Relative Cost | Lowest — typically 25% to 50% of new barrel cost | Moderate — less than new barrel but more than surface repair | Highest — full manufacturing and material cost |
| Turnaround Time | Shortest — days to weeks depending on scope | Moderate — requires boring, liner manufacturing, fitting, and final machining | Longest — weeks to months for custom barrels |
| Expected Service Life Restoration | Partial to near-original — depends on wear severity and method selected | Near-original to exceeding original — new liner alloy may outperform original inlay | Full original specification — new baseline established |
| Best-Fit Scenarios | Moderate, uniform surface wear; screw flight rebuilds; check-ring restoration; budget-constrained situations with acceptable performance margins | Uniform bore enlargement without structural damage; injection barrel discharge-end wear; upgrading liner metallurgy for more demanding resin formulations | Severe structural compromise; obsolete geometry requiring redesign; cumulative repair costs approaching replacement cost; performance-critical applications |
One final consideration often gets overlooked: the repair-vs.-replace decision should never be made in isolation from your maintenance strategy. A processor who maintains a spare screw in rotation, tracks wear trends over time, and schedules rebuilds during planned shutdowns faces a fundamentally different cost equation than one who waits for catastrophic failure and scrambles for the fastest available fix. The financial advantage of repair depends not just on metallurgy and measurements — it depends on the process you follow from the moment a component arrives at the shop to the moment it's reinstalled and verified. That process, step by step, determines whether a good decision on paper translates into restored performance on the production floor.
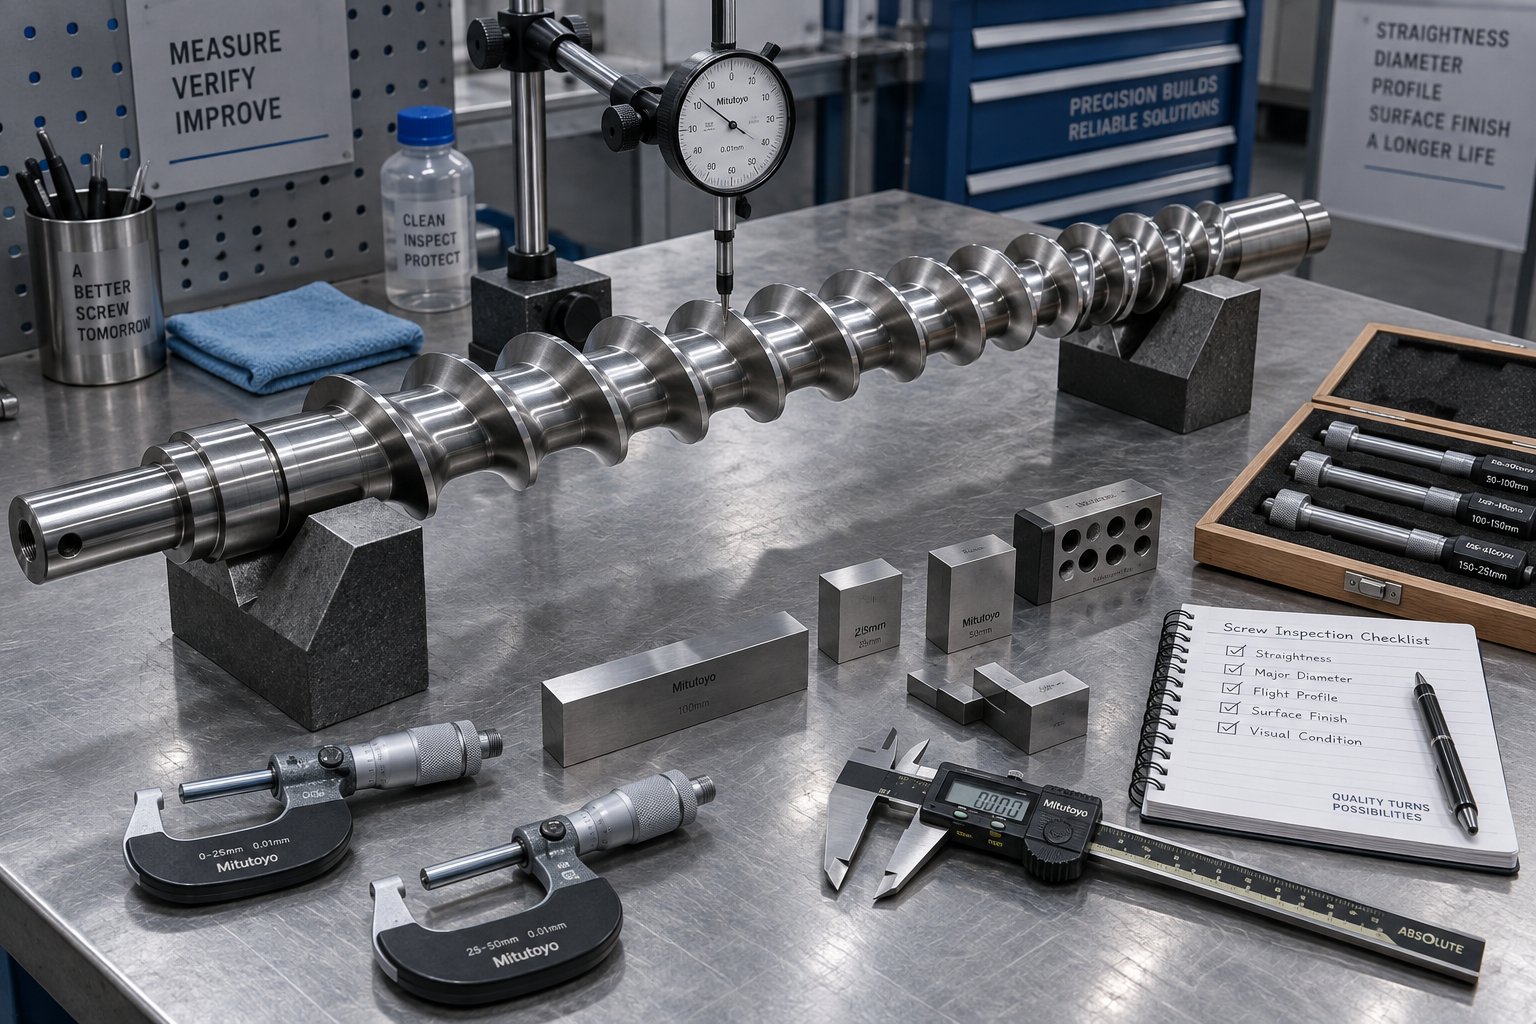
Step-by-Step Screw and Barrel Repair Process From Inspection to Quality Assurance
A sound repair decision means nothing if the execution falls apart. You can correctly diagnose abrasive wear, select the right hardfacing alloy, and choose repair over replacement — and still end up with a component that fails prematurely because a step was skipped, rushed, or done out of sequence. The repair process itself is a precision manufacturing operation, and understanding each stage helps you evaluate whether a provider is doing the job right or cutting corners.
Whether you're shipping a worn injection screw from San Antonio, TX, coordinating a rebuild from New Orleans, LA, or evaluating turnaround quotes from a shop near Shreveport, LA, the fundamental process follows the same sequence. Here's what a thorough, professional repair looks like from intake to sign-off.
Initial Inspection and Dimensional Assessment
Every credible repair begins with measurement — not assumptions. Before any metal is deposited or removed, the component undergoes a comprehensive evaluation that establishes both its current condition and the feasibility of repair.
The intake process typically includes:
- Visual inspection — Examining the entire component for obvious damage: scoring, galling, pitting, discoloration from overheating, bent sections, and broken or chipped flight edges. SpiraMelt's field service team evaluates root wear, OD damage, structural integrity of the base material, and wear patterns as part of this initial assessment.
- Dimensional measurement — For screws, micrometers capture flight OD readings at defined intervals along the entire length. Root diameters are also checked. For barrels, calibrated bore gauges measure the ID at multiple axial positions and angular orientations to detect both overall enlargement and localized ovality. Nan Yun Industrial notes that barrels often develop uneven wear across different sections after long-term use, resulting in ovality that must be quantified before correction can begin.
- Non-destructive testing (NDT) — Dye penetrant inspection reveals surface cracks invisible to the naked eye. Magnetic particle testing detects subsurface flaws in ferromagnetic components. These tests are essential for identifying fatigue damage that dimensional measurements alone cannot catch.
- Straightness verification — The screw is placed on V-blocks or a lathe, and dial indicators measure total indicated runout along its length. A bent screw must be straightened before any surface work proceeds — otherwise, the new coating will simply be driven into the barrel wall once the component is back in service.
This inspection data forms the basis for a detailed report that should be shared with you before any repair work begins. It tells you exactly what's worn, how severely, and whether repair is viable. A provider who skips this step — or won't share the results — is a provider to walk away from.
Core Repair Stages From Buildup to Finish
With the assessment complete and the repair path approved, the actual restoration follows a carefully ordered sequence. Each stage builds on the one before it, and skipping or reordering steps compromises the final result.
- Stripping existing coatings — Old chrome plating, degraded hardfacing, or damaged nitrided layers are removed to expose clean base metal. This ensures the new buildup material bonds directly to a sound substrate rather than adhering to a compromised surface that could delaminate under operating loads.
- Weld buildup or alloy spray welding — This is the dimensional restoration stage, where lost material is replaced. Depending on the wear type and chosen alloy, the shop applies weld overlay (PTA welding for hardfacing alloys like Stellite or Colmonoy) or alloy spray welding to rebuild flight lands, screw roots, or barrel bore surfaces. Alloy spray welding is particularly versatile here because the alloy composition can be tailored to the specific wear environment — nickel-chromium-boron for corrosion resistance, tungsten-enriched formulations for abrasive service. Specialized service providers like NANHAIYA offer alloy spray welding and wear-resistant surface treatments engineered for extrusion and injection molding screws facing abrasive or corrosive wear, making this process accessible to processors dealing with demanding resin formulations. For barrels with uniform bore enlargement, this stage may instead involve boring out the interior and installing a new bimetallic liner.
- Heat treatment and stress relief — Welding introduces residual stresses that can cause cracking or distortion during operation. Controlled stress-relief heat treatment normalizes the component, reducing the risk of premature failure in high-pressure zones. This step is especially critical after repairing fatigue cracks or performing extensive weld buildup.
- OD and ID grinding to final tolerances — The rebuilt component is precision-ground to match OEM dimensional specifications. For screws, OD grinding restores flight land diameters to the clearances required for proper sealing against the barrel bore. For barrels, vertical bore grinding or honing brings the ID to the required size. Nan Yun Industrial's process uses horizontal bore honing to correct ovality first — restoring true roundness and straightness — followed by vertical bore grinding to achieve the final target diameter, surface roughness, and concentricity.
- Re-application of protective coatings or surface treatments — After grinding establishes final dimensions, the component may receive a protective finish layer: hard chrome plating for commodity resin applications, nitriding for corrosion-prone environments, or a final polishing pass to optimize melt flow characteristics. This last protective layer acts as the first line of defense when the rebuilt component goes back into service.
Final Quality Assurance and Documentation
A repaired screw or barrel is only as trustworthy as the verification behind it. The final QA stage confirms that every dimension, surface, and material property meets specification before the component ships back to your facility.
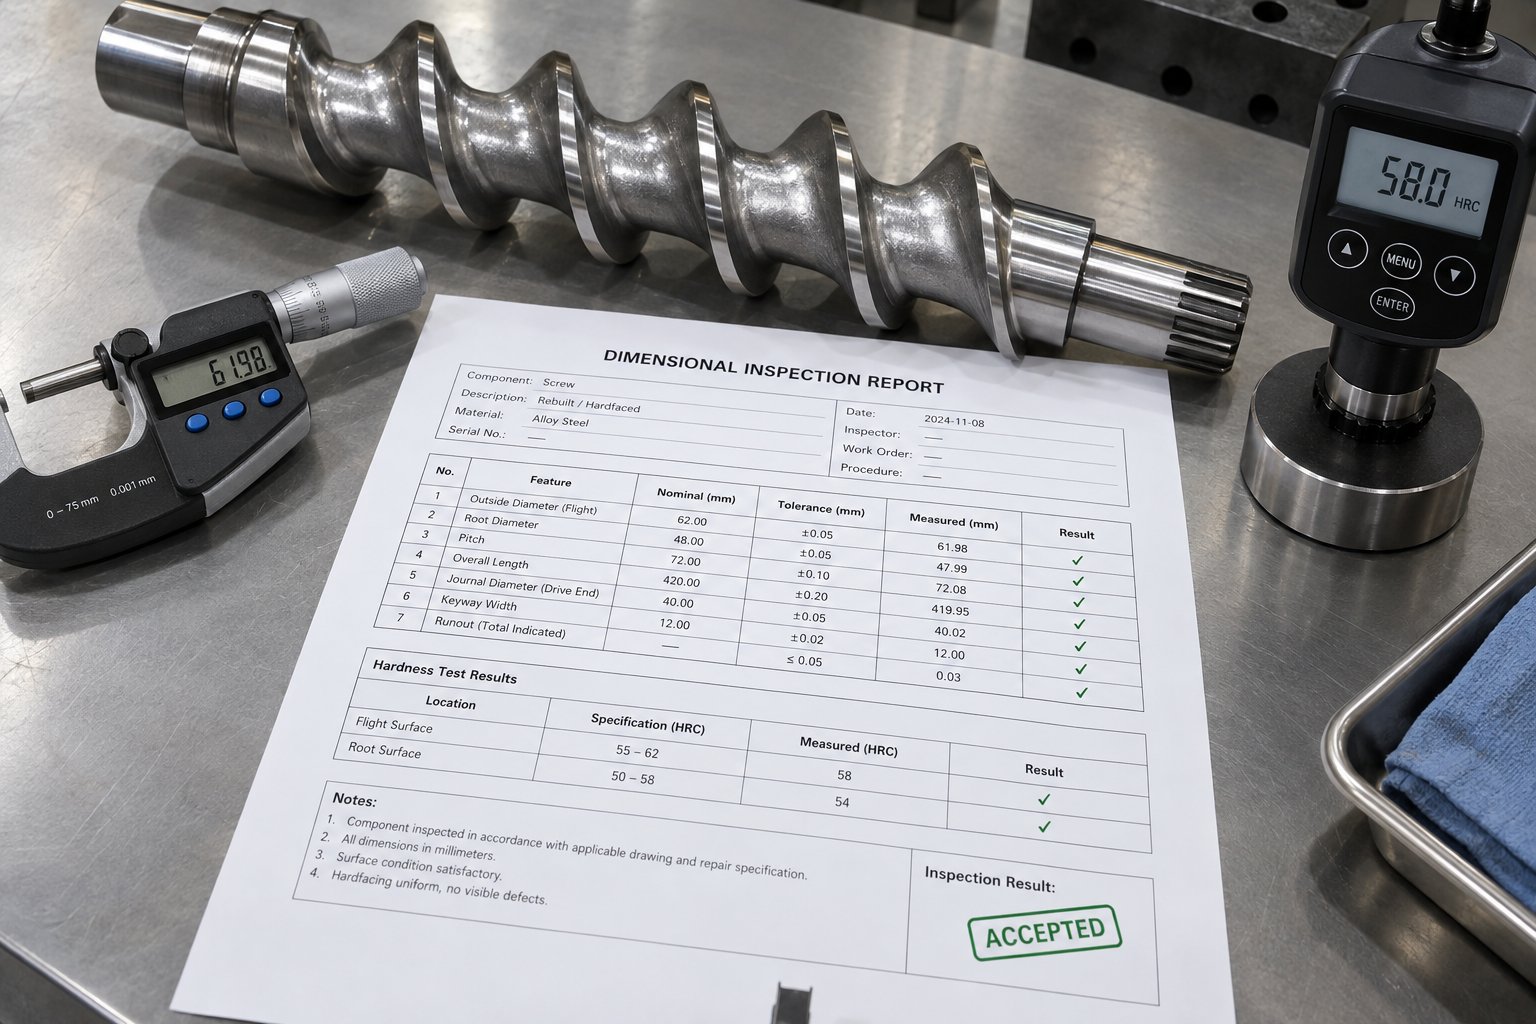
- Final dimensional verification — All critical measurements taken during intake are repeated on the finished component. Flight ODs, root diameters, barrel bore IDs, and overall length are compared directly against OEM specifications to confirm that tolerances have been restored.
- Surface finish measurement — A profilometer verifies that barrel bore surfaces and screw flight lands meet the required surface roughness (Ra) values. Surface finish directly affects melt flow, material degradation, and the tendency for polymer to hang up and degrade in dead spots.
- Hardness testing — Rockwell or Vickers hardness readings confirm that hardfacing alloys, nitrided surfaces, and chrome plating have achieved the specified hardness values. Insufficient hardness means premature wear; excessive hardness can indicate brittleness and a risk of cracking.
- Inspection report documentation — The complete record — before-and-after dimensional data, NDT results, hardness readings, alloy certifications, and surface finish measurements — should be compiled into a detailed inspection report that you receive with the finished component. This document serves as your quality baseline. It proves the repair was performed correctly, provides reference measurements for future wear tracking, and protects you in any warranty discussion.
Insist on receiving this documentation. A repair shop that delivers a rebuilt screw without supporting data is asking you to trust their work on faith alone. The data is what separates professional screw and barrel repair from guesswork — and it's what enables you to track wear progression over the next service cycle so you can plan the next intervention proactively rather than reactively.
That proactive mindset — treating these components as managed assets rather than run-to-failure consumables — is exactly what separates processors who control their maintenance costs from those who are controlled by them.
Preventive Maintenance Practices That Extend Screw and Barrel Service Life
Every section up to this point has focused on what to do after wear has already occurred — how to diagnose it, how to fix it, and how to decide between repair and replacement. That's reactive thinking. The processors who spend the least on screw and barrel repair over a five-year window aren't the ones who find the cheapest shop. They're the ones who slow the wear down before it starts. A disciplined preventive maintenance program doesn't eliminate wear — the physics of forcing abrasive, corrosive, high-viscosity polymers through a metal channel at elevated temperatures guarantees some degree of degradation over time. But it dramatically extends the interval between repairs, reduces the severity of damage when intervention is finally needed, and turns emergency shutdowns into planned service events.
The gap here is striking. Almost every piece of content available on plasticating component care focuses exclusively on the repair itself. Virtually none addresses what you can do today, on your production floor, to push that repair date further into the future. The practices below fill that gap.
Operational Best Practices to Minimize Wear
Daily operational habits have a bigger impact on component longevity than most processors realize. Small procedural mistakes — repeated shift after shift, month after month — accumulate into accelerated wear patterns that shorten service life by years.
- Proper startup and shutdown purging — Never start screw rotation in a cold barrel. Allow sufficient soak time for the barrel to reach operating temperature throughout its full length so that a melt film forms between the screw flights and the bore before rotation begins. Without that protective film, you get direct metal-to-metal contact — the adhesive wear mechanism described earlier. During shutdown, purge the barrel thoroughly with an appropriate commercial purging compound (CPC) to remove residual resin, fillers, and color. As Reiloy USA's preventive maintenance guidelines recommend, always remove corrosive and filled resins before idling equipment. Some heat-stable CPCs can seal the barrel during extended shutdowns, preventing oxidation that causes black specks and surface degradation on startup.
- Maintain correct barrel temperature profiles — Overheating degrades polymer and accelerates corrosive attack on metal surfaces. Running barrel zones hotter than necessary to compensate for other process issues — a common workaround — subjects the screw and barrel to chemical exposure that exceeds design intent. Conversely, temperatures set too low in the feed zone can cause unmelted pellets to jam, creating the extreme localized pressures that drive adhesive wear. Keep temperature profiles within the resin manufacturer's recommended processing window and resist the temptation to chase quality problems by cranking up the heat.
- Use appropriate screw speeds and back pressures — Higher screw RPM means faster particle-to-metal contact frequency when processing filled resins, directly accelerating abrasive wear. Excessive back pressure in injection molding forces material against worn check rings and increases shear stress throughout the metering section. Run at the lowest screw speed and back pressure that still deliver acceptable melt quality and mixing — your components will thank you with extended service life.
- Ensure resin is properly dried — Hygroscopic polymers like nylon, PET, and polycarbonate absorb moisture from the atmosphere. Processing undried material causes hydrolysis — a chemical reaction that breaks polymer chains and releases acidic byproducts directly onto barrel and screw surfaces. This is one of the most preventable causes of corrosive wear, yet it remains one of the most common. Verify dryer dewpoint, hopper residence time, and material moisture content before every production run.
Scheduled Inspection and Monitoring Programs
You can't manage what you don't measure. A structured inspection program converts wear from an invisible, gradual process into a tracked, predictable trend — one you can plan around instead of react to.
- Implement periodic bore gauging and flight measurement — Industry best practice recommends inspecting every six months when running reinforced resins and annually for unfilled materials, until wear trends are established for each specific screw, barrel, and valve combination. Use calibrated bore gauges for barrel ID measurements at multiple positions and micrometers for screw flight OD readings. Record every measurement. Over time, these data points reveal the rate of wear — enabling you to predict when a component will reach its tolerance limit and schedule repair during a planned shutdown rather than scrambling after a failure.
- Track energy consumption trends — Your electricity bill is an early-warning system. As clearances enlarge, operators compensate with higher speeds and temperatures, both of which consume more energy per kilogram of output. Monitoring your kWh-per-kg ratio over time flags declining efficiency before quality problems become visible. Industry analysis has shown that a 16% reduction in throughput capacity from worn components, combined with the increased power needed to compensate, can add significant costs over a twelve-month period — costs that go far beyond just the energy bill when you factor in wasted material and lost production time.
- Monitor scrap rates and part quality metrics — Trending your reject rate, dimensional variation, and surface quality data alongside component age reveals correlations that point measurement alone might miss. A gradual uptick in scrap rate that coincides with months of service on a particular screw is strong circumstantial evidence of wear — and it often appears before a bore gauge confirms it.
- Establish wear baselines at installation — Measure and record every critical dimension on a new or freshly repaired component before it goes into service. Without that baseline, future measurements have no reference point. A well-structured PM program tracks component wear life over time and helps explain process variations — as components degrade, changes typically emerge in cycle times, scrap rates, energy consumption, and downtime frequency.
Material and Machine Alignment Considerations
Some of the most impactful preventive measures happen before the machine even starts running — during component specification, installation, and machine setup.
- Match screw and barrel metallurgy to your resin portfolio — Running glass-filled nylon through a nitrided barrel and uncoated screw is an invitation for rapid abrasive wear. If your production mix includes corrosive resins like PVC or moisture-sensitive engineering plastics, specify corrosion-resistant alloys and barrel liners from the outset. As industry experts emphasize, every resin has unique characteristics, and a poor barrel match can cause hang-ups, uneven melting, or premature wear — leading to costly downtime. The upfront cost difference between commodity and premium metallurgy is a fraction of the cost of an early rebuild.
- Maintain proper machine alignment — A barrel that does not remain straight when heated forces the screw into the bore wall with every rotation, creating the adhesive wear pattern that was covered earlier. Barrel alignment to the gearbox, as well as internal screw-to-barrel alignment, should be checked during installation and reverified periodically — especially after maintenance work that involves removing and reinstalling barrel sections. Even small misalignments compound rapidly at operating speeds.
- Use magnetic separators and screens to catch contaminants — Metal shavings from upstream granulators, loose bolts, wire fragments, and tramp metal in recycled feedstock cause immediate, severe abrasive and adhesive damage. A magnetic separator in the hopper throat and appropriately sized screen packs in the melt stream are inexpensive insurance policies against catastrophic contamination events.
- Invest in surface treatments before wear begins — Nitriding, hard chrome plating, and hardfacing alloys aren't just repair tools — they're preventive measures. Applying wear-resistant coatings to new screws before they ever see production extends the initial service life and pushes the first repair further out. This is particularly cost-effective for screws in abrasive or corrosive service where unprotected tool steel would wear unacceptably fast.
The checklist below consolidates these practices into a format you can adapt for your own facility. Post it in your maintenance area, integrate it into your PM scheduling software, or use it as the starting point for building a program tailored to your specific equipment and resin portfolio.
| Category | Action Item | Frequency |
|---|---|---|
| Startup / Shutdown | Allow full barrel soak time before initiating screw rotation | Every startup |
| Startup / Shutdown | Purge with appropriate CPC; remove corrosive or filled resins before idling | Every shutdown |
| Startup / Shutdown | Apply heat-stable sealing purge for extended downtime periods | Shutdowns exceeding 24 hours |
| Process Monitoring | Verify resin moisture content before processing hygroscopic materials | Every production run |
| Process Monitoring | Track kWh per kg of output and trend over time | Weekly or monthly |
| Process Monitoring | Monitor scrap rates and dimensional variation; correlate with component age | Continuously |
| Dimensional Inspection | Measure screw flight OD and barrel bore ID; record and trend data | Every 6 months (filled resins) or annually (unfilled) |
| Dimensional Inspection | Perform NDT (dye penetrant or magnetic particle) for fatigue crack detection | Annually or at each screw pull |
| Dimensional Inspection | Check screw straightness (total indicated runout) | At each screw pull |
| Machine Setup | Verify barrel-to-gearbox alignment and barrel straightness | At installation and after maintenance |
| Machine Setup | Confirm magnetic separators and screen packs are installed and functional | Daily visual check; replace as needed |
| Component Specification | Match screw hardfacing and barrel liner alloy to resin family | At purchase or rebuild |
| Component Specification | Apply protective surface treatments (nitriding, chrome, hardfacing) to new screws | Before initial installation |
| Documentation | Record baseline dimensions on all new or repaired components before installation | At every installation |
A preventive maintenance program won't make screw and barrel repair disappear — but it transforms repair from an unpredictable emergency into a scheduled, budgeted event. Processors in Tulsa, OK, or Vicksburg, MS, or Wichita, KS, face the same wear physics as anyone else, but those who track, measure, and intervene early consistently spend less over the lifetime of their equipment. The real payoff is predictability: knowing when your components will need service lets you plan ahead — including selecting the right repair provider and asking the right questions before committing to a rebuild.
What to Ask Your Screw and Barrel Repair Service Provider Before You Commit
You've diagnosed the wear, selected the repair method, and confirmed that rebuilding makes more financial sense than replacing. The preventive maintenance program is in place to extend the next service cycle. There's one decision left — and it's the one most processors get wrong: choosing who does the work. A repair is only as good as the shop performing it. Two providers quoting the same process on the same screw can deliver wildly different results depending on their equipment, metallurgical expertise, quality controls, and willingness to be transparent about what they find.
The problem? Most processors evaluate repair providers the same way they'd pick any vendor — lowest price, fastest quote, or whoever a colleague mentioned at the last trade show. That approach ignores the variables that actually determine whether your rebuilt component runs for six months or six years. What follows is a practical procurement framework you can use to separate credible screw and barrel repair service providers from those cutting corners you won't see until the screw is back in the barrel and underperforming.
Essential Questions Before Committing to a Repair Provider
Before you ship a worn screw or barrel to any shop, get clear answers to these questions. The responses — and especially the willingness to answer them in detail — tell you more about a provider's capabilities than any brochure or website ever will.
- What inspection report and dimensional data will you provide before and after repair? — This is the single most important question on the list. A professional shop measures every critical dimension at intake, documents the findings, shares them with you for approval before work begins, and then repeats every measurement on the finished component. You should receive before-and-after data covering flight ODs, root diameters, barrel bore IDs, straightness, surface finish, and hardness values. If a provider can't — or won't — deliver this documentation, keep looking.
- What alloys and coatings are available, and which do you recommend for my specific resin and machine type? — A qualified shop doesn't just offer one hardfacing alloy for every job. They should ask what resins you process, what fillers or reinforcements are involved, and what barrel liner you're running before recommending a specific alloy system. The answer should reference specific material families — Stellite for general abrasion, Colmonoy for corrosive environments, tungsten carbide composites for heavily filled compounds — and explain why one fits your application better than another.
- What is the warranty on the repair, and what does it cover? — Warranties vary significantly. Some cover only craftsmanship defects. Others guarantee dimensional tolerances for a defined service period. Understand exactly what's included, what's excluded, and what documentation you'll need to file a claim. A provider confident in their work will offer clear, written warranty terms without hesitation.
- What are your certifications and screw and barrel repair quality assurance procedures? — Look for ISO 9001 certification or equivalent quality management systems. Ask about their NDT capabilities — do they perform dye penetrant testing and magnetic particle inspection in-house, or outsource it? Do they verify hardness on every job? What instruments do they use for bore gauging and OD measurement, and how frequently are those instruments calibrated? The specificity of the answers reveals the rigor of the operation.
- Can you accommodate both injection molding screw and barrel repair and extruder screw repair? — This question tests breadth of capability. Injection molding screws involve check-ring restoration, precise flight geometry for shot-to-shot consistency, and often tighter tolerances than extrusion screws. Extruder screws may be significantly longer and require different hardfacing strategies. A provider comfortable with both machine types demonstrates deeper metallurgical expertise and more versatile equipment. American Screw & Barrel, for instance, handles screws from 1.00 inch to 10 inches in diameter across a range of designs, with turnaround dependent on size, condition, and materials required — the kind of range that signals genuine capability.
- What is your process if you determine that repair is not viable? — This question is a character test. The right answer is: "We'll show you the data, explain why, and help you source a replacement." A shop that repairs everything regardless of condition is either lacking diagnostic capability or prioritizing revenue over your outcome.
Turnaround Times and Planning for Minimal Downtime
Screw and barrel repair turnaround time varies widely based on the scope of work, component size, and the repair methods involved. Setting realistic expectations — and planning around them — is essential for minimizing production disruption.
General lead time benchmarks to keep in mind:
- Light repairs (chrome stripping and replating, polishing, minor flight rebuilds) — Often completed within a few days to two weeks, depending on shop backlog and component size.
- Standard rebuilds (full flight hard-facing, OD grinding, heat treatment, and recoating) — Typically two to four weeks. Industry providers note that completion can range from a few days to a few weeks based on size, design complexity, condition, and materials required.
- Barrel relining — Longer lead times due to the boring, liner fabrication, interference fitting, and final machining sequence. Expect three to six weeks or more for full-length relines.
- Emergency or expedited service — Many shops offer rush tiers at a premium. If your line is down and every hour of lost production costs thousands, paying a 25% to 50% expedite surcharge may be the most economical decision overall. Ask about this option upfront — not after you've already shipped the component.
The most effective strategy for managing turnaround time has nothing to do with the repair shop at all: maintain a spare screw. Rotating a backup screw into service while the primary is out for rebuild eliminates downtime entirely. The spare doesn't need to be identical — a general-purpose geometry that runs your most common resin acceptably is sufficient to keep production moving while the optimized screw is rebuilt with the right alloys and coatings for your primary application.
When evaluating provider capabilities, look for shops that support a wide range of repair methods and machine types under one roof. Service providers like NANHAIYA, who support both extrusion and injection molding operators with alloy spray welding and wear-resistant surface treatment options, can serve as a useful reference point for assessing whether a provider offers the metallurgical versatility your application demands. A shop limited to only chrome plating or only one type of weld overlay may not be able to deliver the best repair for your specific wear pattern.
Red Flags and Signs of a Quality Provider
Not every shop advertising screw and barrel repair delivers the same caliber of work. Here's what separates the credible providers from the ones likely to cost you more in the long run:
Signs of a quality provider:
- Provides detailed, dimensional inspection reports — both pre-repair and post-repair — without being asked
- Supplies material certifications for every alloy and coating applied, traceable to the source
- Offers transparent, itemized pricing that breaks down inspection, buildup, grinding, coating, and QA as separate line items
- Asks detailed questions about your resin portfolio, machine type, and operating conditions before recommending a repair approach
- Willingly recommends replacement over repair when the data supports it — even though that means less revenue for their shop
- Maintains calibrated measurement equipment and can describe their calibration schedule
- Holds ISO 9001 or equivalent quality certifications and can provide documentation on request
Red flags to watch for:
- Quoting a repair price without inspecting the component or asking about your application
- Refusing to share before-and-after dimensional data or claiming it's "proprietary"
- Offering a single alloy or coating for every job regardless of resin type or wear mechanism
- No written warranty, or a warranty with vague terms and no defined coverage period
- Unable to explain the difference between abrasive and corrosive wear — or why it matters for alloy selection
- Consistently recommending repair on components that other shops have evaluated as beyond salvage
The best repair provider is one who tells you when not to repair.
That willingness to turn down work — to look at your dimensional data, your wear pattern, and your production requirements, and honestly say "this component needs to be replaced" — is the clearest signal of a provider who prioritizes your long-term outcome over their short-term invoice. It takes confidence in their own capabilities and integrity in their customer relationships. Those are exactly the qualities you want behind every rebuild that goes back into your machine.
Screw and barrel repair, done right, is a precision discipline that restores production performance, extends component life, and delivers measurable cost savings over replacement — but only when every link in the chain holds: accurate diagnosis, correct alloy selection, disciplined process execution, thorough quality assurance, and a provider relationship built on transparency and data. Arm yourself with the questions, benchmarks, and red-flag awareness outlined here, and you'll approach every repair decision not as a reactive scramble, but as a strategic investment in the reliability of your operation.
Frequently Asked Questions About Screw and Barrel Repair
1. How do I know when my screw and barrel need repair?
Several measurable warning signs indicate the need for screw and barrel repair. Watch for declining throughput at constant screw speed, inconsistent melt temperature, poor color mixing, short shots in injection molding, rising energy consumption per kilogram of output, and unusual metallic noises during operation. When multiple symptoms from different categories appear simultaneously and persist after basic process troubleshooting, it is time to pull the components for a dimensional inspection. Comparing measured flight OD and barrel bore ID against OEM tolerances confirms whether intervention is necessary.
2. What are the main types of screw and barrel wear in plastics processing?
Four primary wear mechanisms affect plasticating components. Abrasive wear is caused by glass fibers, mineral fillers, and contaminants physically eroding metal surfaces - it leaves polished, rounded flight edges. Corrosive wear results from chemical attack by acids released during processing of PVC, fluoropolymers, and undried hygroscopic resins, producing pitted and cratered surfaces. Adhesive wear occurs from direct metal-to-metal contact due to misalignment or cold starts, leaving galled and torn surfaces. Fatigue wear develops from cyclic pressure and thermal loading over time, creating microscopic cracks that can lead to sudden failure. In practice, multiple mechanisms often act simultaneously.
3. Is it better to repair or replace a worn screw and barrel?
The answer depends on six key factors: degree of wear relative to OEM tolerances, whether the damage is surface-level or structural, remaining substrate thickness available for rebuild, cost comparison (repair typically saves 25% to 50% versus new), lead time urgency, and expected post-repair service life. Surface wear from abrasion or corrosion is generally repairable, while deep fatigue cracks or warped barrels often require replacement. Barrel relining offers a middle-ground option when bore wear is uniform and no structural damage exists. When cumulative repair costs approach 60% to 75% of replacement cost, purchasing new components usually makes more economic sense.
4. What repair methods are used for screw and barrel restoration?
Repair techniques are matched to the specific wear type. For abrasive wear, hard-facing weld overlay with tungsten carbide or Stellite alloys rebuilds flight lands, while bimetallic barrel relining restores bore dimensions. For corrosive wear, nickel-based Colmonoy coatings, nitriding, and alloy spray welding provide chemical resistance. Alloy spray welding is particularly versatile because the alloy composition can be tailored to the exact chemical and abrasive environment - providers like NANHAIYA offer this service for both extrusion and injection molding screws. Adhesive and fatigue damage require straightening, stress-relief heat treatment, and Plasma Transferred Arc (PTA) welding followed by precision grinding.
5. How can I extend the service life of my screw and barrel between repairs?
A disciplined preventive maintenance program dramatically extends component life. Key practices include allowing full barrel soak time before starting screw rotation, purging thoroughly at shutdown with appropriate compounds, maintaining resin-manufacturer-recommended temperature profiles, running at the lowest effective screw speed and back pressure, and always verifying resin moisture content for hygroscopic polymers. Implement periodic dimensional inspections - every six months for filled resins, annually for unfilled - and track energy consumption trends as an early wear indicator. Matching screw hardfacing and barrel liner metallurgy to your resin portfolio before installation is one of the most impactful steps you can take.
Written by
Nanhaiya Technical Team
Zhoushan Nanhaiya Plastic Machinery Co., Ltd.
The Nanhaiya technical team supports screw and barrel manufacturing projects through application review, technical communication, custom manufacturing coordination, and production and quality control.
Discuss Your Application
Related Articles
More insights on screw barrel technology and plastics processing.

What Nobody Tells You About Screw Barrel For Plastic Machine Design
Oct 10, 2026
Learn how screw barrel for plastic machine design affects melt quality, throughput, and wear life. Covers geometry, resin matching, troubleshooting, and sourcing.
Read Article
Single Screw Extruder for Sheet: Stop Guessing, Start Specifying
Oct 9, 2026
Learn how to specify a single screw extruder for sheet production. Covers screw geometry, resin-specific processing, troubleshooting, and maintenance best practices.
Read Article
PE Pipe Extruder Machine: What Datasheets Won't Tell You
Oct 9, 2026
Learn how a PE pipe extruder machine works, key specs explained, material grade selection, maintenance tips, and buyer guidance beyond the datasheet.
Read ArticleLooking for something else?
Search by material, symptom or product and jump straight to the relevant page.
These are navigation suggestions based on keyword matching — not a quotation, not a delivery commitment, and not a substitute for engineering review. Final specification is confirmed by our engineers against your drawings and processed material.
Need help with screw barrel selection?
Share your machine model, processed material and application. Our team can help with pricing and technical support.