

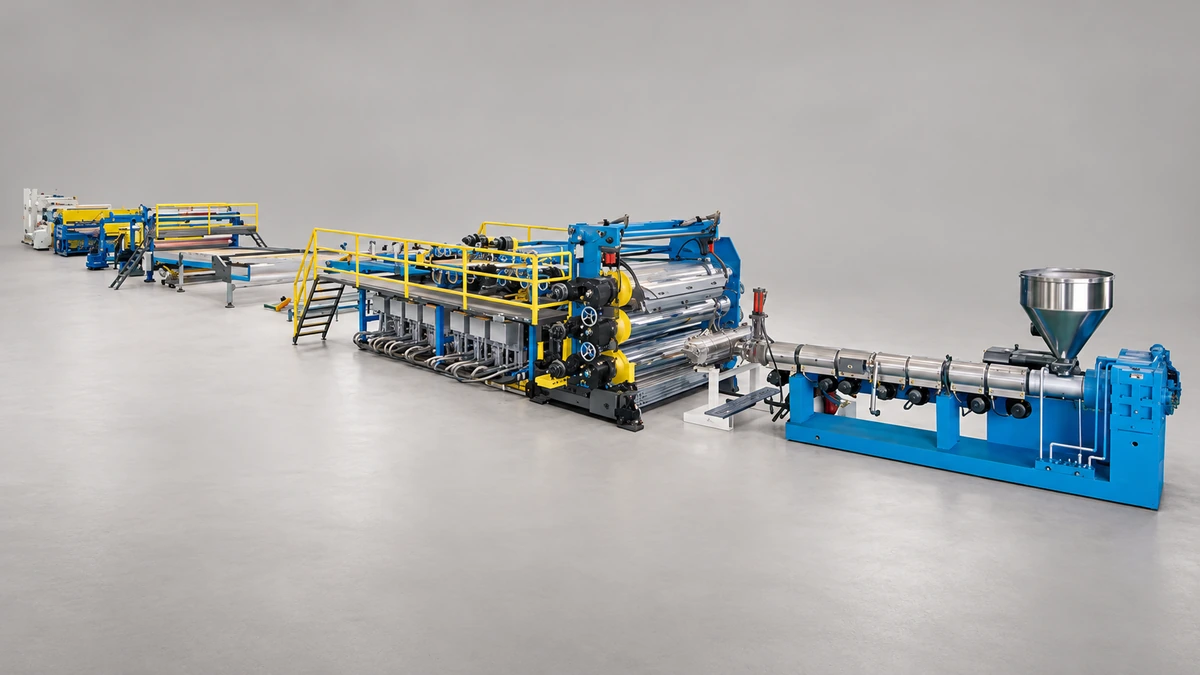
What Is a PET Sheet Extrusion Line and Why It Matters
Imagine a single production system that takes raw plastic pellets and transforms them into perfectly flat, crystal-clear sheets ready for food trays, medical blister packs, or electronics packaging. That is exactly what a pet sheet extrusion line does — and understanding how it works is the difference between a profitable operation and one plagued by scrap, downtime, and frustrated customers.
Defining the PET Sheet Extrusion Line
A PET sheet extrusion line is an integrated manufacturing system designed to convert polyethylene terephthalate (PET) resin pellets or flakes into continuous flat sheets with precisely controlled thickness, clarity, and mechanical properties. The process begins with drying and feeding raw material, moves through melt extrusion and flat-die forming, and finishes with cooling, trimming, and winding — all in one continuous sheetline.
The sheets produced on these lines serve an impressive range of end-use markets. In food packaging, you'll find thermoformed clamshells, deli trays, bakery containers, and blister packs — applications where transparency and food safety are non-negotiable. Medical device packaging relies on PET sheet for sterile, hygienic blister covers and protective trays. The electronics industry uses it for insulating films and component packaging, while the signage and display sector values its rigidity and print quality. Whether you're evaluating new equipment or shopping for used extruders to expand capacity, understanding what this production line actually delivers is the essential starting point.
Why PET Dominates the Sheet Extrusion Market
Why does PET consistently win over other thermoplastics for sheet extrusion applications? The answer lies in a rare combination of properties that no single competing polymer can match.
- Optical clarity: PET sheets rival glass in transparency, making products visible and attractive on retail shelves.
- Mechanical strength: High impact resistance and dimensional stability protect contents during shipping and handling.
- Chemical resistance: PET resists oils, greases, and dilute acids — critical for food and industrial packaging.
- FDA food-contact compliance: PET is approved for direct contact with food, a baseline requirement for packaging converters.
- Recyclability: As a 100% recyclable polymer, PET aligns with growing sustainability mandates and circular economy targets.
How does it compare to alternatives? PP sheet extrusion lines produce lower-cost material, but PP falls short on transparency and rigidity. PVC sheetlines offer decent clarity, yet PVC contains chlorine, complicating recycling and raising food-safety concerns. PET strikes the balance that neither can — premium visual appeal paired with practical performance and environmental responsibility.
PET's glass-like transparency combined with impact resistance makes it the preferred material for high-visibility packaging applications.
Yet here is what most suppliers will not tell you: choosing PET as your polymer is only the first decision. The real complexity — and the real opportunity — lives inside the details of how your line is configured, how your resin is managed, and how each piece of equipment interacts with the next. From intrinsic viscosity preservation and the differences between APET, CPET, and GPET sheet types, to the realities of running recycled PET, common defect troubleshooting, and the criteria that separate a good supplier from a great one, the following sections unpack everything that typical sales brochures leave out.

APET vs CPET vs GPET Sheet Types Explained
Here is a question most equipment sellers skip entirely: does your pet sheet extrusion line need to produce amorphous sheet, crystalline sheet, or glycol-modified sheet? The answer reshapes nearly every downstream component on the line — from chill roll temperatures to cooling speeds to ancillary equipment. Yet most buyers only discover these differences after the purchase order is signed. Let's fix that.
APET — Amorphous PET for Crystal-Clear Packaging
When you hear "crystal-clear PET packaging," you're almost certainly looking at APET — amorphous polyethylene terephthalate. The word "amorphous" simply means the polymer chains are arranged in a random, non-organized structure, and that lack of internal order is exactly what gives APET its exceptional optical transparency.
How is it made? The key lies in rapid cooling. After the molten PET exits the flat die, it passes onto a chill roll stack held at relatively low temperatures — typically between 25 and 40 degrees Celsius. This fast quench "freezes" the polymer before its chains have time to organize into crystalline regions, keeping the sheet glassy and transparent. Line speeds tend to run faster compared to CPET production, precisely because the goal is to move sheet away from the heat source as quickly as possible.
You'll find APET everywhere in retail: food clamshells, bakery containers, blister packs, and point-of-purchase display packaging. If a customer wants to see the product inside the package, APET is the go-to material. For converters shopping for a polymer sheet extrusion setup focused on high-clarity thermoforming, an APET-configured line is the standard starting point.
CPET — Crystalline PET for Heat-Resistant Trays
Flip the cooling strategy on its head and you get CPET — crystalline PET. Instead of quenching the sheet rapidly, the line deliberately slows the cooling process or passes the sheet through a post-extrusion annealing oven. This controlled approach gives the polymer chains enough time and thermal energy to arrange themselves into an ordered, crystalline structure.
The result? An opaque, heat-resistant sheet capable of withstanding temperatures above 200 degrees Celsius. That heat tolerance makes CPET the material of choice for oven-safe meal trays, dual-ovenable containers (microwave and conventional oven), and ready-meal packaging for airlines and food service companies.
The equipment differences are significant. Where an APET line relies on cold chill rolls, a CPET-capable sheet extruder machine requires heated calibration rolls — sometimes set above 140 degrees Celsius — and may incorporate inline annealing ovens or heated conveyor sections downstream. These additions increase capital cost and energy consumption, which is why most converters choose one configuration or the other rather than running both on the same line without modifications.
GPET — Glycol-Modified PET for Specialty Uses
GPET, more commonly known as PETG, introduces a chemical twist. By incorporating a glycol modifier — typically cyclohexanedimethanol (CHDM) — into the PET polymer backbone, manufacturers reduce the material's natural tendency to crystallize. The practical payoff? GPET remains amorphous even under slower cooling conditions, making it significantly easier to thermoform, bend, and bond than standard APET.
You'll encounter GPET in cosmetic packaging, point-of-sale displays, protective face shields, and applications that demand solvent bonding or RF sealing — techniques that standard PET resists. For buyers evaluating an extrusion line for sale that promises versatility across specialty applications, GPET compatibility is a valuable feature to confirm upfront.
The table below pulls these three PET variants together so you can compare them at a glance:
| Property | APET (Amorphous) | CPET (Crystalline) | GPET / PETG (Glycol-Modified) |
|---|---|---|---|
| Clarity | Excellent — glass-like transparency | Opaque — white or off-white | Very good — clear with slight warmth |
| Heat Resistance | Moderate — up to ~70 degrees C | High — above 200 degrees C | Low to moderate — ~65 degrees C |
| Thermoformability | Good — standard forming window | Narrow — requires precise temperature control | Excellent — wide forming window |
| Typical Thickness Range | 0.15 – 2.0 mm | 0.30 – 2.0 mm | 0.20 – 2.0 mm |
| Primary Applications | Food clamshells, blister packs, display packaging | Oven-safe trays, dual-ovenable meal containers | Cosmetic packaging, displays, face shields, signage |
| Key Downstream Equipment | Cold chill rolls (25–40 degrees C), high line speed | Heated calibration rolls, annealing ovens | Standard chill rolls, moderate line speed |
Notice how every row in that table traces back to a specific equipment decision on your extrusion line. Choosing the wrong sheet type for your downstream configuration — or worse, buying a line without understanding which types it can realistically produce — leads to months of frustration and costly retrofits. The material dictates the machinery, not the other way around.
Yet even with the right sheet type selected and the correct downstream equipment in place, there is a hidden variable that quietly governs whether your finished sheet meets spec or ends up as scrap. That variable is intrinsic viscosity — and it deserves far more attention than it typically receives.
How Intrinsic Viscosity Shapes PET Sheet Quality
You've selected the right sheet type, configured the downstream equipment to match, and you're ready to run. But here is the uncomfortable truth most pet sheet extrusion line suppliers never discuss during the sales process: if you don't understand and actively manage intrinsic viscosity, none of those upstream decisions will save your sheet from haze, brittleness, or outright rejection.
Intrinsic viscosity — commonly shortened to IV — is the single most important material parameter in PET processing, yet it rarely appears in equipment brochures or sales presentations. Let's change that.
What Intrinsic Viscosity Means for PET Processing
Think of IV as a fingerprint for polymer chain length. Technically, it is an indirect measure of the molecular weight of PET, expressed in deciliters per gram (dL/g) and determined through a solvent dissolution test. Longer polymer chains mean higher IV values, and those longer chains directly translate into better mechanical strength, greater melt stability, and improved optical properties in the finished sheet.
Why should you care? Because IV governs three things that determine whether your film and sheet extrusion operation turns a profit or generates scrap:
- Melt viscosity: Higher IV produces a thicker, more stable melt that resists sagging and tearing during the transition from die to chill roll. Too low, and the melt curtain becomes unmanageable.
- Melt strength: Adequate chain length ensures the molten sheet holds its shape under the tension of downstream pulling and winding equipment — critical for maintaining dimensional consistency.
- Mechanical performance: In the finished product, IV directly influences impact resistance, tensile strength, and rigidity. A sheet with degraded IV may look acceptable coming off the line, yet fail during thermoforming or end-use handling.
Different PET sheet applications demand different IV ranges. General-purpose APET packaging — clamshells, blister packs, display covers — typically uses resin with an IV between 0.74 and 0.80 dL/g. Thicker structural sheets, CPET oven-safe trays, and applications requiring superior toughness often call for higher IV grades, sometimes reaching 0.85 dL/g or above. For context, PET used in textile fibers operates at a much lower IV range of 0.40 to 0.70 dL/g, while bottle-grade PET sits in the 0.70 to 0.85 dL/g window. Selecting the wrong IV grade for your target application is like choosing the wrong fuel octane for an engine — the system technically runs, but performance suffers in ways that compound over time.
How IV Degrades During Extrusion and How to Prevent It
Here is the part that catches many operators off guard: PET does not simply retain the IV printed on the resin supplier's data sheet. The moment pellets enter your pet sheet extruder, molecular chains start breaking. Every processing decision you make either preserves those chains or shortens them — and shortened chains mean lower IV, weaker sheet, and reduced clarity.
Two degradation mechanisms do the most damage:
- Hydrolytic degradation: PET is hygroscopic — it absorbs moisture from the air. When wet resin enters a hot extruder barrel, water molecules attack the ester bonds in the polymer backbone, snapping chains apart and driving IV downward. This is the number-one cause of IV loss in sheet extrusion, and it is entirely preventable.
- Thermal degradation: Excessive barrel temperatures and prolonged residence time inside the extruder cause polymer chains to break through purely thermal mechanisms. The longer the melt sits at elevated temperatures, the more chain scission occurs. Research on PET degradation pathways confirms that thermo-mechanical stress during consecutive processing cycles progressively reduces molecular weight, affecting rheological, thermal, and mechanical properties.
Preventing hydrolytic degradation starts with rigorous pre-drying. PET resin must be crystallized and then dried in dehumidifying dryers to moisture levels below 50 ppm — typically in the range of 0.02% to 0.04% moisture content. Conventional drying protocols call for residence times of four to six hours at approximately 160 to 170 degrees Celsius, with dryer dew points held at or below minus 40 degrees Celsius. Skip this step, cut the drying time short, or allow the dryer desiccant to degrade, and you'll see bubbles, haze, and mechanical weakness show up in the sheet within minutes.
Thermal degradation demands a different set of controls. Barrel temperature profiles should be set as low as practical for achieving a homogeneous melt — hotter is not better with PET. Screw design matters enormously: poor flight geometry, excessive compression ratios, or an inadequate L/D ratio can create shear hot spots and extend residence time beyond safe limits. If you're evaluating used extrusion lines or shopping for a used extruder for sale, the condition and design of the screw and barrel deserve as much scrutiny as the motor and control system — arguably more, because a worn screw directly accelerates IV loss through uncontrolled shear and extended melt residence.
Even a small IV drop of 0.02 dL/g can noticeably reduce sheet clarity and mechanical performance — a change invisible to the eye at the extruder but painfully obvious at the thermoformer.
The practical takeaway? IV management is not a set-it-and-forget-it task. It requires continuous attention to dryer performance, barrel temperatures, screw condition, and throughput rates. Operators who treat IV as a living variable — monitoring it, protecting it, and adjusting process parameters to preserve it — consistently produce sheet that thermoforms cleanly, looks flawless, and meets mechanical specifications. Those who don't end up chasing defects that seem to appear at random but actually trace straight back to molecular chain degradation.
Knowing what IV is and why it matters, though, only tells half the story. The real question is how each stage of the extrusion process — from pellet drying through melt forming and sheet cooling — either supports or undermines that fragile molecular integrity.
The PET Sheet Extrusion Process Step by Step
Every stage of your pet sheet extrusion line either protects or destroys the molecular integrity you worked so hard to preserve during resin selection and drying. That reality makes the process far more than a simple "melt it and flatten it" operation. Each zone, each temperature setting, and each downstream component plays a direct role in determining whether the finished sheet meets spec — or becomes expensive scrap.
Before diving into the details, here is the complete sequence at a glance:
- Crystallization and drying of PET resin to eliminate moisture
- Gravimetric feeding for precise material delivery and blend control
- Plasticizing and homogenizing through the extruder barrel zones
- Melt filtration to remove contaminants and gels
- Flat die forming to shape the melt into a uniform sheet profile
- Chill roll cooling and polishing to solidify and finish the sheet surface
- Thickness gauging and automatic feedback for dimensional control
- Edge trimming, haul-off, and winding into finished rolls
Sounds straightforward on paper. In practice, the interactions between these stages are where most operators either excel or struggle. Let's walk through each one.
Material Preparation — Drying and Feeding
If there is a single step that separates experienced PET processors from newcomers, it is material preparation. PET is hygroscopic — it actively pulls moisture from ambient air — and processing wet resin triggers hydrolytic degradation that cuts polymer chains and tanks your IV before the melt even reaches the die. That is not a theoretical risk. It happens on production floors every day when drying protocols are shortcut.
The preparation sequence starts with crystallization. Virgin PET pellets arrive in an amorphous state and tend to stick together when heated directly. A pre-crystallizer — typically a heated, agitated hopper operating at around 160 to 180 degrees Celsius — brings the pellets to a semi-crystalline state that prevents clumping and prepares them for the main dryer.
From the crystallizer, material flows into a desiccant dehumidifying dryer. Unlike conventional hot-air dryers, desiccant systems strip moisture from the circulating air before it contacts the resin, achieving the ultra-low dew points that PET demands — typically minus 40 degrees Celsius or lower. Target residence time in the dryer falls between four and six hours at 160 to 170 degrees Celsius, bringing resin moisture content below 50 ppm (0.005%). Rushing this step by cutting dwell time or neglecting desiccant bed regeneration cycles is one of the most common — and most costly — mistakes in sheet plastic extrusion.
How do you verify that drying actually achieved the target? Inline moisture analyzers or periodic sampling with a moisture balance give you data instead of assumptions. Trust numbers, not timers.
After drying, a gravimetric feeding system meters material into the extruder at a precise, consistent rate. Why gravimetric instead of volumetric? Because PET pellets, rPET flakes, and masterbatch additives all have different bulk densities. A volumetric feeder measures volume, which shifts as material density changes. A gravimetric feeder measures actual weight per unit time, maintaining accurate throughput and blend ratios even when switching between virgin and recycled material or introducing color concentrates. For operations running rPET blends — increasingly common as sustainability mandates tighten — this accuracy is not optional.
Melt Processing — Plasticizing and Homogenizing
The heart of any sheet extruder is the screw-and-barrel assembly, and understanding what happens inside it is critical for anyone operating or purchasing a pet sheet extruder machine. The melting process inside a single-screw extruder is not simply about heating plastic until it flows. It is a combined thermal-mechanical process driven by conduction, friction, shear, and pressure — and the screw geometry controls how all four interact.
The barrel is divided into three functional zones, each with a distinct job:
- Feed zone (solid conveying): Dried pellets enter through the feed throat and are compacted by the screw flights. The channel depth is deepest here, and the primary goal is consistent forward transport of solids — not melting. A water-cooled feed throat prevents premature softening that would cause pellets to stick and bridge.
- Transition / compression zone (melting): The channel depth decreases progressively, compressing the solid bed against the heated barrel wall. A thin melt film forms at the barrel surface, and shear heating generated by the screw flights provides the majority of the energy needed to complete the phase change. This is where most of the actual melting occurs — barrel heaters set the thermal boundary, but mechanical shear does the heavy lifting.
- Metering zone (homogenized melt delivery): The channel depth is shallowest and constant, generating stable pressure and ensuring the melt reaching the die is fully homogenized in temperature and viscosity. Inconsistent melt here translates directly into gauge variation in the finished sheet.
Screw geometry determines how effectively these zones perform. Three design parameters matter most:
- L/D ratio (length-to-diameter): PET sheet screws typically run at 24:1 to 36:1. Longer screws provide more residence time for gentle, thorough melting — important for preserving IV — while shorter designs risk incomplete homogenization.
- Compression ratio: This describes the difference in channel depth between the feed and metering zones. For PET, moderate compression ratios prevent excessive shear heating that would degrade molecular chains. Overly aggressive compression generates heat spikes that accelerate IV loss.
- Flight design: Flight depth, pitch, and width influence the balance between conveying efficiency and shear intensity. Barrier-flight screws, which separate solid and molten polymer into distinct channels, can improve melt consistency and reduce the risk of unmelt particles reaching the die.
Precise barrel temperature profiling across zones ties everything together. PET melt temperatures typically fall in the 270 to 290 degrees Celsius range, but the profile is never flat. The feed zone runs cooler to avoid premature melting and screw slippage. The transition zone ramps up to initiate melting. The metering zone stabilizes at a target that balances full homogeneity against thermal degradation. Even small deviations — five to ten degrees Celsius in the wrong direction — can cause problems ranging from incomplete melting to yellowing and gel formation.
What many operators overlook is that screw wear changes everything. A worn compression zone loses its ability to generate adequate shear, pushing the melting point further downstream and destabilizing pressure in the metering section. If you're evaluating a used sheet extruder or considering aftermarket screw replacements — whether from American Maplan extruders or other OEMs — measuring actual channel depth against original specifications reveals more about future performance than any cosmetic inspection can.
Sheet Forming — Die, Chill Roll, and Downstream
Once a fully homogenized melt exits the extruder — ideally passing through a melt pump for consistent pressure and a screen changer for contaminant removal — it enters the flat die, where the real sheet forming begins.
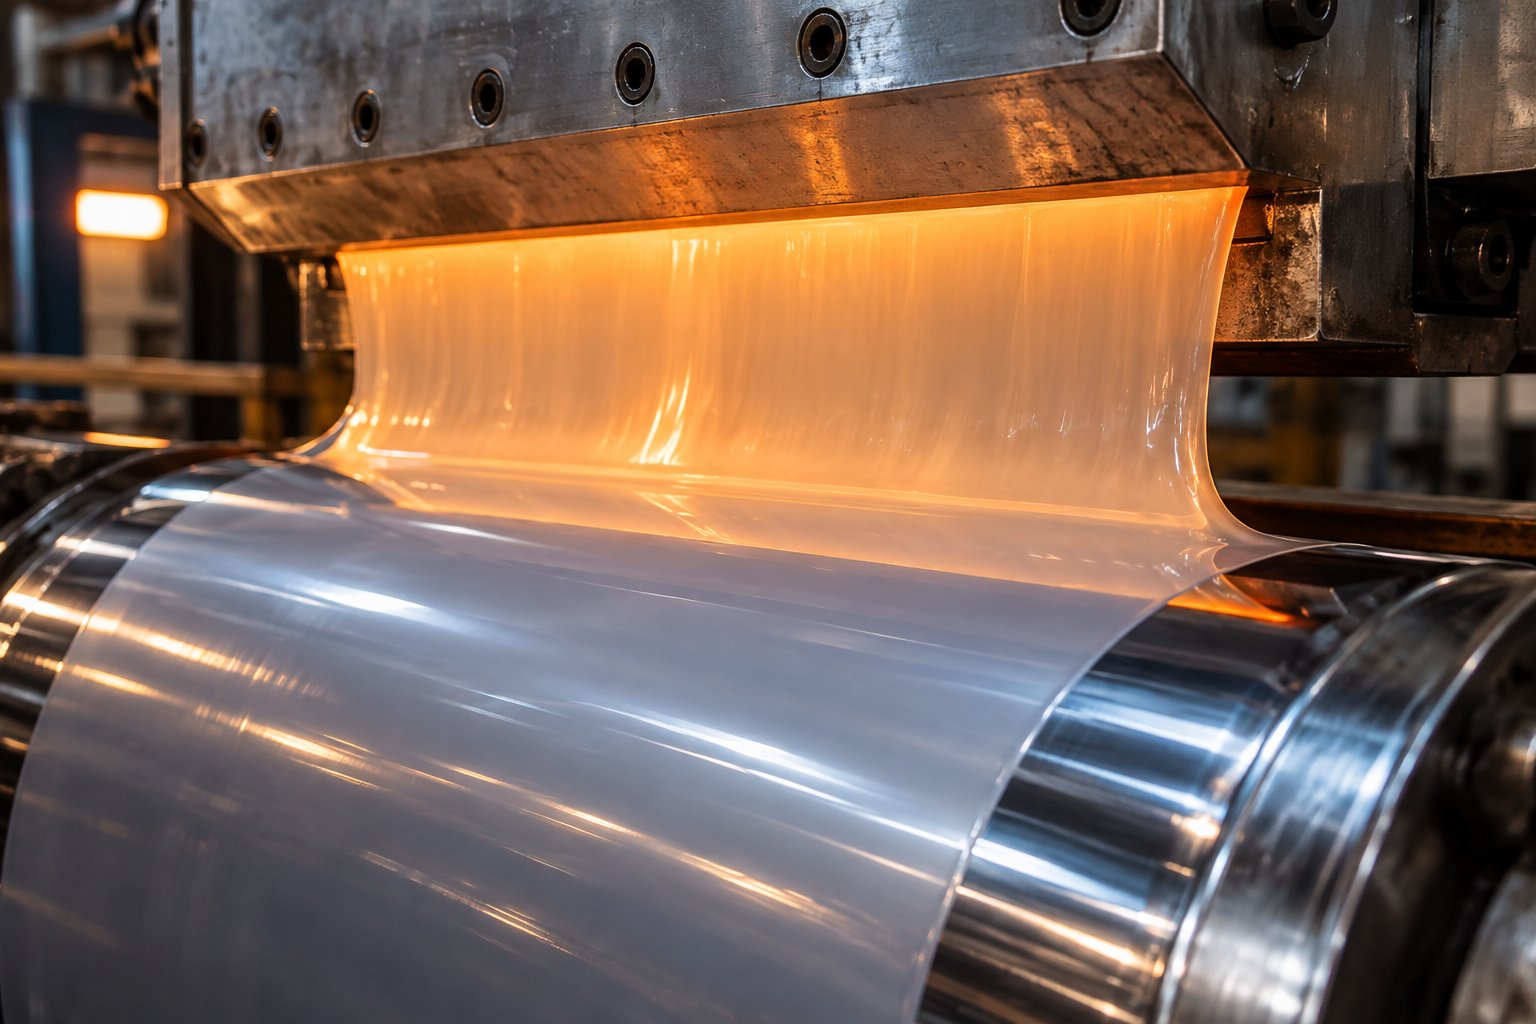
The most common die design for PET sheet is the coat-hanger die. Imagine a cross-section shaped like a wire coat hanger: a central inlet feeds a manifold that gradually reduces in cross-sectional area from center to edges, distributing the melt evenly across the full working width. This geometry ensures that every point across the die lip receives equal flow and equal pressure — critical for thickness uniformity. T-slot dies, which use a constant manifold cross-section, are simpler but cause inferior flow distribution and polymer hang-up at the edges, making them a poor choice for precision PET sheet work.
Die lip gap adjustment controls the initial sheet thickness profile. Manual push-pull adjustment bolts let operators dial in the gap across the die width, but modern lines increasingly use automatic thermal die bolts. These bolts expand or contract in response to electrical heating, allowing a closed-loop control system to make micro-adjustments in real time based on feedback from downstream thickness gauges. The result is significantly tighter gauge tolerance across the full sheet width — a feature that pays for itself quickly in reduced trim waste and thermoforming consistency.
From the die lip, the molten curtain drops onto the three-roll polishing and cooling stack — often called the chill roll stack. This is where the magic of APET versus CPET happens in practice:
- For APET (amorphous sheet): Chill rolls are held at low temperatures, typically 25 to 40 degrees Celsius. The rapid quench freezes the polymer in its amorphous state, preserving the optical clarity that makes APET valuable. Line speed runs fast to minimize the time the sheet spends at temperatures where crystallization could initiate.
- For CPET (crystalline sheet): The first roll may be heated above 140 degrees Celsius, and additional heated calibration rolls or inline annealing zones provide the thermal energy needed for controlled crystallization. Slower line speeds give polymer chains the time to organize into the crystalline structures that deliver heat resistance.
The three chrome-plated rolls in the stack serve triple duty: they cool the sheet, impart surface finish (matte or gloss depending on roll texture), and calibrate final thickness through precise nip gap and roll speed settings. Roll temperature uniformity across the full width matters enormously — even a few degrees of variation creates differential cooling that shows up as warpage, internal stress, or uneven clarity.
Downstream of the chill roll stack, the process enters its quality-control and finishing phase. An inline thickness gauging system — using beta-ray absorption or X-ray measurement — continuously scans the sheet width, feeding data back to the automatic die bolt system for real-time correction. Edge trimming units cleanly remove the uneven borders created during die forming, and the trim is typically granulated and recycled back into the process via an inline edge-trim recovery loop. Finally, a haul-off unit pulls the sheet at a controlled speed — the ratio of haul-off speed to extruder output is one of the primary levers for fine-tuning final gauge — and a winding station rolls the finished sheet into manageable rolls for storage, shipping, or direct feed to a thermoforming line.
Every one of these steps interacts with the others. Change the die gap without adjusting chill roll speed, and you get gauge drift. Alter barrel temperatures without rechecking the dryer output, and moisture-related defects appear. Run the haul-off too fast relative to extruder output, and the sheet thins beyond spec. A well-run line treats the entire sequence as a single, interconnected system — because it is one.
The process itself, however, is only as good as the hardware executing it. And the specific equipment choices you make — from extruder type to auxiliary systems that most suppliers barely mention — have a surprisingly large impact on sheet quality, uptime, and long-term operating cost.
Essential Equipment and Auxiliary Systems on the Line
Ask most suppliers to describe a pet sheet extrusion line and you will hear about the extruder, the die, and the chill roll stack — the big-ticket items that anchor every quotation. What you rarely hear about are the auxiliary systems running quietly alongside them. Yet these supporting components often determine the difference between a line that holds tight gauge tolerances hour after hour and one that drifts unpredictably between screen changes, shift handoffs, and material transitions.
A complete sheet extrusion machine is not a single device. It is a coordinated ecosystem of core machinery and purpose-built auxiliaries, each one solving a specific problem. Understanding what every piece does — and what happens when it is absent — gives you far more negotiating power than any supplier brochure ever will.
Core Machinery — Extruder, Die, and Cooling Stack
The extruder is where polymer becomes melt, and for PET sheet the dominant choice remains the single-screw extruder. Why not twin-screw? Twin-screw configurations deliver superior mixing and positive displacement feeding, which makes them ideal for compounding, reactive extrusion, and processing materials with complex formulations or high filler loads. PET sheet production, however, prioritizes low shear heat generation, gentle melt handling, and maximum IV preservation. A single-screw design achieves all three. It generates less frictional heating in the compression zone, subjects the melt to a shorter and more predictable shear history, and delivers consistent output at a lower energy cost per kilogram — all factors that directly protect those fragile polymer chains discussed earlier.
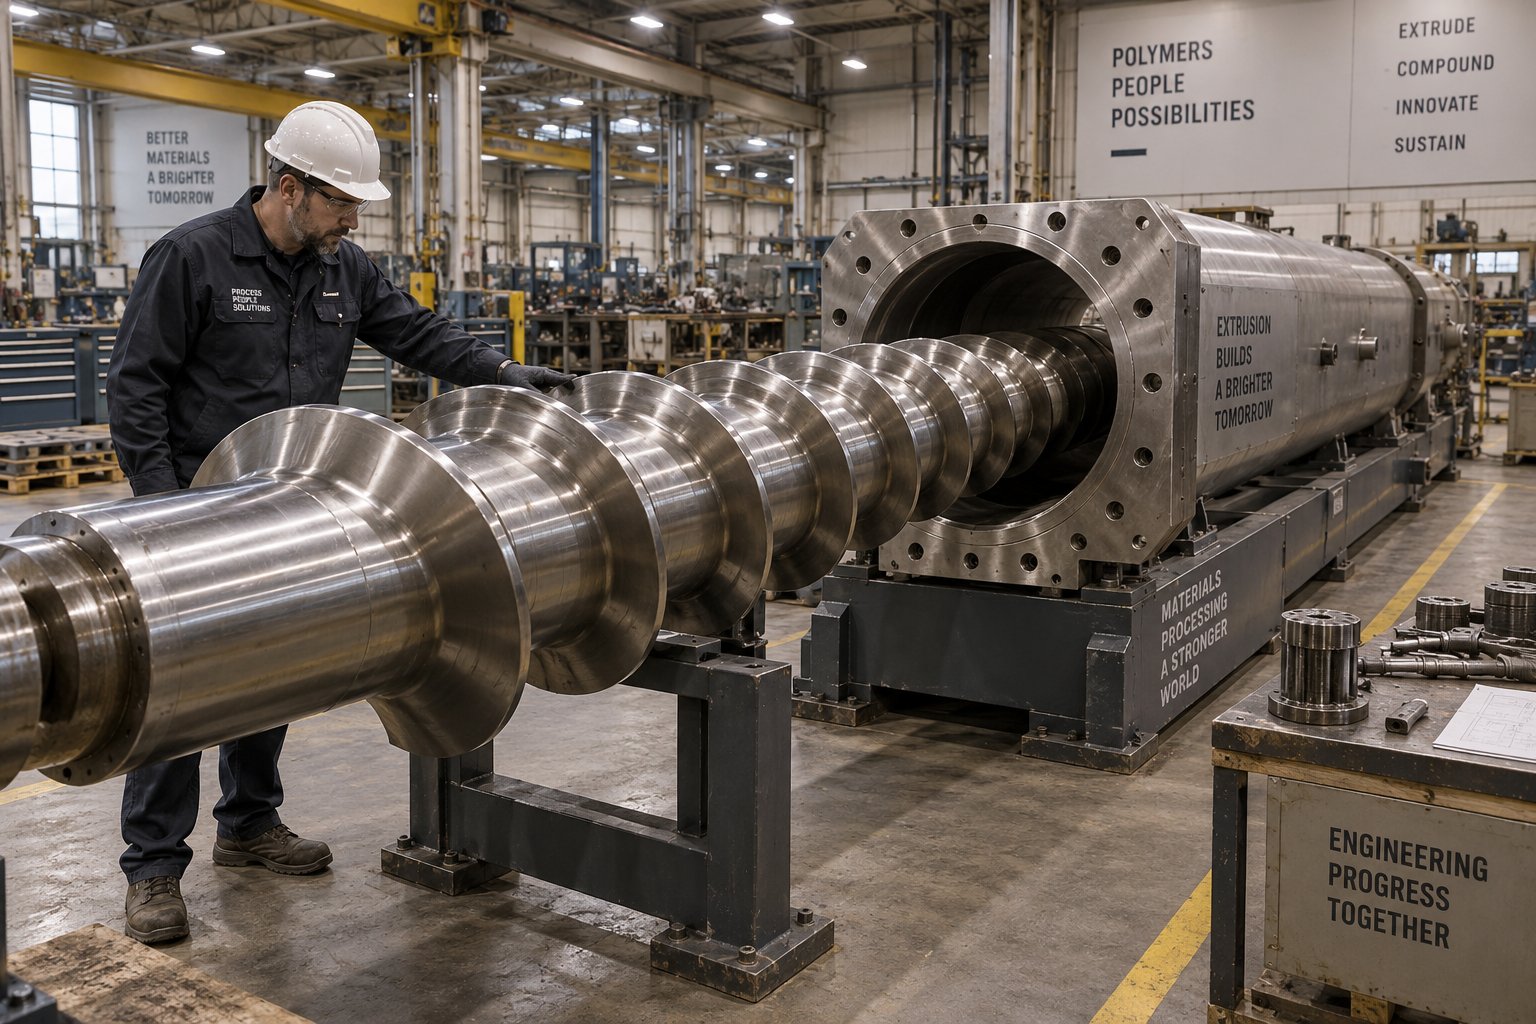
The screw and barrel themselves deserve special attention, because their metallurgy, geometry, and surface condition govern melt quality more than any other single component. Operators seeking optimized or replacement screw barrels for PET extrusion often turn to specialists like NANHAIYA, whose custom-engineered single screw barrels are designed specifically for sheet, film, pipe, recycling, and pelletizing extrusion lines. Selecting the correct compression ratio, flight depth, and barrel alloy for PET's sensitivity to shear and thermal history is not a generic decision — it is one of the most consequential equipment choices on any line.
Downstream of the extruder, the flat die converts a cylindrical melt stream into a wide, uniform curtain. Coat-hanger die geometry remains the industry standard for PET sheet because it equalizes flow velocity and pressure across the full working width — typically ranging from 800 mm for narrow specialty lines up to 2,000 mm or more for high-volume packaging operations. Lip adjustment precision matters enormously: modern dies offer adjustment resolution as fine as 10 to 25 microns per bolt position, either through manual push-pull bolts or automated thermal die bolts that respond to feedback from downstream gauges.
The three-roll polishing and cooling stack rounds out the core machinery. These chrome-plated or mirror-finished rolls simultaneously cool the melt curtain, calibrate thickness through nip pressure and speed differentials, and impart the desired surface finish. For APET production, chill roll temperatures stay between 25 and 40 degrees Celsius to lock in amorphous clarity. CPET lines push those temperatures above 140 degrees Celsius to encourage controlled crystallization. In both cases, roll temperature uniformity across the full face width is critical — even small deviations create differential shrinkage and internal stress that show up as warpage or optical inconsistency in the finished sheet.
Auxiliary Systems That Define Line Performance
Here is where the real conversation begins — and where most supplier presentations end. The auxiliaries listed below rarely headline a sales pitch, yet each one solves a specific production problem that, left unaddressed, quietly erodes quality, inflates scrap rates, or creates unplanned downtime.
Melt pumps sit between the extruder outlet and the die inlet. Their job is deceptively simple: deliver a constant volumetric flow of melt regardless of pressure fluctuations upstream. In practice, this single addition can dramatically reduce gauge variation. Extruder output naturally pulses with screw rotation, material feeding inconsistencies, and screen-changer pressure shifts. A gear-type melt pump absorbs those fluctuations, isolating the die from upstream disturbances. The payoff? Tighter thickness tolerances, lower material giveaway, and less reliance on downstream correction systems to compensate for what is fundamentally an upstream instability. As one industry resource notes, a melt pump stabilizes flow and pressure but does not remove contamination — it complements filtration rather than replacing it.
Automatic screen changers handle melt filtration without stopping production. Every PET melt stream carries some level of contamination — gels, carbonized particles, metal dust from screw wear, or foreign polymer fragments when running recycled material. A screen pack on a breaker plate catches these before they reach the die. The challenge is that loaded screens increase upstream pressure, and replacing a clogged screen on a manual changer creates a sudden pressure drop that can produce gauge spikes, surface defects, or short scrap lengths. Automatic screen changers — whether hydraulic piston, rotary, or continuous belt types — minimize or eliminate this pressure disturbance by transitioning filtration area without interrupting melt flow. For lines running virgin PET with low contamination, a hydraulic slide-plate changer may suffice. For rPET processing or high-output lines where even brief pressure upsets create costly scrap, continuous belt changers become essential.
Static mixers are installed in the melt pipe between the extruder and the die to improve thermal homogeneity. Even with a well-designed metering zone, the melt exiting the screw can carry residual temperature gradients — hotter material near the barrel wall, cooler material near the screw root. These gradients translate directly into viscosity differences, which cause uneven flow through the die and visible thickness bands in the finished sheet. A static mixer uses fixed, helical elements to repeatedly divide and recombine the melt stream, evening out temperature and viscosity without adding shear heat or residence time.
Edge trim granulators with inline recycling solve a material-efficiency problem that every sheet line faces. The edges of every extruded sheet are inherently uneven — thicker, thinner, or slightly irregular compared to the controlled center section. Trim systems cleanly remove these edges, granulate the material on the spot, and feed it directly back into the extruder hopper via a conveying system. This inline recycling loop recovers what would otherwise be waste, often reclaiming 10 to 15 percent of total extruder throughput. Without it, you are literally throwing margin on the floor.
Beta-gauge or X-ray thickness measurement with automatic die-bolt feedback closes the quality loop. A scanning gauge head traverses the sheet width continuously, building a real-time cross-direction thickness profile and tracking machine-direction trends. When paired with automatic thermal die bolts, this system creates a true closed-loop control: the gauge detects a high or low lane, the controller calculates the correction, and the corresponding die bolt adjusts — all without operator intervention. The result is consistent gauge across the entire roll, reduced material giveaway from intentional overbuild, and traceable quality data for every roll produced.
The table below consolidates each auxiliary system, its core function, and its measurable impact on sheet quality:
| Auxiliary System | Primary Function | Impact on Sheet Quality |
|---|---|---|
| Melt Pump | Delivers constant melt pressure and volumetric flow to the die | Reduces gauge variation by isolating the die from extruder output pulsation |
| Automatic Screen Changer | Filters contaminants from the melt without stopping production | Prevents gels, black specks, and die damage; eliminates scrap from pressure disturbances during screen changes |
| Static Mixer | Homogenizes melt temperature and viscosity before the die | Eliminates thermal streaks and cross-web viscosity differences that cause thickness bands |
| Edge Trim Granulator with Inline Recycling | Reclaims trim edges and returns them to the extruder feed | Recovers 10–15% of throughput as usable material; reduces waste and raw material cost |
| Beta-Gauge / X-Ray Thickness Measurement | Continuously scans cross-web and machine-direction thickness | Provides real-time profile visibility; enables data-driven manual or automatic correction |
| Automatic Die-Bolt Feedback Control | Adjusts individual die lip zones based on gauge data | Maintains tight cross-web tolerances; reduces overbuild, trim waste, and operator dependence |
Notice a pattern? Each auxiliary system addresses a failure mode that the core machinery alone cannot prevent. A perfectly engineered extruder still pulses without a melt pump. A flawless die still produces gauge drift without thickness feedback. A pristine resin still generates scrap if contamination passes through unfiltered. The core machines create the sheet — the auxiliaries protect its quality.
For operators evaluating new or used equipment — whether building a line from scratch, upgrading a pp sheet extrusion line or pvc sheet extrusion line for PET capability, or sourcing replacement components — the lesson is clear: do not budget for the extruder, die, and chill rolls alone. Budget for the entire system. The auxiliaries are not accessories. They are the infrastructure that turns a pet extrusion setup from a machine into a production platform.
A single-layer line with the right auxiliaries can produce excellent sheet. But what happens when your customers demand barrier properties, food-contact compliance with recycled content, or multi-material aesthetics that a single-layer configuration simply cannot deliver? That is where multi-layer co-extrusion enters the picture — and it brings an entirely new set of equipment decisions with it.
Multi-Layer Co-Extrusion for Advanced PET Sheets
A single-layer PET sheet handles an impressive range of packaging applications — until it doesn't. The moment a customer asks for oxygen-barrier performance in a fresh-meat tray, food-contact compliance on a sheet made with 80% recycled content, or a glossy clear surface hiding a cost-effective filled core, one extruder feeding one die simply cannot deliver. That is where multi-layer co-extrusion transforms your pet sheet extrusion line from a single-purpose machine into a genuinely versatile production platform.
Most suppliers mention co-extrusion in passing — a checkbox on a spec sheet, a bullet point in a brochure. What they rarely explain is why specific layer configurations exist, what equipment each one demands, and how the added complexity changes daily operations. Let's fill that gap.
Why Multi-Layer PET Sheet Co-Extrusion Exists
Every layer in a co-extruded sheet solves a specific problem. No one adds complexity for its own sake — the drivers are functional, regulatory, and economic:
- Barrier performance: PET alone is a decent moisture barrier but offers limited resistance to oxygen and carbon dioxide transmission. For modified atmosphere packaging (MAP) used in fresh meat, cheese, and prepared meals, an EVOH (ethylene-vinyl alcohol copolymer) layer sandwiched within the PET structure dramatically improves oxygen barrier properties, extending shelf life from days to weeks. Without co-extrusion, you would need to laminate a separate barrier film onto the PET sheet — a slower, more expensive secondary process.
- Food-contact compliance with recycled content: Regulations from the FDA and EFSA impose strict decontamination requirements on recycled PET intended for direct food contact. Co-extrusion sidesteps the most difficult compliance hurdles by placing rPET in the core layer while encapsulating it with virgin PET skin layers that form the actual food-contact surfaces. The recycled content stays safely isolated from the food product, and the finished sheet meets regulatory thresholds without requiring every batch of rPET to clear the most stringent food-grade certification.
- Aesthetic flexibility: Imagine a sheet that looks crystal-clear on both surfaces but contains a colored, opaque, or mineral-filled core. Co-extrusion makes this possible by confining pigments or fillers to the center layer, preserving the premium appearance of the outer skins. Retail brands use this approach for display packaging where visual impact is everything.
- Cost optimization: Specialty resins — barrier polymers, high-IV virgin PET, UV-stabilized grades — carry premium price tags. Co-extrusion lets you place expensive materials only where they are functionally needed, using lower-cost resins everywhere else. A thin EVOH barrier layer representing just 3 to 5 percent of total sheet thickness delivers the same performance as if the entire sheet were made from barrier material, at a fraction of the resin cost.
Each of these drivers maps directly to an equipment decision. And that is where the conversation gets practical.
Typical Layer Configurations and Equipment Requirements
Not all multi-layer structures are created equal. The configuration you choose depends on your target application, regulatory environment, and how many different materials you need to combine. Here are the most common setups:
- A/B/A (virgin PET / rPET / virgin PET): The workhorse of sustainable food packaging. Virgin skin layers provide food-contact compliance and optical clarity; the rPET core layer delivers recycled content — often 50 to 80 percent of total sheet weight. This is the configuration driving most new co-extrusion line investments as brand owners race to meet mandatory recycled-content targets.
- A/B/C (PET / tie layer / EVOH / tie layer / PET): The go-to for high-barrier food packaging. EVOH provides the oxygen barrier, adhesive tie layers bond the chemically dissimilar polymers together, and PET skins deliver strength and thermoformability. Five or even seven distinct layers are common in MAP applications for proteins and dairy.
- A/B/A with filled or colored core: Clear PET skins encapsulate a core containing mineral fillers, recycled content, or pigments. Used extensively in cosmetics packaging, electronics trays, and display applications where surface aesthetics matter but internal material composition does not.
- A/B (two-layer asymmetric): A simpler structure pairing a printable or sealable surface layer with a structural PET base. Common in lidding films and specialty industrial sheet where one surface needs different properties than the other.
What does all this mean for your equipment list? Every distinct material in the layer stack requires its own extruder — a three-material structure needs three extruders, each with independent temperature control, screw speed regulation, and feeding systems. The melt streams from these extruders must then be combined into a single, layered flow before entering the die.
Two technologies handle this combination, and understanding the difference matters:
- Feedblock systems merge the melt streams before they enter a standard single-manifold flat die. The feedblock divides, combines, and adjusts the individual layers using internal flow channels and adjustment tools that control layer ratio and distribution. This approach works well when the polymers being combined have similar processing temperatures and when the layer count stays below roughly five. It is also the more economical option, since you can pair a feedblock with a conventional coat-hanger die rather than purchasing a purpose-built multi-manifold die.
- Multi-manifold die systems keep each polymer in its own separate flow channel all the way through the die body, combining them only at the die lip. This design handles polymers with temperature differences of 20 degrees Celsius or more — critical when pairing PET (processing around 270 to 285 degrees Celsius) with EVOH or adhesive tie resins that run at significantly lower temperatures. Multi-manifold dies cost more and are heavier, but they deliver superior layer uniformity when material thermal properties diverge.
Beyond the extruders and die system, co-extrusion adds complexity in temperature control and layer ratio management. Each extruder runs its own barrel temperature profile, and the melt temperatures must be balanced so that streams combine without thermal shock or interfacial instability. Layer ratio — the percentage of total sheet thickness contributed by each material — is controlled by adjusting individual extruder screw speeds and, in feedblock systems, by internal flow adjustment levers. Even small ratio shifts can affect barrier performance, food-contact compliance boundaries, or surface appearance, so precise, repeatable control is non-negotiable.
Single-Layer or Multi-Layer: Matching Configuration to Production Goals
Not every operation needs co-extrusion. If your product range centers on clear APET clamshells made from virgin resin, a well-equipped single-layer line with robust auxiliaries will outperform a co-extrusion setup in simplicity, uptime, and cost per kilogram. Single-layer lines are faster to start up, easier to purge during material changes, and less sensitive to operator skill level.
Co-extrusion earns its place when your market demands something a single layer structurally cannot provide: barrier properties, regulatory-compliant recycled content, or layered aesthetics. The capital investment is higher — two or three additional extruders, a feedblock or multi-manifold die, and more sophisticated controls — but the product capability and material-cost savings often justify the premium within a few years of operation.
One additional consideration for operations thinking long-term: many co-extrusion lines designed for PET can also process other polymers — PP, PS, and even PVC — with appropriate screw changes, temperature adjustments, and die modifications. This multi-material capability matters if your business serves diverse markets. Plastic extrusion machines configured with modular co-extrusion heads and quick-change screw barrels can pivot between a PET barrier tray run and a PP dairy cup sheet run on the same line, giving you production flexibility that a dedicated single-polymer setup cannot match.
Whether you choose single-layer simplicity or multi-layer versatility, though, one material trend is reshaping every configuration decision on the market: the accelerating shift toward recycled PET. And processing rPET introduces a set of technical challenges that go far beyond simply swapping virgin pellets for recycled flakes.
Processing Recycled PET on Your Extrusion Sheet Line
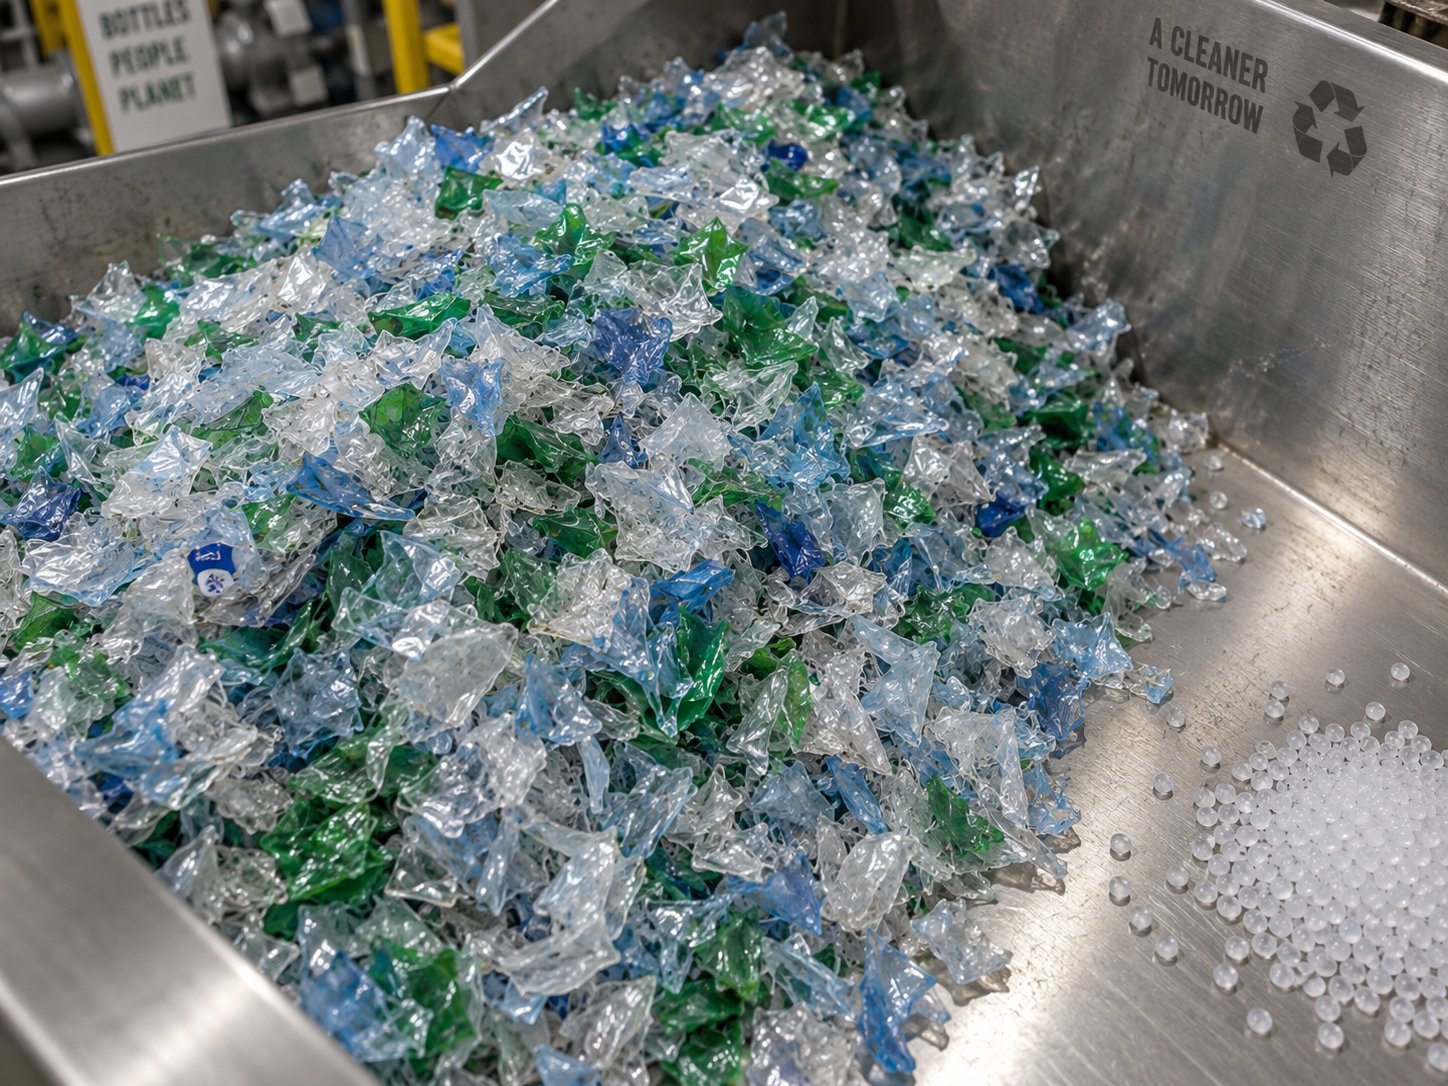
Every major brand owner and retailer is racing toward ambitious recycled-content targets — 30%, 50%, even 100% rPET in packaging by decade's end. Marketing departments love the sustainability story. What they rarely mention is what happens on the production floor when you actually feed post-consumer recycled PET through your pet sheet extrusion line. The challenges are real, they are technical, and they require specific equipment solutions that go well beyond swapping one bag of pellets for another.
If you are evaluating an extruder line for rPET capability — or wondering why your current setup struggles every time you increase recycled content — this section lays out what you actually need to know.
Technical Challenges of Processing Recycled PET
Virgin PET arrives at your facility with a tightly controlled IV, consistent color, known moisture content, and predictable melt behavior. Recycled PET arrives with none of those guarantees. Understanding the specific problems rPET introduces is the first step toward solving them.
IV variability between batches. Every batch of rPET flakes or pellets carries a different molecular weight history. Some material has been through one recycling loop; some has survived three or more. The result is IV values that swing from batch to batch — sometimes from bag to bag within the same shipment. A comprehensive review of recycled PET properties confirms that higher percentages of post-consumer recycled resin consistently correlate with lower and more variable IV, because contaminants generate acidic components that catalyze hydrolytic cleavage of the ester bond, shortening polymer chains. For your extrusion process, this variability means melt viscosity shifts unpredictably, forcing constant adjustments to barrel temperatures, screw speeds, and die lip settings just to maintain consistent sheet gauge and clarity.
Contamination. Post-consumer PET streams carry hitchhikers: adhesive residues from labels, fragments of other polymers (polyethylene caps, polypropylene labels, PVC sleeves), paper fibers, metal dust, and organic residues from prior contents. Even state-of-the-art sorting and washing facilities cannot eliminate every trace. These contaminants show up in your sheet as gels, black specks, haze, or — worst case — die lip buildup that progressively degrades surface quality across an entire production run.
Higher acetaldehyde generation. Thermal processing of PET always generates some acetaldehyde (AA), a volatile byproduct of chain degradation. Recycled PET, with its already-shortened chains and residual catalyst content, tends to produce significantly more AA during extrusion than virgin resin. For food packaging applications, excessive AA can impart off-tastes and off-odors to sensitive products — a problem that performance additives like oxygen and acetaldehyde scavengers can help mitigate, but one that demands attention during process design.
Color inconsistency. Recycled PET often exhibits a yellow or gray tint compared to water-white virgin resin. This discoloration results from thermal degradation accumulated across multiple processing cycles and from trace contaminants that survived the washing stage. Color-stable toners and recycle-friendly additives can offset yellowing and improve batch-to-batch consistency, but they add cost and require precise dosing through your gravimetric feeding system.
Re-drying complexity. Virgin PET pellets have uniform geometry and predictable bulk density, making crystallization and drying straightforward. rPET flakes are irregular in shape, vary widely in bulk density, and tend to absorb more atmospheric moisture due to their greater surface-area-to-volume ratio. Drying protocols that work perfectly for virgin pellets — four to six hours at 160 to 170 degrees Celsius — may need to be extended or adjusted for rPET. Crystallizer agitation settings often require recalibration to prevent flake bridging or clumping, and hopper residence times must be verified to ensure every particle reaches the target moisture content below 50 ppm before entering the barrel.
Equipment Modifications for rPET Processing
Recognizing these challenges is one thing. Equipping your line to handle them is another. Processing rPET at meaningful percentages — 50% and above — is not a matter of willpower. It is a matter of hardware. Here are the key upgrades that separate a line capable of running rPET reliably from one that fights it every shift.
- High-capacity continuous screen changers: On a virgin PET line, a manual or hydraulic slide-plate screen changer may be perfectly adequate — contamination levels are low and screen life is long. With rPET, contamination loads multiply dramatically, and screens clog in a fraction of the time. A continuous belt screen changer becomes essential because it indexes fresh filtration media automatically, without interrupting melt flow or causing the pressure drops that create gauge spikes and surface defects. Continuous belt designs offer particular advantages for rPET applications: no pressure drop during screen changes, minimal metal-to-metal wear, and the lowest consumable screen cost among continuous changer types.
- Vacuum degassing systems: Volatile contaminants trapped in rPET — residual solvents, degradation byproducts, acetaldehyde, and moisture that survived the dryer — need an escape route. A vacuum venting port on the extruder barrel, positioned in the metering or transition zone, pulls these volatiles out of the melt under negative pressure. The result is measurably improved sheet clarity, reduced odor, and fewer surface blemishes. Lines originally built for virgin PET often lack this feature entirely, making it one of the most impactful retrofits for rPET capability.
- Upsized crystallizer and dryer capacity: rPET flakes occupy more volume per kilogram than uniform virgin pellets, and their irregular geometry slows heat transfer during drying. To maintain adequate residence time at target temperature, the crystallizer and dehumidifying dryer may need to be 20 to 40 percent larger than what a virgin-only line requires. Alternatively, operators can add a secondary pre-drying stage or increase airflow rates — but undersizing the dryer is not something you can compensate for with wishful thinking.
- Enhanced melt filtration area: Beyond switching to a continuous changer, the total filtration area itself may need to increase. Finer mesh screens — sometimes down to 80 or 100 mesh — catch the smaller contaminant particles that rPET introduces, but finer meshes also restrict flow and load faster. A larger effective screen area balances filtration quality against pressure drop, keeping the process stable across longer runs without exceeding safe upstream pressure limits.
- Robust gravimetric blending systems: When running blends of virgin and recycled material — common during the transition toward higher rPET percentages — the feeding system must handle two or more streams with different bulk densities, flow characteristics, and moisture behaviors. A multi-component gravimetric blender with loss-in-weight control maintains accurate blend ratios regardless of these physical differences, ensuring that the sheet composition remains consistent from the first meter to the last.
Co-Extrusion as a Compliance Strategy
One of the most effective approaches to maximizing recycled content while satisfying food-contact regulations is the A/B/A co-extrusion structure discussed in the previous section — virgin PET skins encapsulating an rPET core. This configuration allows the recycled layer to comprise 50 to 80 percent of total sheet thickness without any recycled material touching the food product directly. The virgin skin layers handle regulatory compliance; the rPET core delivers the sustainability credentials and material-cost savings.
This strategy is not just clever engineering. It reflects the practical reality that achieving full food-grade certification for every incoming rPET batch is expensive, time-consuming, and sometimes impossible given the variability of post-consumer feedstock. Co-extrusion provides a reliable, repeatable path to high recycled content that brand owners, regulators, and consumers can all accept.
The regulatory and commercial pressure behind rPET adoption is not slowing down. Brand-owner commitments, EU packaging regulations, and emerging U.S. state-level mandates are pushing the industry toward lines specified for 50 to 100 percent rPET capability as a baseline rather than an option. If you are buying or upgrading equipment, designing for rPET readiness from the start — even if you are running mostly virgin material today — avoids the far more expensive proposition of retrofitting later.
Getting the equipment right and the material flowing consistently, though, only matters if the finished sheet actually meets quality standards. And when it doesn't — when bubbles appear, color shifts, gauge drifts, or surfaces haze over — knowing exactly which defect you are looking at and where it originates is the fastest path back to saleable product.
Common PET Sheet Defects and How to Fix Them
You have invested in the right equipment, dialed in your material preparation, and configured your line for the target sheet type. Production is running — and then something goes wrong. Bubbles appear inside the sheet. The once crystal-clear output turns hazy. Yellow streaks drift across the web. Thickness readings start bouncing outside tolerance. What now?
This is the moment that separates experienced operators from those still climbing the learning curve. Every defect on a plastic sheet extrusion line has a root cause, and in PET processing, those causes almost always trace back to one of three categories: moisture, heat, or mechanical control. Knowing which category you are dealing with — and which specific corrective action to take — can turn a shift-long scrap event into a thirty-minute fix.
Surprisingly, almost no supplier documentation covers this ground in meaningful detail. Equipment manuals describe how to operate the line. They rarely explain what to do when the line produces defective sheet. Consider this section your field-ready troubleshooting guide.
Moisture-Related Defects — Bubbles, Haze, and IV Loss
If you had to pick the single most common source of problems on any pet sheet extrusion line, moisture would win by a wide margin. PET is aggressively hygroscopic — it absorbs water from ambient air even while sitting in a hopper — and that absorbed moisture triggers hydrolytic degradation the instant wet resin hits a hot barrel. The ester bonds in the polymer backbone react with water molecules, snapping chains apart and driving IV downward. The consequences show up fast and they show up visibly.
Bubbles inside the sheet are the most obvious symptom. Moisture trapped in the resin vaporizes during melting, creating gas pockets that remain suspended in the melt and appear as visible voids in the finished sheet. In severe cases, you will see surface blistering — raised bumps where steam pressure distorted the sheet surface before it could solidify on the chill roll. Even at moisture levels slightly above the 50 ppm threshold, bubble formation and reduced transparency become detectable, particularly in thicker gauges where gas has more time to nucleate before the sheet cools.
Haze and reduced clarity often accompany bubbles but can also appear independently at moisture levels that are above target but not high enough to produce full-blown voids. Micro-scale chain scission from hydrolysis creates low-molecular-weight fragments that scatter light, turning what should be a glass-clear APET sheet into something that looks washed out or milky. For packaging applications where product visibility is the entire selling point, even mild haze is a rejection event.
Mechanical weakness follows right behind. Shortened polymer chains mean lower tensile strength, reduced impact resistance, and poor thermoforming performance downstream. A sheet that looks passable coming off the winder may crack, thin unevenly, or tear during forming — defects that your customer discovers, not you.
Troubleshooting moisture-related defects requires working backward through the drying system:
- Verify dryer dew point. Your dehumidifying dryer should be delivering air at a dew point of minus 40 degrees Celsius or lower. If the dew point has crept upward, the desiccant beds may be saturated, the regeneration cycle may be malfunctioning, or there may be air leaks in the closed-loop drying circuit.
- Check hopper residence time. PET resin needs four to six hours at 160 to 170 degrees Celsius to reach target moisture levels. If production rate exceeds the dryer's capacity — or if the hopper was recently refilled with a large slug of undried material — some pellets may be passing through without adequate drying time.
- Inspect desiccant condition. Molecular sieve desiccant degrades over time and loses adsorption capacity. If your dryer has been running for thousands of hours without desiccant replacement or regeneration verification, performance may have silently declined below the threshold needed for PET processing.
- Measure actual resin moisture. Don't assume the dryer is working — confirm it. Use an inline moisture analyzer or pull periodic samples for gravimetric moisture analysis. If you are running rPET flakes, remember that their irregular geometry and higher surface area demand longer drying times or higher airflow rates than virgin pellets.
Thermal Defects — Yellowing, Degradation, and Gel Formation
When moisture is confirmed under control and defects persist, the investigation shifts to temperature. PET's processing window is narrower than most operators realize. Push barrel or die temperatures even 10 to 15 degrees Celsius above optimal, and thermal degradation begins — silently at first, then visibly.
Yellowing is the classic thermal degradation signature. PET polymer chains break down under excessive heat, producing chromophore compounds that shift the sheet's color from water-white toward yellow or amber. The discoloration typically appears gradually — sometimes so slowly that operators acclimate to it and only notice when a customer rejects the roll. Overheating PET causes thermal degradation, and the effect is cumulative: resin that spends too long at elevated temperatures degrades more severely than resin processed quickly at the same temperature.
This is why residence time matters as much as temperature. A plastic sheet extruder with dead zones in the screw channel, an oversized barrel relative to throughput, or a poorly designed adapter between extruder and die can trap material in hot zones for minutes longer than necessary. That extended thermal exposure breaks chains, generates discoloration, and reduces IV — even when the thermocouple readings all look correct.
Black specks and gels take degradation a step further. When PET material sits in a stagnant zone long enough, it doesn't just yellow — it carbonizes. These carbonized particles eventually dislodge and appear as black specks scattered through the sheet. Gels, by contrast, are typically cross-linked or partially degraded polymer fragments that show up as small, raised translucent bumps on the surface. Both defects are caused by degraded material sitting in stagnant areas of the barrel, die lip, or screen pack regions, and both require more than a temperature adjustment to resolve.
Corrective actions for thermal defects target both temperature settings and residence time management:
- Audit barrel temperature profiles zone by zone. PET melt temperatures should typically fall in the 270 to 290 degrees Celsius range, with a profile that ramps gradually from feed to metering. Flat profiles or spikes in individual zones suggest heater band malfunction, thermocouple failure, or incorrect setpoints. Reduce temperatures to the lowest settings that still deliver a fully homogenized melt.
- Reduce residence time. Run the extruder at an output rate that matches its barrel volume — an undersized production order on an oversized used extruder is a recipe for thermal degradation. If you cannot increase throughput, consider reducing barrel temperature setpoints to compensate for the longer time the material spends at temperature.
- Purge stagnant zones. Black specks and gels often originate from material trapped behind screen packs, in die manifold corners, or in adapter dead spots. A thorough purge with a high-viscosity purge compound — or, in severe cases, a manual teardown and cleaning of the die and adapter — is the only reliable fix once carbonized material has accumulated.
- Inspect the screw and barrel for wear. A worn compression zone shifts the melting point downstream, increasing effective residence time in the metering zone and creating thermal hot spots. Measuring actual channel depths against original specifications reveals whether the screw needs replacement or refurbishment.
- Control regrind ratio. Repeatedly reprocessed PET accumulates thermal history with each pass. Limiting the percentage of regrind in the feed — and ensuring that trim reclaim loops do not recirculate material through more than two or three heat cycles — helps prevent the progressive yellowing that comes from over-recycled resin.
Dimensional and Surface Defects — Gauge Variation, Die Lines, and Poor Clarity
Not every defect traces to chemistry. Some of the most frustrating problems on a plastic sheet extrusion line are mechanical in origin — the result of hardware condition, control system gaps, or physical misalignment that no amount of temperature or moisture adjustment will fix.
Gauge variation — uneven thickness across the sheet width or along the machine direction — ranks among the most costly defects because it creates waste at every downstream step. Cross-direction thickness variation typically points to die lip issues: uneven lip gap settings, thermal distortion of the die body, or fouled adjustment bolts that no longer respond accurately. Machine-direction variation — thickness that cycles or drifts over time — usually originates upstream: melt pressure fluctuations from unstable extruder output, a worn screw that delivers inconsistent volumetric flow, or the absence of a melt pump to dampen pressure pulses. Without a gear pump isolating the die from upstream instability, every screw-rotation pulse translates into a thickness ripple in the finished sheet.
Die lines — persistent streaks running in the machine direction — are almost always a die lip problem. Material buildup on the lip surface, scratches from improper cleaning, or microscopic nicks from foreign objects create flow disruptions that stamp themselves into the sheet as visible lines. Die lip contamination and material buildup on the die surface are the primary culprits, and the only reliable fix is careful cleaning with brass or copper tools — never steel scrapers — followed by inspection under magnification. If die lines persist after cleaning, the lip may need professional re-polishing or replacement.
Surface haze on otherwise defect-free sheet often confuses operators who have already confirmed their drying system is performing correctly. In this case, the cause is usually downstream rather than upstream. Chill roll temperatures that are too cold can quench the sheet surface so aggressively that microscopic stress patterns develop, scattering light and creating a frosty appearance. Conversely, rolls that are too warm allow partial crystallization in APET sheet, introducing opacity. The air gap between the die lip and the first chill roll also matters — too large a gap allows the melt curtain to cool unevenly and sag, producing thickness inconsistencies and surface irregularities. Optimizing the combination of roll temperature, air gap distance, and line speed resolves most clarity issues that are not moisture-related.
The table below consolidates the most common PET sheet defects, their typical root causes, and the recommended corrective actions in a single reference you can bring to the production floor:
| Defect | Typical Root Cause | Recommended Corrective Action |
|---|---|---|
| Bubbles / blistering | Resin moisture above 50 ppm; insufficient vacuum degassing; contaminated rPET | Verify dryer dew point (below -40 degrees C); confirm 4-6 hr residence time; check desiccant condition; improve rPET washing quality; optimize vacuum degassing |
| Haze / cloudiness (moisture-related) | Marginal drying allowing micro-scale hydrolysis; degraded polymer scattering light | Measure actual resin moisture with inline analyzer; extend drying time for rPET; upgrade to higher-capacity dryer if throughput exceeds current dryer rating |
| Yellowing | Excessive barrel/die temperature; prolonged residence time; over-recycled regrind | Reduce barrel temperatures to minimum for homogeneous melt; increase throughput to shorten residence time; limit regrind to 2-3 thermal cycles; strengthen raw material quality control |
| Black specks | Carbonized material in barrel dead zones, die manifold, or adapter; contaminated rPET feed | Purge with high-viscosity purge compound; schedule preventive die teardown and cleaning; install or upgrade fine-mesh melt filtration; inspect raw material for foreign contamination |
| Gels (raised translucent bumps) | Cross-linked or partially degraded polymer; insufficient filtration; stagnant melt zones | Install fine-mesh continuous screen changer; eliminate dead spots through die and adapter redesign; maintain consistent production speed to prevent stagnation |
| Gauge variation (cross-direction) | Uneven die lip gap; thermal distortion of die body; fouled die bolts | Recalibrate die lip settings; verify automatic die-bolt feedback is functioning; inspect die body heating uniformity; clean or replace stuck adjustment bolts |
| Gauge variation (machine-direction) | Extruder output pulsation; worn screw; no melt pump; screen-changer pressure disturbance | Install or verify melt pump operation; inspect screw flights for wear; switch to continuous screen changer to eliminate pressure drops during screen changes |
| Die lines (machine-direction streaks) | Damaged or contaminated die lip; material buildup; foreign particles disrupting flow | Clean die lip with brass/copper tools; inspect under magnification for nicks or scratches; re-polish or replace lip if damage is permanent; improve upstream filtration |
| Surface haze (non-moisture-related) | Incorrect chill roll temperature; excessive air gap between die and first roll; partial crystallization in APET | Optimize chill roll temperature (25-40 degrees C for APET); reduce air gap distance; adjust line speed to balance cooling rate with sheet thickness |
| Edge cracking / sheet breakage | Excessive internal stress from uneven cooling; degraded resin with reduced toughness; excessive winding tension | Balance cooling uniformly across sheet width; verify resin IV has not degraded below acceptable range; reduce winding tension; maintain consistent sheet temperature |
| Sheet curling | Differential cooling rate between top and bottom surfaces; residual internal stress; unbalanced roll temperatures | Equalize cooling across both sheet surfaces; optimize calendering roll temperatures; adjust line speed to minimize stress buildup |
Print that table and keep it near the operator console. When a defect appears mid-run, the instinct is to start changing everything at once — temperatures, speeds, die gaps — hoping something fixes the problem. That approach usually makes things worse by introducing multiple variables simultaneously. Instead, identify the defect category first. Is it moisture, thermal, or mechanical? Then work through the corresponding corrective actions one at a time, verifying results before moving to the next adjustment. Systematic troubleshooting is slower in the first five minutes but dramatically faster over the course of a shift.
The fastest path from defective sheet to saleable product is not more adjustments — it is the right adjustment, made once, based on accurate root-cause identification.
One pattern worth noting across all three defect categories: equipment condition is a recurring factor. Worn screws, degraded desiccant, fouled die lips, and malfunctioning gauges do not announce themselves with alarms. They degrade gradually, and the defects they produce creep in slowly enough that operators adapt rather than investigate. Building preventive maintenance into your production schedule — desiccant replacement intervals, screw measurement audits, die lip inspection protocols, and calibration checks on gauging systems — catches these problems before they reach the sheet.
Knowing how to diagnose and fix defects keeps your current line running. But the broader question — whether your line, your supplier, and your overall equipment strategy are set up for long-term success — requires a different kind of evaluation framework entirely.
Evaluating Suppliers and Building the Right Line
Diagnosing defects on an existing line is a reactive skill. Choosing the right supplier and equipment configuration in the first place is a proactive one — and it pays dividends for the entire 15- to 20-year lifespan of the machinery. Yet here is the uncomfortable reality: almost every piece of "buyer's guidance" available online comes from companies selling sheet extruders. Their evaluation criteria inevitably steer you toward their own product. What follows is different — a vendor-neutral framework built around the metrics that actually predict long-term production success, regardless of which nameplate sits on the machine.
Key Criteria for Evaluating PET Sheet Extrusion Line Suppliers
Imagine you have three quotations on your desk, each from a different supplier, each promising excellent output and unbeatable pricing. How do you separate genuine capability from marketing polish? Start with these six evaluation criteria — in order of importance — and insist on verifiable evidence for each one.
- Proven throughput capacity and sheet width range. Every supplier quotes a maximum output figure. What matters is the sustained output — the kilograms per hour you can reliably maintain shift after shift, not the peak number achieved during a ten-minute demonstration. Ask for production data logs from reference installations running the same resin grade and sheet thickness you plan to produce. Verify the working width range and confirm whether the quoted output applies to the narrowest, widest, or some intermediate sheet width. A line rated at 800 kg/h on a 1,200 mm die may only deliver 600 kg/h at 1,800 mm — a detail that rarely appears in brochures.
- IV preservation performance. This is the criterion that separates suppliers who truly understand PET from those who build generic plastic sheet extrusion equipment and relabel it for PET applications. Ask each supplier to disclose the typical IV drop their screw and barrel configuration produces — from resin inlet to die outlet — at your target throughput. A well-engineered single-screw system should limit IV loss to 0.02 dL/g or less. Suppliers who cannot provide this number either have not measured it or know the answer is unflattering. Either way, it tells you something important about their engineering depth.
- Energy efficiency metrics. Rising electricity costs make energy consumption per kilogram of output (kWh/kg) a direct driver of your operating margin. Research on polymer extrusion energy efficiency shows that traditional systems operate at just 45 to 75 percent efficiency, with major losses occurring in motor drives, barrel heating, and cooling systems. Upgraded AC vector drives, induction heating, and optimized cooling designs can deliver 25 to 40 percent energy savings over conventional configurations. Ask each supplier for their specific energy consumption data at your target output, and compare the numbers on a per-kilogram basis to strip out the effect of different line sizes.
- Automation level and control system sophistication. A line with manual die-bolt adjustment, no inline thickness gauging, and a basic relay-logic control panel will technically produce PET sheet — but it will demand constant operator intervention, produce wider gauge tolerance bands, and generate more scrap than a system with PLC-based closed-loop control, automatic die-bolt feedback, recipe management, and data-logging capability. Evaluate the control system not as a luxury, but as the infrastructure that enables consistent quality with less operator dependency. As experienced industry engineers emphasize, the supplier's willingness to walk you through zone-by-zone temperature profiles, HMI screens, and PLC programming for your specific resin grade is a strong indicator of genuine process expertise versus generic sales knowledge.
- After-sales support and spare parts availability. The best-engineered line in the world becomes a liability if the supplier takes three weeks to ship a replacement heater band or cannot send a technician within 48 hours of a critical failure. Verify response-time guarantees in writing. Confirm that common wear parts — screw tips, thermocouples, die bolts, breaker plates, screen packs — are stocked, not manufactured to order. Ask reference customers specifically about their support experience after commissioning, not during the honeymoon period when everyone is paying attention.
- Reference installations with verifiable production data. Nothing substitutes for talking to operators who run the same type of line you are considering. Request at least three reference contacts running comparable material, sheet thickness, and output volume. Ask them about sustained uptime percentages, actual versus quoted throughput, the frequency and cost of unplanned maintenance, and — critically — whether they would buy from the same supplier again. A supplier who cannot produce any willing reference customers is waving a red flag that no glossy brochure can cover.
The total cost of ownership over 15 to 20 years — energy, spare parts, downtime, and maintenance — matters far more than the upfront purchase price on day one.
One additional signal worth watching: how the supplier responds when you push back on technical details. A confident manufacturer welcomes questions about screw L/D ratio, die-lip adjustment precision, or IV preservation test results. A supplier who deflects, gives vague answers, or pivots to price when asked about engineering specifics is telling you — through their evasiveness — that those details will not survive scrutiny. Whether you are evaluating brand-new sheet extruders, exploring used extrusion equipment, or considering small plastic extruders for sale to serve a niche market, the evaluation framework above applies equally. Scale changes; the principles do not.
Building a Line That Grows With Your Business
Even the most rigorous supplier evaluation only captures a snapshot of today's production requirements. Markets shift. Regulations tighten. Customers who ordered single-layer APET clamshells last year may demand barrier co-extrusion or 50 percent rPET content next year. The line you buy today needs to accommodate the products you will be asked to make three, five, and ten years from now — or it becomes a constraint rather than an asset.
Three scalability dimensions deserve attention during the specification and purchase process:
- Modular co-extrusion capability. Even if your current product range is entirely single-layer, consider whether the line's control system, die platform, and factory layout can accommodate additional extruders and a feedblock later. Retrofitting co-extrusion onto a line that was never designed for it is expensive and disruptive. Specifying the control architecture, electrical infrastructure, and floor space for future co-extrusion capability at the time of initial purchase costs relatively little and preserves your options.
- rPET processing readiness. As discussed earlier, processing recycled PET at meaningful percentages requires high-capacity continuous screen changers, vacuum degassing, upsized dryers, and robust gravimetric blending. If your current operation runs 100 percent virgin resin, these features may seem unnecessary today. But regulatory mandates and brand-owner requirements are making rPET capability a baseline expectation, not a premium option. A line specified with rPET-ready filtration, venting, and drying connections — even if those systems are not installed on day one — avoids the far costlier proposition of retrofitting under time pressure when a major customer makes recycled content a purchase condition.
- Downstream integration options. Will you wind sheet into rolls for sale to external thermoformers, or will you eventually run an inline thermoforming station directly off the extrusion line? The answer affects haul-off design, accumulator requirements, and control system architecture. Similarly, consider whether your winding system can accommodate the range of roll diameters and sheet thicknesses you may need in the future, and whether the line speed range is broad enough to handle both thin packaging sheet and thicker structural grades.
Across all three dimensions, one theme recurs: component-level quality determines how well the line ages. Motors, drives, and control systems attract attention during the buying process because they carry recognizable brand names — Siemens, ABB, Schneider. But the components with the greatest impact on day-to-day melt quality, energy consumption, and maintenance intervals are the screw and barrel. These are the parts that touch every gram of polymer you process, and their metallurgy, dimensional precision, and surface treatment directly govern how much IV you preserve, how much energy you consume, and how many hours you run between maintenance stops.
This is where component-specialist suppliers play a critical role that OEM line builders sometimes overlook. NANHAIYA, for example, engineers custom and replacement single screw barrels specifically for sheet, film, pipe, pelletizing, and recycling extrusion applications — a breadth of extrusion expertise that translates into application-specific screw geometry, optimized compression ratios for PET's sensitivity to shear, and barrel alloys selected for the corrosive and abrasive conditions that rPET processing introduces. Whether you are specifying screws for a new line build, replacing worn components on an aging system, or upgrading a used extrusion line for higher performance, working with a specialist who understands the relationship between screw design and PET melt quality is one of the highest-return investments you can make.
The broader point applies beyond any single component supplier: treat your pet sheet extrusion line as a system that evolves, not as a static purchase. The suppliers, component partners, and service relationships you establish during the buying process will shape your production capability for the next two decades. Choose them with the same rigor you apply to choosing your resin — because in the long run, they matter just as much.
Frequently Asked Questions About PET Sheet Extrusion Lines
1. What is the difference between APET, CPET, and GPET sheet produced on a PET sheet extrusion line?
APET (amorphous PET) is rapidly cooled on chill rolls held at 25-40 degrees Celsius, producing glass-clear sheet ideal for food clamshells and blister packs. CPET (crystalline PET) uses heated calibration rolls above 140 degrees Celsius and slower cooling to create opaque, heat-resistant sheet for oven-safe trays rated above 200 degrees Celsius. GPET, also known as PETG, incorporates a glycol modifier that suppresses crystallization, yielding clear sheet with an exceptionally wide thermoforming window suited to cosmetic packaging and display applications. Each type requires distinct downstream equipment configurations, so confirming which sheet types your line can produce before purchasing is essential.
2. Why is intrinsic viscosity (IV) so important in PET sheet extrusion?
Intrinsic viscosity is an indirect measure of PET polymer chain length and molecular weight. It directly controls melt viscosity, melt strength, and the mechanical performance of the finished sheet. General-purpose APET packaging typically requires resin with IV between 0.74 and 0.80 dL/g, while CPET and structural sheets may need 0.85 dL/g or higher. Even a small IV drop of 0.02 dL/g during processing can reduce sheet clarity and impact resistance. Preventing IV loss requires rigorous pre-drying below 50 ppm moisture, optimized barrel temperatures, proper screw design with moderate compression ratios, and minimized residence time. Operators who actively monitor and protect IV consistently produce higher-quality, more thermoformable sheet.
3. What equipment upgrades are needed to process recycled PET (rPET) on an extrusion line?
Running rPET at 50% or higher demands several hardware upgrades beyond what a virgin-PET line requires. A high-capacity continuous belt screen changer handles the significantly higher contamination loads without causing pressure drops. Vacuum degassing on the extruder barrel removes volatiles, acetaldehyde, and residual moisture to improve sheet clarity. Crystallizer and dryer capacity typically needs a 20-40% increase because rPET flakes have irregular geometry and higher moisture absorption. Enhanced gravimetric blending systems maintain accurate virgin-to-recycled ratios despite differing bulk densities. Suppliers like NANHAIYA offer custom single screw barrels engineered for the abrasive and corrosive conditions that rPET introduces, helping preserve melt quality across extended production runs.
4. How do you troubleshoot bubbles and haze in PET sheet?
Bubbles and haze in PET sheet almost always originate from excess moisture in the resin. PET must be dried to below 50 ppm moisture content using a desiccant dehumidifying dryer with a dew point at or below minus 40 degrees Celsius and a residence time of four to six hours at 160-170 degrees Celsius. To troubleshoot, first verify the dryer dew point is within spec and check whether the desiccant beds need replacement. Then confirm that hopper residence time matches the required drying duration — a rapid production rate can push undried pellets through too quickly. Finally, measure actual resin moisture with an inline analyzer rather than relying on timer-based assumptions. For rPET flakes, extend drying time and increase airflow to compensate for their greater surface area and irregular shape.
5. What should I look for when evaluating PET sheet extrusion line suppliers?
Focus on six criteria in order of importance: sustained throughput capacity verified by production logs from reference installations, IV preservation performance measured as the IV drop from resin inlet to die outlet (target below 0.02 dL/g), energy efficiency expressed as kWh per kilogram of output, automation level including closed-loop gauge control and recipe management, after-sales support with documented response-time guarantees and stocked spare parts, and at least three verifiable reference customers running comparable products. Beyond the line itself, evaluate component-level quality — particularly the screw and barrel, which govern melt quality, energy consumption, and maintenance intervals. Specialists such as NANHAIYA engineer application-specific single screw barrels for sheet extrusion that optimize compression ratio and alloy selection for PET processing demands.
Written by
Nanhaiya Technical Team
Zhoushan Nanhaiya Plastic Machinery Co., Ltd.
The Nanhaiya technical team supports screw and barrel manufacturing projects through application review, technical communication, custom manufacturing coordination, and production and quality control.
Discuss Your Application
Related Articles
More insights on screw barrel technology and plastics processing.
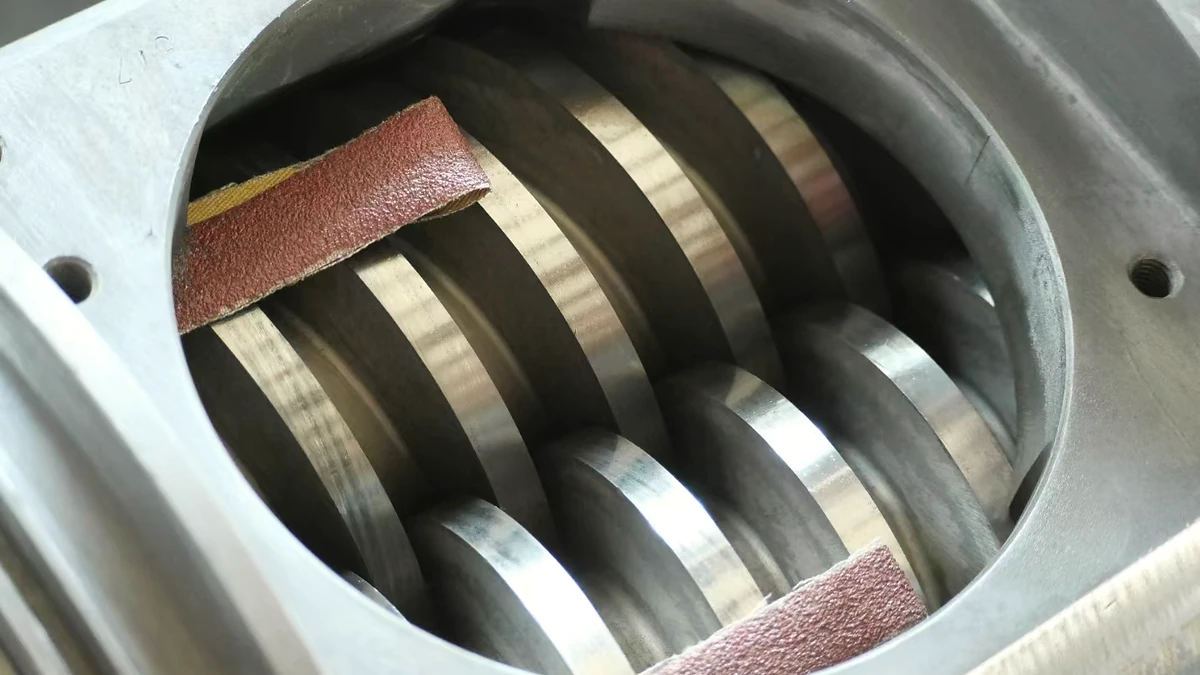
Why Your Conical Twin Screw Extruder Parts Wear Out Too Fast
Oct 28, 2026
Learn why conical twin screw extruder parts wear out fast. Full anatomy, wear analysis, material science, and maintenance checklist for PVC extrusion.
Read Article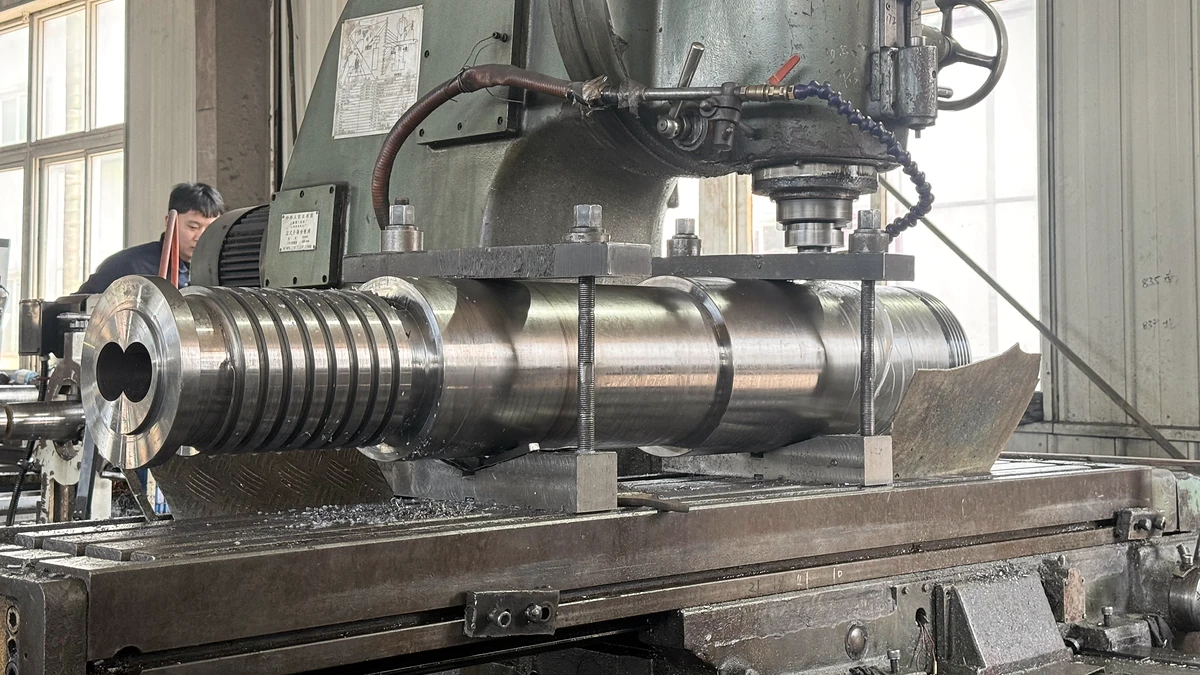
Extruder Barrel Price Decoded: What Suppliers Won't Tell You
Oct 26, 2026
Extruder barrel price guide covering cost drivers, material tiers, geographic pricing, OEM vs. aftermarket options, and total ownership cost to help buyers compare quotes smartly.
Read Article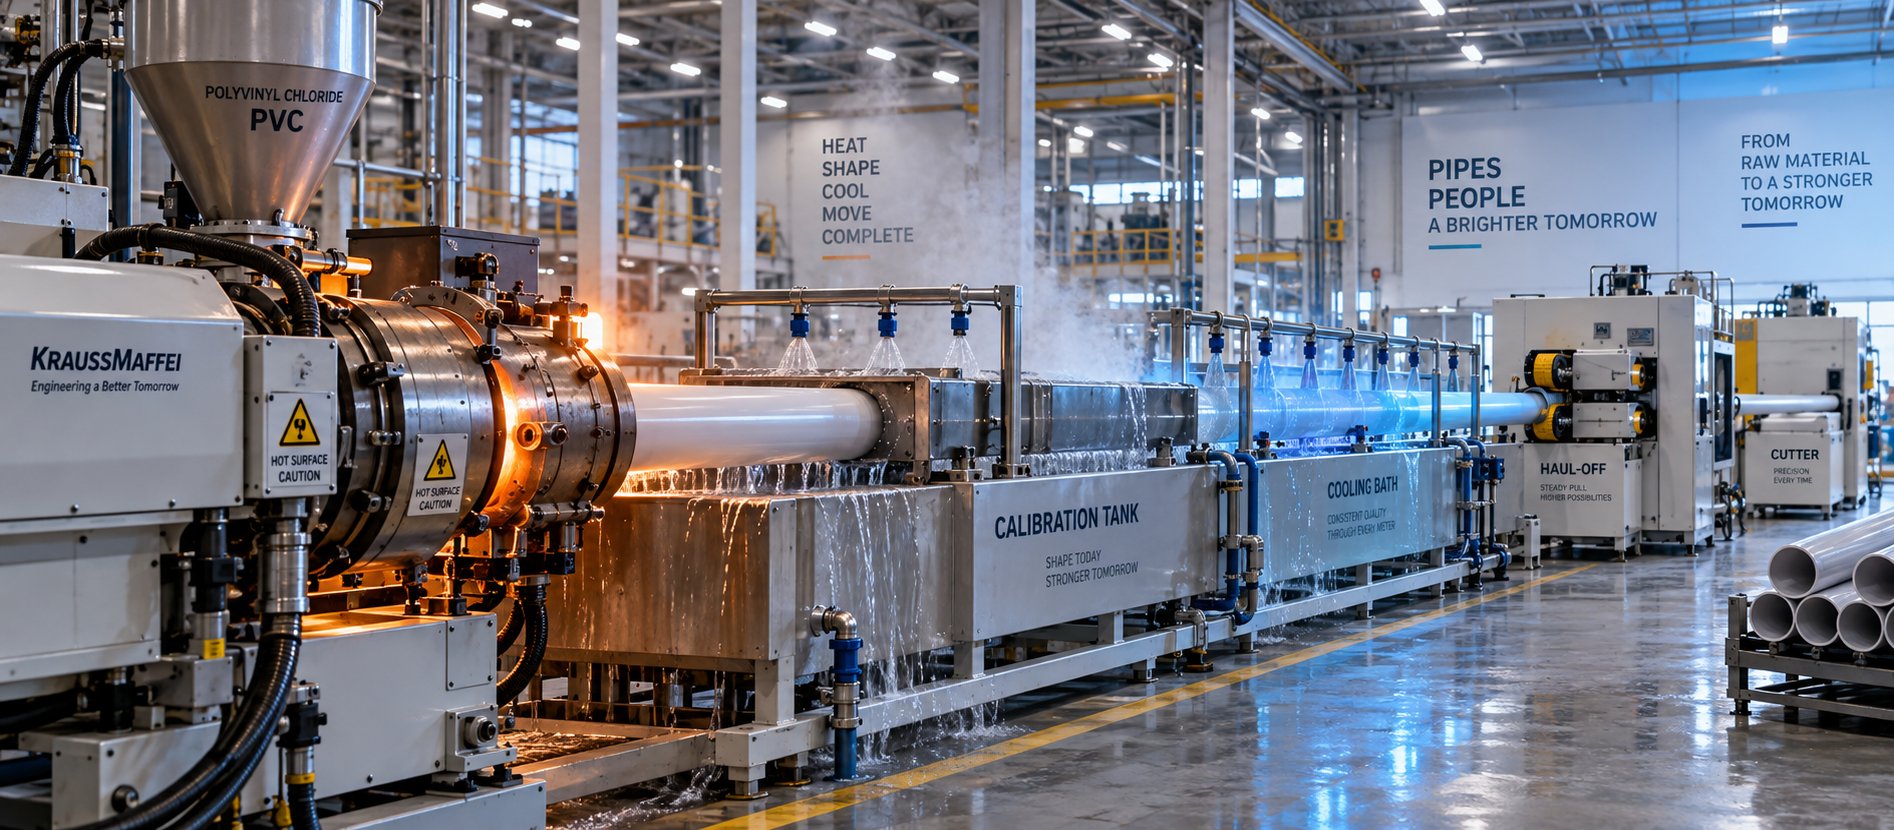
PVC Pipe Making Machine: What No Supplier Will Tell You First
Oct 21, 2026
Learn what a PVC pipe making machine really includes, how each component works, extruder types compared, maintenance schedules, defect fixes, and buying tips.
Read ArticleLooking for something else?
Search by material, symptom or product and jump straight to the relevant page.
These are navigation suggestions based on keyword matching — not a quotation, not a delivery commitment, and not a substitute for engineering review. Final specification is confirmed by our engineers against your drawings and processed material.
Need help with screw barrel selection?
Share your machine model, processed material and application. Our team can help with pricing and technical support.