

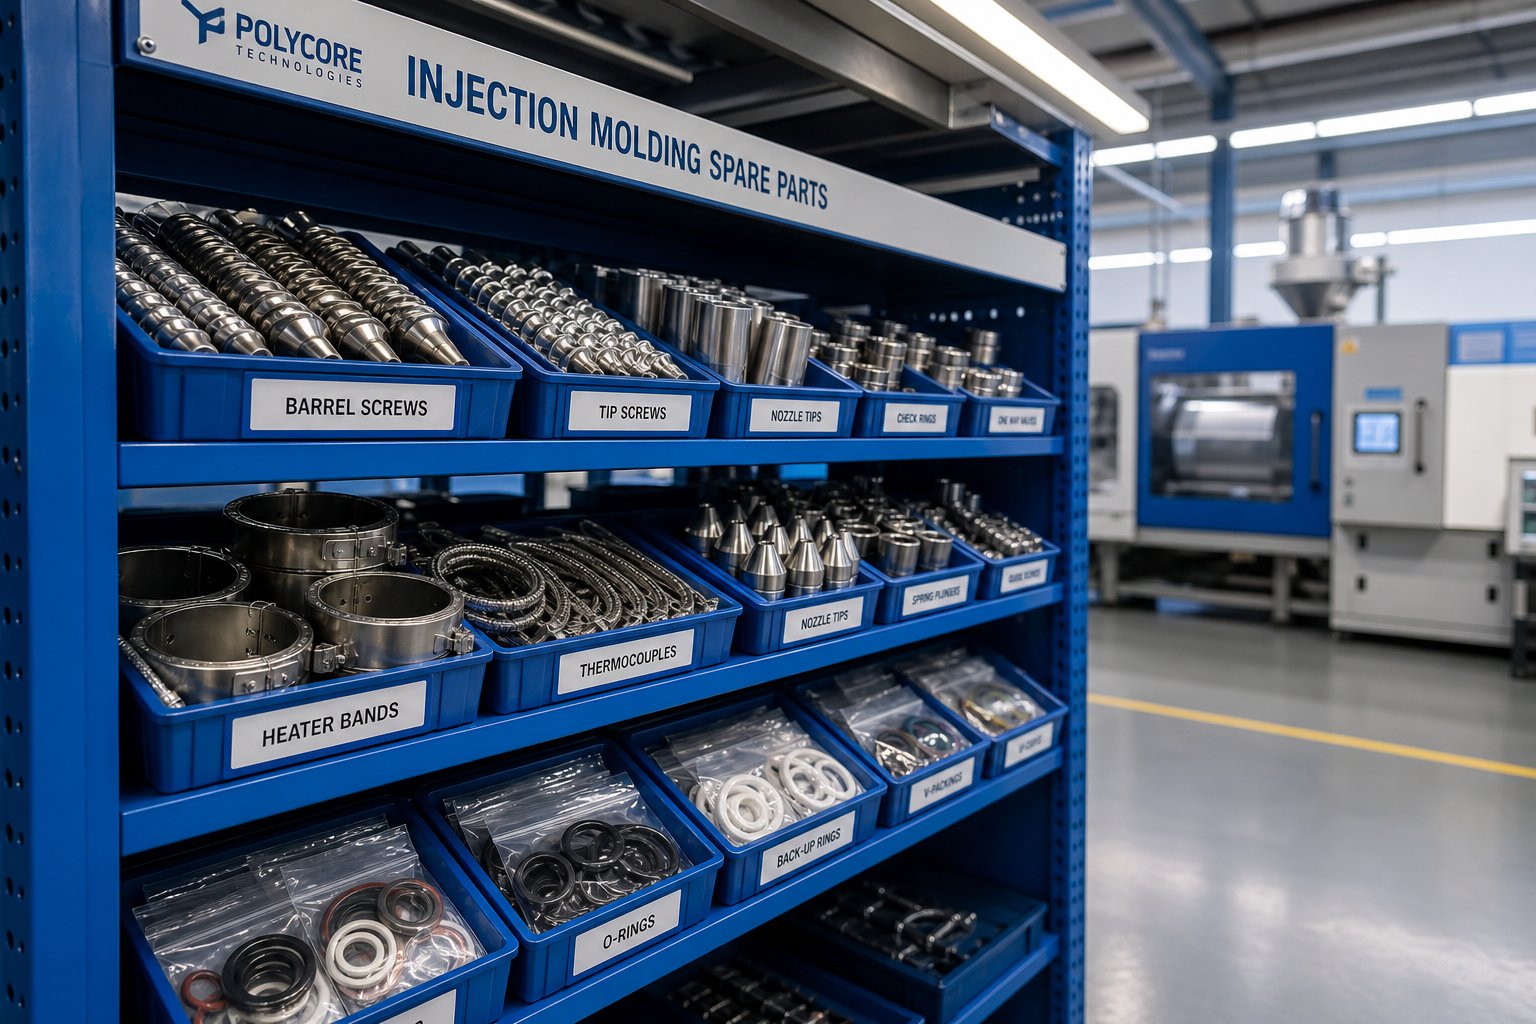
What Are Injection Molding Spare Parts and Why They Matter
Imagine a single worn-out check ring shutting down an entire production line for a full shift. The machine is fine. The mold is fine. But one small component failed, and suddenly you are hemorrhaging money by the minute. That scenario plays out in molding facilities every day, and it almost always traces back to the same root cause: a spare parts strategy that was not built to prevent it.
Injection molding spare parts are the consumable, wear-prone, and replacement components required to keep injection molding machines and molds running at specification. They span the entire molding cell — from the injection unit and clamping unit to the mold itself — and they are distinct from capital equipment like the machine frame or complete tooling assemblies. These are the items that degrade through normal operation and must be periodically inspected, serviced, or replaced to sustain consistent production of plastic parts.
What Qualifies as an Injection Molding Spare Part
Not every component on the shop floor counts as a spare part. Capital equipment — the machine itself, the robot, the conveyor — falls into a different asset category. Complete molds are classified as tooling. Spare parts, by contrast, are the individual injection mold components and machine wear items that maintain or restore function. Common examples include:
- Screw tips, check rings (non-return valves), and nozzle tips
- Heater bands, thermocouples, and barrel heaters
- Ejector pins, guide bushings, and sprue bushings
- Hydraulic seals, toggle bushings, and tie bar nuts
- Contactors, sensors, and proportional valves
Each of these mold components and machine-side parts carries a replacement cost that is usually modest. The real expense hides elsewhere.
The cost of a missing spare part is never the price of the part itself — it is the cost of the downtime it causes.
Research from EAS Change Systems reinforces this point: every hour a machine sits idle represents lost output, wasted labor, and potential delivery penalties that dwarf the price tag of any individual component in your supply chain.
Who Relies on Spare Parts Inventory
Three distinct roles depend on a well-managed component supply strategy, and each brings a different priority to the table:
- Maintenance technicians — responsible for machine uptime, these professionals need the right parts on the shelf the moment a failure occurs. Their metric is mean time to repair, and an empty bin turns a 30-minute fix into an open-ended production stop.
- Tooling specialists — focused on mold performance, they track wear on ejector pins, guide bushings, cavity inserts, and other mold-side items that directly influence the quality of finished plastic parts.
- Procurement professionals — tasked with balancing cost against lead time, they evaluate sourcing channels, negotiate pricing, and decide which items to stock versus order on demand.
The rest of this article is built as a practical resource for all three roles. It walks through every major spare part category, explains how and why components fail, provides a symptom-to-part troubleshooting guide, and lays out a structured inventory plan — so the next time a check ring wears out, the replacement is already waiting on the shelf.
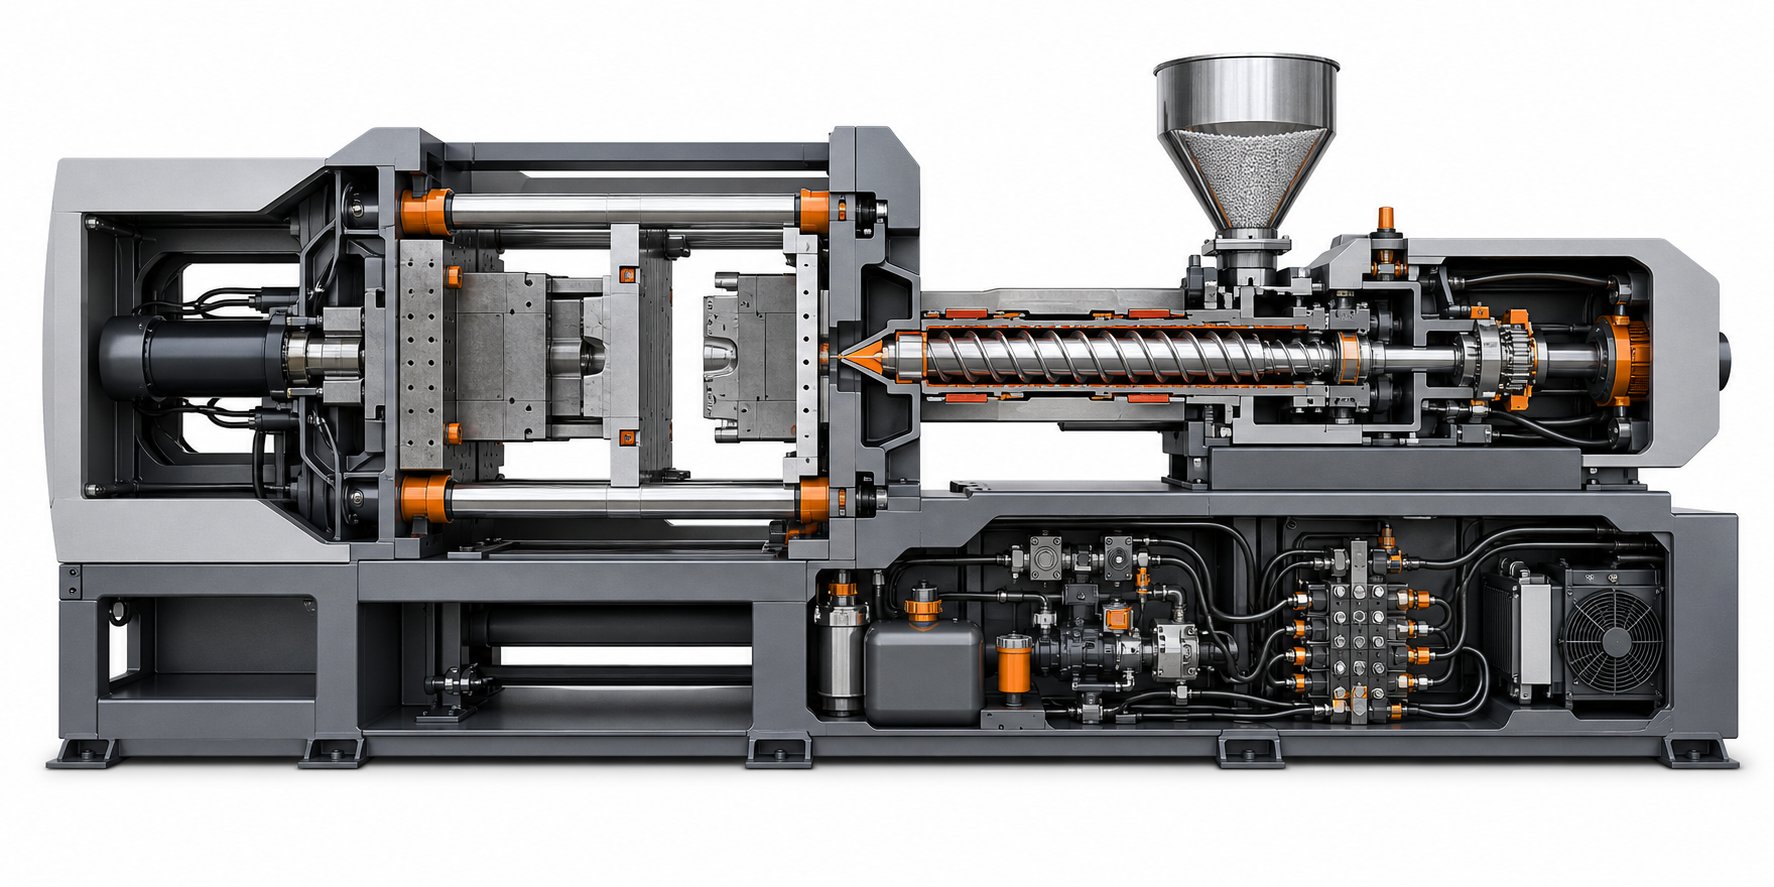
Complete Spare Parts Breakdown for Machine and Mold
Knowing that a missing part costs far more than its price tag is one thing. Knowing exactly which parts to stock is another. The challenge most maintenance teams face is scope — injection molding spare parts span two fundamentally different domains, and overlooking either one leaves a gap that production eventually falls through.
Those two domains are the machine side and the mold side. Each has its own subsystems, wear patterns, and failure consequences. Breaking them down into a single, organized reference makes it far easier to build an inventory plan that actually covers the full molding cell.
Machine-Side Spare Parts Across Every Subsystem
A typical injection molding machine contains 500 to 700 or more individual component types, depending on tonnage and configuration. You do not need to stock every one of them — but you do need to identify the wear-prone items within each major subsystem. Here is how injection mold parts break down on the machine side:
- Injection unit: screws, barrels, screw tips, check rings (non-return valves), nozzle tips, nozzle heaters, barrel heater bands, thermocouples
- Clamping unit: toggle pins, toggle bushings, tie bars, platens, hydraulic cylinders, seals, mold adjustment components
- Drive and hydraulic system: hydraulic pump components, proportional valves, servo motors, encoders, oil filters, hydraulic hoses, seal kits
- Control and electrical system: controllers, sensors, contactors, fuses, power supply modules, motor drivers
- Safety and auxiliary: guard detect sensors, lubrication system parts, cooling system fittings
Each subsystem degrades at a different rate. Injection unit components wear fastest because they are in constant contact with abrasive, corrosive, or high-temperature molten resin. Clamping unit parts experience mechanical fatigue over millions of cycles. Electrical and hydraulic components tend to fail less predictably, which makes stocking critical spares even more important.
Mold-Side Spare Parts and Tooling Wear Items
The parts of a plastic injection mold wear just as surely as machine-side components do — sometimes faster. Every mold cycle subjects pins, bushings, and sealing surfaces to repeated mechanical stress, thermal expansion, and contact with molten polymer. Organizing plastic injection mold parts by function makes it easier to audit inventory against actual wear patterns:
- Ejection components: ejector pins, ejector sleeves, ejector return pins, core pins, lifter components
- Guidance and alignment: guide pins, guide bushings, interlocks, alignment locks
- Feed system: sprue bushings, runner inserts, cavity inserts, gate inserts
- Thermal management: cooling fittings, baffles, bubblers, hose connectors
- Sealing and wear surfaces: O-rings, slide wear plates, parting line inserts, date stamps
Ejector pins and guide bushings are among the most frequently replaced mold parts because they absorb direct mechanical impact every cycle. Cooling fittings and O-rings degrade from thermal cycling and chemical exposure to water treatment additives. Even small items like date stamps need periodic swaps to keep traceability current.
Why Both Categories Belong in One Inventory Plan
In practice, maintenance teams do not manage just the machine or just the mold — they manage the entire cell. A press technician troubleshooting short shots may find the root cause on the injection side (a worn check ring) or the mold side (a blocked gate insert). A tooling specialist pulling a mold for PM may discover that machine-side heater bands have also drifted out of spec.
Splitting your parts of an injection mold inventory from your machine-side inventory creates silos. When those silos do not communicate, you end up with fully stocked mold shelves but no check rings on hand — or vice versa. A unified injection molding mold parts plan, organized by both domain and criticality, gives every role on the floor a single source of truth and a faster path to getting production back online.
Of course, stocking the right parts only solves half the equation. The other half is understanding how and why those parts fail in the first place — and catching the warning signs before a worn component turns into a full production stop.
Common Failure Modes and Early Warning Signs
A well-stocked shelf means nothing if your team does not know what to look for before a component gives out entirely. Most injection molding machine components do not fail without warning. They degrade in predictable patterns — abrasive wear, thermal fatigue, erosion — and each pattern leaves behind clues that a trained eye can catch weeks or even months before a catastrophic breakdown halts production.
Understanding these failure progressions transforms your spare parts strategy from reactive to proactive. Instead of scrambling to order a replacement screw tip at 2 AM, you pull one off the shelf because your maintenance team spotted the early symptoms during a routine check.
Wear-Related Failures in Barrels and Screws
The screw and barrel are often called the "heart" of the injection unit, and they operate under some of the harshest conditions in the entire molding cell — high temperature, high pressure, and high shear over thousands of hours. Three distinct wear mechanisms attack these components:
- Abrasive wear — glass-filled nylon, mineral-filled polypropylene, and carbon fiber compounds contain hard particles that continuously grind against the screw flights and barrel bore. Over time, the screw outside diameter shrinks and the barrel ID opens up, reducing the compression ratio.
- Corrosive wear — PVC, flame-retardant plastics, and halogen-containing compounds release aggressive gases during processing. These gases pit and roughen metal surfaces, accelerating further degradation and trapping degraded resin that contaminates future molded parts.
- Adhesive wear — metal-to-metal contact between the screw and barrel, often worsened by poor concentricity or foreign object damage, creates localized galling and scoring.
The progression is gradual but measurable. You will notice screw recovery time creeping upward first. Then shot-to-shot cushion position becomes inconsistent. Eventually, the machine simply cannot hold shot size, and your injection moulded parts start showing dimensional variation and short shots. Pulling the screw for visual inspection at this stage typically reveals polished or grooved flight edges and reduced flight depth — damage that was building quietly for weeks.
Thermal Component Failures in Heater Bands and Thermocouples
Heater bands and thermocouples are among the most frequently replaced components of injection moulding machine thermal systems, yet their failure modes are often misunderstood. A blown heater band rarely fails because of a manufacturing defect. As diagnostic research from Hongtai highlights, roughly 90% of premature band heater failures fall into preventable categories: contamination from polymer ingress, air gaps caused by poor clamping, incorrect watt density, PID control errors, and mechanical wire fatigue.
Here is what happens in practice. Molten polymer or hydraulic oil seeps into the folded seams of a mica band heater. At operating temperatures above 250 degrees Celsius, these organic compounds carbonize, creating a conductive bridge that shorts the heating element to the grounded barrel sheath. The result is a violent short circuit and an immediate temperature alarm. On the outside, the telltale sign is rainbow or blue discoloration on the heater casing — a metallurgical fingerprint of extreme overheating caused by trapped heat that never made it into the barrel.
Thermocouples fail differently. They drift. Oxidation and insulation breakdown from thermal cycling cause the sensor to read slightly lower or higher than actual barrel temperature. Your PID controller compensates, but the real melt temperature has shifted. You might see zone temperature fluctuations, increasing heater alarm frequency, or subtle changes in part quality before the thermocouple fails outright. That drift window is your maintenance team's opportunity to swap in a replacement before the inaccuracy starts producing defective plastic injection parts.
Mechanical Failures in Check Rings and Nozzle Tips
The non-return valve — specifically the check ring — is one of the most critical yet frequently overlooked injection moulding machine components. During every cycle, the check ring must open cleanly to allow molten resin to flow past the screw tip, then seal tightly against the seat during injection to prevent backflow. Thousands of cycles under high pressure and temperature gradually erode the sealing surfaces.
As Asaclean's troubleshooting team notes, one telltale sign of a leaking non-return valve is the machine losing its injection cushion and its ability to apply consistent plastic pressure. Material slips past the worn ring, allowing the screw to creep forward, which limits control over packing. What starts as minor shot-to-shot variation worsens quickly into dimensional instability and rejected parts.
Nozzle tips degrade through a different combination of thermal fatigue and drool wear. Repeated heating and cooling cycles cause micro-cracking at the tip orifice, while molten resin eroding through a narrowing passage increases shear and pressure drop. The visible warning is drooling or stringing between shots, followed by burn marks from material degrading in the restricted flow path.
The table below consolidates these failure modes into a quick-reference format your maintenance team can use during inspections:
| Component | Primary Failure Mode | Warning Signs | Typical Consequence |
|---|---|---|---|
| Screw and barrel | Abrasive, corrosive, or adhesive wear | Rising recovery time, inconsistent cushion, visible flight wear on pulled screw | Shot size instability, dimensional variation, scrap increase |
| Heater bands | Contamination ingress, air-gap overheating, watt density mismatch | Zone temperature alarms, blue/rainbow discoloration on casing, frequent burnouts | Temperature loss in affected zone, unplanned machine stoppage |
| Thermocouples | Oxidation drift from thermal cycling | Zone temperature fluctuations, gradual quality shift, inconsistent melt behavior | Inaccurate barrel temperature control, defective molded parts |
| Check ring (non-return valve) | Seat erosion and sealing surface wear | Unstable cushion position, shot weight variation, poor packing | Short shots, dimensional out-of-spec, inability to maintain plastic pressure |
| Nozzle tip | Thermal fatigue cracking and drool wear | Drooling or stringing between shots, burn marks on parts | Flow restriction, material degradation, cosmetic defects on injection moulded parts |
Spotting these warning signs early is valuable, but translating a vague symptom — a short shot here, a flash defect there — into the specific spare part that needs attention is where most maintenance teams struggle. That diagnostic step deserves its own framework.
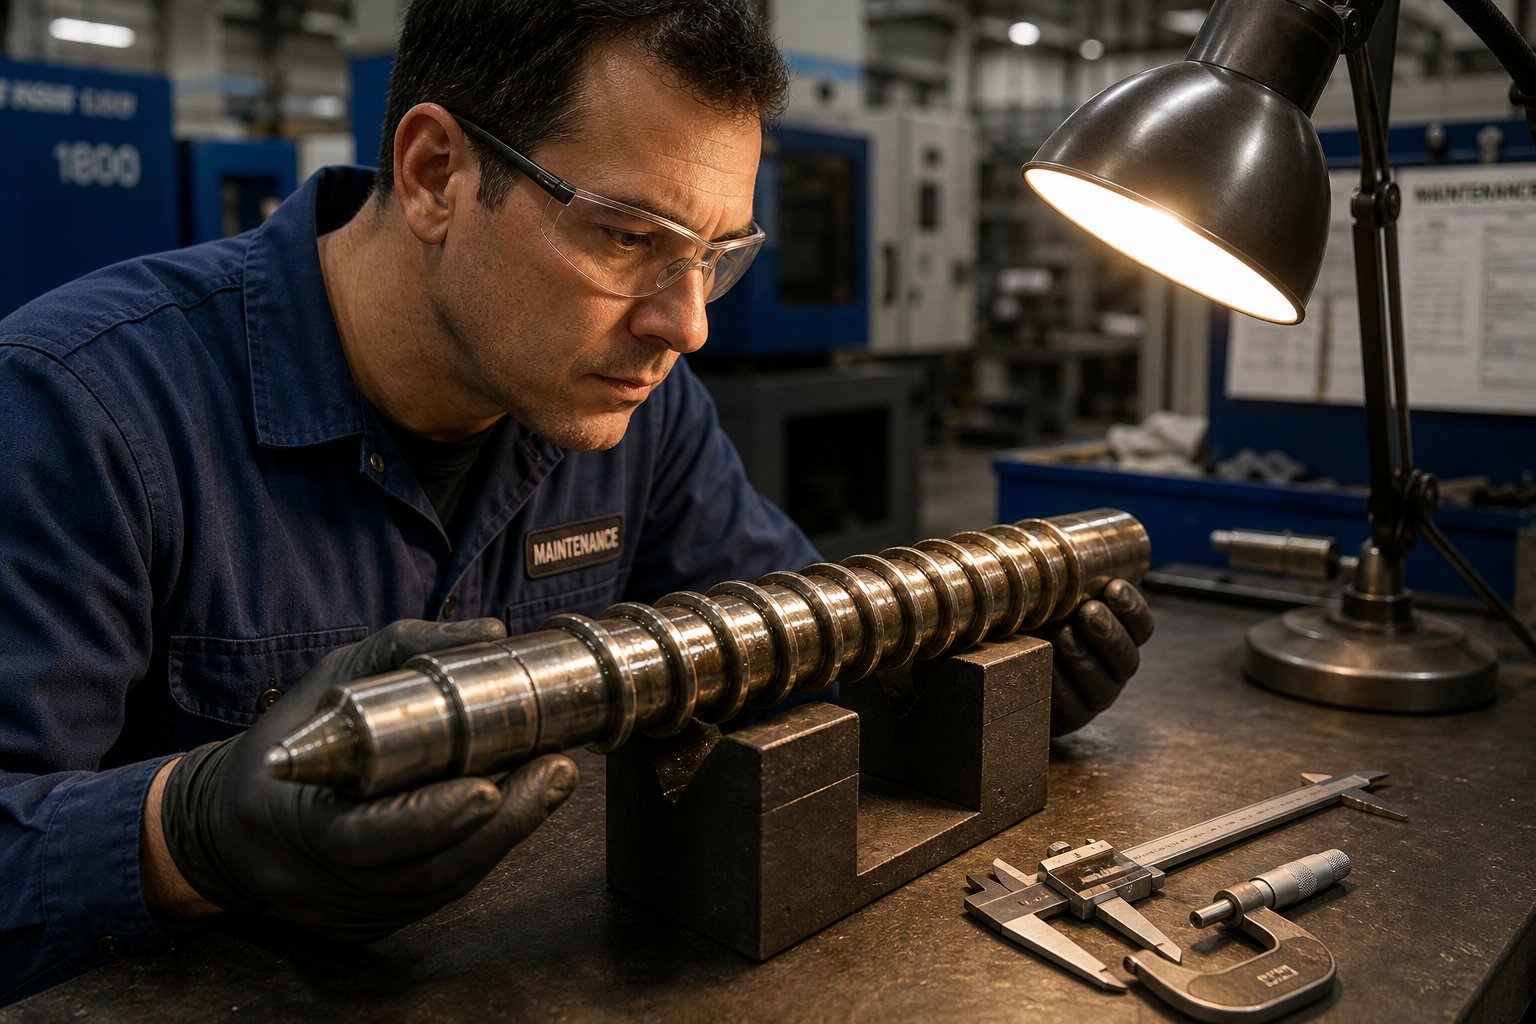
Troubleshooting Guide That Maps Symptoms to Spare Parts
You notice a defect on an injection molded part and your first instinct is to adjust a process parameter — bump the pressure, tweak the temperature, extend the hold time. Sometimes that works. But when the same symptom keeps returning shift after shift, the problem is rarely a setting. It is a worn component masquerading as a process issue.
The gap between seeing a symptom and identifying the right spare part to pull off the shelf is where hours of unplanned downtime hide. A structured symptom-to-part map closes that gap, giving maintenance technicians a direct path from what they observe to what they need to inspect or replace.
Defect Symptoms Linked to Injection Unit Spare Parts
Part defects are the most visible indicators that something has physically degraded in the injection unit. Each defect pattern points toward a specific component — if you know where to look:
- Short shots — When injection molded plastic parts come out incomplete, the most common culprit is a worn check ring or screw tip that can no longer seal properly during injection. Material leaks backward past the non-return valve instead of filling the cavity. A systematic troubleshooting approach should first rule out venting and process settings, then move directly to check ring inspection.
- Burn marks — Dark discoloration near the end of fill or at gate areas can indicate a degraded nozzle tip restricting flow. As the orifice narrows from thermal fatigue and erosion, material shears excessively through the restriction, generating localized overheating and scorching. Trapped gas from poor venting is another cause, but when vents check out clean, the nozzle tip belongs at the top of your inspection list.
- Inconsistent shot weight — When your molded plastic parts vary in weight from cycle to cycle without any process change, the root often traces to check ring wear allowing variable backflow, thermocouple drift feeding inaccurate temperature data to the controller, or barrel wear reducing plasticizing consistency. Monitoring cushion stability cycle-over-cycle quickly narrows down which component is degrading.
- Flash — Thin fins of material escaping the parting line do not always mean you need more clamp tonnage. On machines with high cycle counts, worn platens, stretched tie bars, or degraded toggle bushings can create uneven clamp force distribution. The mold seals perfectly in some areas but leaks in others — a symptom that worsens progressively as plastic injection molding parts volumes grow and mechanical wear accumulates.
The key insight here is pattern recognition. A single short shot might be a process hiccup. Short shots appearing three times in one week signal a check ring that is actively failing and needs immediate replacement.
Machine Performance Symptoms and Their Part-Level Causes
Not every spare part failure shows up as a visible defect on plastic injection moulded parts. Some failures manifest as machine performance degradation — things only the operator or maintenance team would notice on the HMI or during routine checks. These symptoms are subtler but equally damaging to production efficiency.
| Symptom | Possible Spare Part Cause | Recommended Inspection Action |
|---|---|---|
| Hydraulic pressure loss or slow response | Worn hydraulic pump internals, degraded proportional valve, blown seal kits | Check system pressure against spec; inspect pump output flow rate; look for external leaks at cylinder seals |
| Rising cycle times without process changes | Worn toggle bushings increasing friction, degraded heater bands slowing barrel heat-up, hydraulic valve response delay | Monitor clamp open/close speed trends; verify all zone temperatures reach setpoint within normal time; check valve response curves |
| Temperature instability or zone fluctuations | Thermocouple drift, partial heater band failure (reduced wattage output), loose barrel connections creating intermittent contact | Swap suspected thermocouple with a known-good unit and compare readings; measure heater resistance with a multimeter; inspect barrel band clamp torque |
| Cushion position creeping forward over time | Check ring seat erosion allowing progressive backflow | Run a series of air shots and measure cushion consistency; pull the screw for visual check ring inspection |
| Excessive screw recovery time | Barrel and screw wear reducing compression ratio, worn screw flights losing conveying efficiency | Compare current recovery time against baseline; measure screw OD at feed, transition, and metering zones |
| Abnormal machine vibration or noise during clamp movement | Worn toggle pin bushings, dry lubrication points, tie bar nut wear | Inspect toggle pin/bushing clearances; verify lubrication system output; check tie bar nut condition |
Each row in this table represents a scenario where adjusting process parameters will not solve the underlying problem. The symptom will keep returning — and often worsen — until the degraded component is physically replaced. This is precisely why experienced technicians learn to distinguish between a process drift and a hardware drift. The fix for one is a parameter change; the fix for the other is a spare part.
Using Symptoms to Prioritize Spare Parts Orders
Here is where diagnostics connect directly to inventory strategy. When your maintenance team logs recurring symptoms against specific machines, patterns emerge that tell procurement exactly which plastic injection molded parts and machine components to prioritize on the next order.
Consider a practical example. Machine 7 has triggered three cushion alarms in two weeks. Machine 12 is consistently running 1.5 seconds longer on recovery than its baseline. Machine 3 has blown two heater bands on Zone 4 in one month. Each of these patterns predicts a near-term failure — and each points to a specific spare part category that should be verified in stock immediately.
Tracking symptoms in a simple log — even a shared spreadsheet tied to your PM schedule — transforms reactive firefighting into proactive ordering. Instead of discovering the check ring stock is empty the morning after a failure, your team sees the trend, confirms inventory, and schedules a planned replacement during the next tool change. The machine never goes down unplanned, and the cost of that injection molded part defect never escalates into a full production stop.
This symptom-driven approach also highlights which components deserve tighter replacement intervals. If the same nozzle tip fails every 8,000 hours on a machine running glass-filled nylon, that data point belongs in your preventive maintenance schedule — not just your troubleshooting log.
Preventive Maintenance Schedules for Critical Components
A nozzle tip that fails every 8,000 hours on one machine but lasts 15,000 hours on another is not random. The difference almost always comes down to material, operating conditions, and whether anyone was tracking the interval. Symptom-driven troubleshooting catches problems that are already developing, but a structured replacement schedule prevents many of those problems from developing at all.
The challenge is that not every component wears at the same rate. Heater bands and thermocouples are high-frequency consumables that may need attention every few thousand hours. Screws and barrels, by contrast, can run for years before reaching their replacement threshold. Treating all molding machine parts with the same inspection cadence wastes resources on long-life items while under-serving the components most likely to fail next.
A tiered approach — grouping injection molding spare parts by replacement frequency and tying each tier to specific operating-hour or cycle-count triggers — gives maintenance teams a schedule they can actually follow without drowning in unnecessary inspections.
Replacement Intervals Based on Operating Hours and Cycle Counts
The table below organizes critical tooling components and machine-side wear items into three replacement tiers. Intervals are based on general industry guidance and data from structured PM programs running across multi-press operations. Your actual intervals will vary based on materials processed, machine tonnage, and production intensity — but this framework gives you a defensible starting point.
| Component | Inspection Interval Guidance | Replacement Trigger | Notes |
|---|---|---|---|
| Tier 1 — High-Frequency Consumables | |||
| Heater bands | Monthly resistance check; visual inspection every shift | Resistance out of spec, visible discoloration, zone unable to reach setpoint | Watch for blue/rainbow discoloration indicating air-gap overheating; keep matched sets by barrel zone size |
| Thermocouples | Monthly calibration verification | Reading deviates more than 3 degrees C from reference; intermittent signal loss | Drift is progressive — swap proactively if trending outside tolerance over two consecutive checks |
| Nozzle tips | Quarterly on standard resins; every 2,000-3,000 hours on abrasive materials | Drooling, stringing, burn marks on parts, visible orifice erosion | Stock nozzle tips matched to each machine's nozzle body thread and orifice size |
| Check rings and screw tips | Monthly cushion stability monitoring; physical inspection quarterly or every 3,000-5,000 hours | Cushion drift exceeding +/- 0.5 mm, shot weight variation beyond +/- 1% | Always replace check ring and seat as a matched set — never mix old and new |
| Hydraulic seals and O-rings | Monthly visual leak check; replace per manufacturer recommendation or every 4,000-6,000 hours | Visible weeping at cylinder rods, pressure loss at sustained hold | Stock complete seal kits rather than individual seals; material compatibility matters for high-temp applications |
| Tier 2 — Moderate-Wear Components | |||
| Screw tips (separate from check ring) | Inspect during quarterly screw-pull or every 4,000-6,000 hours | Visible scoring, cracking, or dimensional wear exceeding OEM spec | Tip geometry affects melt flow distribution — replace with identical profile |
| Barrel liners | Annual bore gauge measurement or every 4,000-6,000 operating hours | ID wear beyond 0.2-0.3 mm from nominal; bore gauge shows localized scoring | Bimetallic liners last longer on abrasive resins but still need measurement-based tracking |
| Toggle bushings | Quarterly clearance measurement | Pin-to-bushing clearance exceeds OEM limit; audible knock during clamp close | Worn bushings cause uneven clamp force and accelerate tie bar wear |
| Ejector pins | Every mold PM cycle; typically every 100,000-250,000 shots depending on mold complexity | Bent, galled, or dimensionally worn; parts sticking in cavity | Stock common diameters and lengths; DME mould parts catalogs standardize sizing |
| Guide bushings | Every mold PM cycle | Visible scoring, excessive play when mold halves close | Worn guide bushings affect parting line alignment and accelerate cavity wear |
| Tier 3 — Long-Life Components | |||
| Screws | Annual screw pull with flight OD measurement; every 4,000-6,000 hours | Flight wear exceeding 0.2-0.3 mm per side; recovery time trending upward beyond baseline | As highlighted by Plastics Technology, chart performance against screw measurements to predict the point of diminishing returns |
| Barrels | Annual bore gauge measurement aligned with screw pull | ID opening beyond manufacturer limit; localized scoring or corrosion pitting | Re-line or replace based on bore condition — see rebuild-vs-replace decision criteria |
| Tie bars | Annual stretch measurement and visual inspection | Measured stretch exceeding OEM allowance; visible surface pitting or corrosion | Tie bar failure is rare but catastrophic — trend measurements year over year |
| Platens | Annual parallelism check | Parallelism drift beyond 0.05 mm/m; visible surface damage or deformation | Resurfacing may restore function — measure before committing to full replacement |
| Gearbox internals | Oil analysis every 6 months; vibration monitoring if available | Metal particles in oil sample; bearing noise increase; output shaft play | DME mould components and gearbox items often require OEM or custom sourcing with longer lead times |
A critical detail: hour-based intervals take priority over calendar-based schedules on any machine running more than a single shift. A press operating 24/7 accumulates "annual" mileage in roughly five to six months of calendar time, as maintenance program data consistently shows. Applying calendar dates to a three-shift machine guarantees you will inspect too late.
How Processing Materials Accelerate Wear Schedules
The intervals in the table above assume general-purpose resins — unfilled ABS, polypropylene, polyethylene, and similar commodity polymers. The moment you introduce abrasive or corrosive materials, those intervals compress dramatically.
Glass-filled nylon, mineral-filled polypropylene, and carbon fiber compounds are some of the most aggressive materials a plasticizing unit will ever encounter. Hard filler particles act like sandpaper against the screw flights, barrel bore, check ring seating surfaces, and nozzle tip orifice. Industry experience suggests that aggressive fillers can reduce screw and barrel useful life by 50% or more compared to processing unfilled resins under the same conditions. A check ring that lasts 5,000 hours on commodity PP may need inspection every 2,000 to 2,500 hours on 30% glass-filled nylon.
Corrosive resins present a different but equally damaging challenge. PVC releases hydrochloric acid during processing. Fluoropolymers generate hydrofluoric acid. Flame-retardant compounds release halogenated byproducts. These chemical attacks erode standard tool steels from the inside out, creating rough surfaces that trap degraded material and accelerate further corrosion. Plants running these materials should not only shorten inspection intervals but also specify corrosion-resistant barrel linings and screw alloys — high-nickel or high-chromium compositions that resist chemical attack far better than standard nitrided steel.
Here is a practical rule of thumb for maintenance teams: if your facility runs abrasive-filled or corrosive resins on any machine, cut the Tier 1 and Tier 2 inspection intervals for that machine by at least 40 to 50 percent. Then let your measurement data tell you whether to tighten further. Relying on the same schedule across machines processing vastly different materials is one of the most common causes of "unexpected" failures that were entirely predictable.
Building a Calendar-Based Maintenance and Parts Review
Interval guidance only works if someone actually follows it. The most effective approach is tying spare parts audits directly to your scheduled machine PM events rather than treating inventory as a separate activity.
Imagine your team has a quarterly PM scheduled for Machine 5. Before that PM begins, the lead technician reviews the replacement interval table for every Tier 1 component on that press. Check rings were last inspected 4,200 hours ago — they are due. Heater bands were resistance-tested last month and passed. Nozzle tips were replaced two quarters ago and are running a glass-filled material — they are likely approaching end of life. This five-minute review generates a parts pull list before anyone picks up a wrench.
That same review should cross-reference current stock levels. If the check ring set for Machine 5's barrel size shows zero on hand, procurement gets notified immediately — not after the PM reveals the ring is worn. This simple practice of checking stock levels against upcoming replacement needs turns your maintenance calendar into a demand forecast for spare parts ordering.
Several habits make this system more reliable over time:
- Log every replacement with the date, operating hours, and machine ID — this builds a facility-specific wear database that eventually replaces generic interval guidance with data specific to your materials, machines, and run schedules.
- Align mold-side PM with machine-side PM where possible — when the mold comes out for ejector pin inspection, the machine is already idle. Use that window to verify heater band resistance, check hydraulic sight glasses, and pull thermocouples for calibration checks.
- Schedule quarterly inventory audits tied to production planning — if next quarter's production schedule is heavy on glass-filled nylon jobs, your parts audit should verify that additional screw tips, check rings, and nozzle tips are in stock or on order.
- Assign ownership — every PM interval and inventory check needs a named responsible person. A checklist without an owner becomes a checklist that no one completes.
The financial case for this discipline is straightforward. Structured PM programs for injection molding equipment typically run $4,500 to $8,000 per press annually, while a single unplanned hydraulic failure or mold crash can cost $15,000 to $120,000 in repair and lost production, according to operational data from multi-press facilities. Every dollar invested in disciplined preventive maintenance prevents roughly $8 to $14 in unplanned repair costs — a ratio that climbs even higher on machines running abrasive or corrosive resins around the clock.
Even with the best maintenance schedule, some components will eventually reach a point where repair alone is no longer the right answer. The question then becomes whether a worn screw, barrel, or hydraulic cylinder should be rebuilt or replaced outright — a decision that deserves clear criteria rather than guesswork.
When to Rebuild Worn Parts vs Buying Replacements
A worn screw does not automatically mean a new screw. Neither does a scored barrel bore, a leaking hydraulic cylinder, or a mold platen with surface damage. Many of these components can be restored to functional condition through professional rebuilding — at a fraction of the cost of buying new. But rebuilding is not always the right call, and choosing incorrectly in either direction wastes money. Rebuild a component that should have been replaced, and you pay for the rebuild plus the replacement when it fails again three months later. Replace a component that was a strong rebuild candidate, and you spend thousands more than necessary.
The difference between a smart decision and a costly one comes down to measurement, material condition, and honest evaluation of what the component has left to give.
Components Where Rebuilding Is Commonly Viable
Rebuilding works best on high-value components where the base structure remains sound and only wear surfaces need restoration. Experienced refurbishment specialists emphasize that not all components benefit equally from rebuilding — proper assessment of the base metal condition is the essential first step before committing to any restoration work. When the evaluation confirms viability, several major injection molding spare parts categories respond well to professional rebuilding:
- Screws — Flight crests can be rebuilt through PTA (Plasma Transferred Arc) welding with dual-alloy compositions of nickel, tungsten, and cobalt, which can more than double service life compared to the original nitrided surface. Surface hard chrome plating restores flowability and surface accuracy. Bent screws can be straightened and polished back to spec.
- Barrels — Bore ovality from uneven wear can be corrected using horizontal boring machines to restore true roundness and straightness, followed by vertical honing to grind the bore back to the required diameter. Barrels with localized scoring but intact bimetallic liners are strong candidates for re-honing rather than full replacement.
- Hydraulic cylinders — Scored cylinder bores can be re-honed and fitted with new seal kits. As long as the cylinder tube wall thickness remains within structural limits, a seal and surface refresh restores full pressure-holding capability.
- Gearbox assemblies — Bearing replacement, seal kit installation, and gear inspection can restore gearbox function at a fraction of new-unit cost. Oil analysis data guides the rebuild scope by revealing which internal components are generating wear particles.
- Platens — A worn mold platen with surface irregularities or parallelism drift can often be resurfaced through precision grinding rather than replaced entirely. Given that platens are among the most expensive cast parts on a molding machine, resurfacing delivers significant cost savings when the base casting is structurally sound.
- Mold base components — Worn leader pin bores, ejector plate guides, and support pillars within a mold base can be re-bushed, re-bored, or built up with weld and re-machined, extending the productive life of tooling that would otherwise require a full rebuild.
The common thread across all of these candidates is the same: the core structure must still be dimensionally and metallurgically sound. Rebuilding restores the wear surface, not the underlying architecture.
When Replacement Is the Better Investment
Rebuilding has clear limits. Pushing past those limits — out of budget pressure or lead-time urgency — usually results in a component that fails again prematurely, costing more total than a new part would have. Replacement is the better path when any of the following conditions apply:
- Base metal is compromised beyond re-coating thresholds — If a screw's root diameter has worn past the point where weld overlay can restore the original flight geometry, no amount of hardfacing will bring it back. Similarly, barrels with deep corrosion pitting through the bimetallic liner into the backing steel cannot be reliably re-honed.
- Dimensional wear exceeds re-machining allowances — Every component has a finite envelope for material removal. A barrel that has already been bored to its maximum oversize limit during a previous rebuild has no room for another pass. Custom molded parts from the mold side face the same constraint — cavity inserts worn beyond re-polishing depth need replacement, not another attempt at restoration.
- The component has already been rebuilt once or twice — Each rebuild cycle removes base material and introduces heat-affected zones from welding. Industry guidance on refurbishment decision-making reinforces the principle that diminishing returns set in quickly after the first restoration. A second rebuild rarely delivers the same life extension as the first.
- Rebuild lead time exceeds acceptable downtime — Professional screw and barrel refurbishment typically requires disassembly, high-temperature annealing, assessment, restoration, and re-inspection — a process that can take weeks. If your production schedule cannot absorb that window and no loaner or backup component is available, ordering a new part with faster delivery may be the more practical choice.
- Annual maintenance costs approach replacement value — The 50% rule applies at the component level just as it does for full machines: when cumulative rebuild and repair costs on a single component exceed 50% of its replacement price, the next failure should trigger a new purchase rather than another restoration attempt.
None of these thresholds are guesswork — they are measurable. And that is the critical point most maintenance teams miss. The rebuild-or-replace decision should never be made by instinct alone.
Decision Criteria for Maintenance Teams
Accurate measurement is the foundation of every rebuild-versus-replace decision. Before committing to either path, your team needs to pull the component, clean it, and take precise dimensional readings using calibrated instruments — micrometers for screw flight OD, bore gauges for barrel ID, dial indicators for runout and concentricity, and surface roughness testers where applicable. Without these numbers, you are guessing.
The table below provides a structured decision framework for the plastic mold parts and machine-side components most commonly evaluated for rebuilding. Use it as a starting reference, then refine the thresholds based on your OEM specifications and facility-specific wear data.
| Component | Rebuild Viable When | Replace Instead When | Key Measurement to Check |
|---|---|---|---|
| Screw | Flight OD wear is within weld overlay limits; root diameter is intact; no cracking or fatigue fractures | Root diameter is reduced beyond spec; screw has been rebuilt twice; straightness cannot be restored | Flight OD with micrometer at feed, transition, and metering zones; runout on centers |
| Barrel | Bore wear is uniform and within re-honing range; bimetallic liner is intact; no through-wall corrosion | Bore exceeds maximum oversize; liner is breached; previous re-bore used all available material | Bore ID with calibrated bore gauge at multiple stations along length |
| Check ring and seat | Generally not rebuilt — replace as matched set | Any measurable seat erosion or sealing surface wear; cushion instability confirmed | Visual inspection of sealing faces; cushion consistency test over 20+ consecutive shots |
| Hydraulic cylinder | Bore scoring is shallow; wall thickness remains within structural limits; rod is straight | Deep scoring beyond honing limits; rod is bent; previous re-hone consumed available material | Bore ID and roundness with bore gauge; rod straightness with dial indicator on V-blocks |
| Mold platen | Surface damage is limited to contact face; parallelism drift is correctable by grinding; no structural cracking | Casting has cracks in T-slot areas; parallelism is beyond grinding correction; custom molding parts alignment features are damaged | Parallelism across full face with precision level or laser alignment; surface flatness with straight edge and feeler gauge |
| Gearbox | Bearings are worn but gears are intact; housing bores are within spec; oil analysis shows normal wear metals only | Gear teeth are chipped or pitted; housing bores are elongated; output shaft has excessive play beyond bearing replacement | Shaft runout with dial indicator; gear tooth condition by visual and dye penetrant; housing bore with telescoping gauge |
| Mold base (leader pin bores, ejector guides) | Bore wear allows re-bushing; steel is structurally sound; plate flatness is within tolerance | Plate is warped or cracked; multiple bores are oversized beyond re-bushing; heat-treat distortion from prior welding | Bore ID with pin gauges; plate flatness and parallelism with surface plate and indicator |
One discipline ties this entire framework together: document every measurement. Record the as-found dimensions, the rebuild or replacement decision, the restored dimensions (if rebuilt), and the date the component returns to service. Over time, this data builds a facility-specific history that tells you exactly how long each rebuilt component lasts versus a new one — and whether the cost savings justified the choice.
Whether you ultimately rebuild or replace, the next question is where to source that component. OEM direct, authorized distributor, independent aftermarket, or overseas custom manufacturer — each channel carries a different cost, lead time, and quality profile, and choosing the wrong one introduces its own risks.
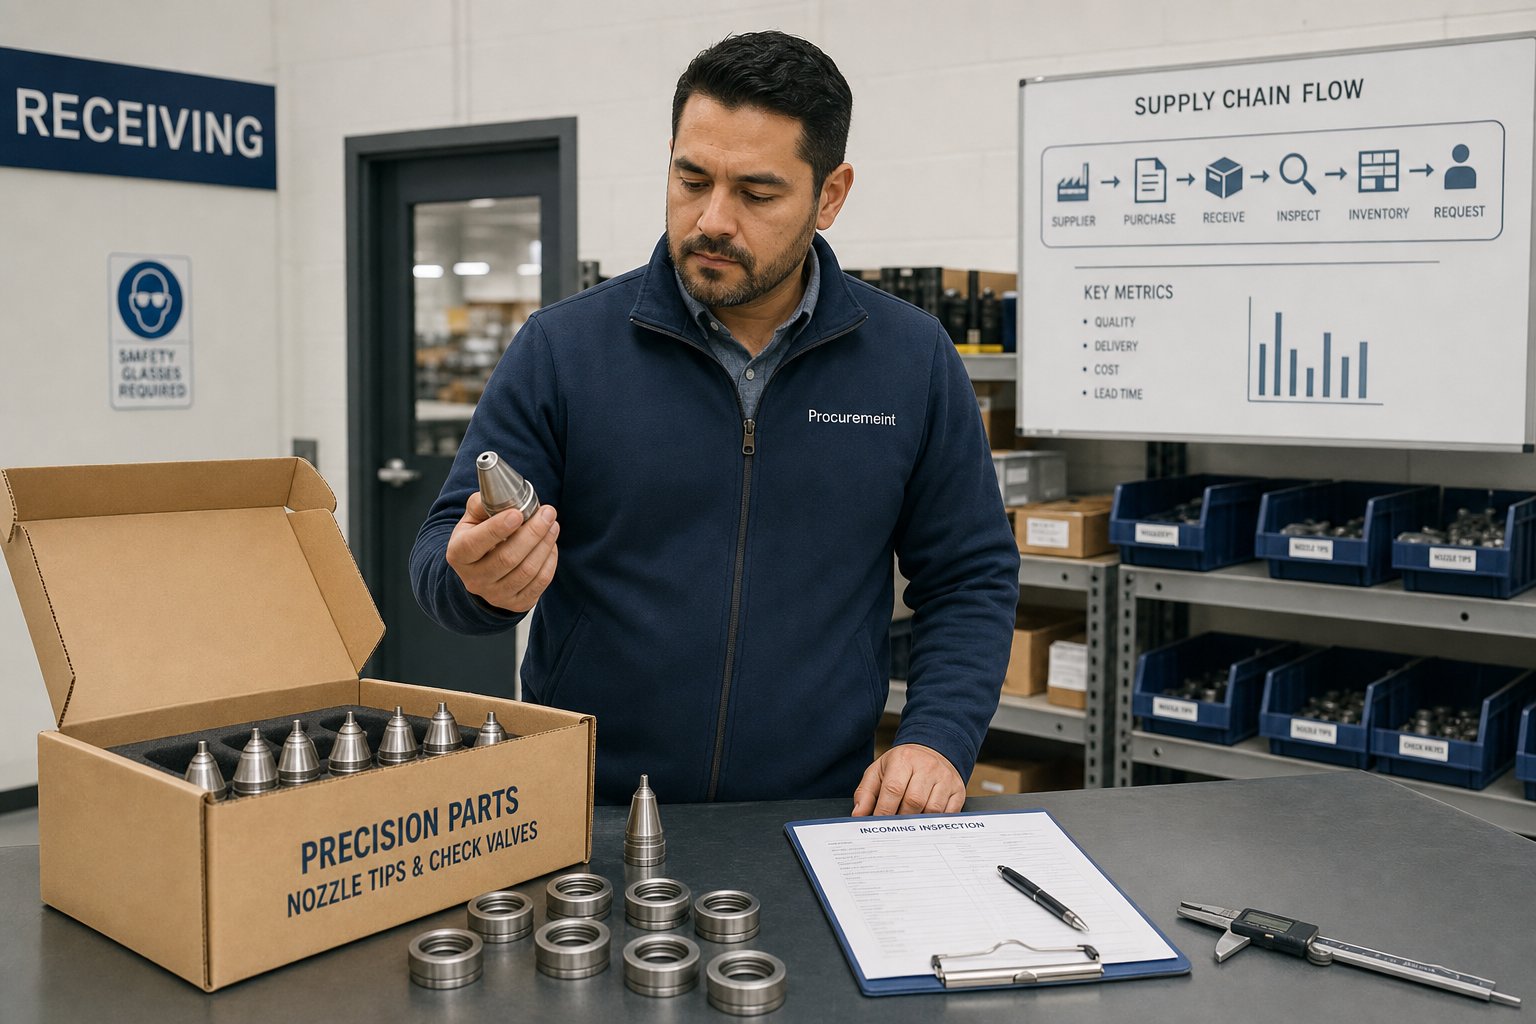
Comparing Spare Part Sourcing Channels
Four distinct sourcing channels exist for injection molding spare parts, and each one trades off cost, lead time, and quality assurance differently. Choosing a channel without understanding those trade-offs is how plants end up paying premium prices for routine consumables — or worse, receiving cheap components that fail within weeks of installation.
The right choice depends on the specific component, its criticality, your machine fleet composition, and how much quality verification your team is prepared to handle in-house. Here is how each channel stacks up.
OEM Direct vs Authorized Distributors
Purchasing directly from the original equipment manufacturer — whether that is an Engel, Arburg, Husky, or any other brand — guarantees exact fitment, traceability, and warranty coverage. You get the same part that shipped with the machine, manufactured to the same specifications, with full documentation. The downside? OEM pricing typically sits at the top of the market, and lead times can stretch weeks or months for items not held in regional stock. You are also locked into a single source for each machine brand, which limits flexibility for plants running mixed fleets.
Authorized distributors occupy a middle ground. They carry OEM-branded parts with similar quality assurance, but their broader stocking programs and competitive pricing often deliver faster availability. For plants that value guaranteed compatibility without the direct-from-factory wait, authorized distributors are a practical default — particularly for high-frequency consumables like heater bands, thermocouples, and hydraulic seal kits that cannot sit on backorder while a machine idles.
Independent Aftermarket Suppliers and Overseas Manufacturers
When OEM parts are discontinued, prohibitively expensive, or carry unacceptable lead times, independent aftermarket suppliers and overseas custom manufacturers fill the gap. This is especially relevant for legacy machines — presses 15 or 20 years old where original injection mold components suppliers no longer stock replacement items.
Reputable aftermarket suppliers manufacture to OEM specifications using customer-supplied drawings, physical samples, or reverse-engineered dimensions. A qualified plastic part manufacturer operating in this space can produce custom plastic components — screw tips, check rings, nozzles, barrel liners, gearbox parts — that meet or exceed original tolerances when proper material specifications and heat treatment protocols are followed.
For example, NANHAIYA operates as an overseas custom manufacturer producing replacement screw tips, check rings, injection nozzles, heater bands, thermocouples, and gearbox components based on drawings, samples, photos, or measured dimensions. This capability to work from customer-supplied documentation makes suppliers like NANHAIYA particularly valuable for plants maintaining diverse or multi-brand machine fleets where standardized OEM parts are no longer readily available.
The trade-off is clear: quality verification shifts to the buyer. When you purchase custom plastic parts or custom injection molded parts through aftermarket channels, your incoming inspection process — dimensional checks, hardness verification, material certification review — becomes the primary quality gate. That responsibility is manageable when you have calibrated instruments and defined acceptance criteria. It becomes risky when you do not.
The table below provides a structured comparison across all four channels. Use it as a decision framework when evaluating where to source specific components based on your priorities.
| Sourcing Channel | Typical Cost Level | Lead Time | Quality Assurance | Best For | Key Risk |
|---|---|---|---|---|---|
| Overseas Custom Manufacturer | Low to moderate | 2-6 weeks (depending on complexity and shipping) | Buyer-verified; request material certs, hardness reports, and dimensional inspection data | Legacy machine parts, discontinued items, bulk orders, custom molded plastic parts, plants with multi-brand fleets | Quality variation between suppliers; requires robust incoming inspection; longer shipping transit |
| Independent Aftermarket (Domestic) | Moderate | 1-3 weeks | Buyer-verified; reputable suppliers provide inspection reports | Cost-conscious replacement of standard wear items; machines out of warranty; custom plastic components | Fitment not guaranteed without proper specification; quality varies widely across the plastic parts supplier landscape |
| Authorized Distributor | Moderate to high | Days to 2 weeks (stocked items); longer for special orders | OEM-backed; warranty support available | Fast turnaround on common consumables; plants prioritizing verified compatibility | Limited to brands carried; pricing still above aftermarket alternatives |
| OEM Direct | Highest | Days (stocked) to 4-8 weeks (non-stock or manufactured to order) | Full OEM warranty, traceability, and documentation | Critical components under warranty; safety-related items; machines still in active OEM support | Highest cost; potential long lead times for non-stock items; single-source dependency |
A few practical guidelines emerge from this comparison. For critical spares where failure stops production immediately — check rings, screw tips, proportional valves — many plants maintain one OEM or distributor-sourced set on the shelf for immediate swap, while ordering aftermarket replacements at lower cost to replenish long-term stock. This dual approach balances uptime protection against budget realities.
For high-volume consumables like heater bands, thermocouples, O-rings, and nozzle tips, aftermarket and overseas channels often deliver acceptable quality at 40-60% lower cost than OEM pricing. The key is qualifying your supplier once through sample orders and incoming inspection, then reordering with confidence once quality is proven.
Plants manufacturing plastic parts in high volumes across multiple machine brands benefit most from diversifying their sourcing channels rather than relying exclusively on one. A single OEM relationship works when you run a homogeneous fleet of new machines. It breaks down quickly when your floor includes 10-year-old presses, acquired equipment from different manufacturers, and legacy tooling that predates current catalog offerings. In those environments, having a qualified overseas partner capable of manufacturing from drawings or samples is not a luxury — it is an operational necessity.
Regardless of which channel you choose, one variable remains constant: quality verification. The part arriving at your dock must meet the dimensional, metallurgical, and performance standards your machine demands. How you verify that — and what documentation you should require — is what separates a procurement team that gets burned from one that builds a reliable supply chain.
Quality Standards and Incoming Part Verification
A replacement screw tip arrives at your receiving dock. The packaging looks professional. The dimensions appear close. But "close" is not a specification — and installing a component that has not been properly verified against measurable quality standards is how a $200 spare part creates a $20,000 production problem.
Every sourcing channel — OEM, distributor, aftermarket, or overseas — delivers parts that ultimately face the same question: does this component meet the metallurgical, dimensional, and performance requirements the machine demands? The answer should never be assumed. It should be measured, documented, and confirmed before anything gets installed.
Metallurgy and Heat Treatment Standards for Screws and Barrels
Material composition and heat treatment are the invisible factors that determine how long a screw or barrel will last under real operating conditions. Two components can look identical on the outside yet deliver wildly different service lives if the underlying metallurgy differs. Procurement teams sourcing precision plastic components for the plasticizing unit need to understand what separates a properly manufactured part from one that will wear out prematurely.
Start with the base steel. Injection screws and barrels are commonly manufactured from alloy steels such as 38CrMoAlA, 42CrMo, AISI 4140, or tool steels like H13 and SKD61. Each grade offers a different balance of hardness, toughness, and heat resistance. The choice depends on the application — general-purpose resins allow standard alloys, while abrasive or corrosive materials demand higher-grade compositions capable of withstanding aggressive processing environments.
Heat treatment transforms that base steel into a working surface capable of resisting wear. Three primary processes matter for injection molding spare parts buyers:
- Gas nitriding — The most common treatment for injection screws. It diffuses nitrogen into the steel surface to create a hardened case layer typically 0.5 to 0.8 mm deep, achieving surface hardness of HV 900 to 1000. This dramatically improves abrasion resistance and reduces polymer adhesion to the screw surface. Nitriding is effective for processing standard thermoplastics but insufficient for highly abrasive glass-fiber compounds.
- Through-hardening (quenching and tempering) — Heats the entire component above its critical temperature, then rapidly cools it to achieve a uniform hardness throughout the cross-section, typically HRC 58 to 62. This provides structural toughness but does not create the same surface hardness depth as nitriding.
- Induction hardening — Selectively hardens specific zones — such as screw flight crests or barrel feed zones — using high-frequency electromagnetic heating. Useful when only localized wear areas need reinforcement without altering the entire component's properties.
Beyond heat treatment, surface coatings add another layer of protection. Chrome plating at 10 to 50 micrometers thickness improves corrosion resistance and surface smoothness, making it suitable for processing PVC and other chemically aggressive resins. Bimetallic alloy linings, applied at 2 to 5 mm thickness inside barrel bores, provide superior resistance to both abrasion and corrosion — extending barrel life by over 30% compared to standard nitrided surfaces when running filled or corrosive compounds.
What does this mean in practical terms for buyers? Every screw and barrel order — regardless of supplier — should include a request for material certifications confirming the steel grade and hardness test reports verifying that heat treatment met the specified depth and hardness targets. A supplier who cannot provide these documents is a supplier whose product you cannot trust with your production uptime.
Dimensional Tolerances and Fitment Verification
Metallurgy determines how long a part lasts. Dimensions determine whether it fits at all. Injection unit components operate under extremely tight tolerances, and even small deviations can cause immediate performance problems or accelerated wear on mating plastics components.
Consider the screw-to-barrel relationship. The clearance between screw outer diameter and barrel inner diameter on a typical injection molding machine is held within approximately 0.02 mm. Too tight, and metal-to-metal contact generates adhesive wear and potential seizure. Too loose, and resin flows backward past the flights, reducing plasticizing efficiency and shot consistency. That 0.02 mm window leaves zero room for "close enough."
Other critical tolerance relationships include:
- Check ring seat concentricity — The check ring must seat uniformly against the screw tip seat ring to create a 360-degree seal during injection. Any concentricity error allows backflow through the gap, producing the same cushion instability symptoms as a worn ring.
- Nozzle tip thread compatibility — Thread pitch, diameter, and reach must match the machine's nozzle body exactly. An incorrect thread engagement creates a leak path for molten resin under injection pressure — a safety hazard and an immediate production stop.
- Barrel bore straightness and roundness — Industry standards call for straightness within 0.015 mm per 1,000 mm of barrel length and circular runout within 0.04 mm. Bore surface roughness should be Ra 0.4 micrometers or finer to minimize polymer degradation and ensure consistent melt flow.
Incoming inspection catches these issues before they reach the machine. You do not need a metrology lab to perform effective verification — but you do need calibrated instruments and a consistent process. Here is a recommended incoming inspection sequence for high-value spare parts:
- Verify part number, material grade, and heat treatment documentation against your purchase order specifications before opening the packaging.
- Perform a visual inspection for shipping damage, surface defects, corrosion, or machining anomalies — burrs, tool marks, or discoloration that indicate process issues.
- Measure all critical dimensions with calibrated instruments: micrometer for screw flight OD at feed, transition, and metering zones; bore gauge for barrel ID at multiple stations along the length; thread gauges for nozzle tips and fittings.
- Check hardness using a portable hardness tester on an accessible surface, comparing the reading against the supplier's heat treatment report.
- Perform a physical fit check against the mating component — seat the check ring on its tip, thread the nozzle tip into the nozzle body, or trial-fit the screw into the barrel — before committing to installation.
- Document all measurements, compare against specifications, and file the inspection record alongside the supplier's certifications for traceability.
This process adds perhaps 30 minutes per component. Skipping it saves half an hour on the front end but risks days of troubleshooting, scrap, and unplanned downtime if a non-conforming part makes it into production. For polymer components and precision metal parts alike, the math always favors verification.
Certifications and Documentation to Request from Suppliers
Documentation is the bridge between a supplier's claims and your team's confidence. Without it, you are trusting that the part was made correctly based on nothing more than its appearance. With it, you have a verifiable record that protects your facility if a component fails prematurely and provides traceability for root cause analysis.
As quality control frameworks in manufacturing consistently emphasize, documentation creates an audit trail connecting every part back to its raw material, heat treatment batch, dimensional inspection results, and final acceptance. This traceability is not optional for critical spare parts — it is fundamental to maintaining a defensible quality system.
Here is what your procurement team should require with every order of injection molding spare parts, whether sourced from an OEM, distributor, or aftermarket supplier:
| Document Type | What It Confirms | When to Require It |
|---|---|---|
| Material Test Report (MTR) | Chemical composition and mechanical properties of the base steel match the specified grade | Every order for screws, barrels, check rings, nozzle tips, and any component where metallurgy affects performance |
| Heat Treatment Record | Nitriding depth, hardness achieved, quench and temper parameters match specified process | Every order for heat-treated components — screws, barrels, pins, wear plates |
| Dimensional Inspection Report | Critical dimensions measured and recorded against drawing tolerances; includes actual values, not just pass/fail | Every order for tight-tolerance components — screws, barrels, check rings, PCS mold components, HASCO mold components, DME mold components |
| Certificate of Conformance (CoC) | Supplier's formal declaration that the part meets all specified requirements | Every order — this is the minimum acceptable document from any supplier |
| Surface Coating or Plating Report | Chrome plating thickness, bimetallic liner alloy composition, or coating adhesion test results | Any component with applied surface treatment — chrome-plated screws, bimetallic barrels, coated wear parts |
A supplier who provides these documents proactively — without being chased — signals a quality-oriented operation. A supplier who hesitates, delays, or claims documentation is "not available" raises a red flag that procurement verification best practices consistently warn against. As one practical guideline puts it, pricing that falls 30 to 40 percent below market rates combined with missing documentation almost always signals counterfeit or substandard inventory.
File every document alongside your incoming inspection records. When a screw wears faster than expected or a check ring fails at half the anticipated interval, those records let your team trace the issue back to a specific material lot, heat treatment batch, or supplier — turning a frustrating failure into actionable data that improves your next purchase decision.
Quality verification protects you on every individual order. But building a spare parts inventory that actually prevents downtime requires a broader strategy — one that accounts for your specific machines, production volumes, and the materials running through them every shift.

Building a Recommended Spare Parts Inventory
You know what to stock, how it fails, how to verify quality when it arrives, and where to source it. The final piece is assembling all of that knowledge into a structured inventory plan — one that ensures the right injection molding machine parts are on the shelf before the machine goes down, not ordered after it already has.
The difference between a plant that averages two hours of downtime per failure and one that averages twelve hours almost always comes down to inventory discipline. Not budget. Not headcount. Whether the replacement part was physically available the moment the technician needed it.
Critical Spares Every Injection Molding Plant Should Stock
Critical spares are components whose failure causes immediate machine stoppage and whose lead times — from any sourcing channel — exceed the downtime your production schedule can absorb. If the part takes three weeks to arrive and your customer expects shipments daily, that item belongs on the shelf regardless of its cost.
Every injection molding facility, regardless of machine brand, tonnage, or production type, should maintain on-hand stock of the following universal critical injection molding parts:
- Check rings and screw tips (matched sets) — always stock as pairs since mixing old and new components creates sealing failures; keep one matched set per barrel size on the floor
- Nozzle tips — sized to each machine's nozzle body thread and orifice diameter; high-wear items that can fail without warning
- Thermocouple sets for each barrel zone — a single drifting thermocouple compromises temperature control across the entire plasticizing unit
- Heater bands organized by size — stock the specific watt density and diameter combinations that match your machines; a 50mm band does not fit a 55mm barrel
- Hydraulic seal kits — complete kits for injection cylinders, clamp cylinders, and ejector cylinders; seals degrade on a timeline, not on demand
- Fuses and contactors for control cabinets — electrical failures are binary: the machine runs or it does not. A $15 contactor should never be the reason a $400,000 press sits idle
- Ejector pins in common sizes — bent or broken ejector pins are among the most frequent mold-side failures and represent essential mold supplies for every toolroom
A spare parts inventory is not an expense line — it is downtime insurance. The cost of carrying one extra check ring is always less than the cost of the production it protects.
Plants producing injection molding automotive parts face even tighter urgency. Automotive supply chains operate on just-in-time delivery schedules with contractual penalties for missed shipments. A single hour of unplanned downtime on an automotive cell can cascade into line stops at the customer's assembly plant — transforming a $300 spare part shortage into a $50,000 premium freight charge or worse. For these environments, critical spares inventory is not a recommendation; it is a contractual survival requirement.
Recommended Spares Based on Machine Type and Production Volume
Beyond the universal list, your specific inventory needs depend heavily on two variables: the type of injection machine parts your fleet uses, and the production intensity those machines face daily.
High-volume operations running 24/7 consume fast-wearing items at two to three times the rate of single-shift facilities. These plants should maintain deeper buffer stock on every Tier 1 consumable identified in the maintenance schedule — doubling minimum quantities for heater bands, thermocouples, and seal kits. Plants processing abrasive glass-filled or mineral-filled materials need backup screws and barrel liners staged and ready, because wear on those components progresses measurably every month under continuous production.
Machine drive technology also dictates which injection machine parts categories matter most for your storeroom. A facility running all-electric presses has zero need for hydraulic seal kits, pump components, or proportional valves — but absolutely needs spare servo motor encoders, ball screw assemblies, and timing belts that hydraulic machine plants can safely ignore. The table below maps spare parts priorities by machine type to help you allocate budget where it matters most.
| Spare Parts Category | Hydraulic Machine Priority | All-Electric Machine Priority | Hybrid Machine Priority |
|---|---|---|---|
| Hydraulic seal kits and O-rings | High — stock complete kits for every cylinder type | Not applicable | Moderate — clamp-side hydraulics require seal inventory |
| Proportional valves and solenoid valves | High — critical for pressure and flow control | Not applicable | Moderate — limited to hydraulic subsystems |
| Hydraulic pump components | High — pump failure stops all machine movement | Not applicable | Low to moderate — servo-pump systems reduce failure frequency |
| Servo motor encoders and drives | Low — limited servo use on older hydraulic machines | High — each axis has a dedicated servo; failure stops that function entirely | High — servo motors drive injection and often plasticizing |
| Ball screw assemblies | Not applicable | High — primary motion conversion component; replacement cost ranges from $3,000 to $15,000 per axis | Moderate — used on electric-driven axes only |
| Timing belts | Not applicable | Moderate — belt-driven machines need periodic replacement | Low to moderate — depends on configuration |
| Hydraulic oil filters and hoses | High — filters require scheduled replacement every 3,000-5,000 hours | Not applicable | Moderate — reduced oil volume means fewer filter changes |
| Toggle bushings and pins | Moderate to high — mechanical clamp wear is progressive | Moderate — electric toggles still use bushings | Moderate to high — depends on clamp type |
| Check rings, screw tips, nozzle tips | High — universal across all drive types | High — universal across all drive types | High — universal across all drive types |
| Heater bands and thermocouples | High — universal across all drive types | High — universal across all drive types | High — universal across all drive types |
| DME mold parts (ejector pins, guide bushings, sprue bushings) | High — mold-side wear is independent of machine drive type | High — same mold-side requirements regardless of drive | High — mold-side inventory needs are identical |
Notice that the bottom three rows — check rings, heater bands, and dme mold parts — remain high priority regardless of machine technology. These are universal wear items driven by process physics, not drive architecture. Your storeroom should never be short on these items, even if everything else is optimized by machine type.
For facilities supporting injection molding automotive parts production across mixed fleets, the inventory challenge multiplies. You might run hydraulic presses on large structural components and all-electric machines on precision connectors — requiring separate spare parts profiles for each. This is precisely where working with suppliers who can manufacture from drawings, samples, or measured dimensions becomes essential. A partner like NANHAIYA, for instance, produces screw tips, check rings, nozzles, heater bands, thermocouples, and gearbox components from customer-provided specifications — making them a practical sourcing option for plants maintaining diverse or legacy machine fleets where standardized OEM parts may not be readily available or economically viable in the quantities needed across multiple machine brands.
Organizing and Auditing Your Spare Parts Inventory
Stocking the right parts is only half the equation. If your technician cannot find the right heater band at 2 AM during an unplanned stop — because it is mislabeled, stored in the wrong bin, or the inventory system says three are in stock when the shelf is actually empty — you have the same downtime outcome as not stocking it at all.
Effective spare parts organization follows a few non-negotiable principles, drawn from best practices in maintenance inventory management:
- Label every part by machine compatibility — A heater band labeled only by watt density and dimensions is useful. One labeled "Machine 5, Zone 3 — 240V, 1500W, 50mm x 60mm" is immediately actionable. Include machine serial number references on critical items so any technician — not just the one who ordered it — can match part to press without guessing.
- Store in climate-controlled conditions — Rubber seals, O-rings, and hydraulic hose assemblies degrade in heat and UV exposure. Thermocouples and electronic components are moisture-sensitive. A storeroom that swings between 50 and 110 degrees Fahrenheit with no humidity control is slowly destroying your inventory investment before it ever reaches a machine.
- Maintain a digital inventory log — Whether you use a full CMMS, a dedicated inventory module, or even a well-maintained spreadsheet, every part needs a tracked quantity, a minimum stock level, and a reorder trigger. As inventory management research consistently confirms, manual systems — paper logs and whiteboards — break down under the pressure of urgent repairs. When a technician grabs a part at midnight for an emergency fix, updating a paper log is the last thing on their mind. Digital systems with barcode or QR scanning keep counts accurate without relying on human discipline at inconvenient moments.
- Set minimum and maximum stock levels using actual consumption data — Do not guess. Review the past 12 months of replacement history for each component. If you replaced six nozzle tips across your fleet in the last year, your minimum stock level should account for lead time demand plus a safety buffer — not an arbitrary number someone chose when the storeroom was first set up.
- Schedule quarterly audits aligned with PM cycles — Before every major planned maintenance event, cross-reference the components due for inspection against current inventory levels. This five-minute check prevents the worst-case scenario: discovering during a scheduled PM that the replacement part you need is out of stock, converting a planned maintenance window into an unplanned extended shutdown.
One final discipline ties everything together: track mean time to repair (MTTR) as a direct function of inventory availability. Every time a repair takes longer than expected, document why. If the answer is "waiting for parts," that data point feeds directly into your next inventory review. Over time, a well-managed spare parts inventory should drive MTTR down quarter over quarter — because the components your team needs are organized, labeled, verified, and physically present the moment a machine demands them.
The plants that achieve single-digit-hour MTTR on critical failures are not luckier than everyone else. They simply built an inventory system that treats spare parts as production infrastructure rather than an overhead expense — and they maintain it with the same rigor they apply to the machines themselves.
Frequently Asked Questions About Injection Molding Spare Parts
1. What are the most critical injection molding spare parts to keep in stock?
The most critical spare parts are those whose failure causes immediate machine stoppage and whose supplier lead times exceed your allowable downtime window. At a minimum, every facility should stock matched check ring and screw tip sets for each barrel size, nozzle tips matched to each machine, thermocouple sets for every barrel zone, heater bands organized by watt density and diameter, hydraulic seal kits for injection and clamp cylinders, control cabinet fuses and contactors, and common ejector pin sizes. Plants running automotive or just-in-time production lines should maintain even deeper buffers on these items, as a single missing part can cascade into customer line stops and premium freight penalties.
2. How often should injection molding machine spare parts be inspected or replaced?
Replacement frequency depends on the component tier. High-frequency consumables like heater bands, thermocouples, nozzle tips, and check rings should be inspected monthly and replaced based on measurable triggers such as resistance drift, temperature deviation, or cushion instability. Moderate-wear items like screw tips, barrel liners, toggle bushings, and ejector pins warrant quarterly inspection and condition-based replacement. Long-life components such as screws, barrels, tie bars, and platens need annual measurement-based monitoring. Importantly, machines processing abrasive glass-filled or corrosive resins should compress these intervals by 40 to 50 percent, since filler particles and aggressive chemicals dramatically accelerate wear rates.
3. How do you decide whether to rebuild or replace a worn injection molding component?
The decision hinges on measurable criteria rather than instinct. Rebuilding is viable when the base metal remains structurally sound and only wear surfaces need restoration — for example, screws can receive hardfacing overlays, barrels can be re-honed, and hydraulic cylinders can be re-sealed. Replacement becomes the better investment when base material is compromised beyond re-coating limits, dimensional wear exceeds re-machining allowances, the component has already been rebuilt once or twice, or rebuild lead time exceeds your acceptable downtime. Always measure with calibrated instruments — micrometers, bore gauges, runout indicators — before committing to either path. A useful benchmark is the 50 percent rule: when cumulative rebuild costs on a single part exceed half its replacement price, the next failure should trigger a new purchase.
4. What is the difference between OEM, aftermarket, and overseas sourcing for injection molding spare parts?
OEM sourcing guarantees exact fitment, full warranty, and traceability but carries the highest prices and potentially long lead times. Authorized distributors offer similar quality assurance with broader stock availability and competitive pricing. Independent aftermarket suppliers manufacture to OEM specifications at lower cost, though quality verification becomes the buyer's responsibility. Overseas custom manufacturers like NANHAIYA produce replacement components — screw tips, check rings, nozzles, heater bands, thermocouples, and gearbox parts — from customer-supplied drawings, samples, or measured dimensions, offering significant cost savings especially for legacy or multi-brand machine fleets. Many plants use a blended strategy: OEM-sourced critical spares for immediate swap capability, paired with aftermarket or overseas orders to replenish long-term stock at lower cost.
5. What quality documents should you request when ordering injection molding spare parts?
Every spare parts order should include a request for five key documents: a Material Test Report confirming the steel grade and mechanical properties, a Heat Treatment Record verifying nitriding depth or hardness achieved, a Dimensional Inspection Report with actual measured values compared against drawing tolerances, a Certificate of Conformance declaring the part meets all specifications, and — for coated or plated components — a Surface Coating Report confirming plating thickness or alloy composition. These documents provide traceability if a part fails prematurely and enable root cause analysis. A supplier who cannot provide them proactively is a significant quality risk, regardless of how competitive their pricing appears.
Written by
Nanhaiya Technical Team
Zhoushan Nanhaiya Plastic Machinery Co., Ltd.
The Nanhaiya technical team supports screw and barrel manufacturing projects through application review, technical communication, custom manufacturing coordination, and production and quality control.
Discuss Your Application
Related Articles
More insights on screw barrel technology and plastics processing.

What Nobody Tells You About Screw Barrel For Plastic Machine Design
Oct 10, 2026
Learn how screw barrel for plastic machine design affects melt quality, throughput, and wear life. Covers geometry, resin matching, troubleshooting, and sourcing.
Read Article
Single Screw Extruder for Sheet: Stop Guessing, Start Specifying
Oct 9, 2026
Learn how to specify a single screw extruder for sheet production. Covers screw geometry, resin-specific processing, troubleshooting, and maintenance best practices.
Read Article
PE Pipe Extruder Machine: What Datasheets Won't Tell You
Oct 9, 2026
Learn how a PE pipe extruder machine works, key specs explained, material grade selection, maintenance tips, and buyer guidance beyond the datasheet.
Read ArticleLooking for something else?
Search by material, symptom or product and jump straight to the relevant page.
These are navigation suggestions based on keyword matching — not a quotation, not a delivery commitment, and not a substitute for engineering review. Final specification is confirmed by our engineers against your drawings and processed material.
Need help with screw barrel selection?
Share your machine model, processed material and application. Our team can help with pricing and technical support.