

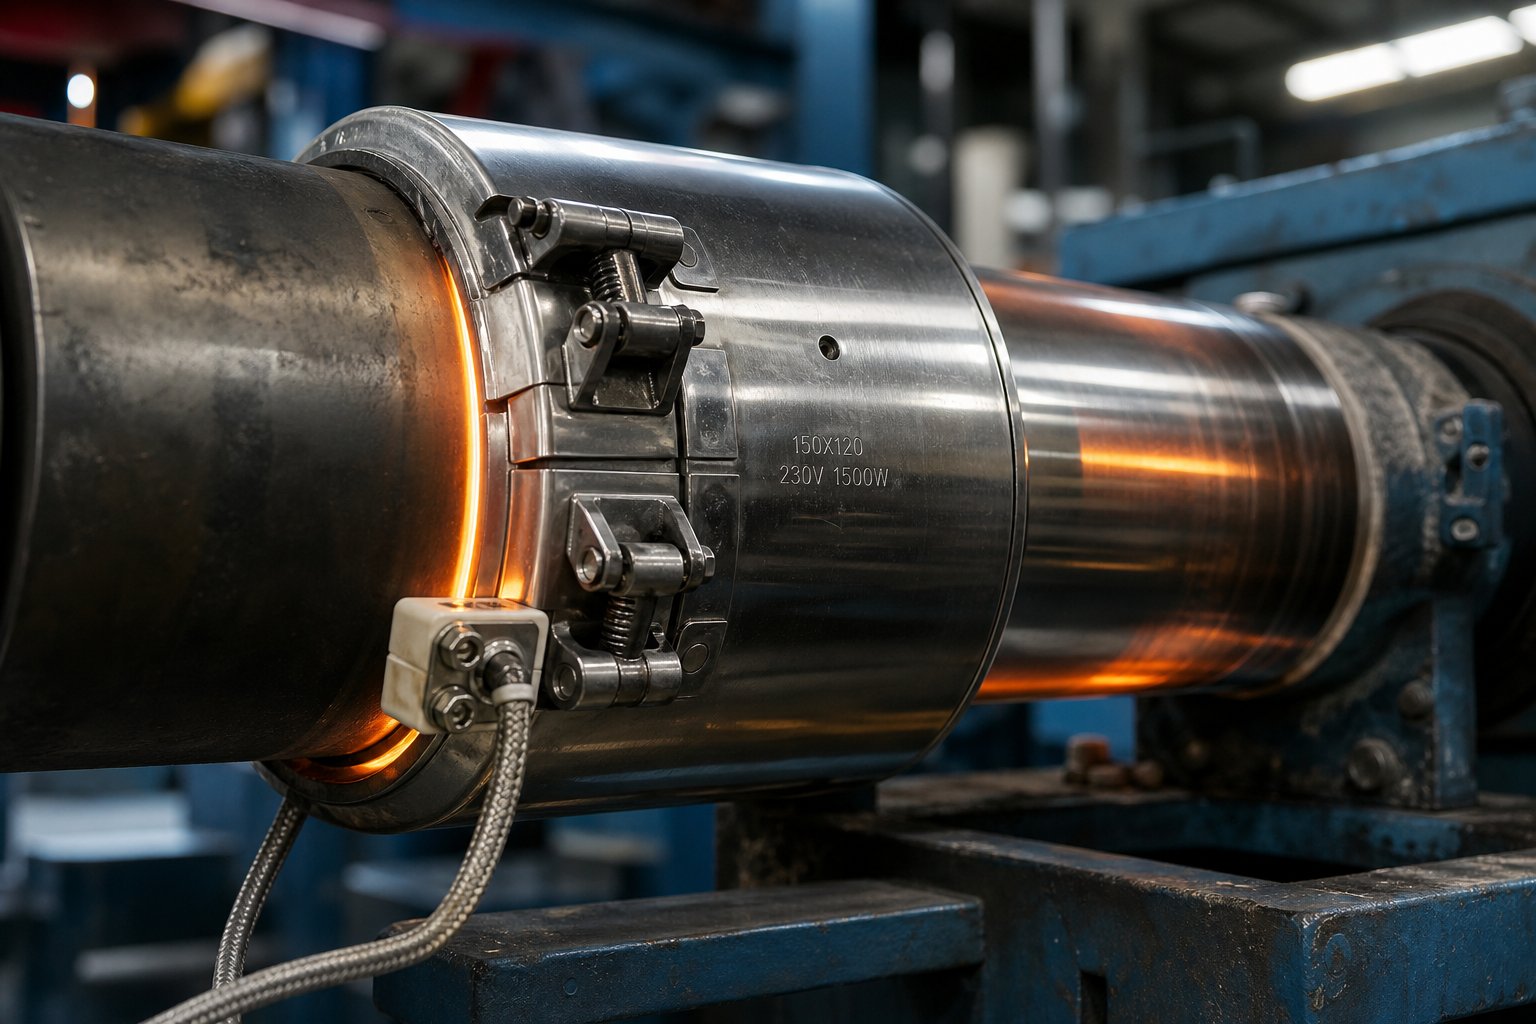
What Is a Ceramic Heater Band and Why It Matters
You're staring at a failed heater on an extruder barrel, production is down, and you need a replacement fast. But before you order the same part that just burned out, ask yourself: are you even using the right type of band heater for your application?
Defining the Ceramic Heater Band
A ceramic heater band is a cylindrical heating device that wraps around barrels, pipes, and other cylindrical vessels, using interlocking ceramic insulation and nickel-chrome resistance wire to deliver radiant and conductive heat at temperatures up to 1,400°F (760°C).
That ceramic insulation layer is exactly what separates this design from other band heaters on the market. Mica band heaters rely on thin mica sheets for electrical isolation, while mineral-insulated versions use compacted mineral fill. A ceramic band heater, by contrast, uses robust ceramic knuckles or bead-style elements that both support the heating coil and act as a high-performance thermal barrier. It's a fundamentally different approach to managing heat.
Why Ceramic Insulation Changes the Game
So why does the insulation material matter so much? Three reasons stand out:
- Higher operating temperatures — Ceramic insulation withstands sustained heat that would degrade mica over time, making these heater bands suitable for demanding high-temperature processes.
- Superior energy efficiency — The ceramic layer directs heat inward toward the barrel and minimizes outward losses, potentially reducing energy consumption by 20-30% compared to uninsulated or mica-insulated designs.
- Greater durability under thermal cycling — Ceramic elements resist the repeated heating and cooling cycles that shorten the lifespan of other band heaters.
These advantages make ceramic designs the go-to choice across plastics processing, chemical manufacturing, and other industries where consistent barrel temperatures drive product quality.
Choosing the right heater band, however, takes more than knowing the type. You'll need to understand how these devices actually transfer heat, what goes into their construction, how they compare head-to-head against mica alternatives, and what specifications to lock down before placing an order. That's exactly what the sections ahead will cover — from working principles and internal assembly to selection, maintenance, and sourcing strategies that keep your line running.
How Ceramic Band Heaters Transfer Heat
Here's something most suppliers won't explain clearly: the real reason a ceramic heater band outperforms other designs has everything to do with how it moves thermal energy. Understanding these mechanics isn't just academic — it directly affects whether the heater you choose will work reliably on your specific barrel.
Every heating band transfers energy through some combination of three physical mechanisms:
- Conduction — Heat flows through direct physical contact between the heater's inner surface and the barrel wall. The tighter the fit, the more efficient this pathway becomes.
- Radiation — The heated ceramic elements emit infrared energy that travels across space without needing surface contact, much like the warmth you feel standing near a hot oven door.
- Convection — Heated air circulating within any small gap between the heater and barrel carries a modest amount of thermal energy, though this plays a minor role compared to the other two modes.
Mica band heaters depend almost entirely on that first mechanism — conduction. If the metal-to-metal contact isn't nearly perfect, their performance drops sharply. Ceramic band heaters, however, shift the equation dramatically by adding powerful radiant heat transfer into the mix.
Radiant Heat Transfer Through Ceramic Elements
When electrical current passes through the nickel-chrome ceramic heating coil wound inside a ceramic band, the interlocking ceramic elements absorb that energy and re-emit it as infrared radiation. At operating temperatures above roughly 400°C (750°F), this radiant component becomes a significant portion of total heat delivery. The infrared energy radiates directly from the ceramic heat coil assembly toward the barrel surface, transferring thermal energy even across small air gaps where conduction alone would stall.
Why Ceramic Bands Work on Loose-Fitting Barrels
Imagine a barrel that's been running for years. Thermal cycling and mechanical wear gradually change its outer diameter — sometimes by just fractions of a millimeter, sometimes more. A mica heating band clamped onto that slightly out-of-round surface loses contact in spots, creating tiny air pockets that act as insulation barriers. The resistance wire then overheats trying to push energy across those gaps, and the heater burns out prematurely.
Ceramic band heaters handle this situation far more gracefully. Because infrared radiation doesn't require physical contact to transfer energy, the heater continues delivering heat effectively even where small gaps exist between the inner surface and the barrel. This tolerance for imperfect fit is one of the biggest practical advantages in real-world maintenance scenarios where barrels are rarely factory-fresh.
Energy Efficiency Through Directed Heat Flow
The ceramic insulation layer does double duty. While the inner face radiates heat toward the barrel, the outer ceramic layer acts as a thermal barrier that blocks energy from escaping into the surrounding environment. Think of it as a one-way valve for heat — energy flows inward toward the process, not outward into the factory air.
The measurable impact is significant. Technical data from manufacturers like Tempco and OMEGA Engineering indicate that this built-in insulation reduces power consumption by 25 to 30 percent compared to uninsulated designs. For a single heater, that might seem modest. But across an extrusion line with a dozen or more heating zones, those savings compound into a meaningful reduction in energy costs over a full production year.
The physics of directed heat flow also improves safety. With less thermal energy radiating outward, the external shell of a ceramic band runs significantly cooler than its internal surface — reducing burn risks for operators working near the equipment.
Of course, understanding how heat moves is only part of the picture. The specific materials and construction layers inside the heater determine how well these principles translate into real-world durability and performance.
Inside the Assembly and Construction of a Ceramic Heater Band
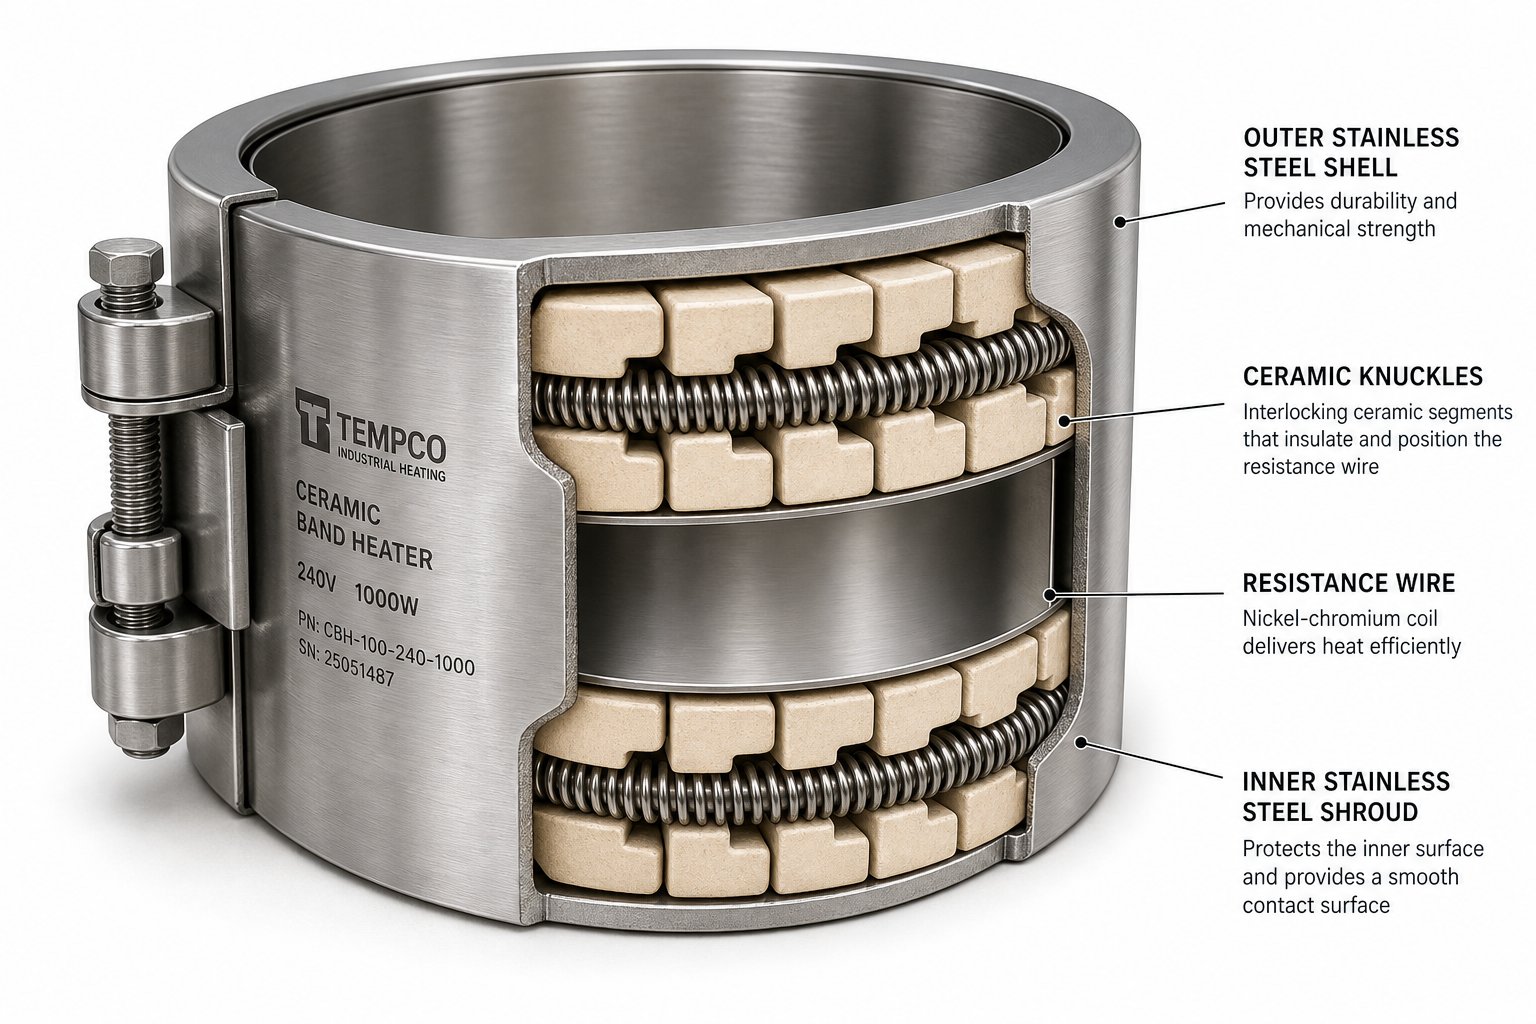
Peel back the outer shell of a ceramic heater band and you'll find a surprisingly elegant layered structure. Each layer serves a specific engineering purpose — and understanding those layers is the difference between ordering a replacement that lasts and one that fails within months.
Component Layers and Their Functions
Every ceramic band heater element is built from four primary layers, working together from outside in. Here's how they break down:
| Layer (Outside to Inside) | Material | Function |
|---|---|---|
| Outer Shell | Stainless steel (typically 300-series) | Provides structural rigidity, protects internal components from impact and environmental damage, and serves as the mounting surface for clamping hardware |
| Insulation Layer | Interlocking ceramic knuckles or bead-style ceramic elements, often backed by ceramic fiber blanket (1/4" or 1/2" thick) | Electrically isolates the resistance wire, supports the coil in position, and acts as a thermal barrier that directs heat inward while reducing outward heat loss |
| Heating Coil | Nickel-chrome (Ni-Cr) or iron-chrome-aluminum (FeCrAl) resistance wire | Generates heat when electrical current passes through it; wound through the ceramic supports to distribute heat evenly along the band's width and circumference |
| Inner Shroud | 26-gauge stainless steel sheet | Prevents ceramic elements from shifting, cracking under vibration, or making direct contact with the barrel surface; provides a smooth, uniform inner contact face |
The ceramic insulators for heater elements deserve particular attention because they're the defining feature of this design. Unlike mica sheets that compress flat, these interlocking ceramic knuckles cradle the ceramic heater coil in a three-dimensional lattice. This structure holds the wire firmly in position even under repeated thermal expansion and contraction, preventing coil-to-coil contact that would otherwise cause localized hot spots and premature burnout.
The Role of the Interior Shroud in Durability
You might wonder why a thin 26-gauge stainless steel liner matters so much. Consider what happens without it. During installation, ceramic knuckles can shift as the band is tightened around a barrel. During operation, vibration from the extruder drive or injection unit rattles those elements continuously. Over time, loose ceramic pieces can fracture, fall out of position, and expose sections of bare resistance wire directly against the barrel wall. The result? Electrical grounding faults, uneven heating, or outright element failure.
The interior shroud eliminates this problem. It acts as a containment layer that keeps every ceramic element locked in place while still allowing the coil's radiant energy to pass through to the barrel surface. It also creates a consistent inner contact surface that improves heat distribution across the full circumference of the band — critical for maintaining uniform melt temperatures in high temperature band heater applications like engineering-grade polymers.
Clamping Mechanisms and Terminal Connections
The outer shell isn't just structural — it's where the clamping and electrical connection hardware lives. Common clamping options include:
- Built-in bracket with bolt-and-nut — The most common clamp heater design, using a standard 1/4-20 screw to draw the band tight around the barrel. Simple, reliable, and easy to adjust during installation.
- Spring-loaded screw — Adds a compression spring to the bracket that absorbs thermal expansion, maintaining consistent clamping force as the band heats and cools through operating cycles.
- Latch and trunnion — A spring-loaded latch system preferred on larger-diameter bands (above 12 inches) where bolt-style clamps become awkward to tighten evenly.
Terminal connections are equally varied. Screw post terminals handle up to 480 VAC at 25 amps and work well where direct wiring is accessible. Lead wire terminations — including straight leads, wire braid, and armor cable options — suit tight-clearance installations. Quick-disconnect plugs provide the fastest changeover during scheduled maintenance but are typically limited to 250 VAC. The right choice depends on your plant's electrical supply, available clearance, and how frequently you expect to swap heaters.
Understanding Watt Density and Temperature Ratings
Two specifications ultimately define how a ceramic band heater performs — and how long it survives.
Watt density measures the heating power delivered per square inch of the band's inner contact surface. You calculate it by dividing total wattage by the active heated area. A higher watt density means faster heat-up and the ability to reach higher process temperatures. But here's the trade-off: pushing watt density too high forces the resistance wire to operate closer to its material limits, which accelerates degradation and shortens heater life — sometimes dramatically.
For standard insulated ceramic bands, recommended watt density typically stays at or below 35 W/in². Uninsulated designs with perforated shells and forced-air cooling, like those used in clamp heater shroud systems, can safely run up to 50 W/in² because the airflow carries excess surface heat away from the element. Maximum operating temperatures for ceramic band heaters generally reach 1,200°F (649°C) at the element, with some designs rated to 1,400°F (760°C) depending on the specific ceramic and wire alloy used.
In practical terms, this means a standard insulated ceramic band heater comfortably handles the vast majority of plastics processing applications, where barrel temperatures rarely exceed 800°F. But if you're processing high-performance polymers like PEEK or PEI — or running chemical reactors at elevated temperatures — you'll want to verify that both the watt density and the maximum temperature rating match your specific process demands.
These construction details and specifications shape how well a ceramic band heater fits your application. But they also raise a natural question: when does this design genuinely outperform the less expensive mica alternative — and when is mica still the smarter buy?
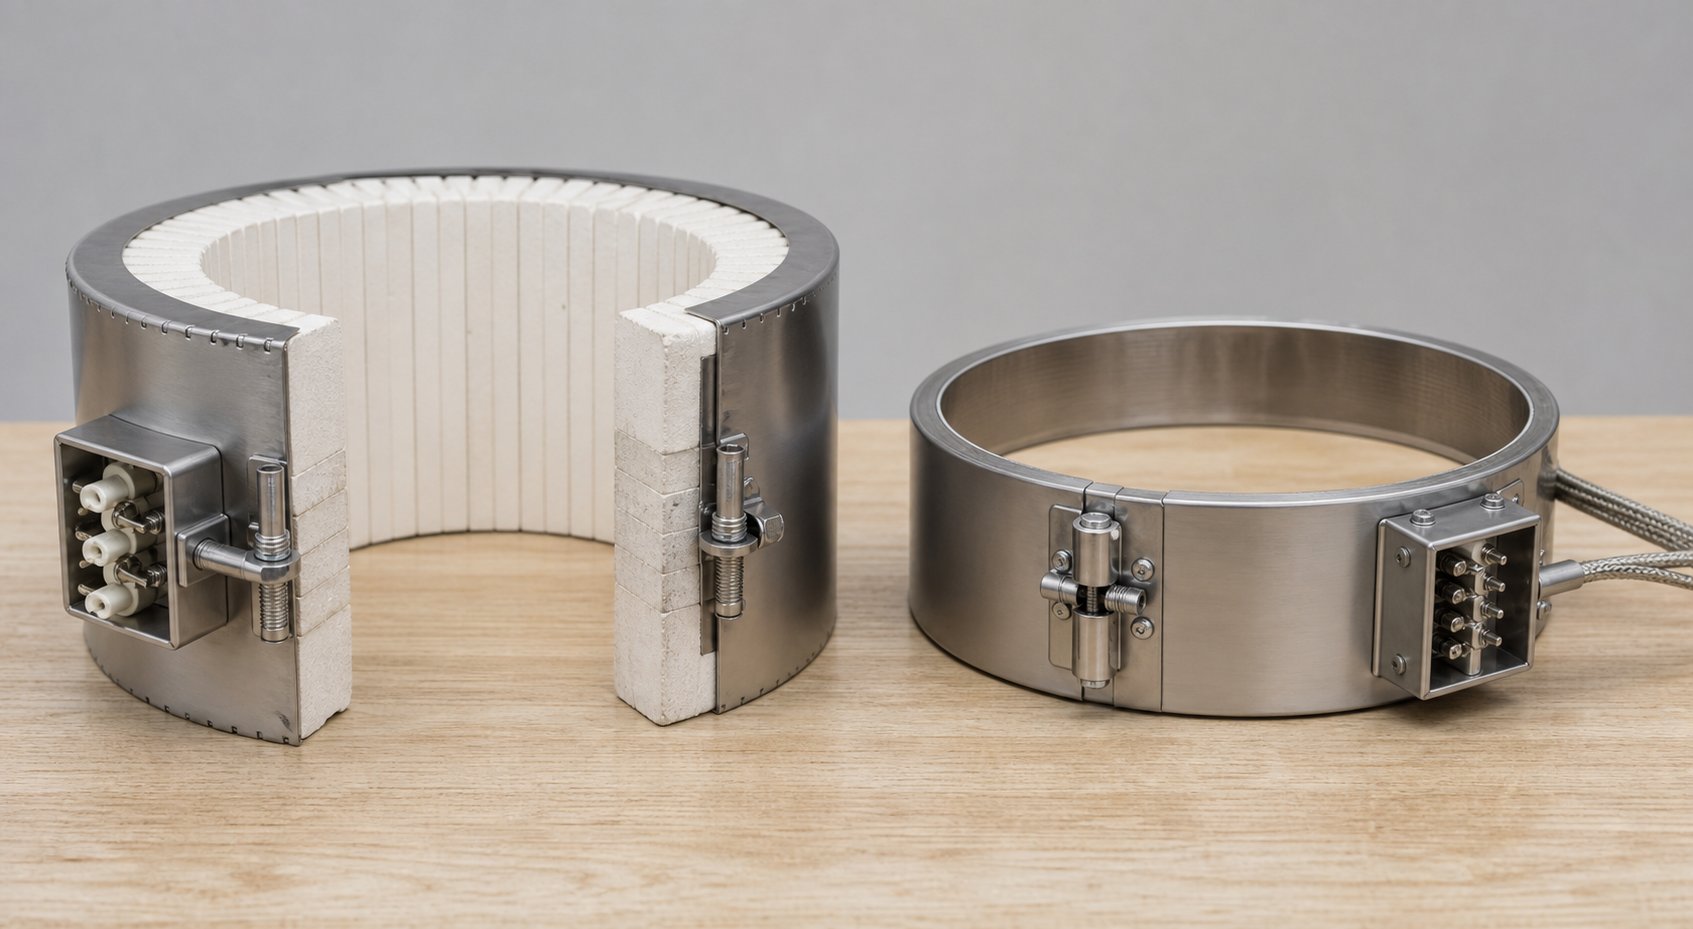
Ceramic vs. Mica Band Heaters Compared
This is the question maintenance teams and process engineers keep circling back to: should you spend more upfront on a band heater ceramic design, or save capital with a mica alternative? The answer isn't always the same — it depends on your process temperatures, barrel condition, energy goals, and production schedule. Let's break this comparison down across every dimension that actually matters on the factory floor.
Ceramic Band Heaters vs. Mica Band Heaters
The core difference between these two heater bands starts at the molecular level. Mica band heaters use thin sheets of natural phlogopite mica as a dielectric insulator between the resistance ribbon and the outer steel sheath. This construction is compact, lightweight, and inexpensive to manufacture — but mica's organic binders begin to degrade and carbonize when barrel temperatures push past roughly 340°C (644°F). Once those binders break down, the dielectric barrier fails, and the heater arcs to the machine barrel.
Ceramic designs use interlocking steatite ceramic knuckles fired at temperatures far above any industrial process requirement. No organic binders. No degradation threshold lurking in the mid-300s. That's why a band heater ceramic configuration comfortably operates at temperatures up to 1,200°F–1,400°F (650°C–760°C) — nearly double mica's safe ceiling.
The differences extend well beyond temperature ratings. Here's a side-by-side comparison across every specification that influences your total cost of ownership:
| Feature | Mica Band Heater | Ceramic Band Heater |
|---|---|---|
| Max Operating Temperature | ~340°C / 644°F | ~600°C–760°C / 1,112°F–1,400°F |
| Max Watt Density | 3 W/cm² (19 W/in²) | 6 W/cm² (39 W/in²) |
| Heat Transfer Mode | Conduction only | Conduction + far-infrared radiation |
| Built-In Insulation | None (uninsulated outer shell) | Yes — 12mm ceramic fiber blanket |
| Energy Efficiency | Lower — significant ambient heat loss | Higher — 25%–30% energy savings vs. uninsulated designs |
| Fit Tolerance on Worn Barrels | Poor — air gaps cause hot spots and burnout | Good — radiant heat bridges minor air gaps |
| Heat-Up Speed (Cold Start) | Very fast (low thermal mass) | Moderate (ceramic tiles add thermal inertia) |
| Minimum Inner Diameter | 25mm | 60mm |
| Typical Profile Thickness | 3–5mm | ~12mm or more |
| Lifespan Under Thermal Cycling | Shorter — flat ribbon oxidizes faster; binder degradation accelerates failure | Longer — round coil wire oxidizes slowly; no binder degradation |
| Relative Upfront Cost | Lower | Higher (but often offset by energy savings and longer service life) |
| Customization Flexibility | Excellent — mica sheets cut easily into complex shapes and narrow widths | More restricted — tile dimensions limit width increments and cutout placement |
A few details in that table deserve emphasis. The fit tolerance line is critically important for anyone maintaining aging equipment. Mica heater bands depend almost entirely on metal-to-metal conduction — even a 0.5mm air gap from a slightly worn or out-of-round barrel creates a localized hot spot that spikes the internal wire past its melting point. Ceramic bands, by contrast, radiate infrared energy across those same gaps, continuing to heat the barrel without self-destructing. If your barrels aren't factory-fresh — and most aren't — this tolerance alone can justify the price difference.
The lifespan advantage also compounds over time. Mica heaters use flat resistance ribbon with a high surface-area-to-mass ratio, which means faster oxidation and shorter element life. Ceramic designs wind round coil wire through their knuckle supports, offering a smaller surface-area-to-mass ratio that oxidizes far more slowly. On a 24/7 production line, that translates into fewer unplanned shutdowns and fewer replacement orders per year.
It's also worth noting a third option: mineral-insulated (MI) band heaters. These use compacted magnesium oxide insulation and can handle even more extreme temperatures and watt densities than ceramic designs. They're typically reserved for specialty applications — think die head heating or situations requiring exceptionally high thermal conductivity — and come at a premium price point above ceramic. For the vast majority of plastics processing and industrial heating scenarios, ceramic and mica remain the two practical contenders.
When Mica Bands Are Still a Reasonable Choice
Despite ceramic's advantages, mica band heaters aren't obsolete — far from it. They remain the right specification in several common scenarios:
- Process temperatures stay below 300°C (572°F) — Standard commodity resins like ABS, PP, and PE process well within mica's safe operating range. You're not paying for thermal headroom you'll never use.
- Space is extremely tight — With a profile of just 3–5mm, mica fits into clearances where a 12mm-thick ceramic band simply won't. Hot runner systems, compact nozzle assemblies, and machinery with minimal barrel-to-guard clearance often demand this ultra-thin profile.
- Very small diameters are required — Mica heater bands roll down to a 25mm inner diameter. Ceramic designs generally start at 60mm minimum, ruling them out for small-bore applications.
- Budget constraints are the overriding priority — For intermittent, low-temperature production where energy costs are secondary, mica's lower upfront price makes financial sense. Short-cycle injection molding at moderate temperatures is a classic example.
- Rapid heat-up from cold start is critical — Mica's low thermal mass means it reaches setpoint faster than ceramic. If your process involves frequent cold starts and cycle time is paramount, that speed advantage matters — particularly for applications like a mica band heater 24v configuration on compact OEM equipment where fast thermal response is essential.
Decision Framework for Choosing the Right Type
Rather than defaulting to whichever band heater you ordered last time, run through this quick decision logic:
- Is your barrel temperature above 340°C? → Ceramic is mandatory. Mica's binders will fail.
- Are you running 24/7 continuous production? → Ceramic's energy savings and longer lifespan typically achieve ROI break-even within six months under high-load operation.
- Are your barrels worn or slightly out-of-round? → Ceramic's radiant heat transfer compensates for imperfect fit. Mica will develop hot spots and burn out prematurely.
- Is your facility undergoing an energy audit or targeting ISO 50001 compliance? → Ceramic's 25%–30% reduction in energy consumption directly supports those goals.
- Do you have less than 10mm of clearance around the barrel? → Mica is likely your only physical option.
- Is the barrel diameter below 60mm? → Mica is the only option — ceramic can't be manufactured that small.
The real cost of choosing wrong isn't just the price of the heater itself. It's the downstream impact — premature burnout causing unplanned downtime, excess energy consumption bleeding money month after month, or uneven barrel temperatures degrading product quality. Matching the heater type to your actual operating conditions is the single highest-leverage decision in this entire specification process.
With the right type selected, the next challenge is equally important: matching a ceramic band heater to the specific applications and industries where it delivers the greatest return.
Key Industrial Applications for Ceramic Band Heaters
Knowing that a ceramic heater band handles higher temperatures and tolerates worn barrels better than mica is useful — but where does that actually matter most? The answer varies by process, and the technical reasoning behind each application is worth understanding before you specify a replacement.
Here's where industrial band heaters built with ceramic insulation consistently prove their value:
- Injection molding — Barrel heating zones on injection molding machines demand precise temperature control, often with high watt densities to ensure rapid melt recovery between shots. Ceramic bands excel here because their radiant heat transfer produces more uniform barrel temperatures zone to zone, reducing melt inconsistency. For engineering-grade resins like nylon, polycarbonate, or PEEK — which process at temperatures well above 300°C — ceramic insulation isn't just preferred, it's essential.
- Extrusion — A typical single-screw extruder runs anywhere from five to twelve heating zones along its barrel length. Multiply the 25%–30% energy savings of a single ceramic band across that many zones, and the annual reduction in power consumption becomes substantial. Extruder barrel heating also involves continuous operation — often 24/7 — which means ceramic's longer lifespan under thermal cycling compounds into fewer replacement shutdowns per year. One important consideration: ceramic heaters perform best in clean processes. If significant contamination is present — talc dust, resin leaks, or moisture — a mineral-insulated design may be the better fit.
- Blow molding — Accumulator heads and barrels in blow molding equipment require uniform radiant heat to ensure the plastic parison reaches a consistent temperature before inflation. Uneven barrel heating shows up as wall thickness variation in the finished part. Ceramic bands deliver more uniform heat distribution than mica alternatives, especially on larger-diameter accumulator barrels where perfect surface contact is difficult to maintain.
- Pipe and drum heating — Not every application involves plastics processing. Band heaters for pipe systems and drum heater band installations serve chemical processing, petroleum, and food manufacturing environments where cylindrical vessels need controlled, uniform heat. Drum heater bands wrapped around steel drums maintain viscosity in heavy oils, resins, or adhesives, while band heaters for drums in pharmaceutical settings keep temperature-sensitive materials within tight process windows. The ceramic insulation advantage is the same: superior energy efficiency and tolerance for imperfect surface contact on vessels that may not be machined to tight tolerances.
- Blown film extrusion — Die heads in blown film lines are typically vertical installations, and ceramic bands on these surfaces benefit from spring-tensioned mounting bolts that prevent sagging as the heater cycles between heating and cooling. Industry experts recommend specifying a spring-loaded clamp style for any vertical ceramic band installation to maintain consistent contact pressure and avoid overheating from uneven barrel contact.
- Plastic recycling equipment — Recycling lines melt and reprocess waste material at elevated temperatures, making ceramic insulation valuable for both energy savings and thermal durability. However, recycling environments tend to involve higher contamination levels, so you'll want to evaluate the specific conditions before defaulting to ceramic over a more sealed heater design.
Injection Molding and Extruder Barrel Heating
These two applications account for the vast majority of ceramic band heater installations worldwide — and for good reason. Injection molding machines cycle rapidly between heating, injection, and cooling phases. Each cycle subjects the heater to thermal stress, and the cumulative effect over thousands of cycles per day separates durable designs from disposable ones. Ceramic knuckle construction absorbs this cycling far better than mica's flat ribbon elements, which is why high-volume molding operations almost universally specify ceramic on barrel zones processing above 300°C.
Extrusion presents a different challenge: sustained, continuous heating rather than rapid cycling. Here, the energy efficiency argument dominates. Imagine twelve ceramic bands running at 30% lower power draw compared to mica equivalents — across a three-shift operation, that adds up to thousands of dollars in annual electricity savings on a single line. Scale that across multiple extruders in a facility, and the total cost of ownership tilts decisively toward ceramic.
Drum and Pipe Heating Applications
Outside of plastics processing, band heaters for pipe installations and drum heating represent a growing segment for ceramic designs. These applications typically involve maintaining process fluids at stable temperatures — keeping waxes or adhesives fluid for dispensing, preventing condensation in chemical vapor lines, or preheating feed stocks before they enter a reactor vessel. The cylindrical geometry is identical to a barrel, so the same ceramic band construction works without modification. What differs is the operating context: pipes and drums often sit in less controlled environments — outdoors, in unheated warehouses, or near loading docks — where the insulation advantage of ceramic bands pays for itself even faster by reducing heat lost to cold ambient air.
Pairing Ceramic Bands with Temperature Controls
No ceramic band heater operates in isolation. In every serious industrial application, the heater works as one component of a closed-loop temperature control system. Here's what that system looks like in practice:
A thermocouple — typically a Type J or Type K sensor — mounts directly on the barrel surface within the heater's zone. It feeds a real-time temperature signal to a PID temperature controller, which continuously adjusts the power delivered to the band to maintain the target setpoint. When the measured temperature drops below setpoint, the controller increases power output. When it overshoots, power is reduced or cut entirely until the temperature falls back into range.
This closed-loop pairing is what transforms a simple heating element into a precision process tool. Without it, you're just dumping watts into a barrel and hoping the temperature lands somewhere useful. With it, you're holding melt temperatures within a few degrees of target — the difference between consistent product quality and scrap.
Ceramic bands integrate particularly well into these control loops because their thermal mass provides a stabilizing effect. Unlike mica heaters that heat up and cool down rapidly, the ceramic insulation retains energy and releases it gradually, dampening temperature oscillations. The controller doesn't have to work as hard to maintain a steady state, which reduces relay cycling and extends the life of both the controller output components and the heater itself.
Getting the application right, however, is only half the specification challenge. The other half — and the one where most ordering mistakes happen — is nailing down the exact dimensions, watt density, and electrical configuration for your specific barrel.
How to Select the Right Ceramic Band Heater
Here's where most ordering mistakes happen — and where the most money gets wasted. You know you need a ceramic heater band, you know which barrel it's going on, but the replacement you receive doesn't fit, can't reach temperature, or has terminals pointing straight into a structural beam. Every one of those problems traces back to a specification error that could have been avoided with a methodical approach.
Whether you're replacing a failed electric band heater on an injection molding barrel or specifying a new installation, the following checklist walks you through every parameter that matters — in the order you should address them.
Critical Dimensions and How to Measure
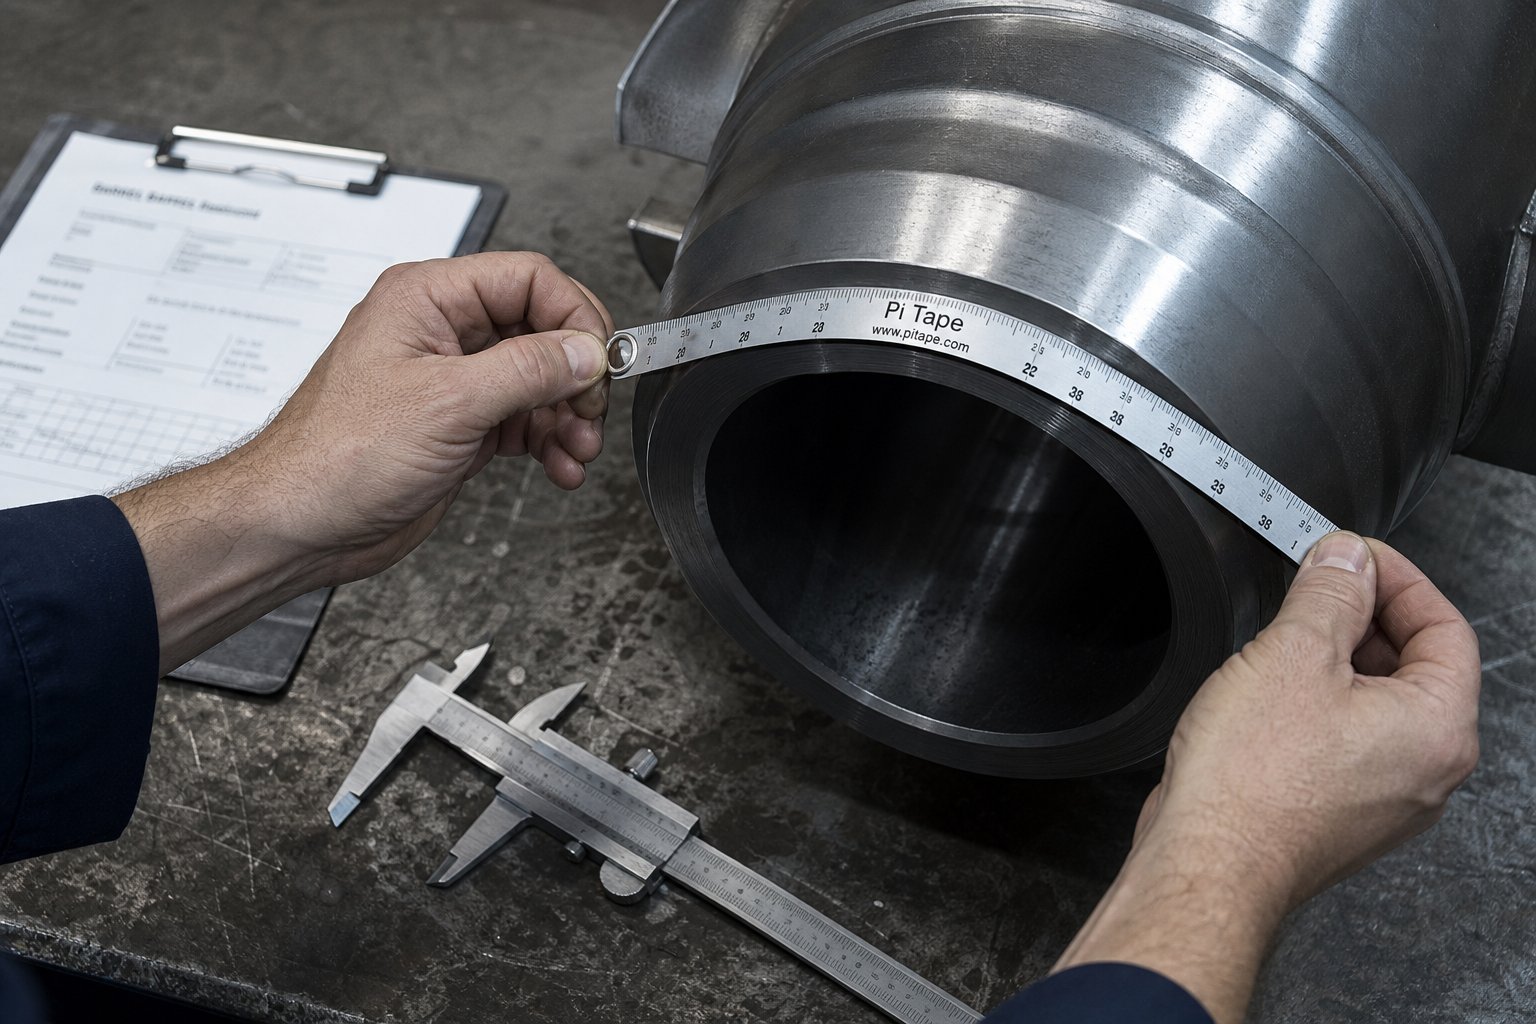
The single most important rule? Measure the barrel, not the old heater. This trips up maintenance teams constantly. After thousands of hours of thermal cycling at 300°C or higher, a burned-out heater's metal sheath warps, stretches under clamping tension, and loses its original geometry. As engineering guides from manufacturers emphasize, measuring the inner diameter of a dead heater gives you a distorted dimension that no longer reflects its manufactured state.
Instead, let the machine barrel cool to ambient temperature, clean off any residual plastic or carbonized buildup, and measure the barrel's outer diameter (OD) directly. Use precision calipers for barrels small enough to span, or a Pi Tape (circumference-to-diameter tape) for larger cylinders. The heater manufacturer will engineer the band's inner diameter to match that barrel OD, accounting for manufacturing tolerances — typically -0.00" / +0.06" — so the band slides on smoothly and tightens to a firm fit.
One critical detail for aging equipment: worn barrels may have an increased or slightly out-of-round outer diameter compared to the original machine specifications. This is exactly why accurate, fresh measurements matter every time you order. The good news is that ceramic bands are more forgiving on slightly oversized barrels than mica alternatives, thanks to radiant heat transfer bridging minor air gaps. But "more forgiving" doesn't mean "measure carelessly" — a tolerance mismatch of even a millimeter creates thermal inefficiency and accelerates burnout.
Width is your second critical dimension. Measure the available space along the barrel's axis where the heater will sit, accounting for any obstructions — thermocouple ports, pressure transducer bosses, or barrel flange shoulders. Standard ceramic bands start at a minimum width of 1" (25.4mm) and increase in 1/8" increments, with width tolerances ranging from ±1/16" on narrow bands up to ±1/4" on bands exceeding 6.5".
Matching Watt Density and Voltage to Your Process
Dimensions get the heater onto the barrel. Watt density and voltage determine whether it actually does its job.
Watt density — the power output per unit of heated surface area — is the specification that balances heat-up speed against element longevity. For insulated ceramic bands, the nominal operating range sits between 20–45 W/in² (3–7 W/cm²), with a maximum of 45 W/in² (7 W/cm²). Uninsulated designs can push to 50 W/in² (8 W/cm²) with adequate airflow. What does this mean in practical terms? If your process needs rapid heat-up or involves high-temperature engineering resins, you'll specify toward the upper end of that range. For moderate-temperature, steady-state applications, a lower watt density extends element life significantly.
Here's the constraint that catches engineers off guard: you can't just request any wattage in any size band. If your required wattage divided by the heater's surface area exceeds the material limit — 6 W/cm² for ceramic — the internal resistance wire will overheat and melt. The fix is either increasing the band width to gain more surface area or reducing the total wattage requirement.
Voltage must match your plant's electrical supply. Common configurations include 120V, 240V, and 480V single-phase, with dual-voltage options available for facilities running multiple supply voltages. A band heater with thermocouple integration and a band heater temperature controller in the loop will regulate the power delivery, but the base voltage must be correct at the panel. If you're replacing an existing heater, check the nameplate on the unit or the electrical schematic — don't assume every zone runs at the same voltage.
Insulation thickness directly affects both outer surface temperature and energy savings. Standard ceramic insulation runs 1/4" (6.4mm) thick, while double insulation doubles that to 1/2" (12.7mm). The thicker option reduces outward heat loss further and brings the outer shell temperature down — a meaningful safety improvement in areas where operators work close to the barrel. If your process runs above 500°F and you're evaluating energy reduction targets, double insulation often pays for itself within a few months of continuous operation.
Terminal Configuration and Installation Constraints
The best-specified heater in the world is useless if you can't connect it. Terminal style depends on three factors: available radial clearance around the barrel, your electrical infrastructure, and how frequently you swap heaters during maintenance.
- Screw post terminals — Handle up to 480 VAC at 25 amps per circuit. Best for permanent installations with adequate clearance for a terminal box or junction cover.
- Lead wire exits — Available as straight leads, 90-degree exits, or stainless steel braided armor cable. Ideal for tight spaces where a band heater with thermostat wiring must share limited clearance between the barrel and machine guarding.
- Quick-disconnect plugs — Fastest swap during scheduled shutdowns, typically limited to 250 VAC. Preferred in high-changeover environments.
Terminal position matters just as much as terminal type. The industry standard is the "clock face" system: imagine looking at the end of the barrel and specifying terminal location by hour position (12 o'clock, 3 o'clock, etc.), with the clamping gap typically at 6 o'clock. If terminals point into a steel beam, an oil line, or another heater's wiring run, you've created an installation headache that could have been avoided with a simple clock position callout on the order.
For heaters requiring thermocouple pass-through holes or cutouts for pressure transducers, specify the exact location using Cartesian coordinates — distance from a defined edge in both the axial and circumferential directions — along with the hole diameter plus a 2mm tolerance buffer for alignment during installation. Most manufacturers require a minimum 12mm "cold zone" border between any cutout edge and the internal heating element to prevent electrical shorting.
Ordering by Drawing or Sample for Exact Replacement
Ceramic band heaters are rarely off-the-shelf items. Most replacements are custom-manufactured to match your specific barrel, and the industry has developed three standard ordering methods to handle this:
- Engineering drawing — The most precise method. Provide a dimensioned drawing showing barrel OD, band width, cutout locations (with Cartesian coordinates), terminal position (clock face), wattage, voltage, and insulation type. This eliminates ambiguity and gives the manufacturer everything needed to produce an exact-fit replacement.
- Physical sample — Send the old heater to the manufacturer. They'll reverse-engineer the dimensions while cross-referencing against your barrel OD measurement (which you should always provide alongside the sample, since the old heater may be distorted). This is common when no drawing exists for legacy equipment.
- Measured dimensions with photos — Provide your barrel OD measurement, width, wattage, voltage, and terminal details along with clear photos showing the installation context. This works well for straightforward replacements where cutouts and terminal positions are standard.
Whichever method you use, always double-check one thing: does the replacement need to accommodate a band heater with thermocouple port? Thermocouple holes are easy to overlook during measurement but impossible to add after manufacturing without destroying the heater's internal wiring.
Here's a consolidated specification checklist you can copy directly into your next purchase order or RFQ:
- Barrel outer diameter (measured cold, directly on the machine)
- Band width (available axial space on the barrel)
- Total wattage required
- Supply voltage (120V, 240V, 480V, or dual)
- Number of circuits (single or multi-zone)
- Insulation type (standard 1/4", double 1/2", or uninsulated)
- Terminal style (screw post, lead wire, quick-disconnect)
- Terminal position (clock face designation)
- Clamping style (built-in bracket, spring-loaded, latch and trunnion)
- Cutout locations and dimensions (Cartesian coordinates, hole diameters)
- Thermocouple hole location and size (if applicable)
- One-piece or two-piece construction (two-piece is mandatory above ~15" diameter)
Getting these twelve parameters right the first time eliminates the back-and-forth that delays production and wastes budget on heaters that arrive and can't be installed. But even a perfectly specified heater won't last forever — and knowing what shortens its life, what the warning signs look like, and how to extend its service interval is the next critical piece of the puzzle.
Maintenance, Troubleshooting, and Expected Lifespan of Heating Bands
A perfectly specified ceramic heater band installed on the right barrel doesn't guarantee years of trouble-free operation. How you maintain, inspect, and operate that heater determines whether it lasts six months or five years. The frustrating reality? Most premature failures are preventable — but only if you know what to look for and what habits to break.
Industrial heat bands don't carry a fixed expiration date. Under ideal conditions — correct watt density, clean barrel contact, stable power supply, and moderate thermal cycling — a quality ceramic band heater can deliver three to five years of continuous service. But "ideal conditions" rarely exist on a production floor. Contamination, mechanical abuse, control system errors, and poor installation physics conspire to shorten that lifespan dramatically. Understanding these failure mechanisms transforms reactive maintenance — scrambling at 3 AM to swap a dead heater — into predictive maintenance that catches problems before they shut you down.
Common Failure Modes and Warning Signs
Every failed ceramic heater band tells a story. The trick is learning to read it. Here are the four most common failure modes, along with the visible symptoms that signal trouble before a complete breakdown occurs:
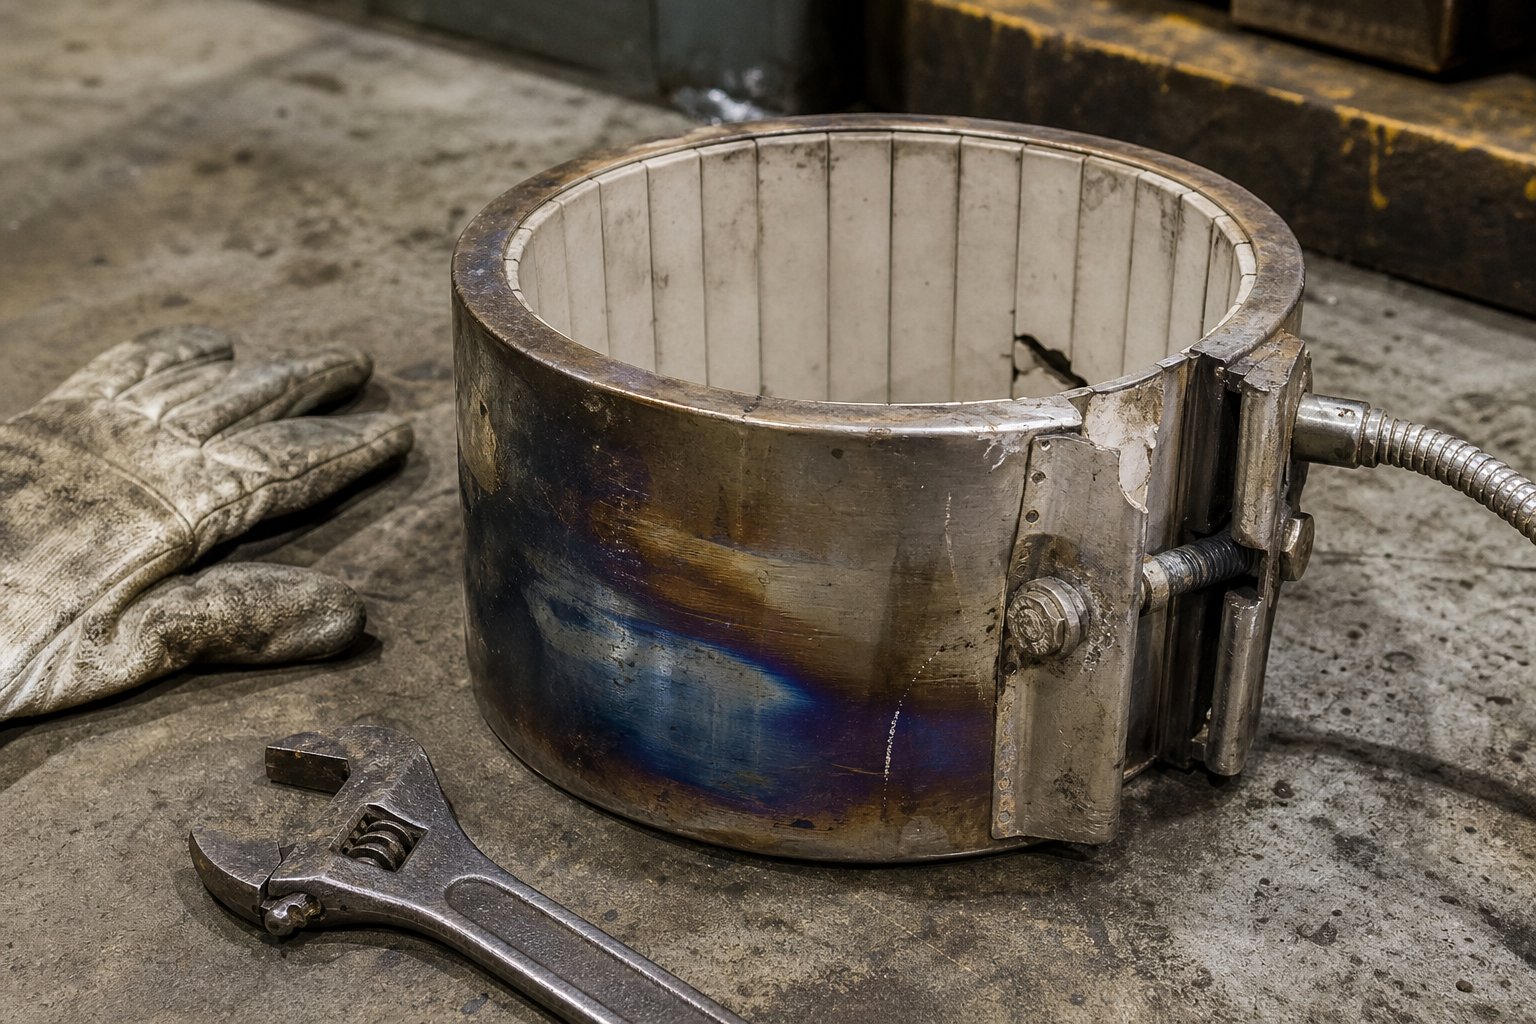
- Cracked ceramic elements from mechanical impact or extreme thermal shock — The interlocking ceramic knuckles inside the band are robust under normal thermal stress, but they're brittle by nature. A sharp impact during installation — dropping the heater, striking it with a wrench, forcing it over a flange — can fracture individual knuckles. Extreme thermal shock produces the same result: powering a cold heater straight to maximum output forces the ceramic elements to expand faster than the surrounding metal, generating internal stresses that crack the insulation. Once cracked, the ceramic loses its ability to support and electrically isolate the resistance coil, leading to hot spots or ground faults.
- Uneven heating from broken coil segments or poor barrel contact — If you notice one section of the barrel running significantly hotter or colder than the rest of the zone, the cause is either a partially broken resistance wire inside the band or inconsistent surface contact between the heater and barrel. Microscopic air gaps between the inner shroud and barrel wall act as thermal insulators — air's thermal conductivity is roughly 0.026 W/m·K, which is essentially a brick wall for heat transfer. The trapped energy drives the wire temperature past safe limits in the gapped section while the rest of the band underperforms.
- Element burnout from exceeding rated watt density or voltage spikes — This is the most common "murder weapon." When a replacement heater is specified with higher wattage than the original design intended — often in a well-meaning attempt to speed up heat-up times — the watt density exceeds what the nickel-chrome wire and ceramic insulation can sustain. The internal temperature climbs past the wire's oxidation threshold, the element becomes brittle, and it snaps. Voltage spikes from unstable plant power supplies produce the same outcome — a sudden surge pushes the element beyond its design limits in seconds rather than weeks.
- Loose fit on worn barrels reducing heat transfer efficiency — Over years of service, barrel outer diameters change. Thermal cycling, mechanical wear, and even corrosion gradually alter the surface geometry. A ceramic band that was properly clamped two years ago may now sit loosely on a barrel that's grown slightly in diameter or developed out-of-round spots. While ceramic's radiant heat transfer compensates better than mica in this scenario, the efficiency loss is still real. The controller compensates by running the heater harder and longer, which accelerates wire oxidation and shortens the thermal band's service life.
Catching these problems early requires knowing what to look for during routine inspections. Here are the telltale symptoms and their most likely root causes:
- Rainbow or blue-purple discoloration on the outer stainless steel shell — This metallurgical annealing pattern is unmistakable evidence of localized overheating caused by air gaps or poor clamping. The heater was cooking itself instead of heating the barrel. Inspect the barrel surface beneath the discolored area for plastic buildup, scale, or uneven contact.
- Visible hot spots or localized glowing during operation — A section of the band running visibly hotter than the surrounding area points to either a broken internal coil segment (forcing remaining segments to carry the full load) or a clamping gap concentrating heat in one zone.
- Gradual increase in energy consumption for the same temperature setpoint — If the controller is commanding progressively higher duty cycles to maintain a temperature that used to require less power, the heater is losing efficiency. Common culprits include loosening fit, degraded ceramic insulation, or thermocouple drift giving the controller inaccurate feedback.
- Inability to reach the temperature setpoint — When a zone simply can't hit target temperature regardless of controller output, test the heater's resistance with a multimeter. An "OL" (open loop) reading means the internal wire has broken completely. A reading significantly higher than the nameplate value suggests partial coil damage — some segments have failed, reducing total heating capacity.
- Black carbon deposits around seams or terminal exits — This signals contamination ingress. Molten polymer, hydraulic oil, or moisture has entered the heater through seam gaps and carbonized at operating temperature, creating conductive bridges that cause arcing and short circuits.
Best Practices for Extending Heater Band Life
Preventing these failures doesn't require exotic technology — it takes disciplined installation and operating habits. Here's a maintenance checklist drawn from real-world best practices that consistently extend the service life of ceramic heating bands:
- Clean the barrel to bare metal before every installation. Scrape off all residual plastic, carbon buildup, and scale. Any debris trapped between the barrel and the heater's inner shroud creates an insulating air gap that causes localized overheating. Use a rubber mallet — never a steel hammer — to seat the band flush against the barrel surface during installation.
- Perform a "hot re-torque" after first heat-up. When the machine reaches operating temperature, thermal expansion changes the barrel's diameter slightly. Re-tighten the clamping screws at this point to close any gaps that opened during the initial warm-up. This single step eliminates one of the most common causes of premature burnout.
- Avoid over-torquing clamps. Cranking a bolt-and-nut clamp past the band's design limit distorts the outer shell, crushes the ceramic knuckles beneath it, and creates uneven pressure distribution around the circumference. The goal is firm, uniform contact — not maximum force. If the band won't seat tightly with moderate torque, the barrel diameter has likely changed and a new band with the correct ID is needed.
- Allow gradual warm-up rather than rapid temperature ramps. Ramping from ambient to full operating temperature in minutes subjects every material in the assembly — stainless steel, ceramic, resistance wire — to sharp thermal gradients. These gradients generate mechanical stress at material boundaries, and repeated cycling through these stress events cracks oxide layers on the resistance wire, exposing fresh metal to oxidation. A controlled ramp — typically 5°C to 10°C per minute — lets all materials expand together and dramatically reduces thermal shock damage.
- Inspect and replace thermocouples at regular intervals. A drifting thermocouple is invisible to the operator but devastating to the heater. If the sensor reads low by even 20°C, the controller overdrives the heating band continuously, pushing the element far beyond its intended duty cycle. Check thermocouple accuracy against a reference probe during scheduled shutdowns. Replace any sensor that has drifted outside its rated tolerance.
- Calibrate PID controllers to prevent overshoot. An improperly tuned PID loop — especially one with excessive integral action — can overshoot the setpoint by 30°C to 50°C on every heat-up cycle. That overshoot forces the ceramic band's internal wire temperature to spike above safe limits repeatedly. If your fast heat band heaters are burning out faster than expected but the setpoint seems reasonable, check the controller's auto-tune settings and verify the overshoot behavior during a cold start.
- Keep heaters dry and free of contamination. Moisture absorbed during storage or downtime can cause catastrophic failure the moment power is applied. If a heater has been sitting in a humid environment or exposed to fluid contamination, preheat it at low temperature to dry out the insulation before ramping to full operating conditions. Fix any upstream leaks — resin drool, hydraulic oil weeps, coolant line drips — before installing a new band.
- Handle heaters by the casing, never by the lead wires. This seems obvious, but it's one of the most common habits that destroys otherwise healthy heaters. Pulling on lead wires fractures the internal crimped connection between the flexible lead and the rigid cold pin, creating high-resistance joints that arc and eventually open. For post-terminal connections, always use two wrenches — one holding the base, the other tightening — to avoid twisting the internal connection.
Safety Limits and Thermal Cycling Effects
Every ceramic heater band has an absolute maximum operating temperature — typically 1,200°F to 1,400°F (649°C to 760°C) at the element — and exceeding that limit isn't a gray area. At temperatures beyond the design threshold, the dielectric strength of ceramic insulation decreases measurably, allowing leakage current to flow between the live resistance wire and the grounded outer sheath. Initially this leakage may be just a few milliamps — enough to trip a sensitive ground-fault detector but not enough to cause visible damage. Left unchecked, the leakage path widens until a full short circuit develops, destroying the heater and potentially damaging the controller or SSR relay driving it.
Oxidation of the nickel-chrome resistance wire accelerates rapidly above 1,100°F to 1,200°F. The oxide layer that forms on the wire surface is actually protective at moderate temperatures — it seals the metal beneath it from further oxidation. But thermal cycling cracks that protective layer repeatedly. Each crack exposes fresh metal, which oxidizes on the next heat-up, gradually thinning the wire until it becomes too brittle to carry current and snaps. This is why a heater held at constant temperature lasts far longer than one cycled between hot and cold many times — the oxide layer stays intact and continues to protect the element.
The practical takeaway? Operate your ceramic bands as far below their rated maximum as your process allows. A heater rated to 1,400°F but running continuously at 700°F will outlast an identical unit pushed to 1,300°F by a factor of several times. And if your process involves frequent shutdowns — weekend stoppages, shift-based cycling, or batch processing with cool-down periods — the cumulative effect of thermal cycling on element oxidation is a real lifespan concern. Reducing unnecessary on-off cycling through smarter scheduling, standby temperature modes, or optimized PID tuning that minimizes power oscillation keeps the protective oxide layer intact and extends service life measurably.
Maintenance discipline keeps your ceramic heater band running longer and failing less — but even the best-maintained heater eventually needs replacement. When that time comes, where you source the replacement and how you manage the ordering process can be just as important as how you maintained the original.
Sourcing Reliable Replacement Ceramic Heater Bands
A ceramic heater band with the right dimensions, watt density, and terminal configuration is only as good as the supplier behind it. Order from the wrong source — one that can't hold tolerances, doesn't understand plastics processing equipment, or ships generic inventory that doesn't match your barrel — and you're back to square one with a heater that underperforms, doesn't fit, or fails within weeks.
The challenge? These are not commodity items you pull off a shelf. Nearly every replacement is a custom-manufactured component built to match a specific machine's barrel diameter, zone width, electrical requirements, and mounting constraints. That reality makes your choice of band heater supplier one of the most consequential decisions in the entire replacement process.
What to Look for in a Heater Band Supplier
Not every heater band manufacturer can deliver what a maintenance team or plant buyer actually needs. Price matters, but it's rarely the factor that separates a smooth replacement from a production nightmare. Here's what to evaluate before committing to a supplier:
- Custom manufacturing from drawings, samples, or measured dimensions — This is non-negotiable. A supplier that only sells standard catalog sizes will leave you with fit problems on any barrel that deviates from textbook dimensions. The best heater band suppliers accept engineering drawings, physical samples of the old heater, photographs with annotated measurements, or raw dimension sets — and manufacture to those specifications with tight tolerances.
- Range of complementary spare parts — During a scheduled shutdown or machine rebuild, you're rarely replacing just the heater. Thermocouples, nozzle tips, check rings, screw tips, and other wear components typically need attention at the same time. A supplier who can provide these alongside your ceramic heater bands eliminates the headache of coordinating multiple vendors for a single maintenance event.
- Technical support and application guidance — Can the supplier help you determine the right watt density for your process? Can they advise on insulation thickness, terminal configuration, or whether your barrel condition warrants a two-piece design? Suppliers invested in your success offer this engineering support as part of the relationship — not as an upsell.
- Realistic lead times with consistent follow-through — Custom industrial ceramic heater production takes time, but a reliable supplier provides clear timelines and hits them. Ask for typical lead times on custom orders, and check whether they can expedite for emergency breakdowns. A quoted lead time that slips by two weeks every order is worse than a longer but honest estimate.
- Compliance and quality certifications — Look for suppliers who use industrial-grade ceramics, high-grade nickel-chrome resistance wire, and durable stainless steel sheathing. Certifications like ISO 9001, CE, or RoHS indicate that the product has been tested for safety, quality, and environmental standards — giving you confidence that what arrives will actually perform as specified.
Ordering Custom Replacements from Drawings or Samples
The ordering process itself matters more than most buyers realize. A vague purchase order — "ceramic band heater, 6 inches, 1500 watts" — leaves critical details to the manufacturer's assumptions. Those assumptions may not match your barrel, your wiring, or your physical clearances.
Three methods consistently produce accurate replacements:
- Engineering drawings — The gold standard. A dimensioned drawing that specifies barrel OD, band width, wattage, voltage, insulation type, terminal position (clock face), clamping style, and cutout locations with Cartesian coordinates leaves zero room for interpretation. If you have a drawing from the original equipment manufacturer, use it — but verify barrel OD against a fresh measurement, since the barrel may have changed.
- Physical samples — Sending the failed heater to the supplier lets them reverse-engineer every dimension, terminal placement, and cutout. Always include a fresh barrel OD measurement alongside the sample, because the old heater's inner diameter will be distorted from years of thermal cycling and clamping stress.
- Measured dimensions with photos — For straightforward replacements, provide barrel OD (measured cold), width, wattage, voltage, terminal type, and clear photos showing the installation context. This method works well when shipping a sample isn't practical and no engineering drawing exists.
Whichever approach you choose, confirm that the supplier cross-checks your specifications before manufacturing begins. A five-minute clarification call can prevent a five-week delay caused by a heater that arrives and can't be installed.
Consolidating Extruder Spare Parts from a Single Source
Here's a procurement insight that experienced maintenance managers learn the hard way: sourcing each replacement component from a different vendor creates compounding complexity. You're managing separate quotes, separate lead times, separate shipping timelines, and separate quality expectations — all for parts that need to arrive together so the machine can go back into production during a single maintenance window.
Consolidating your extruder spare parts through a single supplier dramatically simplifies this process. Instead of coordinating five vendors for a rebuild that needs ceramic heater bands, thermocouples, a screw tip, a check ring, and an injection nozzle, you place one order, track one shipment, and deal with one point of contact.
NANHAIYA is one supplier worth evaluating for this consolidation approach. Their extruder spare parts program is built specifically for maintenance teams and machine rebuilders who need to source multiple replacement components from a single source. Beyond ceramic heater bands, they produce screw tips, check rings, injection nozzles, thermocouples, die heads, pelletizing blades, screen packs, filter adapters, and gearbox-related components — all manufactured from your drawings, samples, photos, or measured dimensions. For a plant buyer managing a scheduled shutdown or a machine rebuilder working through a full overhaul, that single-source capability eliminates the procurement juggling act that turns a planned three-day maintenance window into a two-week parts-chasing exercise.
The broader principle applies regardless of which band heater manufacturer you ultimately choose: evaluate suppliers not just on the industrial ceramic heater itself, but on their ability to support the full scope of what your maintenance event actually requires. The heater band is one component in a system — and the supplier who understands that system-level reality will consistently deliver better outcomes than one who treats each part as an isolated transaction.
Frequently Asked Questions About Ceramic Heater Bands
1. What is the maximum temperature a ceramic heater band can reach?
Most ceramic heater bands are rated for continuous operation between 1,200°F and 1,400°F (649°C to 760°C) at the element, depending on the specific ceramic material and resistance wire alloy used. However, running the heater well below its rated maximum significantly extends service life by reducing wire oxidation and thermal stress on the ceramic insulation. For plastics processing, barrel temperatures rarely exceed 800°F, so standard ceramic bands provide ample thermal headroom for the vast majority of applications.
2. How does a ceramic band heater differ from a mica band heater?
The primary difference lies in the insulation material and heat transfer method. Ceramic band heaters use interlocking ceramic knuckles that provide built-in thermal insulation, enabling both radiant and conductive heat transfer at temperatures up to 1,400°F. Mica band heaters use thin mica sheets and rely almost entirely on metal-to-metal conduction, with a safe operating ceiling around 644°F. Ceramic designs offer 25-30% better energy efficiency, longer lifespan under thermal cycling, and superior performance on worn or slightly out-of-round barrels, while mica bands cost less upfront and fit into tighter radial clearances due to their thinner profile.
3. How do you measure for a replacement ceramic heater band?
Always measure the barrel's outer diameter directly rather than measuring the old heater, which may be warped from years of thermal cycling. Let the barrel cool to ambient temperature, clean off any residual buildup, and use precision calipers or a Pi Tape to capture the exact outer diameter. Then measure the available axial width on the barrel, noting any obstructions like thermocouple ports or flanges. Suppliers such as NANHAIYA can manufacture exact replacements from your measured dimensions, engineering drawings, or even physical samples paired with barrel measurements.
4. Why does my ceramic band heater keep burning out prematurely?
Premature burnout typically stems from one of four causes: air gaps between the heater and barrel creating localized hot spots, excessive watt density pushing the resistance wire beyond safe limits, voltage spikes from unstable power supplies, or a drifting thermocouple causing the controller to overdrive the heater. Start by inspecting the barrel surface for debris or out-of-round wear, verify that the replacement wattage matches the original specification, and check thermocouple accuracy against a reference probe. Performing a hot re-torque after first heat-up and allowing gradual warm-up ramps also dramatically reduce burnout risk.
5. Can I use a ceramic band heater on drums and pipes, not just extruder barrels?
Yes, ceramic band heaters work on any cylindrical surface that falls within their diameter range, typically 60mm and above. Drum heater bands and pipe heating installations are common in chemical processing, petroleum, food manufacturing, and pharmaceutical settings where fluids need to be maintained at stable temperatures. The ceramic insulation advantage is especially valuable in these applications because drums and pipes often sit in less controlled environments with cold ambient air, where the built-in thermal barrier reduces heat loss and lowers energy consumption compared to uninsulated alternatives.
Written by
Nanhaiya Technical Team
Zhoushan Nanhaiya Plastic Machinery Co., Ltd.
The Nanhaiya technical team supports screw and barrel manufacturing projects through application review, technical communication, custom manufacturing coordination, and production and quality control.
Discuss Your Application
Related Articles
More insights on screw barrel technology and plastics processing.
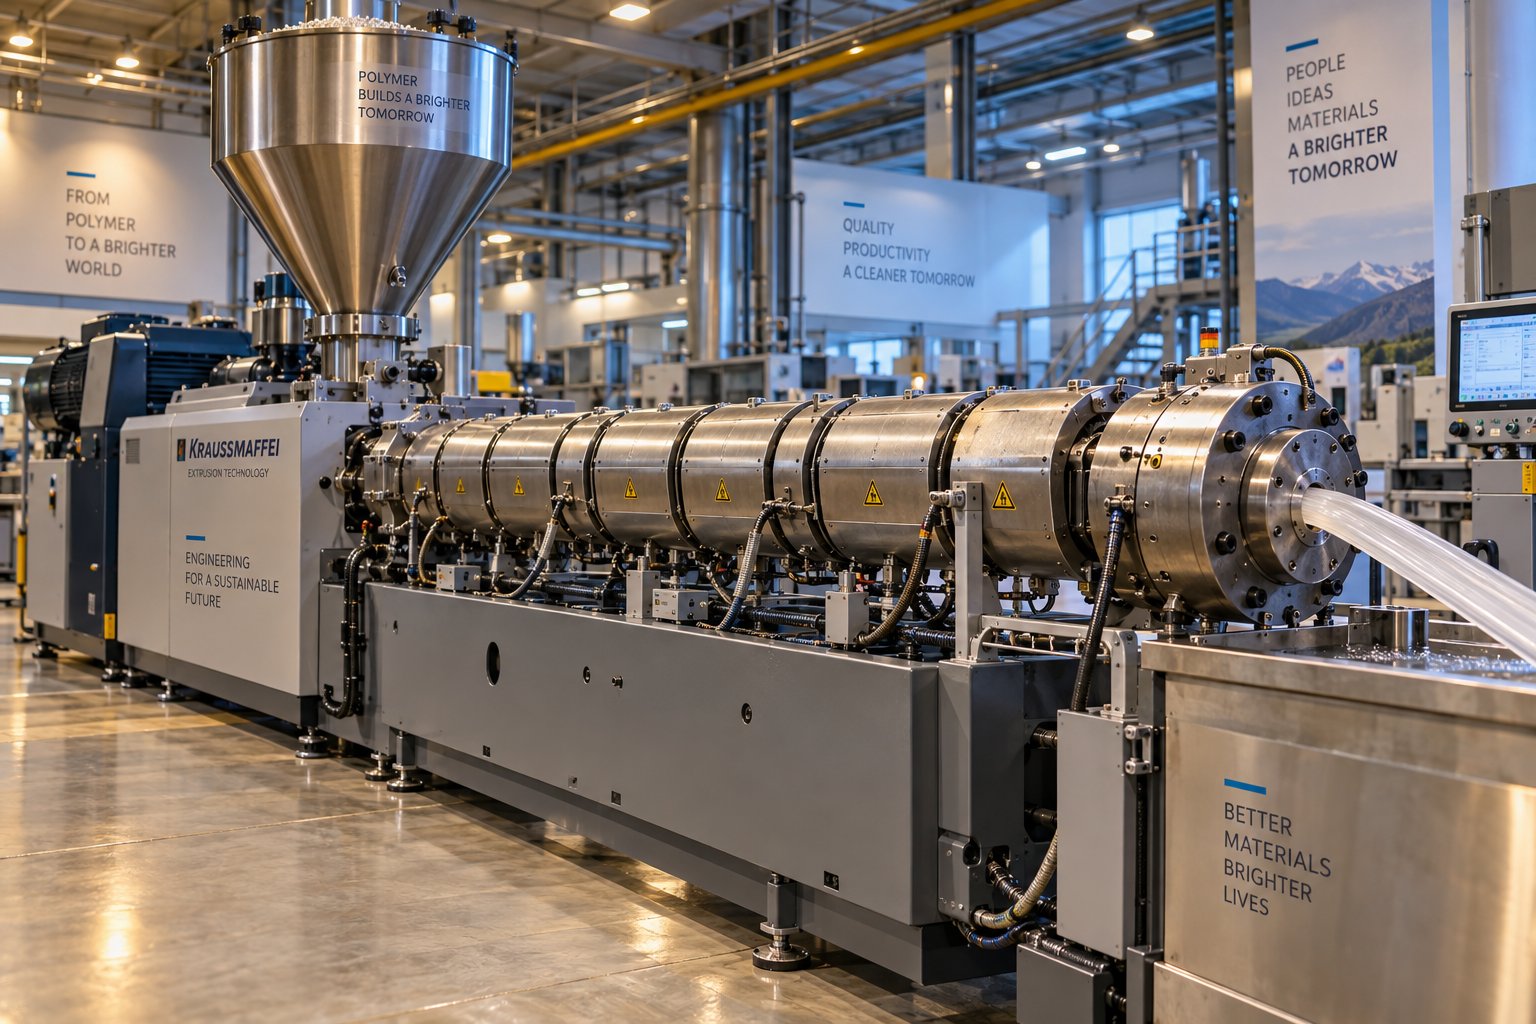
Extruder Machine Decoded: From Raw Pellet To Finished Product
Oct 6, 2026
Learn how an extruder machine works, compare single-screw vs. twin-screw types, and get expert guidance on specs, troubleshooting, and selection.
Read Article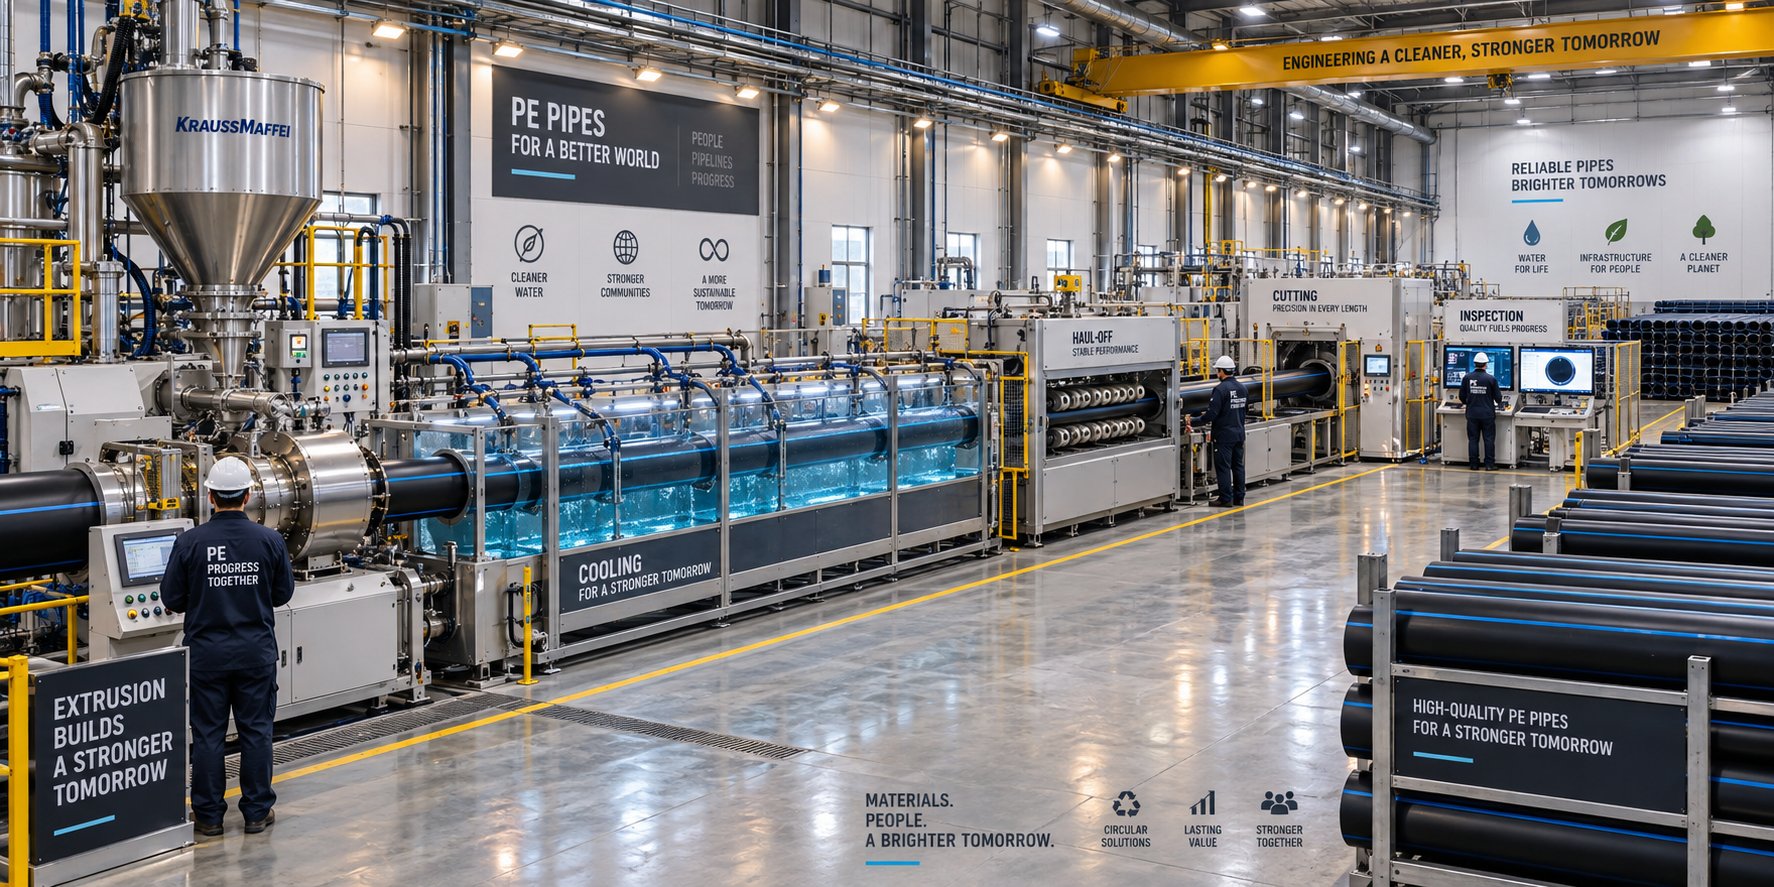
PE Pipe Making Machine Decoded: From Raw Resin to Flawless Pipe
Oct 4, 2026
Learn how a PE pipe making machine works, from resin to finished pipe. Covers components, material grades, automation, troubleshooting, and buyer selection tips.
Read Article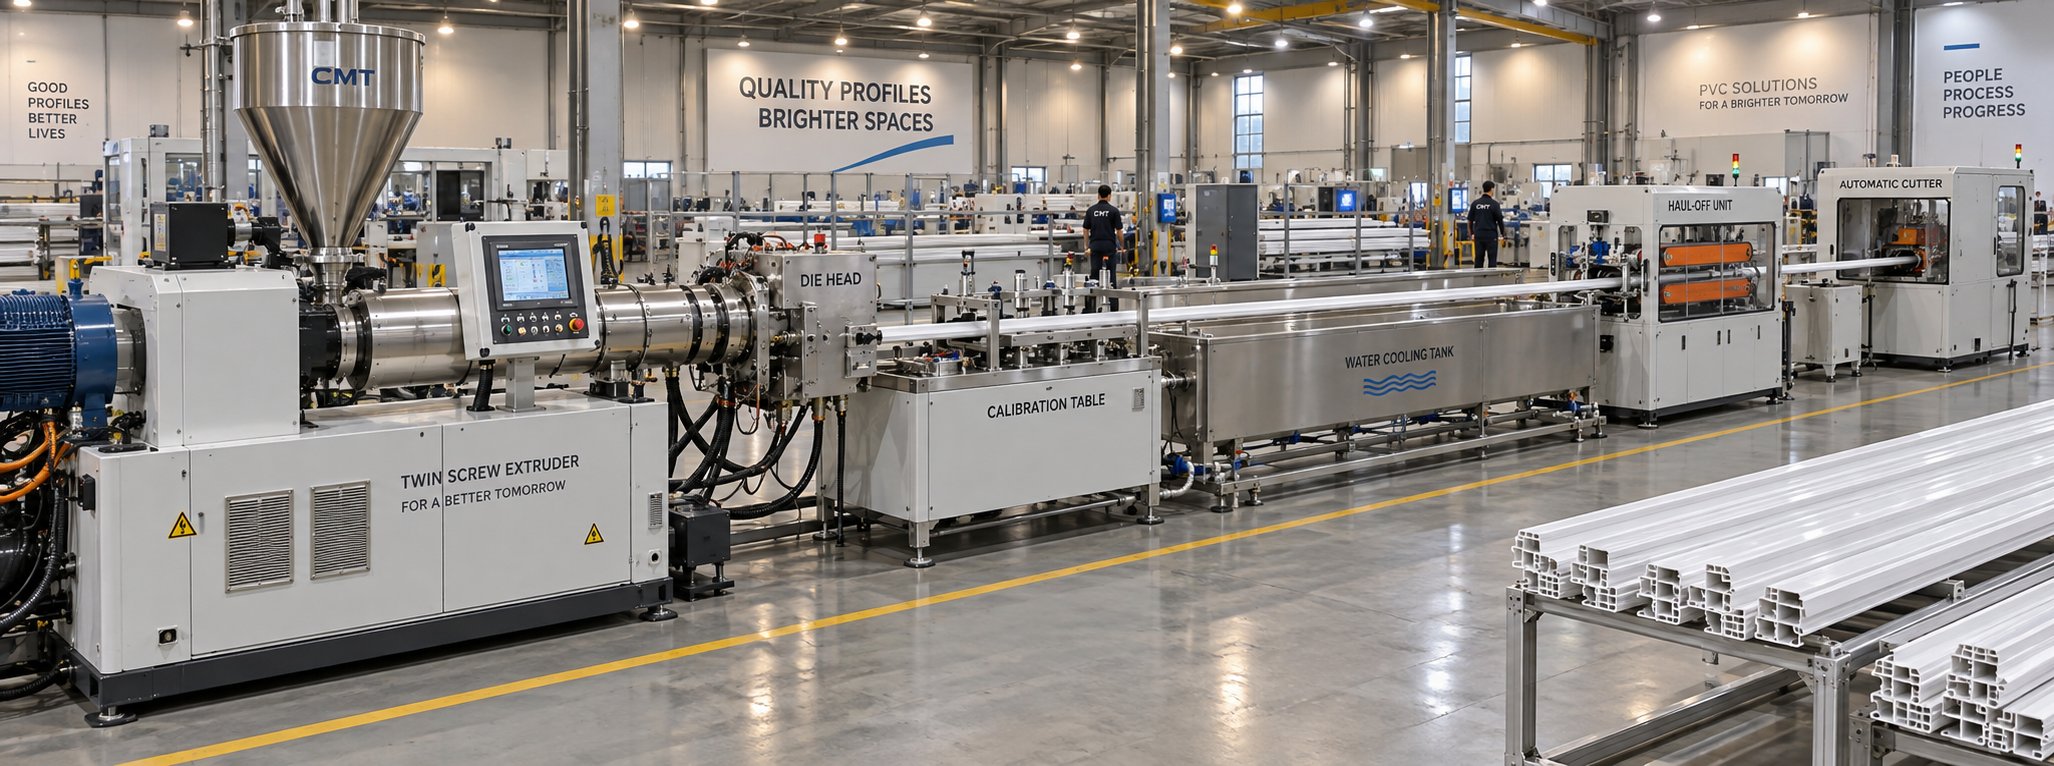
PVC Profile Making Machine Decoded: From Raw Resin To Profit
Oct 3, 2026
Learn how a PVC profile making machine works — extrusion process steps, key technical parameters, die design, calibration methods, maintenance, and total cost of ownership.
Read ArticleLooking for something else?
Search by material, symptom or product and jump straight to the relevant page.
These are navigation suggestions based on keyword matching — not a quotation, not a delivery commitment, and not a substitute for engineering review. Final specification is confirmed by our engineers against your drawings and processed material.
Need help with screw barrel selection?
Share your machine model, processed material and application. Our team can help with pricing and technical support.