


What Screw Speed Really Means in Injection Molding
Ask a molder which parameters matter most, and you'll hear the usual lineup: injection speed, holding pressure, barrel temperature, cooling time. Rarely does screw speed make the top of the list. Yet this single setting — the rotational speed of the injection molding screw during recovery — determines your melt quality before a single gram of resin enters the mold. If the melt is inconsistent, no amount of injection profiling or packing optimization will fix it downstream.
The problem starts with confusion. Search for "screw speed injection molding" online, and you'll find dozens of results that blur the line between two fundamentally different parameters. That confusion costs processors real money in scrap and troubleshooting hours.
Screw Speed vs. Injection Speed — A Critical Distinction
Screw speed and injection speed describe two separate phases of the molding cycle. Injection speed is the linear velocity of the screw moving forward as a ram, pushing melt into the cavity. You control it through your injection profile — velocity settings across the stroke that shape how the mold fills. Screw speed, on the other hand, is purely rotational. It's the RPM at which the screw turns during the plasticizing (recovery) phase, conveying pellets forward, compressing them, and transforming solid resin into a homogeneous melt.
Screw speed is the rotational rate (RPM) at which the screw turns during the plasticizing phase to convey, compress, melt, and homogenize resin — setting melt quality before the injection stroke ever begins.
Mixing these two concepts up leads to process sheets that don't translate between machines and troubleshooting efforts aimed at the wrong variable entirely. As RJG notes, screw speed should be selected based on material type and additive content to deliver the correct amount of shear through the rotation of the screw and its geometry — a distinctly different concern from how fast the screw pushes melt into the mold.
Why Screw RPM Deserves Dedicated Attention
Your melt quality is already locked in before injection begins. Temperature uniformity, additive dispersion, and polymer integrity are all decided during recovery. A poorly plasticized melt carries unmelted particles, uneven viscosity, and trapped air into the cavity — defects that no injection profile can correct after the fact. Despite this, most training curricula dedicate chapters to fill speed and pack pressure while treating screw RPM as a footnote.
This guide changes that. Every section ahead focuses exclusively on screw rotational speed — how it interacts with screw diameter, shear heating, residence time, back pressure, and material behavior. The goal is to give you the practical depth this parameter has always deserved.
And it all begins with understanding why the RPM number on your controller screen doesn't tell the whole story. The real metric material suppliers care about is something different: peripheral screw speed.

Peripheral Screw Speed vs. Raw RPM
Imagine you've validated a robust process on a 40 mm screw machine. Parts are clean, cycle times are tight, and quality is consistent. You transfer that exact RPM setting to a 80 mm screw machine running the same resin — and suddenly you're seeing degradation, streaking, or splay. The RPM number is identical, so what went wrong?
The answer is peripheral screw speed — sometimes called circumferential screw speed or surface speed. It's the metric that actually describes the shear conditions your resin experiences, and it's the number resin suppliers reference when they publish processing guidelines. Raw RPM, by itself, tells you almost nothing useful for injection molding process control across different machines.
The Peripheral Speed Formula Explained
Peripheral screw speed measures how fast a point on the outer edge of the screw flight travels as the screw rotates. It's expressed in meters per minute (m/min) or feet per minute (ft/min), and the formula is straightforward:
Peripheral Speed = π × Screw Diameter × RPM
Think of it this way: a screw's outer circumference is a circle. Multiply that circumference (π × diameter) by the number of revolutions per minute, and you get the linear distance the flight tip travels every minute along the barrel wall. This linear travel speed directly determines how aggressively the advancing flight scrapes the melt film off the barrel surface — the primary melting mechanism inside injection molding screws.
A bigger screw has a larger circumference. So at the same RPM, its flight tip covers far more distance per revolution than a smaller screw. That difference isn't subtle — it's proportional to the diameter ratio.
Why RPM Alone Is Misleading Across Machine Sizes
Here's where injection molding process improvements often stall. Technicians record a successful RPM on one machine and punch in the same number on another machine with a different screw diameter. The assumption is logical on the surface — same material, same RPM, same result. But the resin doesn't experience RPM. It experiences surface speed and the shear forces that come with it.
A small-diameter screw at 100 RPM moves resin across its flight surfaces relatively slowly. A large-diameter screw at that same 100 RPM whips the polymer against the barrel wall at a dramatically higher velocity, generating significantly more viscous heat dissipation. The table below illustrates the effect:
| Screw Diameter | RPM Setting | Approximate Peripheral Speed |
|---|---|---|
| 25 mm (~ 1 in) | 100 | ~7.9 m/min (~25.8 ft/min) |
| 50 mm (~ 2 in) | 100 | ~15.7 m/min (~51.5 ft/min) |
| 80 mm (~ 3.1 in) | 100 | ~25.1 m/min (~82.4 ft/min) |
| 150 mm (~ 5.9 in) | 100 | ~47.1 m/min (~154.5 ft/min) |
At the same 100 RPM, the 150 mm screw produces a peripheral speed roughly six times greater than the 25 mm screw. That's six times the flight-tip velocity scraping against the barrel wall, six times the shear intensity on the melt film. If your resin's recommended peripheral speed range tops out around 20 m/min, the smaller screw is safely within limits while the larger one has blown past them by more than double.
As process expert Andy Routsis points out, circumferential screw speed is a useful reference when establishing an initial process on a new machine, though it's not a perfectly transferable parameter either — screw geometry, flight depth, and channel design also influence melt behavior. Still, it's a far more reliable starting point than copying RPM blindly.
Reading Resin Data Sheets for Speed Limits
Open a technical data sheet for any engineering resin — nylon, polycarbonate, PBT — and you'll notice that screw speed recommendations are listed as peripheral speed ranges, not RPM values. Suppliers do this deliberately. They know their resin will run on injection molding screws ranging from 18 mm micro-molding barrels to 150 mm machines producing automotive bumpers. Specifying an RPM would be meaningless across that spread.
When you pull up a resin's processing parameters — sometimes found in a SEPS injection molding temperature datasheet — look for a line labeled "peripheral screw speed," "circumferential speed," or simply "screw surface speed." The recommended range, often expressed in m/min, reflects the shear intensity the polymer can tolerate without degradation. Staying within that window is your first line of defense for melt quality.
To use this information practically, rearrange the formula to solve for RPM on your specific machine:
RPM = Peripheral Speed ÷ (π × Screw Diameter)
Plug in the supplier's recommended peripheral speed and your machine's screw diameter, and you'll get the appropriate RPM for your setup. This simple calculation is the foundation of reliable process transfer — and it ensures that moving between machine sizes doesn't introduce hidden shear problems that show up as defects on your parts.
Of course, staying within the right peripheral speed range is only half of the equation. The real question is what happens to the resin when that speed generates heat — heat that your barrel temperature display won't show you.
How Screw Speed Controls Shear Heating and Melt Quality
Your barrel zone controllers say 450 °F. Your melt, however, might be sitting at 480 °F — or higher. Where does that extra heat come from? Not from the heater bands. It comes from the screw itself, spinning inside the barrel and shearing the polymer with every revolution. This phenomenon, known as viscous dissipation or shear heating, is the single biggest reason that injection molding parameters optimization must start with screw speed rather than barrel temperature setpoints.
How Shear Heating Raises Melt Temperature Beyond Setpoints
Picture the plasticizing phase. The screw rotates, its flights dragging resin forward from the feed throat toward the nozzle. As pellets compress and begin to melt, a thin film of molten polymer forms between the outer edge of the screw flight lands and the inner barrel wall. That narrow gap is where the action happens. The rotating screw scrapes and shears this melt film continuously, converting mechanical energy — the torque delivered by the drive motor — directly into thermal energy within the polymer.
The physics are straightforward: viscous fluids resist deformation. When you force a high-viscosity polymer melt to shear rapidly in a thin gap, the internal friction between polymer chains generates heat. The faster the screw turns, the higher the shear rate, and the more mechanical energy gets converted into temperature rise. Research published in Polymer Bulletin confirmed this proportional relationship directly — reducing screw speed rotation from 220 to 90 RPM on a rubber compound lowered the measured shear heating temperature by approximately 35 °C, even with all other process parameters held constant.
Here's the critical insight most molders miss: barrel heater bands are not the primary heat source during plasticizing. As extrusion process expert Jim Frankland explains, polymers are excellent thermal insulators — steel conducts heat roughly 120 times faster than LDPE — so the heat transferred from barrel heaters into the bulk of the polymer is surprisingly limited. The dominant heat source is shear, not conduction. This means that your barrel zone temperature display reflects what the heaters are set to, not what the polymer actually experiences. The real melt temperature is the sum of conducted heat from the barrel plus the shear heat generated by screw rotation — and in most practical scenarios, shear heating contributes the larger share.
For thermally sensitive resins like PVC, POM, or certain biopolymers that degrade at specific temperature thresholds, this hidden heat input is particularly dangerous. The barrel controller may show perfectly safe temperatures, yet the actual melt is quietly crossing into a degradation zone with every additional RPM. Chain scission, off-gassing, discoloration, and mechanical property loss all follow — and because the controller never flags a temperature alarm, the root cause can remain invisible for entire production runs.
The Speed-Quality-Cycle Time Trade-Off
Every molder faces the same tension. Faster screw speed shortens recovery time — the screw finishes plasticizing the next shot sooner, the machine idles less, and cycle time drops. On a high-volume production run, shaving even one second off recovery per cycle adds up to significant output gains over a shift. The pressure to maximize throughput naturally pushes screw RPM upward.
But speed has a cost. Higher RPM means more shear, more viscous dissipation, and a hotter melt. Beyond a certain threshold, that extra heat undermines part quality, consistency, and resin integrity. Slower screw speed, by contrast, gives you tighter thermal control and gentler treatment of the polymer — but it may extend recovery beyond the cooling time, stretching the overall cycle.
This is fundamentally an injection molding parameters optimization problem. The ideal screw speed for any given application is the fastest setting that still delivers acceptable melt quality for that specific resin, screw geometry, and shot size. There is no universal "correct" RPM — only a balance point that shifts depending on the material, machine, and part requirements.
When that balance tips too far toward speed, the symptoms show up quickly on the production floor:
- Discoloration or yellowing — thermal degradation alters the polymer's color, especially noticeable in natural or light-colored resins
- Splay or silver streaks — volatile gases released from overheated resin or moisture flash create surface defects on the part
- Brittleness and reduced impact strength — molecular chain scission from excessive heat weakens the polymer's mechanical performance
- Burning or black specks — localized overheating chars resin in the barrel, particularly in stagnation zones near worn flights
- Dimensional instability — an overheated melt with inconsistent viscosity fills and packs differently shot-to-shot, causing weight and size variation
- Odor or off-gassing at the nozzle — volatilization of polymer or additives signals that the melt temperature has exceeded safe processing limits
Recognizing these signs is the first step. But screw speed never acts in isolation — its impact is magnified or mitigated by how long the resin actually sits inside the barrel before it gets injected. That link between rotational speed, shot size, and the time your polymer spends at elevated temperature introduces another hidden variable: residence time.

Screw Speed, Residence Time, and Barrel Utilization
Imagine running a small connector mold on a machine originally purchased for much larger parts. Your shot size is tiny compared to the barrel's full capacity — maybe 15% of what the barrel can hold. The screw recovers in a flash, the next shot is ready well before the mold finishes cooling, and everything looks fine on the controller. Barrel zones are at setpoint. Cycle time is stable. No alarms.
Yet parts come out yellowed, brittle, or streaked with degradation. What's going wrong?
The answer lies in an injection molding parameter that most process sheets never capture: residence time. And screw speed is one of the key levers that either controls it or — more often — makes it worse without anyone noticing.
Barrel Utilization and Its Hidden Impact
Barrel utilization is the ratio of your actual shot size to the barrel's maximum shot capacity, expressed as a percentage. A 20-ounce shot on a barrel rated for 40 ounces gives you 50% utilization. A 6-ounce shot on that same barrel drops to 15%. The concept sounds simple, but its consequences for melt quality are anything but.
When barrel utilization is low, only a small fraction of the total resin inside the barrel gets ejected each cycle. The rest stays behind — sitting at melt temperature, accumulating heat, and slowly degrading with each passing second. It takes multiple cycles for any given pellet to travel from the feed throat all the way through the barrel and out the nozzle. That total transit time, from the moment resin enters the barrel to the moment it gets injected into the mold, defines residence time.
A commonly accepted target for residence time across the industry falls between 2 and 5 minutes, though this window shifts depending on the resin. High-temperature engineering polymers like PEEK may tolerate longer exposure, while thermally sensitive materials like PBT or PVC degrade well before hitting the upper end of that range. In packaging applications running polyolefins, residence times can dip below 1.5 minutes — sometimes too short to fully develop a uniform melt in semicrystalline resins.
The simplest way to estimate residence time for an existing production setup uses three values you already know:
Residence Time = (Maximum Barrel Shot Size ÷ Actual Shot Size) × Cycle Time
For a machine with a 12-inch maximum shot running 1.5 inches of actual displaced plastic on a 15-second cycle, that yields a residence time of roughly 2 minutes. However, this basic injection molding residence time calculation only accounts for the melt sitting in front of the screw. It doesn't include resin being conveyed through the feed, compression, and metering zones — plastic that is physically inside the barrel and exposed to heat but hasn't yet reached the shot volume in front of the screw tip. Factoring in that additional inventory can increase the effective residence time by 40% or more, depending on the screw's L/D ratio and bore diameter.
Here's where screw speed enters the picture. When your shot size is small relative to barrel capacity, the screw doesn't need to turn very long to recover the next shot. A high RPM setting finishes recovery in just a few seconds, and then the screw sits idle — with the melt behind and around it baking at elevated temperatures — until the cooling timer finishes and the mold opens for the next cycle. Cranking up the screw speed in this scenario doesn't just add shear heat during the brief recovery phase. It also leaves more dead time for the melt to soak, compounding the thermal degradation risk from both shear history and extended heat exposure.
Conversely, when barrel utilization is high — say 50% or above — each cycle pushes a large portion of the melt inventory out of the barrel. Fresh material cycles through efficiently, residence time stays short, and screw speed has a proportionally smaller impact on thermal exposure. The resin simply doesn't sit around long enough for accumulated heat to cause trouble.
This relationship matters enormously when scheduling molds across machines. A mold that runs beautifully on a properly sized machine can produce degraded parts on an oversized one, even with identical injection molding parameters on the process sheet. The only difference is barrel utilization — and with it, the residence time that no controller screen displays.
When Residence Time Causes Degradation Despite Correct Settings
This is the trap that catches experienced molders and novices alike. Every zone on the barrel reads within spec. The nozzle temperature matches the resin supplier's datasheet. The process has been validated. And yet, parts exhibit the unmistakable signs of thermal degradation — discoloration, brittleness, splay, or reduced mechanical properties.
The explanation is deceptively simple. Your barrel zone controller measures the temperature of the steel barrel wall at each heater band location. It does not — and cannot — measure the actual temperature of the polymer melt flowing inside the screw channel. As industry specialists emphasize, two machines with identical barrel profiles can produce melts that differ by 20-40 degrees Fahrenheit because the real melt temperature is shaped primarily by shear energy, screw design, back pressure, and residence time — not heater setpoints.
Correct barrel zone temperatures on the controller display do not guarantee correct melt condition. The actual polymer temperature is the sum of conducted heat, shear-generated heat, and residence-time accumulation — and only the first of these shows up on your screen.
When residence time is excessive, the melt absorbs additional conducted heat from the barrel wall cycle after cycle, even without the screw rotating. Each second the polymer sits at elevated temperature allows further thermal degradation — chain scission, oxidation, and volatile release — that progressively worsens melt quality. By the time that overcooked resin finally reaches the front of the barrel and gets injected, its properties may be significantly compromised despite every displayed temperature looking perfect.
The practical lesson is clear: screw speed cannot be set in isolation from shot size and barrel capacity. A fast RPM paired with low barrel utilization is a recipe for injection molding thermal degradation causes that hide behind clean-looking process data. Matching machine size to mold requirements, or adjusting screw speed to extend recovery closer to the available cooling time, reduces idle melt exposure and keeps residence time in a safe window.
Still, residence time and shear heating are only two pieces of the plasticizing puzzle. The quality of your melt also depends on how thoroughly the resin gets mixed during recovery — and that introduces the other parameter that must always travel alongside screw speed: back pressure.
The Screw Speed and Back Pressure Relationship
Back pressure is the quiet partner that shapes everything screw speed does. You can dial in the perfect RPM for your resin and machine size, stay within peripheral speed limits, manage residence time responsibly — and still end up with poorly mixed melt, color streaks, or erratic shot weights if back pressure isn't set in concert. These two parameters don't just coexist during the plasticizing phase. They interact so tightly that adjusting one without considering the other changes the melt condition in ways your process sheet won't predict.
Yet on many production floors, back pressure is treated as a "set and forget" value — something locked in during initial process setup and rarely revisited, even when screw speed gets tweaked to shorten cycle time. That disconnect is a common source of subtle quality drift that's difficult to trace.
Why Back Pressure and Screw Speed Must Be Set Together
To understand why these parameters are inseparable, picture what happens during screw recovery. The screw rotates, its flights conveying resin forward from the feed zone through compression and metering. As melted polymer accumulates in front of the screw tip, it pushes the screw backward — this rearward movement is what builds your shot size. Back pressure is the hydraulic or servo-driven resistance applied against that rearward motion, essentially telling the screw: "You can retreat, but you have to work for it."
That resistance forces the melt to endure more mechanical work as it passes through the screw channels. Resin gets sheared, compressed, and folded more aggressively before the screw retreats far enough to complete recovery. The result is a denser, more thoroughly mixed, and more thermally uniform melt accumulation in front of the non-return valve. As Huarong's technical guide explains, back pressure compresses the molten polymer ahead of the non-return valve, increasing and stabilizing melt density — which directly translates to consistent shot weight and dimensional repeatability.
Screw speed, meanwhile, determines how quickly material is conveyed forward through those channels. Think of back pressure as the resistance and screw RPM as the driving force. Together, they define the intensity and duration of the mixing event that shapes your melt. Change one without adjusting the other, and you've shifted the balance — sometimes in ways that don't surface until defective parts hit quality inspection.
Here's the practical dynamic:
- Raise back pressure at constant screw speed — the screw takes longer to retract because each increment of rearward travel requires more polymer to push past the increased resistance. Recovery time extends. But the additional work done on the melt improves mixing, increases melt density, and enhances temperature uniformity. Shear heating also increases slightly, since the resin spends more time under mechanical stress.
- Raise screw speed at constant back pressure — the screw conveys material faster, shortening recovery time. But the higher rotational velocity increases shear rate in the melt film between flight lands and barrel wall, adding more viscous dissipation. Melt temperature climbs. Mixing quality may actually decrease if the resin moves through the barrel so quickly that it doesn't get enough residence in the compression and metering zones to homogenize fully.
Experienced process engineers recognize this as a paired optimization. They adjust injection molding back pressure and screw speed together, dialing both until the melt quality, recovery time, and thermal condition all land in an acceptable window. Suhas Kulkarni of Fimmtech recommends a structured backpressure study where you mold fill-only shots at various back pressure settings and measure shot weight consistency — the setting that produces the lowest weight range shot-to-shot indicates optimal melt density. Screw speed optimization feeds directly into that study because the RPM you choose determines the baseline shear and thermal conditions the backpressure study builds upon.
Balancing Mixing Quality Against Recovery Time
Where does this paired relationship matter most in daily production? Color dispersion and additive homogeneity are two of the highest-stakes applications.
When you're running color masterbatch — a concentrated pigment carrier blended into natural base resin at the machine — the screw and barrel are your only mixing equipment. There's no static mixer, no separate compounding step. The plasticizing phase must distribute a small percentage of highly concentrated colorant evenly throughout a much larger volume of base polymer. Insufficient mixing shows up immediately as color streaks, swirls, or inconsistent shade from part to part.
Raising back pressure forces the pigment-loaded melt through more intensive shearing in the screw channels, breaking up pigment agglomerates and distributing them more evenly. But if back pressure alone can't solve a color dispersion problem, the temptation is to crank up screw speed for more shear energy. This works — up to a point. Push the RPM too high and you risk degrading the masterbatch carrier resin, which can alter the final color, release volatiles, or create black specks from burned carrier material.
The same principle applies to additive blends — UV stabilizers, flame retardants, nucleating agents — where uniform distribution directly affects the part's functional performance. Injection molding melt homogeneity depends on both parameters working in harmony: enough back pressure to ensure thorough mixing, paired with a screw speed that delivers adequate shear without overheating the blend.
The following table summarizes the directional effects of adjusting each parameter independently, holding the other constant:
| Outcome | Increasing Screw Speed (constant back pressure) | Increasing Back Pressure (constant screw speed) |
|---|---|---|
| Melt Temperature | Increases — higher shear rate generates more viscous dissipation | Increases slightly — more mechanical work on the melt during longer recovery |
| Mixing Quality | May decrease — resin transits barrel faster with less mixing time per unit volume | Increases — greater resistance forces melt through more intensive shearing and folding |
| Recovery Time | Decreases — material conveys forward faster | Increases — screw retracts more slowly against greater resistance |
| Degradation Risk | Increases — elevated shear heating can push melt past safe thermal limits | Moderate increase — extended work time and slightly higher temperatures add thermal stress |
| Melt Density / Shot Consistency | Minimal direct effect — density depends more on compression than conveyance speed | Increases — compressed melt ahead of the screw tip is denser and more repeatable |
| Color / Additive Dispersion | Variable — faster conveyance can reduce dispersion unless shear compensates | Improves — forced compression breaks up agglomerates and distributes pigment |
Notice the trade-offs built into every row. No single adjustment delivers a free improvement — every change in one direction introduces a cost in another. That's precisely why injection molding recovery time optimization can't be achieved by cranking screw speed alone. You'll shorten recovery, yes, but at the expense of mixing quality or thermal safety. Likewise, raising back pressure to solve a color problem without checking whether recovery still fits within your cooling window can stretch your cycle time unnecessarily.
The goal, as with most things in process engineering, is the minimum intervention that delivers the required result. Use the lowest back pressure injection molding settings that still produce consistent melt density and acceptable dispersion. Set screw speed to recover within the available cooling time — not faster. When both parameters are tuned together, you avoid the whack-a-mole pattern of chasing one defect while creating another.
This paired mindset becomes even more critical when the materials themselves introduce additional complexity. Filled resins, regrind blends, hygroscopic polymers, and color-sensitive applications each impose their own constraints on how aggressively the screw can turn and how much resistance the melt can tolerate — scenarios where a one-size-fits-all speed-and-pressure recipe simply falls apart.

Screw Speed Settings for Challenging Materials
A general-purpose screw speed recipe works fine — until the material changes. Regrind blends, glass-filled compounds, concentrated masterbatch, and moisture-sensitive engineering resins each react to rotational speed in fundamentally different ways. What delivers a beautiful melt with neat virgin polypropylene pellets can destroy fiber reinforcement, burn recycled fractions, streak pigment, or trigger hydrolysis in nylon. The four scenarios below represent the material categories where getting screw RPM wrong carries the steepest penalties.
Regrind and Recycled Material Challenges
Regrind processing in injection molding introduces a variable that virgin resin doesn't: inconsistency. Flake size varies, contamination levels shift from lot to lot, and every pellet has already endured at least one heat history. Some fractions are partially degraded before they ever reach your feed throat. That prior thermal exposure lowers their viscosity and narrows the remaining processing window — meaning these already-weakened chains are the first to break down further under aggressive shear.
As Recycling Today reports, material variability inherent in regrind is one of the largest obstacles to using recycled content in injection molding, often producing unacceptable scrap rates when conventional high-pressure, fixed-velocity processes can't adapt to viscosity swings. The screw speed dimension of this problem is straightforward: faster RPM generates more shear heating, and degraded polymer fractions in the blend have a lower thermal tolerance than virgin material surrounding them. Overheating those weaker chains first leads to localized degradation, black specks, and inconsistent mechanical properties across the part.
Key considerations for regrind and recycled material processing:
- Reduce peripheral screw speed below virgin-material targets — the prior heat history of regrind means it tolerates less additional shear energy before degradation begins
- Expect viscosity variability shot-to-shot — inconsistent pellet geometry and contamination cause fluctuating drag and melting behavior; moderate RPM helps smooth out these swings
- Increase back pressure slightly to compensate for lower screw speed — this maintains mixing quality and melt density without adding excessive shear heat
- Monitor for progressive degradation signs — yellowing, brittleness, or increasing black specks over a production run suggest the screw speed is compounding thermal damage on already-stressed material
- Consider blending ratios carefully — higher regrind percentages demand more conservative speed settings; a 50/50 virgin-to-regrind blend may tolerate moderate RPM, while 100% regrind almost certainly requires a meaningful speed reduction
Preserving Fiber Length in Filled Resins
Glass-filled and mineral-filled resins present an entirely different screw speed challenge. Here, the concern isn't thermal degradation of the polymer — it's mechanical destruction of the reinforcement. Every revolution of the screw subjects glass fibers to shearing forces between the flight lands and barrel wall. Higher peripheral speed means more aggressive contact, more fiber breakage, and shorter average fiber length in the finished part.
Why does that matter? Because fiber length directly correlates with mechanical performance — particularly impact strength and tensile modulus. Short fibers act more like fillers than reinforcements. A glass-filled nylon compound designed to deliver 150 MPa tensile strength can fall well short of that target if excessive screw speed during plasticizing snaps fibers that were already at their minimum effective length coming out of the compounding step.
Key considerations for glass filled resin injection molding screw speed:
- Use the lower end of the resin supplier's recommended peripheral speed range — preserving fiber length requires gentler mechanical treatment during plasticizing
- Avoid compensating for slow screw speed by raising barrel temperatures excessively — overheating the matrix resin around the fibers creates its own set of degradation problems
- Expect accelerated screw and barrel wear — glass fibers are highly abrasive; worn flights widen the clearance between screw and barrel, changing the shear profile and reducing conveying efficiency over time
- Monitor part mechanical properties periodically — a gradual decline in impact strength or stiffness over weeks of production can indicate that fiber breakage from screw speed or wear is worsening
- Mineral-filled resins (talc, calcium carbonate) are less sensitive to fiber breakage — but high screw speeds still generate excessive shear heating that can degrade the polymer matrix, so conservative RPM settings remain prudent
Achieving Consistent Color Dispersion
Color masterbatch dispersion in injection molding is one of the most visible — and most unforgiving — tests of your plasticizing setup. Streaks, swirls, shade inconsistencies, and undispersed pigment agglomerates all show up on the surface of the part where no one can miss them. And because the screw is the only mixing device between the hopper and the mold, screw speed and back pressure are the sole tools available to distribute a small dose of concentrated colorant into a large volume of natural base resin.
The previous chapter established the paired nature of these parameters. With color masterbatch, that pairing becomes especially delicate:
- Too low a screw speed with insufficient back pressure — pigment agglomerates survive the plasticizing phase intact, producing visible streaks and color inconsistency across the part surface
- Moderate screw speed with properly tuned back pressure — the combination of shear intensity and mixing resistance breaks down pigment clusters and distributes color evenly through the melt
- Excessive screw speed — the carrier resin in the masterbatch degrades from shear heating, potentially releasing volatiles that cause splay, or burning to form black specks that contaminate the color
- Masterbatch let-down ratio matters — at standard let-down ratios of 2-4%, even minor fluctuations in mixing intensity become visible; consistent screw speed and back pressure from cycle to cycle are critical
- Test before committing to production — mold a series of parts at different screw speed and back pressure combinations, then evaluate color uniformity visually and with a spectrophotometer if shade tolerance is tight
The key insight is that color dispersion problems almost never require dramatic RPM changes. Small, deliberate adjustments to both screw speed and back pressure — working together — usually resolve streaking without crossing into thermal trouble.
Hygroscopic and Thermally Sensitive Resins
Nylon (PA6 and PA66), polycarbonate, PBT, and other engineering polymers occupy a processing space where screw speed errors carry consequences on two fronts simultaneously: thermal degradation and moisture sensitivity. These resins demand careful management of shear heating because the gap between safe melt temperature and degradation onset is narrower than with commodity polyolefins.
Nylon is particularly instructive. It absorbs atmospheric moisture readily — up to 9% of its weight in water depending on the grade. Even after proper drying, trace residual moisture remains. If screw speed drives the melt temperature above the recommended range through shear heating, that residual moisture becomes volatile, generating steam that erupts as splay or silver streaks on the molded part surface. Simultaneously, elevated temperatures trigger hydrolysis — water molecules attacking the polymer chains — causing molecular weight reduction and mechanical property loss.
Hygroscopic resin injection molding processing demands a conservative approach to screw RPM:
- Stay within the resin supplier's peripheral speed recommendation — engineering polymer data sheets specify these limits precisely because the thermal margin for error is small
- Verify actual melt temperature with an air shot and pyrometer — don't rely on barrel zone readings; shear heating from excessive screw speed hides in the gap between displayed and actual temperatures
- Polycarbonate requires high torque at moderate RPM — its high melt viscosity means the screw must work hard to convey and plasticize it, but high speed converts that work into excessive heat
- ABS presents shear sensitivity in the butadiene rubber phase — excessive RPM degrades the rubber component, reducing impact strength and potentially causing yellowing from styrene degradation
- Minimize residence time alongside controlling screw speed — hygroscopic resins that sit in the barrel too long at elevated temperatures degrade even if the screw is turning at a conservative rate
For every material category covered here, one principle holds constant: consult the resin supplier's technical data sheet for recommended peripheral screw speed ranges before establishing a new process. Material manufacturers invest significant effort testing their polymers across different shear conditions and publishing the results. Those guidelines — expressed in meters per minute of peripheral speed, not machine-specific RPM — are the most reliable starting point for any challenging material scenario.
Of course, knowing the right settings and consistently executing them are two different things. Even processors who understand these material-specific requirements can fall into patterns that quietly erode part quality — habitual mistakes that feel logical in the moment but cost real money in scrap and rework over time.
Common Screw Speed Mistakes That Cost Quality
Patterns are comfortable. Once a screw RPM setting produces acceptable parts, it tends to get locked in — carried forward from job to job, machine to machine, material to material. That inertia feels efficient. Why revisit a number that "works"? Because the conditions around that number change constantly, and each unchecked assumption quietly chips away at part quality, resin integrity, and production consistency. The five injection molding screw speed mistakes below show up on production floors every day, and each one is entirely preventable once you know what to look for.
Cycle-Time-Only Speed Setting
- Setting screw speed based solely on cycle time targets
This is the most widespread error in the industry, and it starts from a reasonable place. Faster screw recovery means the shot is ready sooner, the machine doesn't wait, and cycle time drops. On a high-cavitation mold running hundreds of thousands of parts per month, shaving half a second off recovery per cycle translates to real output gains. So the RPM gets bumped up until recovery finishes comfortably before the cooling timer expires.
The problem? Recovery speed and melt quality are competing interests. As plastics processing consultant Garrett MacKenzie warns, screw speeds running too fast can lead to poor mixing and blending, while premature recovery allows material to settle in the barrel where heater bands bake it — a direct path to splay and degradation. The injection molding cycle time optimization error here isn't wanting faster cycles. It's treating recovery as a speed contest rather than a quality event.
The consequence: Degraded melt with excessive shear heat, inconsistent viscosity shot-to-shot, and defects — discoloration, splay, brittleness — that force slower downstream inspection, increased scrap, and ultimately longer effective cycle times than a moderate RPM would have produced in the first place.
The corrective principle: Set screw speed so recovery finishes 1.5 to 2 seconds before the cooling timer runs out — not as fast as mechanically possible. That narrow window ensures the melt is ready without sitting idle at elevated temperature, and it prevents excessive shear from rushing the plasticizing phase.
- Copying RPM when transferring processes across machine sizes
You've validated a process on a 50 mm screw machine. The process sheet says 120 RPM. A new production run shifts that mold to a 90 mm screw machine. The setup technician enters 120 RPM — same resin, same number, should be the same result. Except the peripheral speed just jumped from roughly 18.8 m/min to approximately 33.9 m/min, nearly doubling the shear intensity at the barrel wall.
This injection molding process transfer between machines mistake is one of the most mechanically straightforward errors to explain, yet it persists because most process sheets record RPM, not peripheral speed. As screw design specialists at SpiraMelt emphasize, a designated RPM on a very small diameter machine does not perform in any way similar to a much larger diameter machine at the same RPM — the scraping frequency and melt film behavior are fundamentally different.
The consequence: Dramatically increased shear heating on the larger machine pushes actual melt temperature well past the safe window, causing thermal degradation, discoloration, and property loss that didn't exist on the original machine.
The corrective principle: Always convert RPM to peripheral speed (π × diameter × RPM) on the original machine, then solve for the equivalent RPM on the new machine using that same peripheral speed value. This single step — documented in an injection molding screw rpm settings guide or process transfer checklist — eliminates the most common source of machine-to-machine process failure.
- Not adjusting screw speed when changing materials
A mold runs polypropylene all week at 150 RPM. Friday afternoon, the schedule calls for a switch to polycarbonate on the same machine. The barrel temperatures get updated. The injection profile gets changed. But the screw speed? It stays at 150 RPM because "it's the same machine and the same screw."
This thinking ignores the fact that different polymers respond to shear in fundamentally different ways. Polypropylene is relatively shear-tolerant — it flows easily and handles moderate RPM without excessive heat buildup. Polycarbonate, on the other hand, has significantly higher melt viscosity, meaning the screw must exert more torque to convey it. That increased mechanical resistance at the same RPM generates substantially more shear heating. The melt temperature spikes, and you're suddenly processing outside the safe thermal window for a resin with a narrower degradation margin than the one it replaced.
The consequence: Thermal degradation, yellowing, molecular weight reduction, and compromised mechanical properties — all from a screw speed that was perfectly safe for the previous material.
The corrective principle: Treat every material change as a screw speed change. Check the new resin's data sheet for its recommended peripheral speed range and recalculate the appropriate RPM for your screw diameter. Different viscosity profiles demand different rotational speeds, regardless of what the machine ran last.
- Neglecting to coordinate back pressure when changing screw speed
This mistake often follows the previous ones. A technician increases screw RPM to speed up recovery — maybe to hit a tighter cycle time, maybe because a new material seems to recover slowly. The back pressure stays untouched because "I only changed one thing." But as the earlier chapter on paired parameters made clear, screw speed and back pressure jointly define the melt's shear history, mixing intensity, and thermal condition. Changing one while holding the other constant doesn't keep the process stable — it shifts it unpredictably.
Raising screw speed without increasing back pressure often reduces effective mixing time per unit of resin. Material races through the barrel faster but gets less thorough homogenization. Lowering screw speed without reducing back pressure extends recovery time and increases mechanical work on the melt, potentially adding unnecessary thermal stress.
The consequence: Inconsistent melt homogeneity, color dispersion problems with masterbatch, unpredictable shot weight, and a process that seems to "drift" for no obvious reason.
The corrective principle: Any time screw RPM changes — whether deliberately or as a side effect of a material or machine switch — revisit back pressure. Evaluate the two together by molding test shots and checking melt consistency, shot weight repeatability, and color uniformity before committing to production.
- Running the same screw speed for vastly different shot sizes without considering residence time
Imagine your facility runs two molds on the same 100 mm machine: a large housing that uses 65% of the barrel capacity and a small bracket that uses only 12%. Both process sheets list the same screw RPM because the machine and resin are identical. But the residence time for the small bracket is roughly five times longer than for the housing. Every pellet of resin cycles through the barrel more slowly, sitting at melt temperature across multiple shots before finally being injected.
At that low barrel utilization, high screw speed makes the problem worse. Recovery finishes in seconds, and the melt sits idle — baking — until the next injection cycle. The combined effect of shear heat from plasticizing plus extended thermal soak from excessive residence time pushes the melt toward degradation territory, even though every displayed temperature is within spec.
The consequence: Thermal degradation, yellowing, reduced physical properties, and increased reject rates on the smaller mold — defects that never appeared when the same RPM ran the larger mold on the same machine.
The corrective principle: When barrel utilization is low, reduce screw speed so that recovery time extends closer to the available cooling window. This limits both shear heating and idle melt exposure. If the mismatch between shot size and barrel capacity is extreme, consider whether the mold belongs on a smaller machine entirely.
Ignoring Machine Size When Transferring Processes
Forgetting to Revisit Back Pressure
Each of these five errors shares a common thread: treating screw RPM as a fixed, context-free number rather than a parameter that must adapt to the machine, material, shot size, and paired process settings around it. Avoiding them doesn't require exotic equipment or advanced simulation — just the discipline to ask, every time the screw starts turning, whether the speed still makes sense for this specific combination of conditions.
Recognizing a mistake in your settings is one thing. Connecting a defect on the production floor back to its screw-speed-related root cause is another challenge entirely — one that calls for a structured troubleshooting approach mapping specific symptoms to the plasticizing conditions that produce them.

Troubleshooting Screw Speed Related Defects
A defect lands on the quality table. It might be a silvery shimmer fanning out from the gate, a cluster of dark specks near the sprue, or an unmelted pellet embedded just under the surface. Your instinct says to check fill speed, pack pressure, or barrel temperatures — the usual suspects. But what if the root cause lives upstream of all those parameters, buried in the plasticizing phase where screw RPM quietly shaped the melt before injection even started?
The five defect categories below trace directly back to screw speed settings, barrel condition, or the interaction between the two. Treating this section as a structured troubleshooting reference — rather than a generic injection molding defects and solutions list — helps you connect what you see on the part to what the screw was doing during recovery.
Splay, Streaks, and Degradation Symptoms
1. Splay and Silver Streaks
Splay marks — those distinctive silver, fan-shaped streaks radiating across the part surface — are among the most common cosmetic defects in injection molding. They look like metallic scratches or watermarks, and they weaken the surface integrity of the part along with its appearance. Understanding the injection molding splay silver streaks causes starts with recognizing that multiple mechanisms produce nearly identical-looking marks, and screw speed connects to several of them.
The primary screw-speed-related pathway is shear-induced volatilization. When RPM is too high for a given resin, the resulting viscous dissipation drives actual melt temperature above the displayed barrel setpoints. For hygroscopic resins like nylon or polycarbonate, that excess heat converts residual trace moisture — moisture that survived the drying process — into steam. The steam nucleates as tiny gas pockets in the melt, which stretch into streaks as the polymer flows across the cavity surface during filling. Chem-Trend's technical analysis identifies five distinct splay types — shear splay, heat splay, moisture splay, decompression splay, and contamination splay — each producing a slightly different streak pattern that helps pinpoint the root cause.
Shear splay specifically results from the screw mechanically overworking the polymer. The melt surface layer gets torn and folded during high-speed plasticizing, trapping micro-voids that show up as silvery marks oriented in the flow direction. Heat splay overlaps closely: the excessive temperature generated by aggressive RPM thermally degrades the polymer or its additives, releasing volatile gases that create the same surface defect through a chemical rather than mechanical route.
The corrective approach centers on reducing peripheral screw speed to bring shear heating back within the resin's safe processing window. Verify actual melt temperature with an air-shot pyrometer reading — not the barrel zone display. If splay persists after reducing RPM, investigate drying conditions, back pressure settings, and decompression (suckback) stroke, since these factors can independently introduce moisture or air into the melt.
2. Black Specks and Brown Streaks
Few defects trigger faster customer complaints than black specks injection molding troubleshooting calls. Dark particles or brown streaks embedded in an otherwise clean part signal thermal degradation — somewhere in the barrel, resin has been overheated to the point of charring. Screw speed contributes to this defect through two distinct mechanisms that often operate simultaneously.
The first is direct shear overheating. Excessive RPM generates enough viscous dissipation to push melt temperature into the degradation zone, particularly for thermally sensitive polymers like PVC, POM, or certain TPEs. The degraded polymer chars, breaks into fragments, and eventually gets swept into the next shot as visible dark contamination.
The second mechanism involves worn screw and barrel clearances — and this is where many troubleshooting efforts stall. As Glycon Corp.'s Jeff Kuhman explains, wear begins the moment the screw starts rotating inside the barrel. Original clearances between the flight outside diameter and barrel bore are typically minimal — around 0.001 inch per side per inch of diameter — to achieve good heat transfer and shear rate. As those clearances enlarge from abrasive or adhesive wear, resin stagnates in the widened gap. Material trapped in these dead zones gets baked cycle after cycle, eventually carbonizing and breaking loose as black specks or brown streaks.
Here's the hidden trap: a screw speed that produced clean parts when the barrel was new may generate black specks months later as wear progresses. The same RPM now creates different shear conditions because the geometry has changed. Santa Fe Machine Works highlights that increased shear heat from excessive screw wear and material degradation from prolonged residence time in a worn barrel are direct causes of burn marks and dark contamination — defects that cannot be corrected through machine settings alone once the hardware has degraded past a critical threshold.
Corrective steps include reducing screw speed to lower shear input, shortening residence time by improving barrel utilization, and — critically — inspecting screw flights and barrel bore for wear. If clearances have opened significantly, process adjustments alone won't eliminate the problem. The plasticizing hardware itself needs attention. For molders facing persistent black specks tied to worn screw geometry or material hang-up zones, a replacement screw barrel engineered to restore proper clearances and channel geometry is often the only lasting fix. NANHAIYA's custom injection molding screw barrels, designed around specific machine specs and resin requirements, offer one route for maintenance teams looking to address wear-related degradation at its mechanical source rather than chasing it endlessly with parameter adjustments.
Unmelts, Color Issues, and Shot Consistency Problems
3. Unmelted Particles
Finding an unmelted pellet — or a partially melted, translucent chunk — in a finished part is unmistakable evidence that the plasticizing phase failed to do its job. The unmelted particles injection molding fix almost always involves screw speed, barrel temperature, or the interaction between them.
When screw RPM is too low for a given resin and barrel temperature profile, the polymer doesn't receive enough shear energy to complete the melt transition. Pellets pass through the feed and compression zones without fully softening, reaching the metering section as solid or semi-solid inclusions. They survive into the shot and show up as visible defects — hard spots, surface blemishes, or transparent "fish eyes" in opaque parts.
Inconsistent pellet feeding compounds the issue. If the feed throat is partially blocked, if regrind flakes bridge in the hopper, or if pellet size varies widely, the screw channels don't fill uniformly. Some flights carry a full bed of solids while others run partially empty. The uneven loading means some resin gets overworked while adjacent material barely melts. Raising screw speed moderately can help by increasing the conveying rate and shear input — but only up to the point where thermal limits for the resin allow. Beyond that threshold, you're trading unmelts for degradation.
The corrective approach: increase screw speed incrementally while monitoring actual melt temperature. Verify that barrel zone temperatures in the rear and transition zones are adequate for the resin's melting point. Check hopper and feed throat for bridging or blockages. If unmelts persist despite reasonable speed and temperature settings, the screw's compression ratio or flight geometry may not suit the resin — a design mismatch that no RPM adjustment can fully overcome.
4. Poor Color Mixing and Streaking
Color streaks and shade inconsistency from masterbatch dispersion failures are instantly visible quality defects. When concentrated pigment doesn't break down and distribute evenly through the base resin, you see swirls, stripes, or mottled patches that make every part look different.
The screw-speed-related cause is straightforward: insufficient shear energy and mixing intensity during plasticizing. Color masterbatch consists of highly concentrated pigment particles bound in a carrier resin. Breaking those pigment agglomerates apart and distributing them uniformly through a much larger volume of natural polymer requires both adequate rotational shear (screw speed) and sufficient resistance to flow (back pressure). When either parameter is set too low, agglomerates survive intact into the shot, producing visible streaks.
The fix involves raising screw speed and back pressure together — in small increments — until color uniformity improves. But watch for the ceiling: pushing RPM too aggressively risks degrading the masterbatch carrier, which can alter the color itself, release volatiles that create splay, or generate burned carrier fragments that appear as dark specks within the color.
5. Inconsistent Shot Weight
Shot-to-shot weight variation undermines dimensional consistency, packing uniformity, and overall part quality. When the screw delivers a different volume of melt each cycle, no amount of holding-pressure tuning can compensate for the upstream inconsistency.
Erratic screw speed during recovery is one direct cause — if the drive system delivers unsteady RPM, the amount of resin conveyed forward varies from shot to shot. But two wear-related factors are far more common culprits. A worn check ring (non-return valve) that fails to seal properly allows melt to leak back past the screw tip during injection, reducing the effective shot volume unpredictably. Similarly, excessive barrel bore wear widens the clearance around the screw flights and check ring outside diameter, creating backflow paths that bypass the valve entirely. As industry analysis confirms, worn check valves causing inconsistent shot size and barrel wear causing inconsistent feeding are among the most frequent mechanical root causes of short shots, sink marks, and weight variation.
The corrective sequence starts with verifying that the drive system delivers stable RPM throughout recovery. Next, inspect the check ring for wear, scoring, or incomplete sealing. Then measure the barrel bore at multiple points along its length to check for diameter growth beyond specification. If the hardware checks reveal significant wear, parameter adjustments — slower speed, higher back pressure — may temporarily stabilize the process, but the underlying mechanical issue will continue to worsen until the worn components are replaced.
The table below consolidates all five defect categories into a quick-reference troubleshooting map:
| Defect Symptom | Likely Screw-Speed-Related Causes | Recommended Corrective Actions |
|---|---|---|
| Splay / silver streaks | Excessive RPM generating shear heat that volatilizes residual moisture or degrades polymer; shear splay from mechanical overworking of the melt surface | Reduce peripheral screw speed; verify actual melt temperature via air shot; confirm drying is adequate; check decompression stroke settings |
| Black specks / brown streaks | High shear heating causing localized charring; material hang-up in worn screw/barrel clearances; excessive residence time baking stagnant resin | Reduce RPM; improve barrel utilization to shorten residence time; inspect screw flights and barrel bore for wear; replace worn screw and barrel if clearances are out of spec |
| Unmelted particles | Screw speed too low to deliver sufficient shear energy for complete melting; inconsistent pellet feed causing uneven channel loading | Increase screw speed incrementally while monitoring melt temperature; verify barrel rear-zone temperatures; check hopper and feed throat for bridging; evaluate screw compression ratio suitability |
| Poor color mixing / streaking | Insufficient screw speed or back pressure to break down masterbatch pigment agglomerates and distribute them uniformly | Raise screw speed and back pressure together in small increments; avoid excessive RPM that degrades the masterbatch carrier; test color uniformity across multiple shots before committing to production |
| Inconsistent shot weight | Erratic screw RPM during recovery; worn check ring allowing backflow during injection; enlarged barrel bore creating bypass paths around the screw flights and valve | Verify drive delivers stable RPM; inspect and replace check ring if sealing is compromised; measure barrel bore for wear; replace screw and barrel assembly if clearance is excessive |
One thread runs through nearly every row of that table: equipment condition. A screw speed setting that produced flawless parts six months ago can become the source of black specks, weight variation, or splay today — not because anyone changed the RPM, but because the screw and barrel wore to the point where the same rotational speed creates a fundamentally different shear and conveying environment. As Glycon Corp. notes, operators often compensate for wear by incrementally adjusting screw speed, barrel temperatures, and backpressure — changes that mask the real problem until quality or productivity finally hits a wall.
That reality points to a broader truth about screw speed optimization: it isn't just a parameter-setting exercise. It's a discipline that connects process knowledge, material science, machine condition, and screw geometry into a single, evolving picture — one that demands ongoing attention rather than a one-time setup.
Optimizing Screw Speed for Long-Term Process Excellence
Every chapter of this guide has circled the same core reality: screw speed is not a standalone number. It's a parameter embedded in a web of interdependent variables — screw geometry, barrel condition, resin behavior, shot size, back pressure, and residence time. Adjusting RPM without accounting for these surrounding factors is like tuning the engine timing on a car without checking whether the spark plugs, fuel injectors, and air filter are still in spec. You might get lucky. More often, you'll create a new problem while chasing the solution to an old one.
Long-term injection molding screw design optimization requires treating plasticizing as a system — not a collection of isolated settings. Here's how the key principles from this guide come together into a practical framework you can apply on the production floor.
Think in peripheral speed, not raw RPM. Peripheral speed is the universal language that connects your machine's screw diameter to the resin supplier's processing recommendations — and it's the only metric that translates reliably across different machine sizes.
Screw Geometry's Role in Speed Optimization
Two machines can run at identical peripheral speeds and still produce dramatically different melt quality. The reason? Screw geometry. The physical design of the screw — its compression ratio, flight depth, L/D ratio, and whether it includes mixing sections — fundamentally shapes how a given RPM translates into melting efficiency, shear intensity, and homogenization.
Consider compression ratio. As Essentra Components explains, this ratio — the feed zone channel depth divided by the metering zone channel depth — directly determines how much mechanical compression and shear heat the resin experiences as it moves forward. A higher compression ratio generates greater shear, better heat uniformity, and more thorough melting, but it also raises the risk of overstressing thermally sensitive polymers. A lower compression ratio treats the material more gently but may leave certain resins undermixed or incompletely melted.
Flight depth plays a parallel role. Deep channels in the metering zone allow more material to pass with less shear per unit volume — reducing heat generation but also reducing mixing intensity. Shallow channels concentrate the melt into a thinner film against the barrel wall, increasing shear dramatically at any given RPM. The L/D ratio — the flighted length of the screw divided by its nominal diameter — determines how much total residence and mixing opportunity the resin gets during plasticizing. A longer L/D (say 24:1 versus 20:1) provides more barrel length for gradual heating, mixing, and homogenization, often permitting higher screw speeds without sacrificing melt quality because the work is distributed over a longer path.
Mixing sections — barrier flights, Maddock mixers, pin-style elements — add another dimension. A screw equipped with a dispersive mixing section can break down pigment agglomerates and homogenize additive blends more effectively than a general-purpose metering screw, even at the same RPM and back pressure. For processors running color masterbatch or filled compounds, the presence or absence of these mixing features can determine whether screw speed alone is sufficient to achieve acceptable dispersion — or whether the geometry simply can't deliver the mixing intensity the application requires.
The practical implication is straightforward: a general-purpose screw designed to run "most materials acceptably" may not be the right tool for your specific resin, shot size, or quality standard. When you find yourself pushing RPM or back pressure to extremes to compensate for poor mixing or incomplete melting, the root cause may be a geometry mismatch rather than a parameter-setting error.
When to Consider a Custom Screw Barrel Replacement
Screw and barrel wear doesn't announce itself with an alarm. It creeps in — a slightly longer recovery time here, a marginal uptick in shot weight variation there. As TAN STAR's technical analysis details, the earliest screw barrel wear injection molding symptoms often appear as processing changes rather than visible hardware damage: unstable plasticizing, increased cycle-to-cycle adjustment, and a process that once ran reliably but now drifts despite no changes to material or settings.
Here's the connection to screw speed that many shops overlook: wear changes the geometry that your RPM interacts with. Enlarged clearances between flight lands and barrel bore alter the shear profile, reduce conveying efficiency, and create stagnation zones where resin degrades. A screw speed that was perfectly dialed in when the hardware was new now operates in a fundamentally different mechanical environment. Operators compensate — nudging temperatures up, adding back pressure, tweaking RPM — and the process limps along. But those adjustments mask the real problem, and the defects documented in the troubleshooting chapter (black specks, shot inconsistency, degradation) gradually intensify.
Two situations call for moving beyond parameter adjustments and addressing the plasticizing hardware itself:
- Wear-driven performance loss — when measured screw-to-barrel clearances have opened beyond specification, when recovery time has increased progressively, or when previously stable processes require frequent re-optimization, the hardware has degraded past the point where settings alone can compensate
- Application-driven geometry mismatch — when a general-purpose screw can't deliver the mixing, melting, or conveying performance a specific resin or product demands, regardless of how carefully RPM and back pressure are tuned
In either case, a custom injection molding screw barrel replacement — one engineered around the specific machine dimensions, target resin, shot requirements, and identified wear patterns — restores the mechanical foundation that every screw speed setting depends on. NANHAIYA's custom injection molding screw barrels are designed with this approach in mind: their technical review evaluates screw geometry, wear conditions, melting and mixing demands, and material-retention concerns to match the replacement hardware to the actual application rather than defaulting to a generic off-the-shelf component. For maintenance teams that have been chasing degradation or inconsistency through endless parameter tweaks, addressing the hardware at its source often delivers the injection molding plasticizing performance improvement that no RPM adjustment ever could.
That said, a new screw barrel is only as effective as the process running on it. Hardware and parameters must evolve together.
Action Checklist for Better Plasticizing Performance
Whether you're setting up a new process, transferring an existing one, or troubleshooting a drift that's been building for months, this checklist captures the core disciplines covered throughout this guide. Print it. Tape it near the machine. Refer to it every time the screw starts turning on a new job.
- Convert RPM to peripheral speed for every process setup — use the formula (π × screw diameter × RPM) and compare the result against the resin supplier's recommended peripheral speed range before running a single shot
- Set screw speed and back pressure as a pair — never adjust one without evaluating the effect on the other; mold test shots and check melt consistency, color uniformity, and shot weight repeatability before committing to production
- Calculate barrel utilization and estimate residence time — if your shot size uses less than 20-25% of the barrel's capacity, reduce screw speed so recovery fills the available cooling window and minimizes idle melt exposure
- Verify actual melt temperature with an air-shot pyrometer reading — barrel zone displays show heater setpoints, not the polymer's real temperature after shear heating; measure the melt directly, especially when running thermally sensitive resins
- Consult the resin data sheet before every material change — different polymers have different shear sensitivity, viscosity profiles, and thermal limits; recalculate the appropriate RPM for your screw diameter each time the material changes
- Document peripheral speed on the process sheet, not just RPM — this single practice eliminates the most common source of failure when transferring processes between machines with different screw diameters
- Monitor plasticizing performance trends over time — track recovery time, shot weight consistency, and screw torque readings at regular intervals; progressive changes in these metrics signal screw or barrel wear before defects become visible on parts
- Inspect screw and barrel together during scheduled maintenance — measure flight outside diameter, barrel bore, and check-ring clearances; worn components change the effective shear environment and make previously validated speed settings unreliable
- Match screw geometry to the application — if a general-purpose screw consistently underperforms on mixing, melting, or conveying for your primary resin, evaluate whether a purpose-built screw design with appropriate compression ratio, flight depth, and mixing sections would deliver better results at moderate RPM
Screw speed in injection molding is not a number you set once and forget. It's a living parameter that must adapt every time the material, machine, mold, shot size, or hardware condition changes. The molders who treat it that way — thinking in peripheral speed, pairing it with back pressure, respecting residence time, and watching for the slow creep of mechanical wear — are the ones who consistently produce better parts with fewer surprises. Everyone else is just spinning the screw and hoping for the best.
Frequently Asked Questions About Screw Speed in Injection Molding
1. What is the difference between screw speed and injection speed in injection molding?
Screw speed (RPM) refers to how fast the screw rotates during the plasticizing or recovery phase to melt and homogenize resin before injection. Injection speed, by contrast, is the linear velocity at which the screw moves forward as a ram to push molten polymer into the mold cavity. These two parameters govern entirely different phases of the molding cycle. Confusing them leads to incorrect process documentation and troubleshooting efforts aimed at the wrong variable. Screw speed sets melt quality upstream, while injection speed controls how the cavity fills downstream.
2. How do you calculate the correct screw RPM for a specific machine?
Rather than guessing RPM, start with the resin supplier's recommended peripheral screw speed (expressed in m/min or ft/min). Then use the formula: RPM = Peripheral Speed / (pi x Screw Diameter). For example, if a resin datasheet recommends a maximum peripheral speed of 20 m/min and your machine has a 50 mm screw, the target RPM would be approximately 127. This calculation ensures you stay within the material's safe shear window regardless of machine size, preventing the common mistake of copying RPM values between machines with different screw diameters.
3. Why does screw speed cause melt temperature to exceed barrel setpoints?
During plasticizing, the rotating screw shears a thin film of molten polymer between its flight lands and the barrel wall. This viscous dissipation converts mechanical energy from the drive motor directly into heat within the polymer. Because plastics are poor thermal conductors — steel conducts heat roughly 120 times faster than LDPE — barrel heater bands actually contribute less to melt temperature than shear heating does in most practical scenarios. The faster the screw turns, the greater the shear rate and the more heat is generated internally. This is why actual melt temperature, measured with an air-shot pyrometer, often reads 20-40 degrees Fahrenheit higher than barrel zone displays suggest.
4. What problems does excessive screw speed cause in injection molding?
Running screw RPM too high introduces a cascade of quality issues. Excessive shear heating can push actual melt temperature into a degradation zone, causing discoloration or yellowing, splay and silver streaks from volatilized moisture or polymer breakdown, brittleness from molecular chain scission, black specks from localized charring, dimensional instability from inconsistent viscosity, and off-gassing at the nozzle. For filled resins, high RPM also causes glass fiber breakage that reduces the part's mechanical strength. These defects are especially dangerous because barrel zone controllers never flag them — the displayed temperatures may look perfectly normal while the polymer quietly degrades.
5. How do screw speed and back pressure work together during plasticizing?
Screw speed and back pressure are paired parameters that jointly control melt quality during recovery. Screw RPM determines how fast resin is conveyed forward through the barrel, while back pressure resists the screw's rearward movement, forcing the melt through more intensive shearing and compression. Raising back pressure at constant RPM improves mixing and melt density but extends recovery time. Raising RPM at constant back pressure shortens recovery but increases shear heating and may reduce mixing quality. Experienced process engineers adjust both simultaneously, using test shots to evaluate shot weight consistency, color dispersion, and melt uniformity before locking in production settings.
Written by
Nanhaiya Technical Team
Zhoushan Nanhaiya Plastic Machinery Co., Ltd.
The Nanhaiya technical team supports screw and barrel manufacturing projects through application review, technical communication, custom manufacturing coordination, and production and quality control.
Discuss Your Application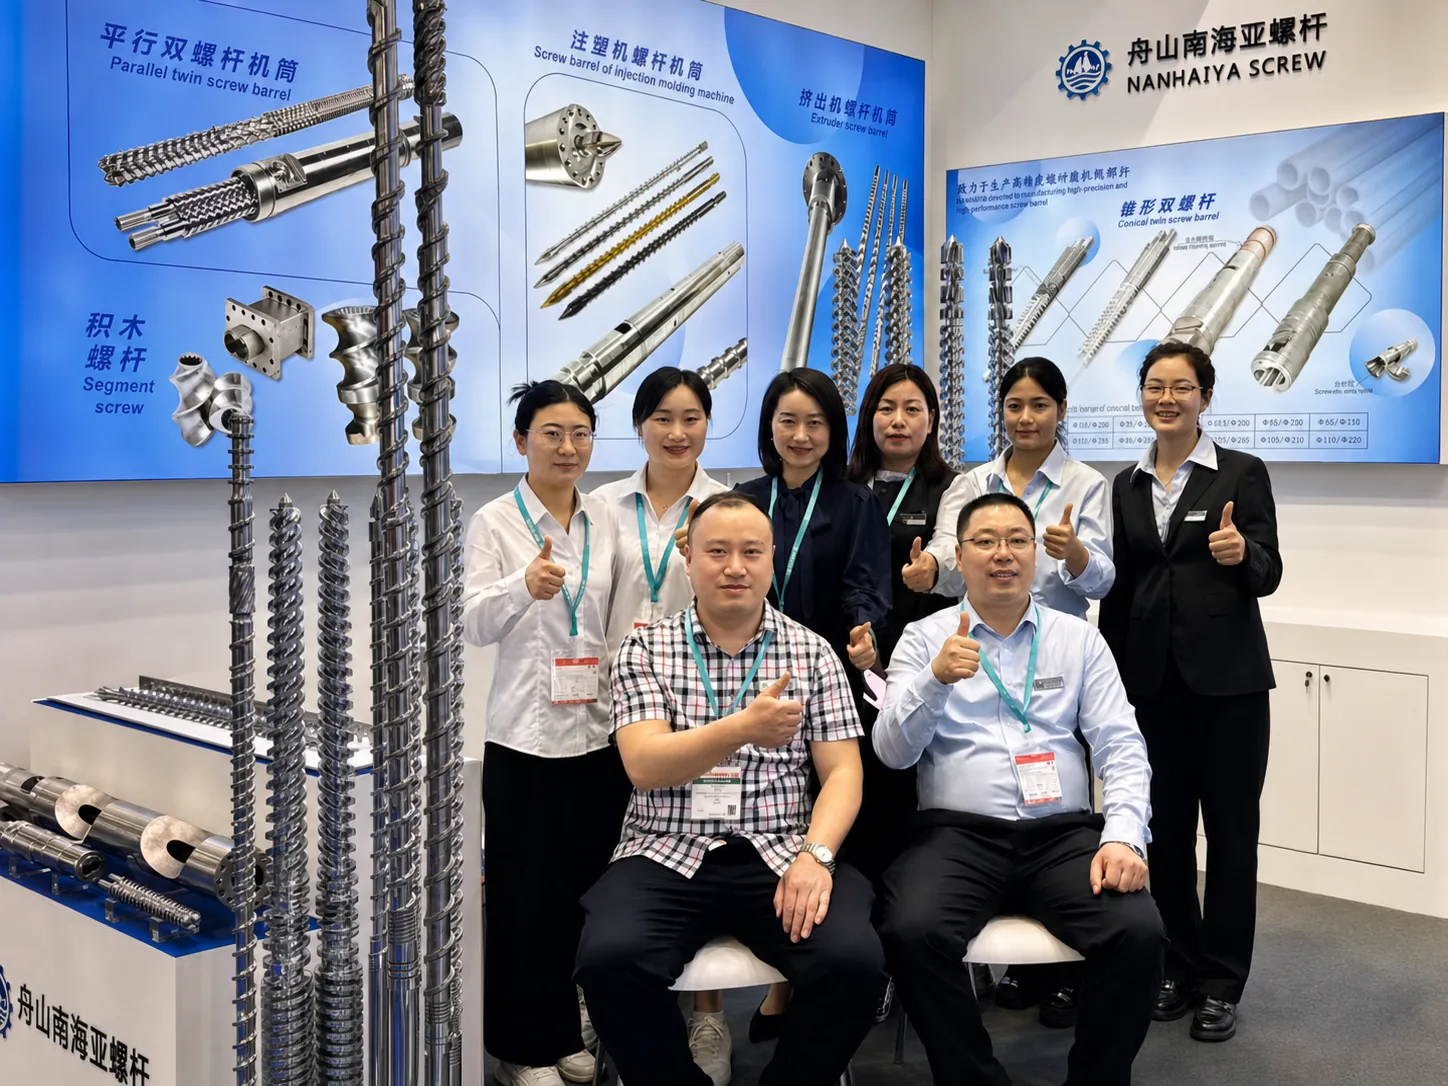
Related Articles
More insights on screw barrel technology and plastics processing.

Blown Film Defects and Solutions: Fix What Others Can't Diagnose
Nov 4, 2026
Master blown film defects and solutions with a systematic diagnostic framework covering defect taxonomy, process-zone troubleshooting, resin-specific behavior, and prevention programs.
Read Article
PVC Profile Extruder Stripped Down: Screws, Dies, and Defect Fixes
Nov 3, 2026
PVC profile extruder guide covering screw types, die design, temperature control, defect troubleshooting, and sizing advice for window frames, trunking, and trims.
Read Article
Plastic Sheet Extrusion Line Mistakes That Silently Kill Your Margins
Nov 3, 2026
Avoid costly plastic sheet extrusion line mistakes. Learn component specs, die design, polymer configs, screw selection, and troubleshooting to protect margins.
Read ArticleLooking for something else?
Search by material, symptom or product and jump straight to the relevant page.
These are navigation suggestions based on keyword matching — not a quotation, not a delivery commitment, and not a substitute for engineering review. Final specification is confirmed by our engineers against your drawings and processed material.
Need help with screw barrel selection?
Share your machine model, processed material and application. Our team can help with pricing and technical support.